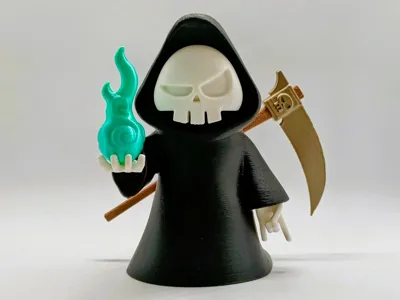
Grim Reaper


Print Profile(2)


Description
⚠️ If you want to see all my models (i.e. middle fingers), turn on nsfw in your account settings under preferences⚠️
Hey everyone. Here is my take on the infamous Grim Reaper.
It is about 10.5cm (4") tall (NO AMS required to print).
There are two profiles available:
- Three colour version - the soul flame and scythe are all the same colour
- Five colour version - the soul flame, scythe blade and handle are all different colours
Happy Printing!
Building Tips
- Glue is required for most parts.
- The scythe blade can be press fit on to the handle. Depending on the filament used it can be a tight fit towards the end, so you may need to press it against a table to get it all the way.
- To best align the scabbard on the back for gluing I recommend mounting the scythe so you can see how it looks from the front.
Soul flame printing considerations
Depending on the filament you use to print the soul flame, you make get differing quality at the very tip of the flame. I have tried everything to improve the quality, but it is not possible to slow down the printing in a way that consistently improves the tip of the flame. Bambu Studio does not have a “minimum layer time” function that works the same as Cura slicer. It does it's best to slow down the print to improve cooling, but it doesn't allow you to wait between layers to ensure that the previous layer has properly cooled. As a result the print quality for thin sharp features is not perfect. I have modified the tip to be as thick and flat as possible to minimise this issue. For best results (if you can spare the time), I recommend setting the part fan (and auxiliary fan where applicable) to maximum as the print approaches the tip.
You can find other models here


License
You shall not share, sub-license, sell, rent, host, transfer, or distribute in any way the digital or 3D printed versions of this object, nor any other derivative work of this object in its digital or physical format (including - but not limited to - remixes of this object, and hosting on other digital platforms). The objects may not be used without permission in any way whatsoever in which you charge money, or collect fees.
Comment & Rating (384)