
Hextraction Super Board Game: Base for A1 mini & +




Print Profile(2)

Bill of Materials


Description
TLDR:
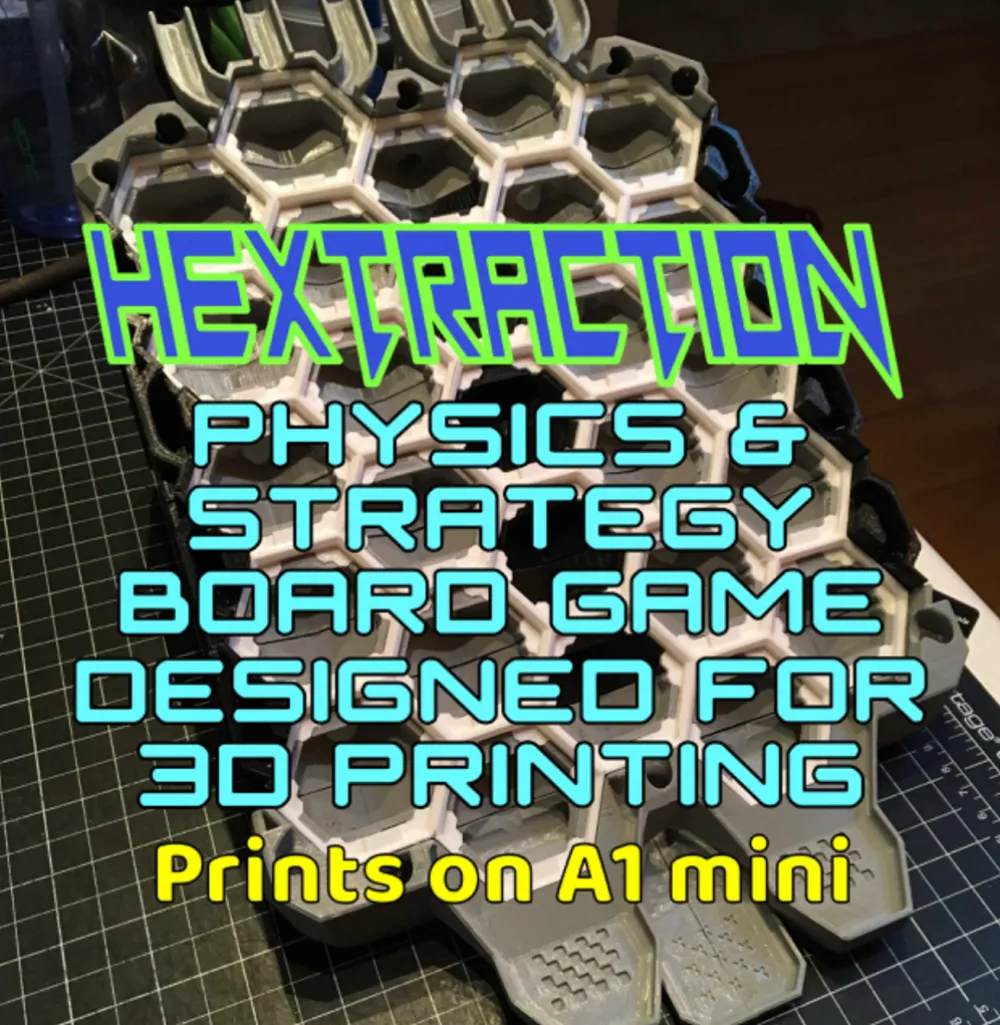
Hextraction is a FAN-TA-STIC game
where beads fly through tiles that create a series of paths and booby traps
that you and your opponents strategically place to get your ball in the end zone,
while blocking your opponents' balls.
2025-04-16: an update to Bambu Studio caused slicing issues for the dices. They were removed from the main file and added to a separate file (Dices only). Thanks to Kanai Kalama Films for pointing this out.
If you are a happy Hextraction fan: I have more fun for you! Please look for the "I want more tiles!" section further down.
If you are new to Hextraction: please start with the “What is Hextraction?” section below.
What is Hextraction?
Hextraction is a FAN-TA-STIC game with so much action, traps, physics, effects and randomness that no two games are the same. Each turn you get to carefully place on your 3D printed board one of your 3D printed tiles from your hand of randomly picked tiles. You also get to launch a steel ball down a start ramp and frantically watch it fly through a series of tunnels and paths created by all of the hexagonal tiles laid out by all players. These paths can include traps, levers, jumps and even special effects that are all strategically placed to get your ball in the end zone (to win), while blocking your opponents' balls with devious tiles.
What's best part? This game is free to play, free to print and will forever keep improving as designers keep coming with AWESOME ideas to make CRAZY tiles (also free to print) that often flip the game on its head. This is all thanks to Zack Freedman, who chose to offer his game to the crowds of 3D printing enthusiasts, and let players and designers contribute to this wonderful game.
- "Hextraction is an open-source game - you can download the files to print yourself, or find a pre-printed set to buy.”
- “Hextraction is a 3D-printable, modder-friendly board game designed by Zack Freedman of Voidstar Lab.”
To get an idea of its potential and learn some rules watch the Hextraction video.
To play the game, you will need to:
- Print the grid: look for the Hextraction Super Board Game: Grid for A1 mini & +. It can be printed on the A1 mini or other printers with larger build plate. I recommend PETG to make your board very sturdy, but PLA work fine too. This grid has 27 slots, which means more fun!
- Print the base: the files on this current page include all the structural parts includes all the structural parts that are specific to the grid with 27 slots from this page, such as the gutters that channel lost balls all the way to the bottom (that would otherwise fall through), On ramps, End zones, adjustable legs and accessories;
- Check the Hextraction Getting Started page.
- Look at the Hextraction Official rules. If you'd like to play by yourself, look at the single player rules.
- Buy 10 mm steel balls or 3/8" slingshot ammo. 50 of them seems like a good number for 3-4 people.
- Print Hextraction game tiles, the more the better! Here are links to my favourites sets.
- Hextraction Tile Set A - Super Starter Pack: includes plenty of tiles to get your Hextraction games started, along with some very cool tiles that will give you an idea of what is possible with this game.
- Hextraction Tiles Set A - PETG parts: since PETG parts need different printing requirements, I pooled all the PETG parts from set A into this file.
- Hextraction Tiles Set B Flip Flop+Secret tiles: with sets A and B you will have all the basic starter tiles recommended, and enough whacky tiles to show you how much talent and creativity went into designing such mischievous contraptions!
- Hextraction Tiles Set C - Deviations: spice up your games with randomness and a bit of malevolence.
- Hextraction Tiles Set D - Traps! : traps are very useful to slow your opponents down and tear apart their sophisticated plans.
- Hextraction Tiles Set E - Wild Tiles: Hextraction tile creators are (thankfully) not selected by committees or review boards. Nope, if you let them loose, they come up with ingenious and/or crazy ideas, the perfect recipe for exotic tiles with strange themes or effects.
- Hextraction Tiles Set F Mega pack: if your games get slowed down by effects tiles, balance things out by adding regular tiles. And no regular does not mean boring.
- Hextraction Tiles Set G Lucky Unlucky tiles: Feeling lucky? With this set, you can test it out, or better yet, you can bestow bad luck upon your opponents. Feeling better now?
- Hextraction Tiles Set H - Tile rail + Golf: if you thought Hextraction was fun, wait until you play the Skyrail tile, my absolute favorite tile. And those golf-themed are sweet.
- Hextraction Tiles Set I - Abuse of power : some tiles have, or give too much power. Don't print this set. It will change your games for the worst. Or the best! Just depends on the point of view.
- Hextraction Tiles Set J - BAM! : you slip, you explode, you burn, earth splits under your ball. That's what this set is about. And some good (and evil) magic.
Why pick the 27 slot version of the “Super Fancy Remix of the Hextraction Game Board”?
The inventor of this game, Zack Freedman, saw the potential of making Hextraction open-source: Anyone can download, print and MODIFY the game for free. As a result, the game keeps expanding and improving.
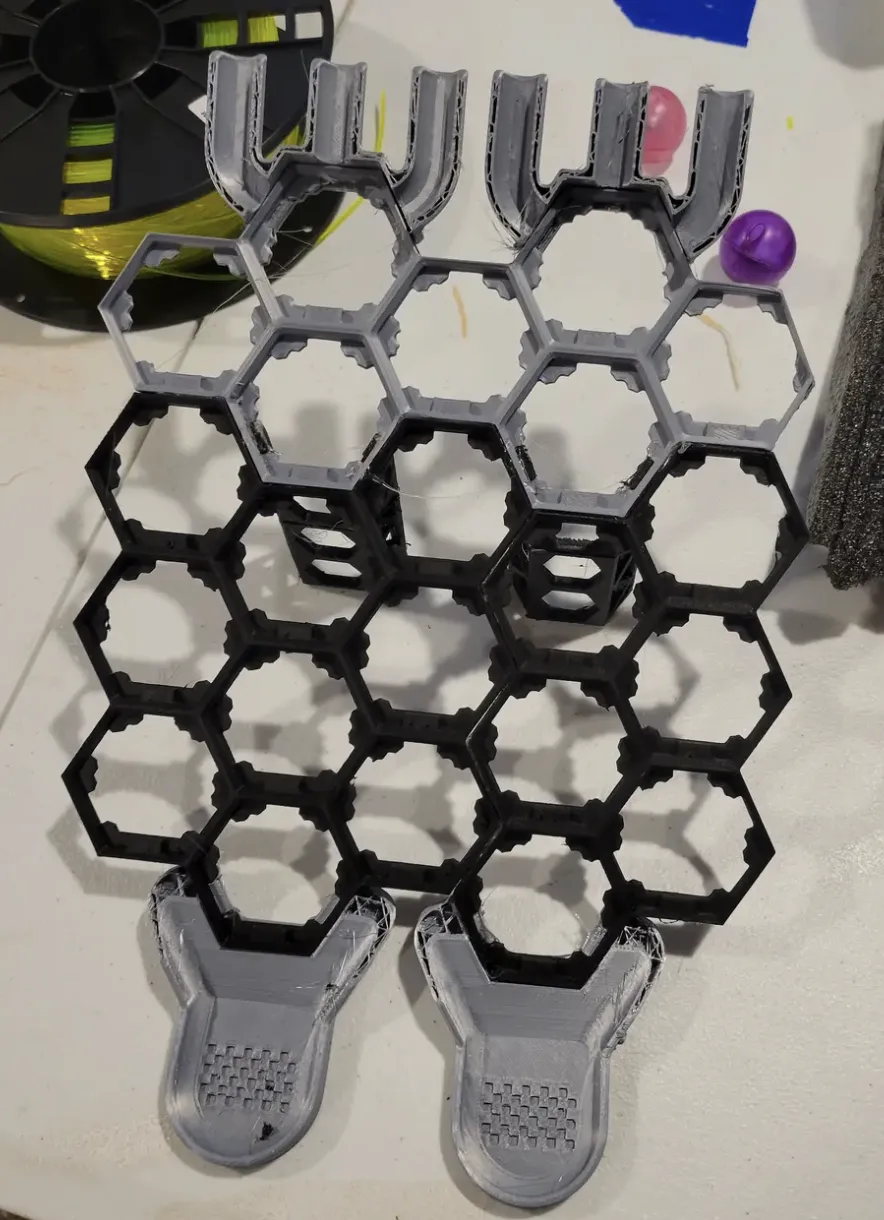
There are a lot of Hextraction board variations online and several hundreds of Hextraction tiles!
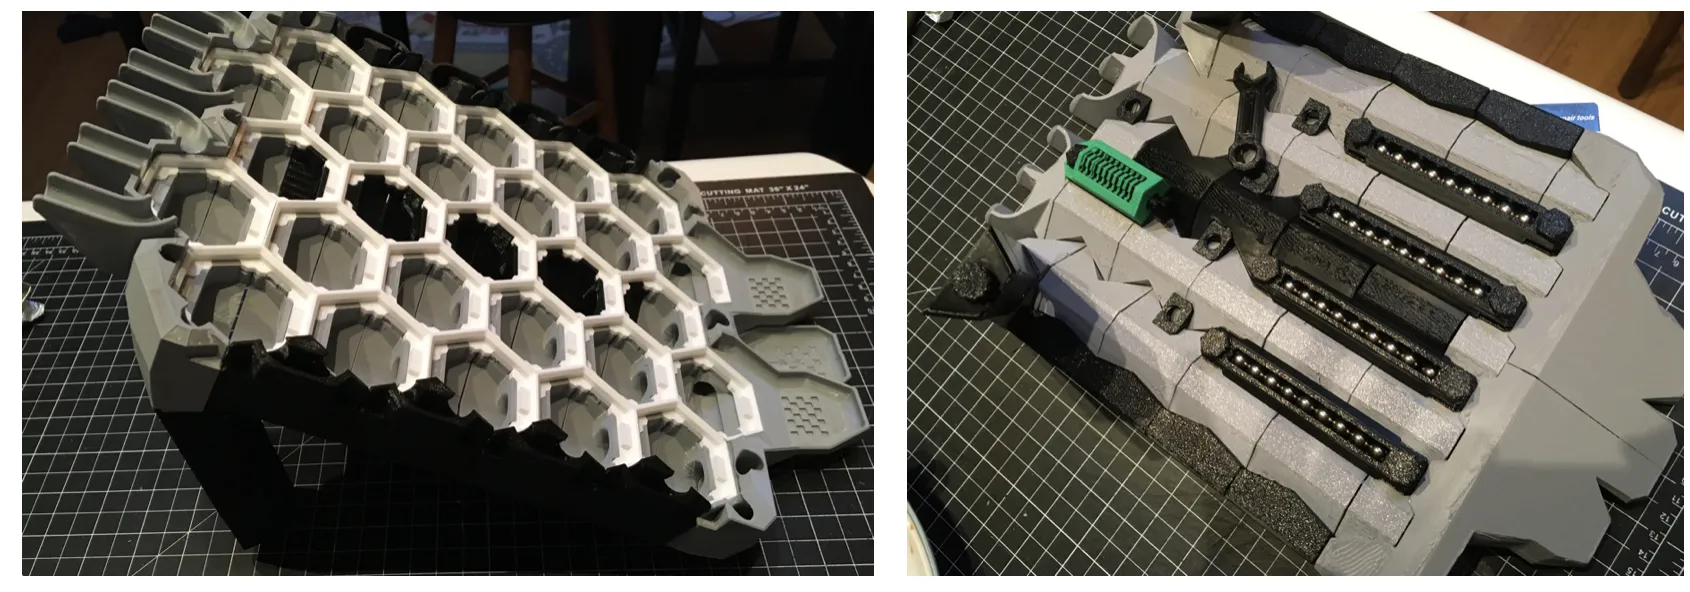
The original board by Zack Freedman is shown on the image on the right.
It has a 22 slot grid, with On Ramps at the top and two Goals at the bottom. You can add to it a gutter system (base) to retrieve balls that would otherwise fall through the grid, then on the table, the floor and eventually under the stove.
After seeing so many amazing Hextraction tiles, I realized that a bigger Hextraction board would make the games more fun.
I have inspected many Hextraction boards and, after tweaking it, I found the Super Fancy Remix by Inaudable to be the best bang for the buck.
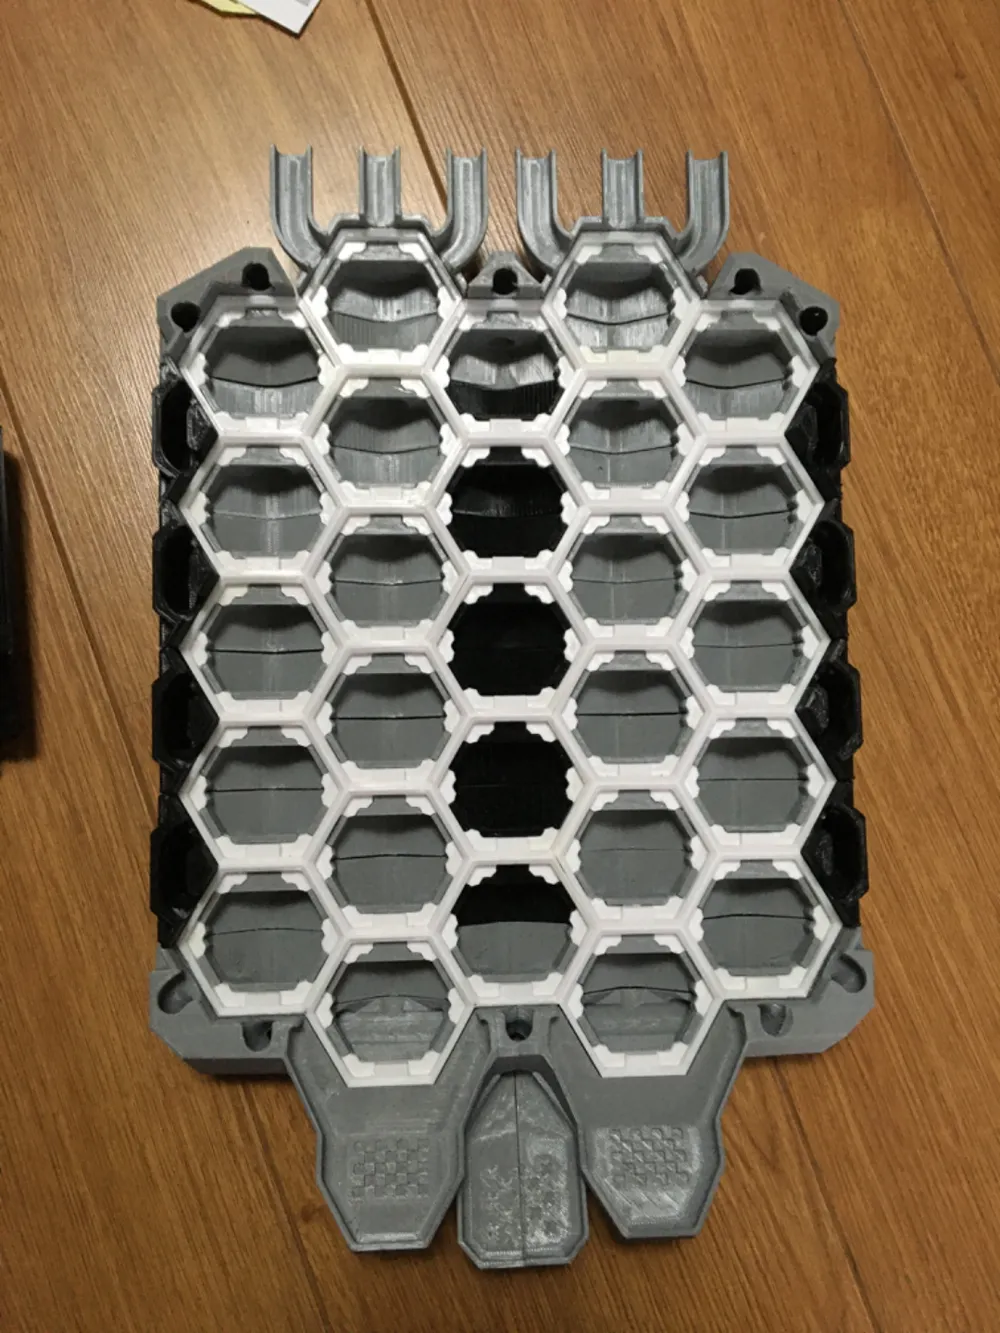
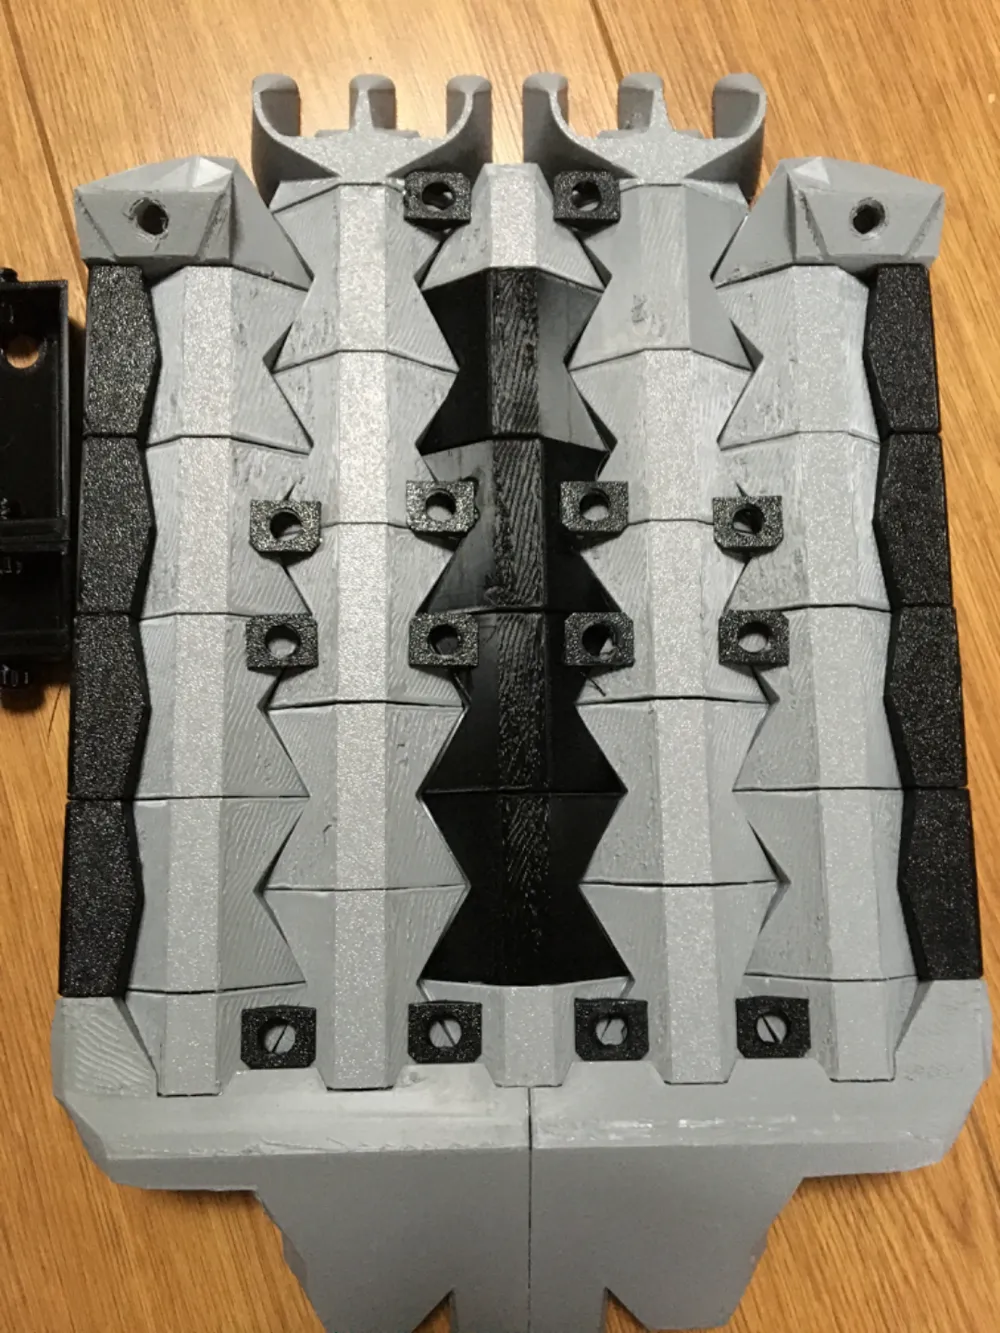
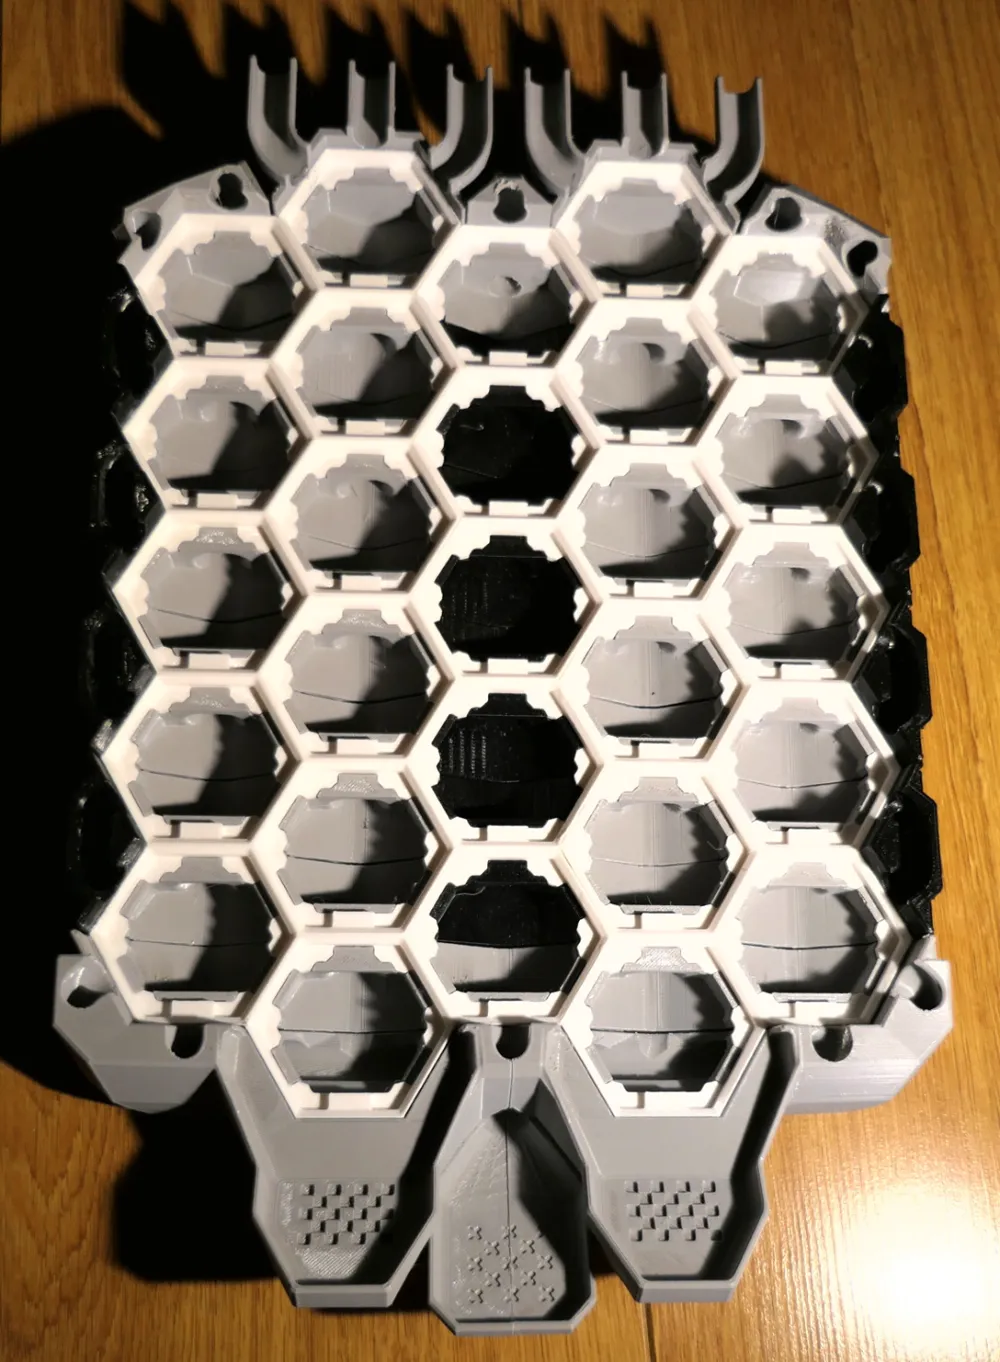
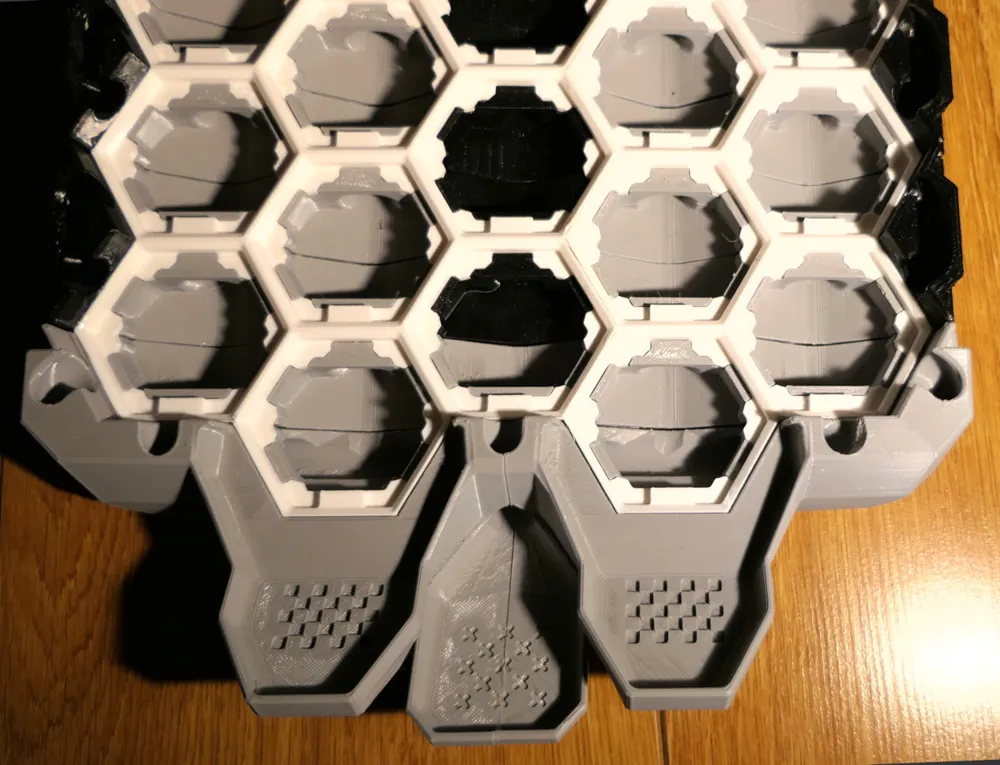
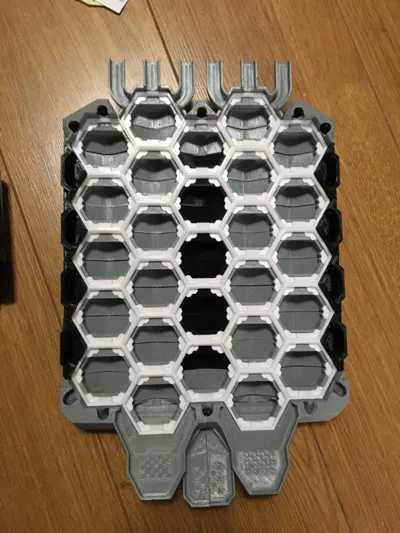
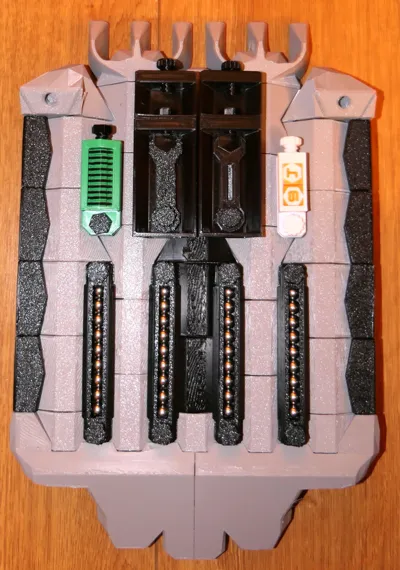
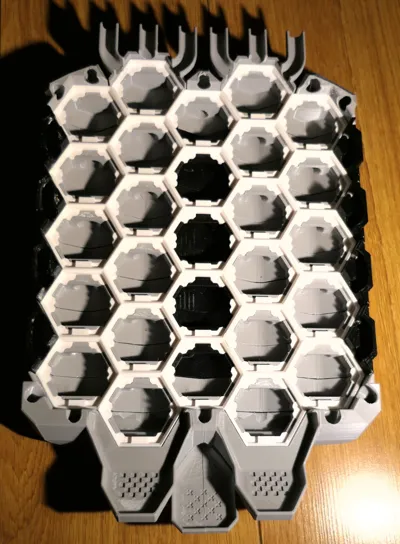
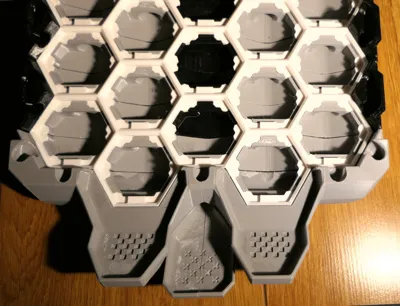
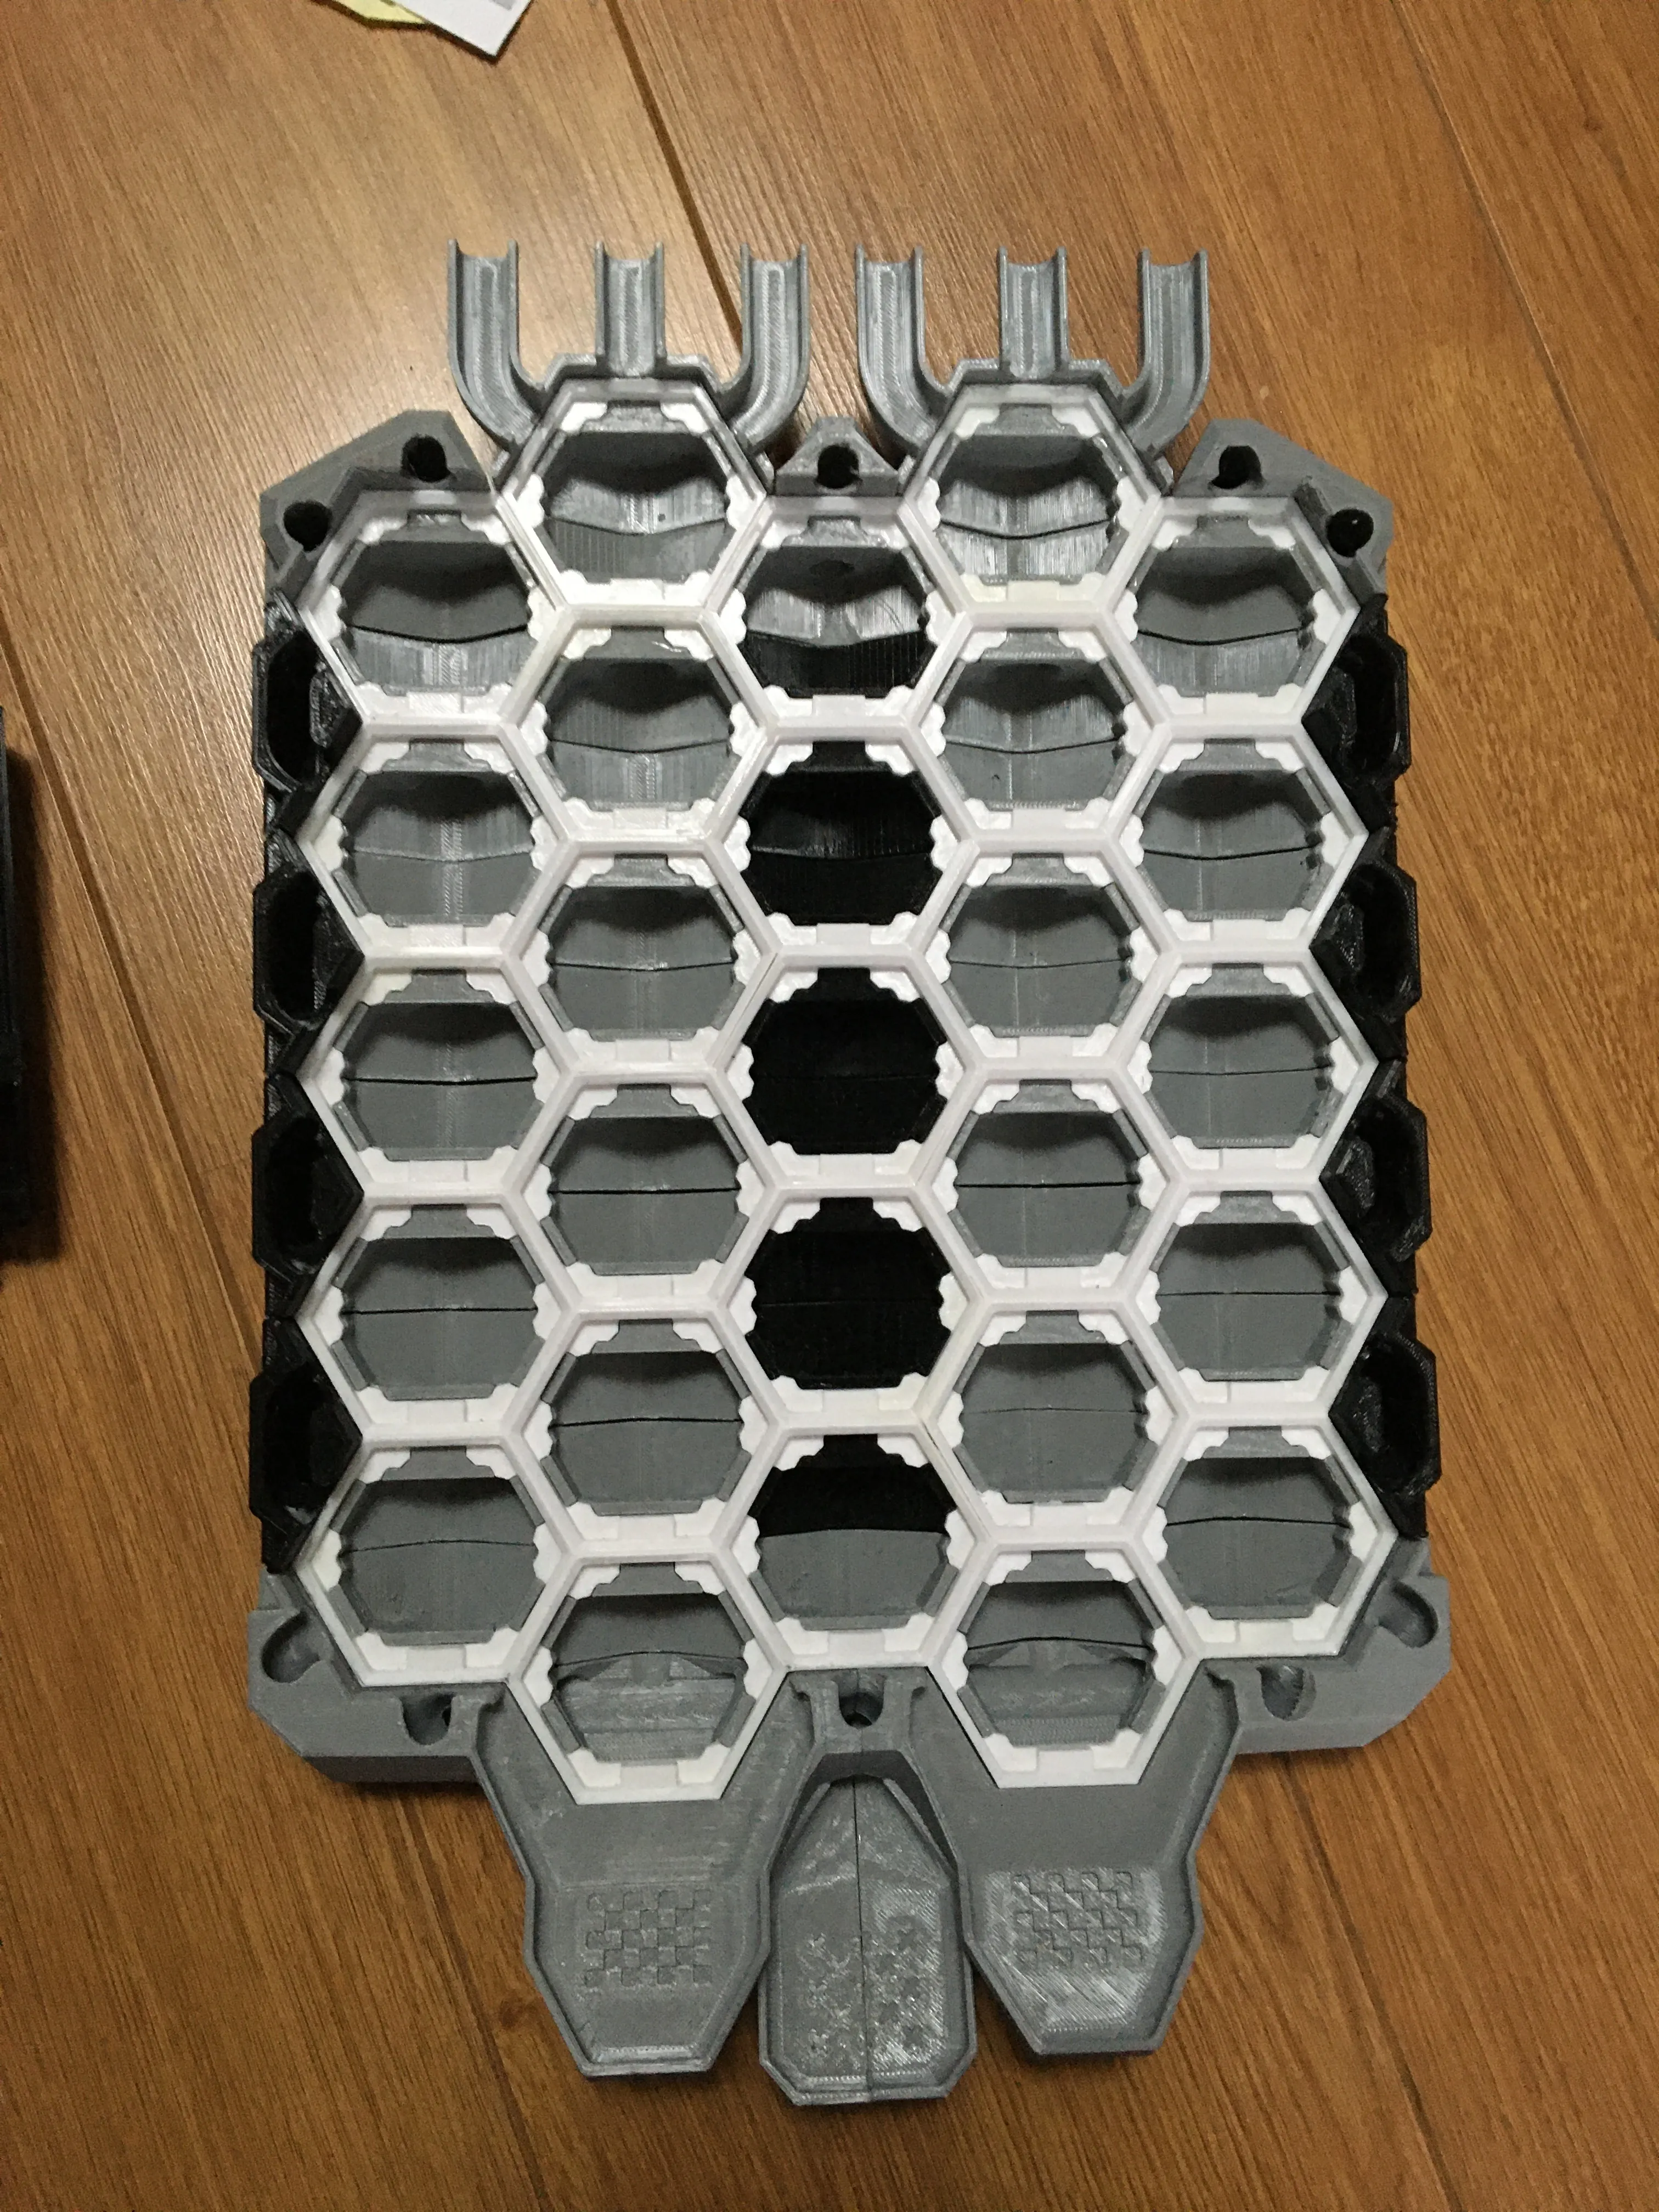
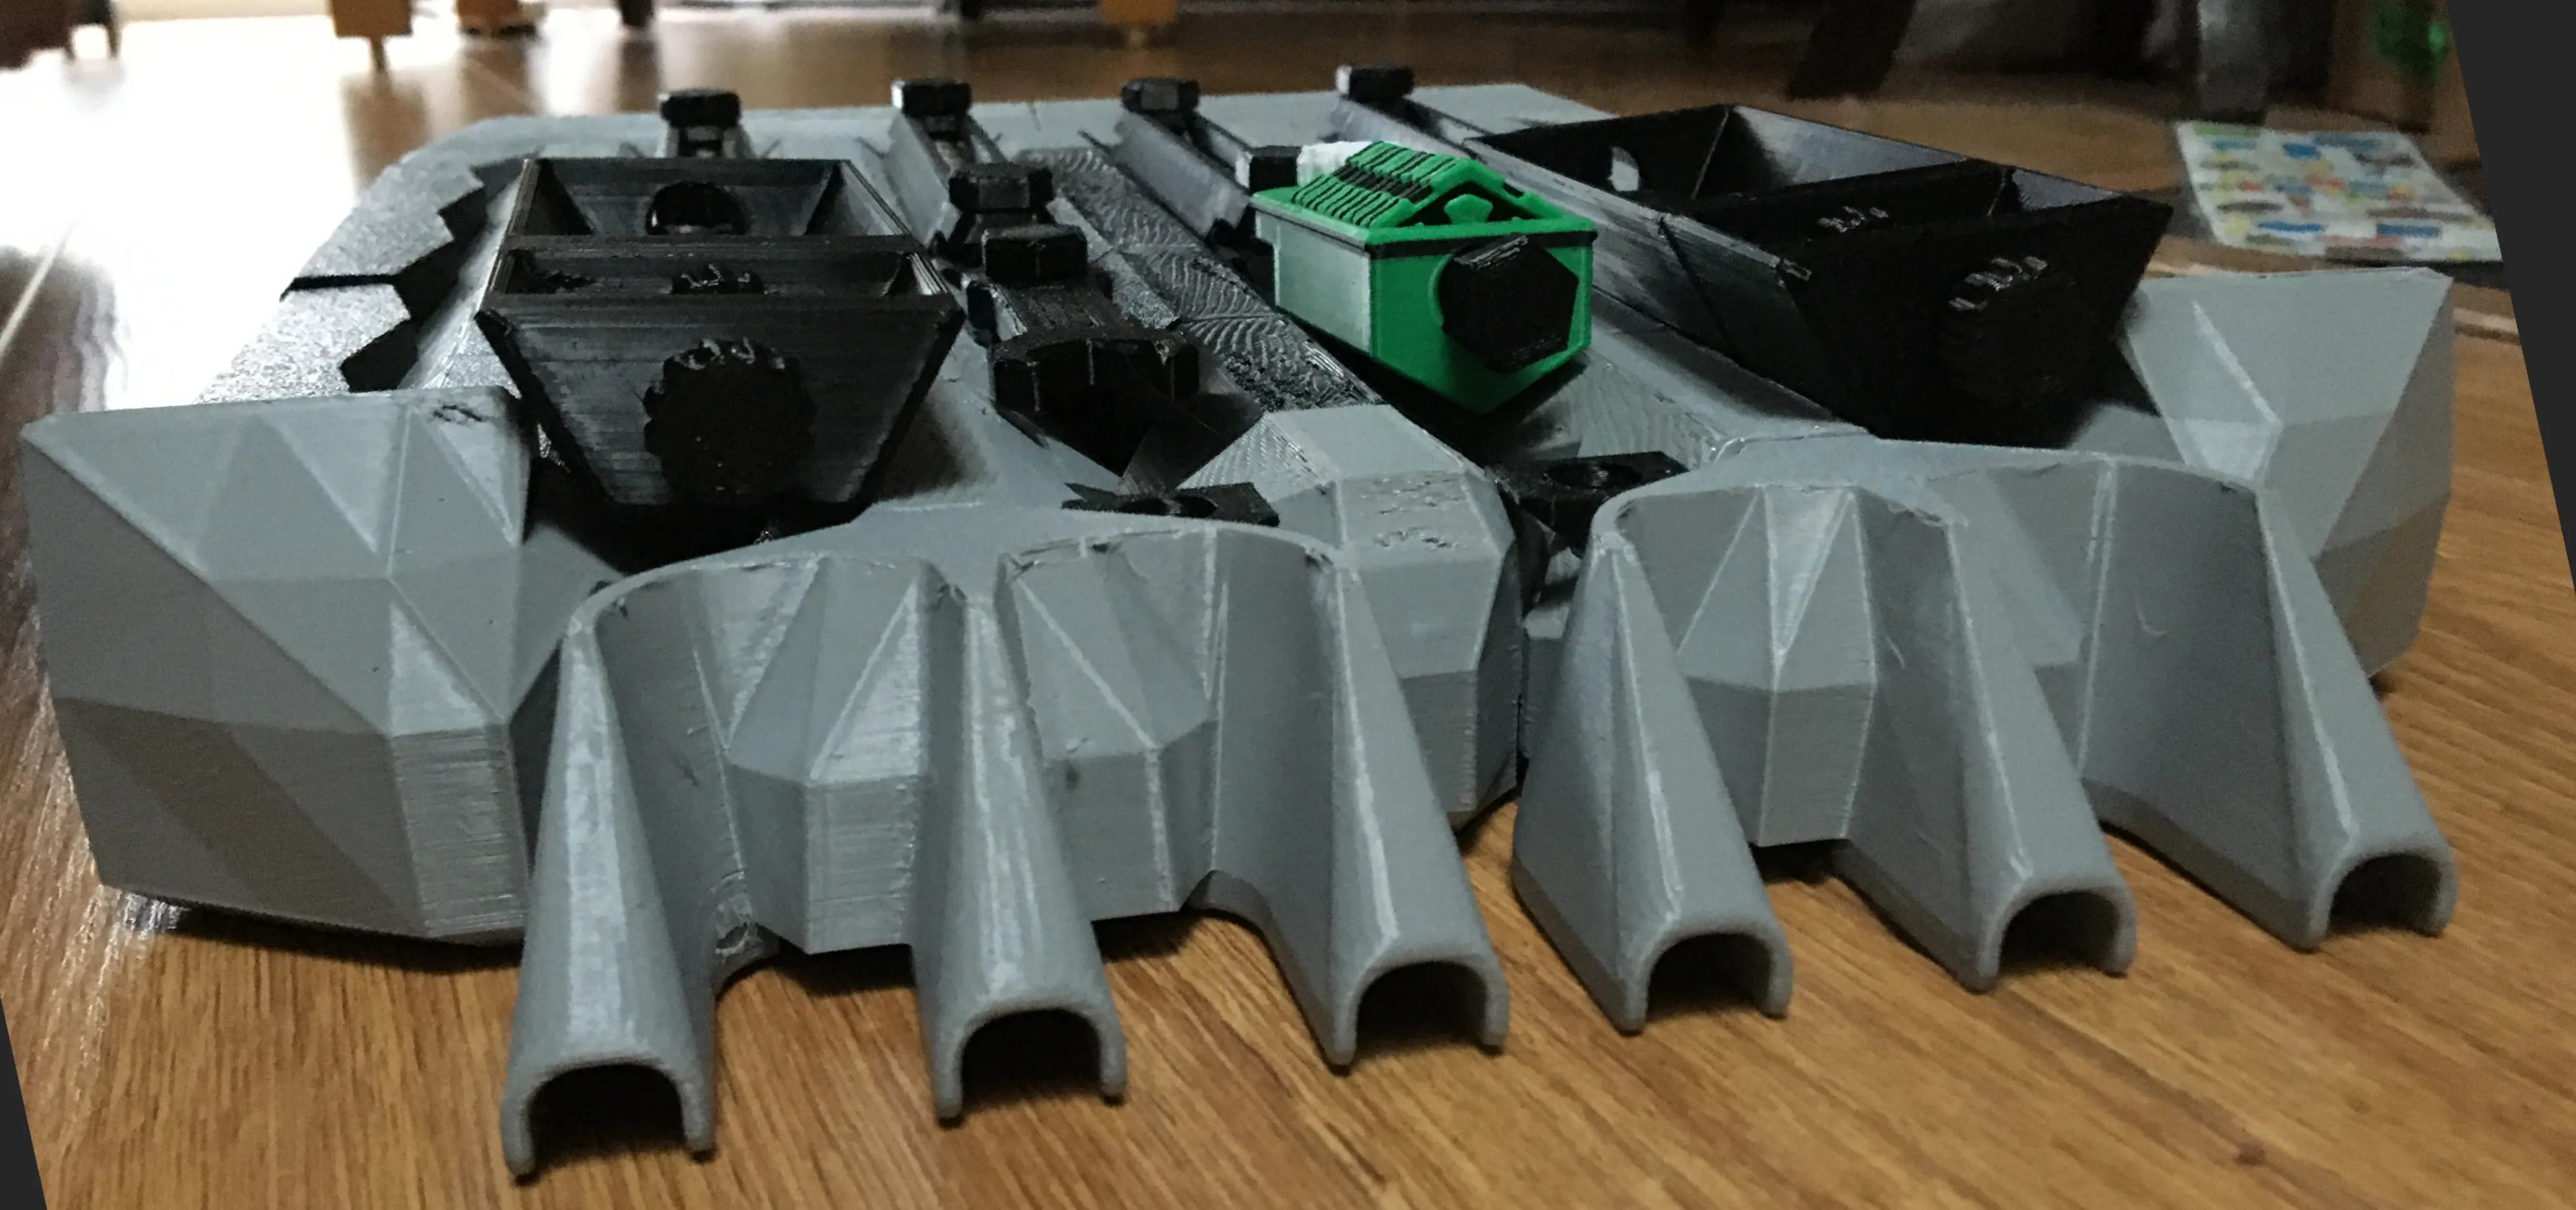
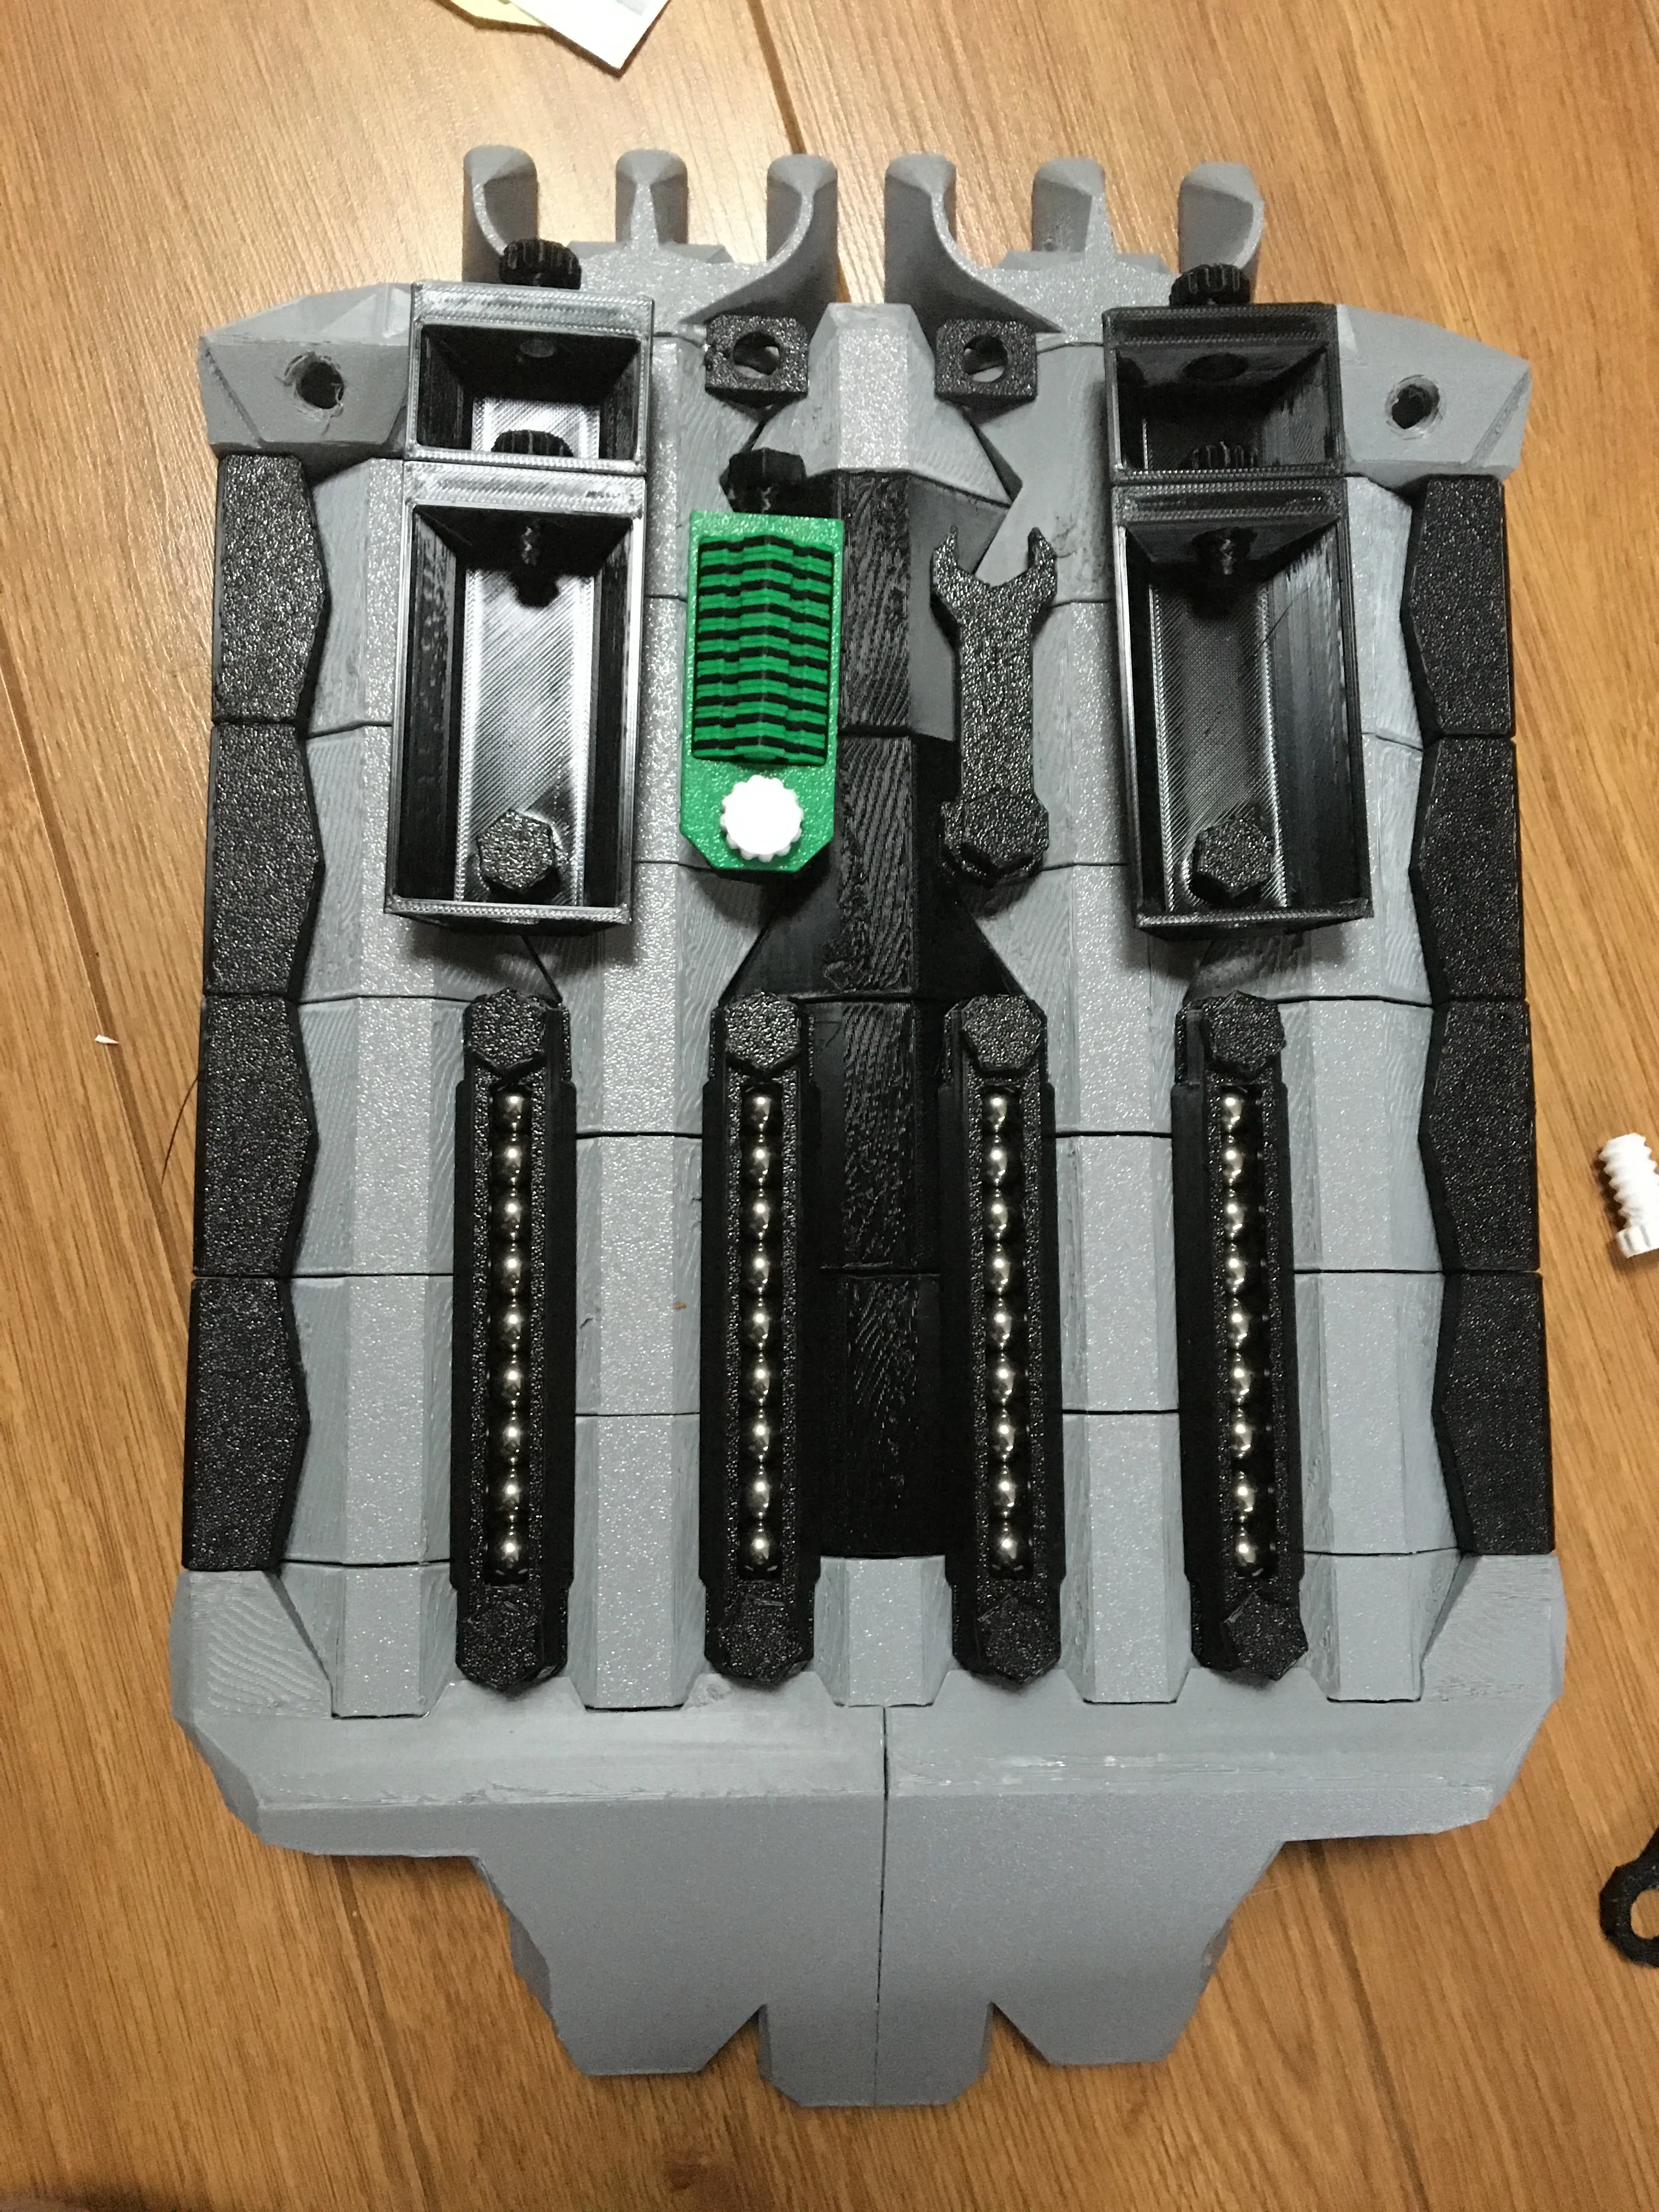
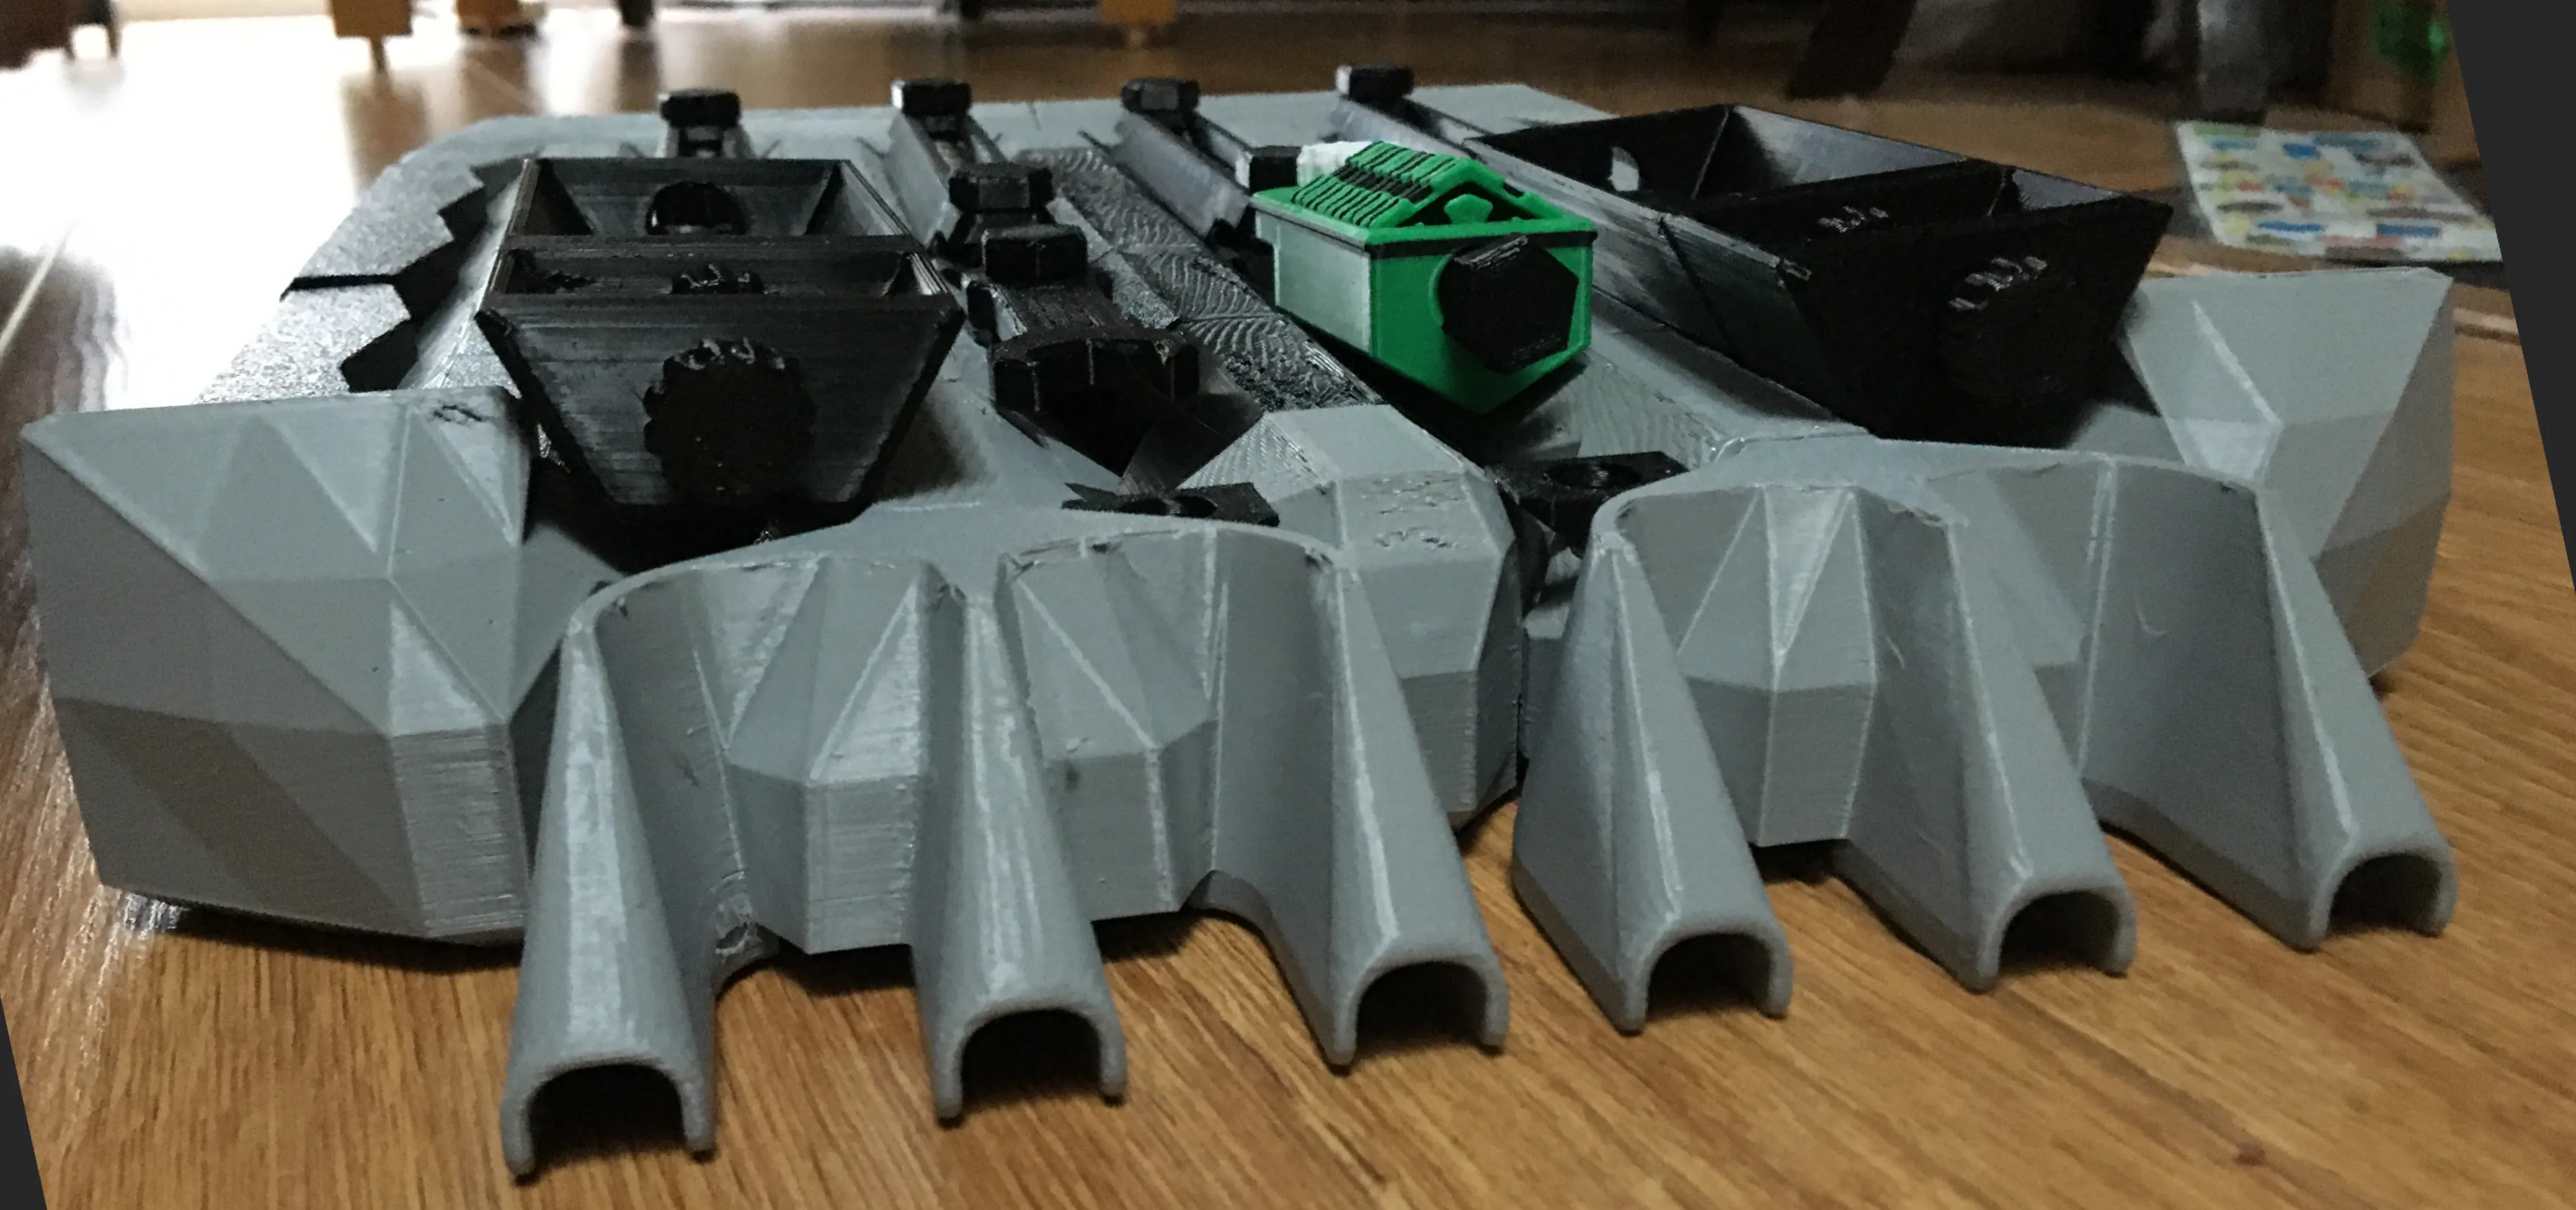
The Super Fancy board is shown in the 2 pictures below (this is my remix from this page, printed on my A1 mini).
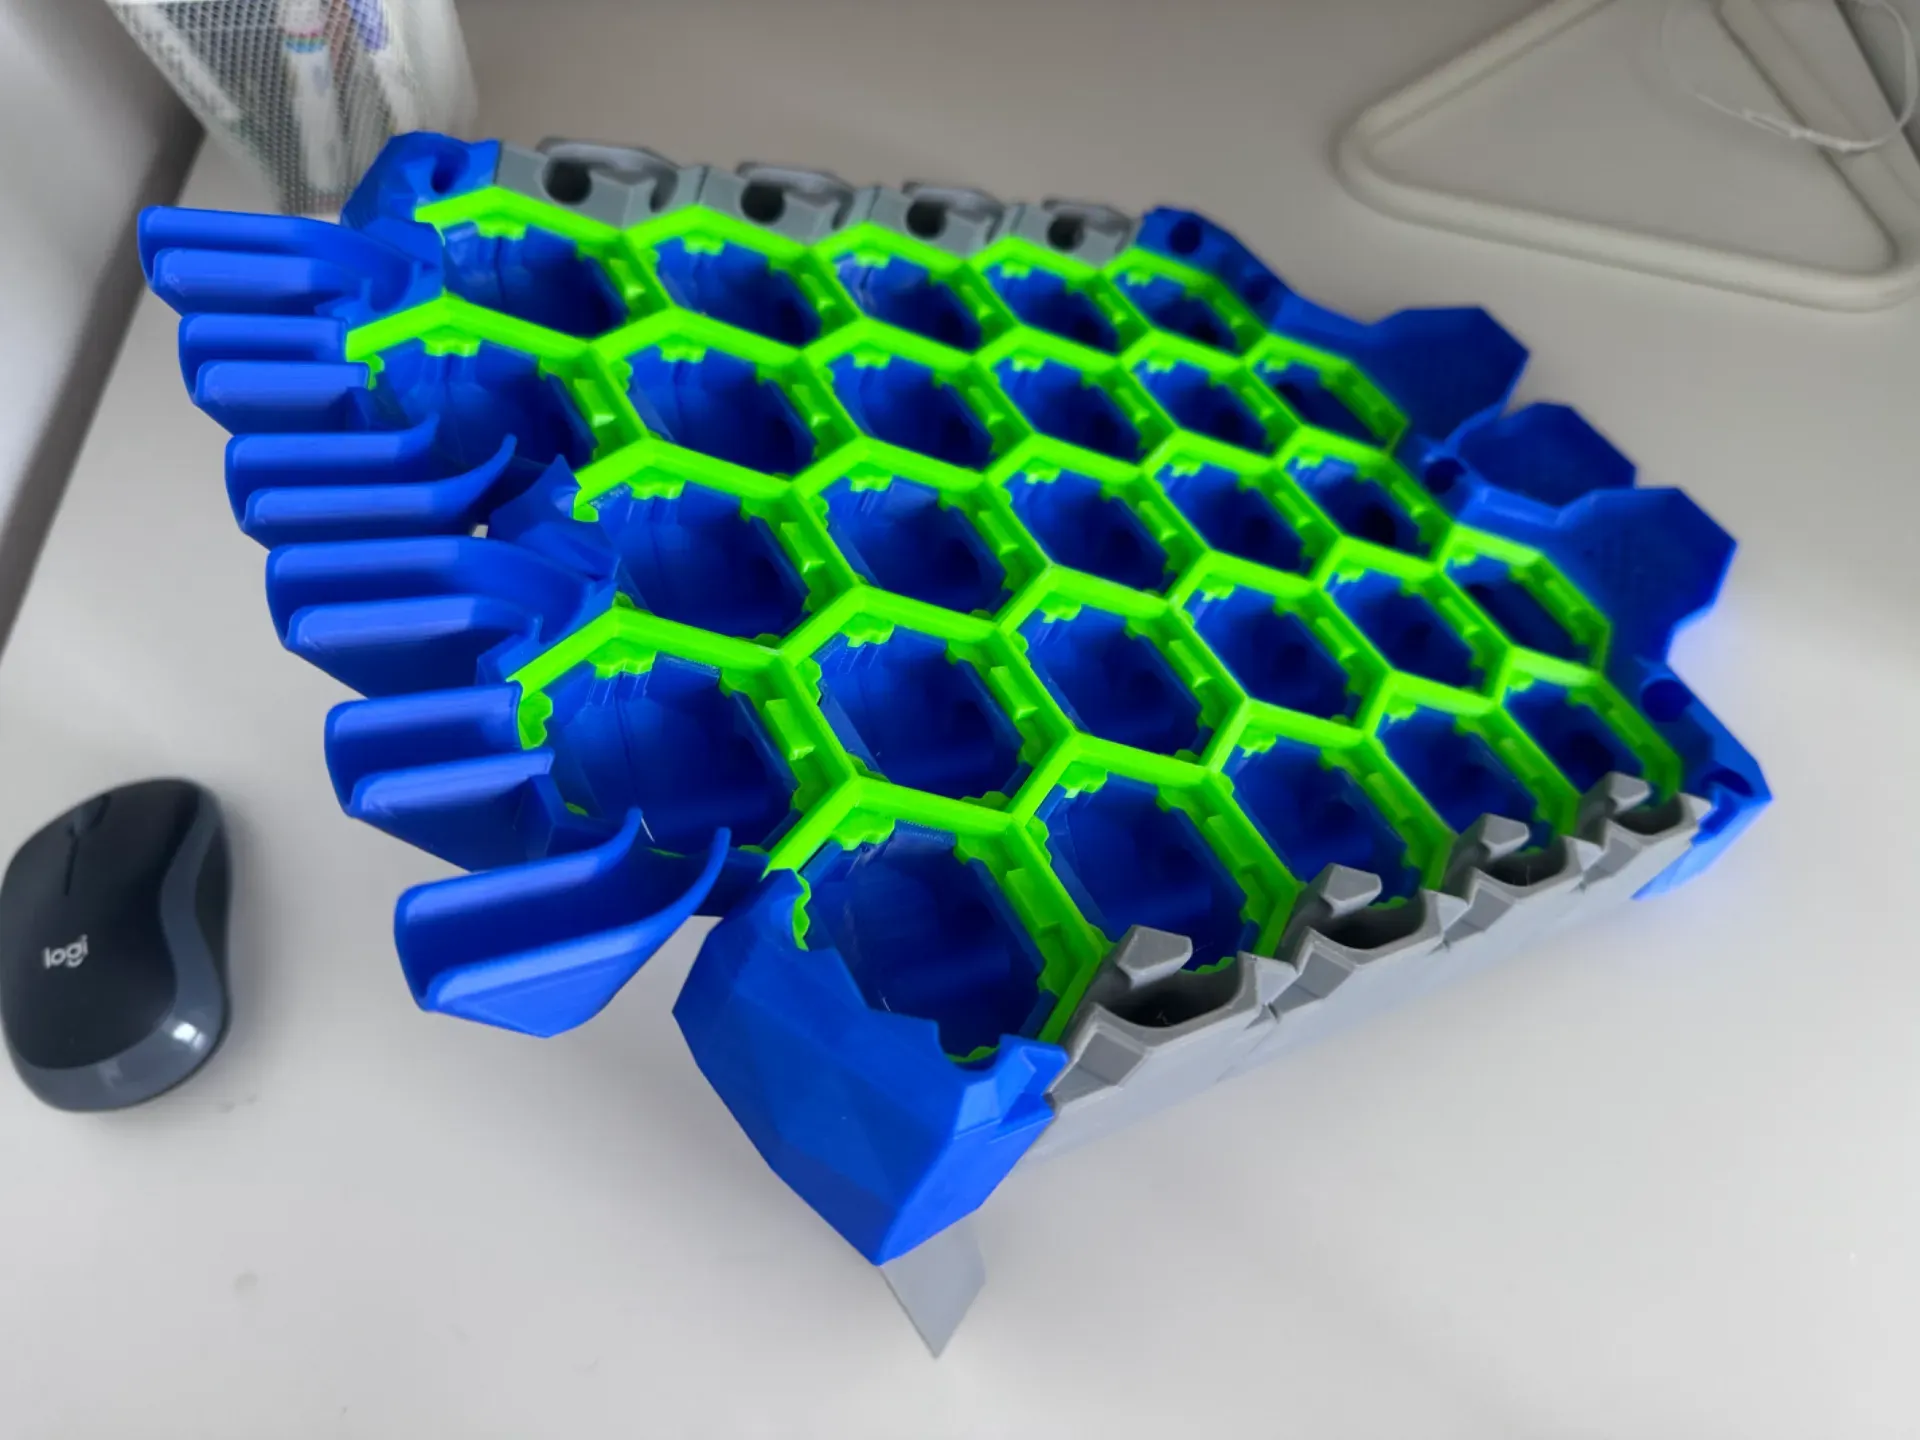
(Picture of board printed in blue and green, with permission from @Andrepadua)
- It has 27 slots, so games are even crazier.
- It features an AWESOME system of gutters, where beads end up in a plate at the bottom, making them easier to retrieve.
- It is sturdy.
- It uses less filament.
- It has leveling legs.
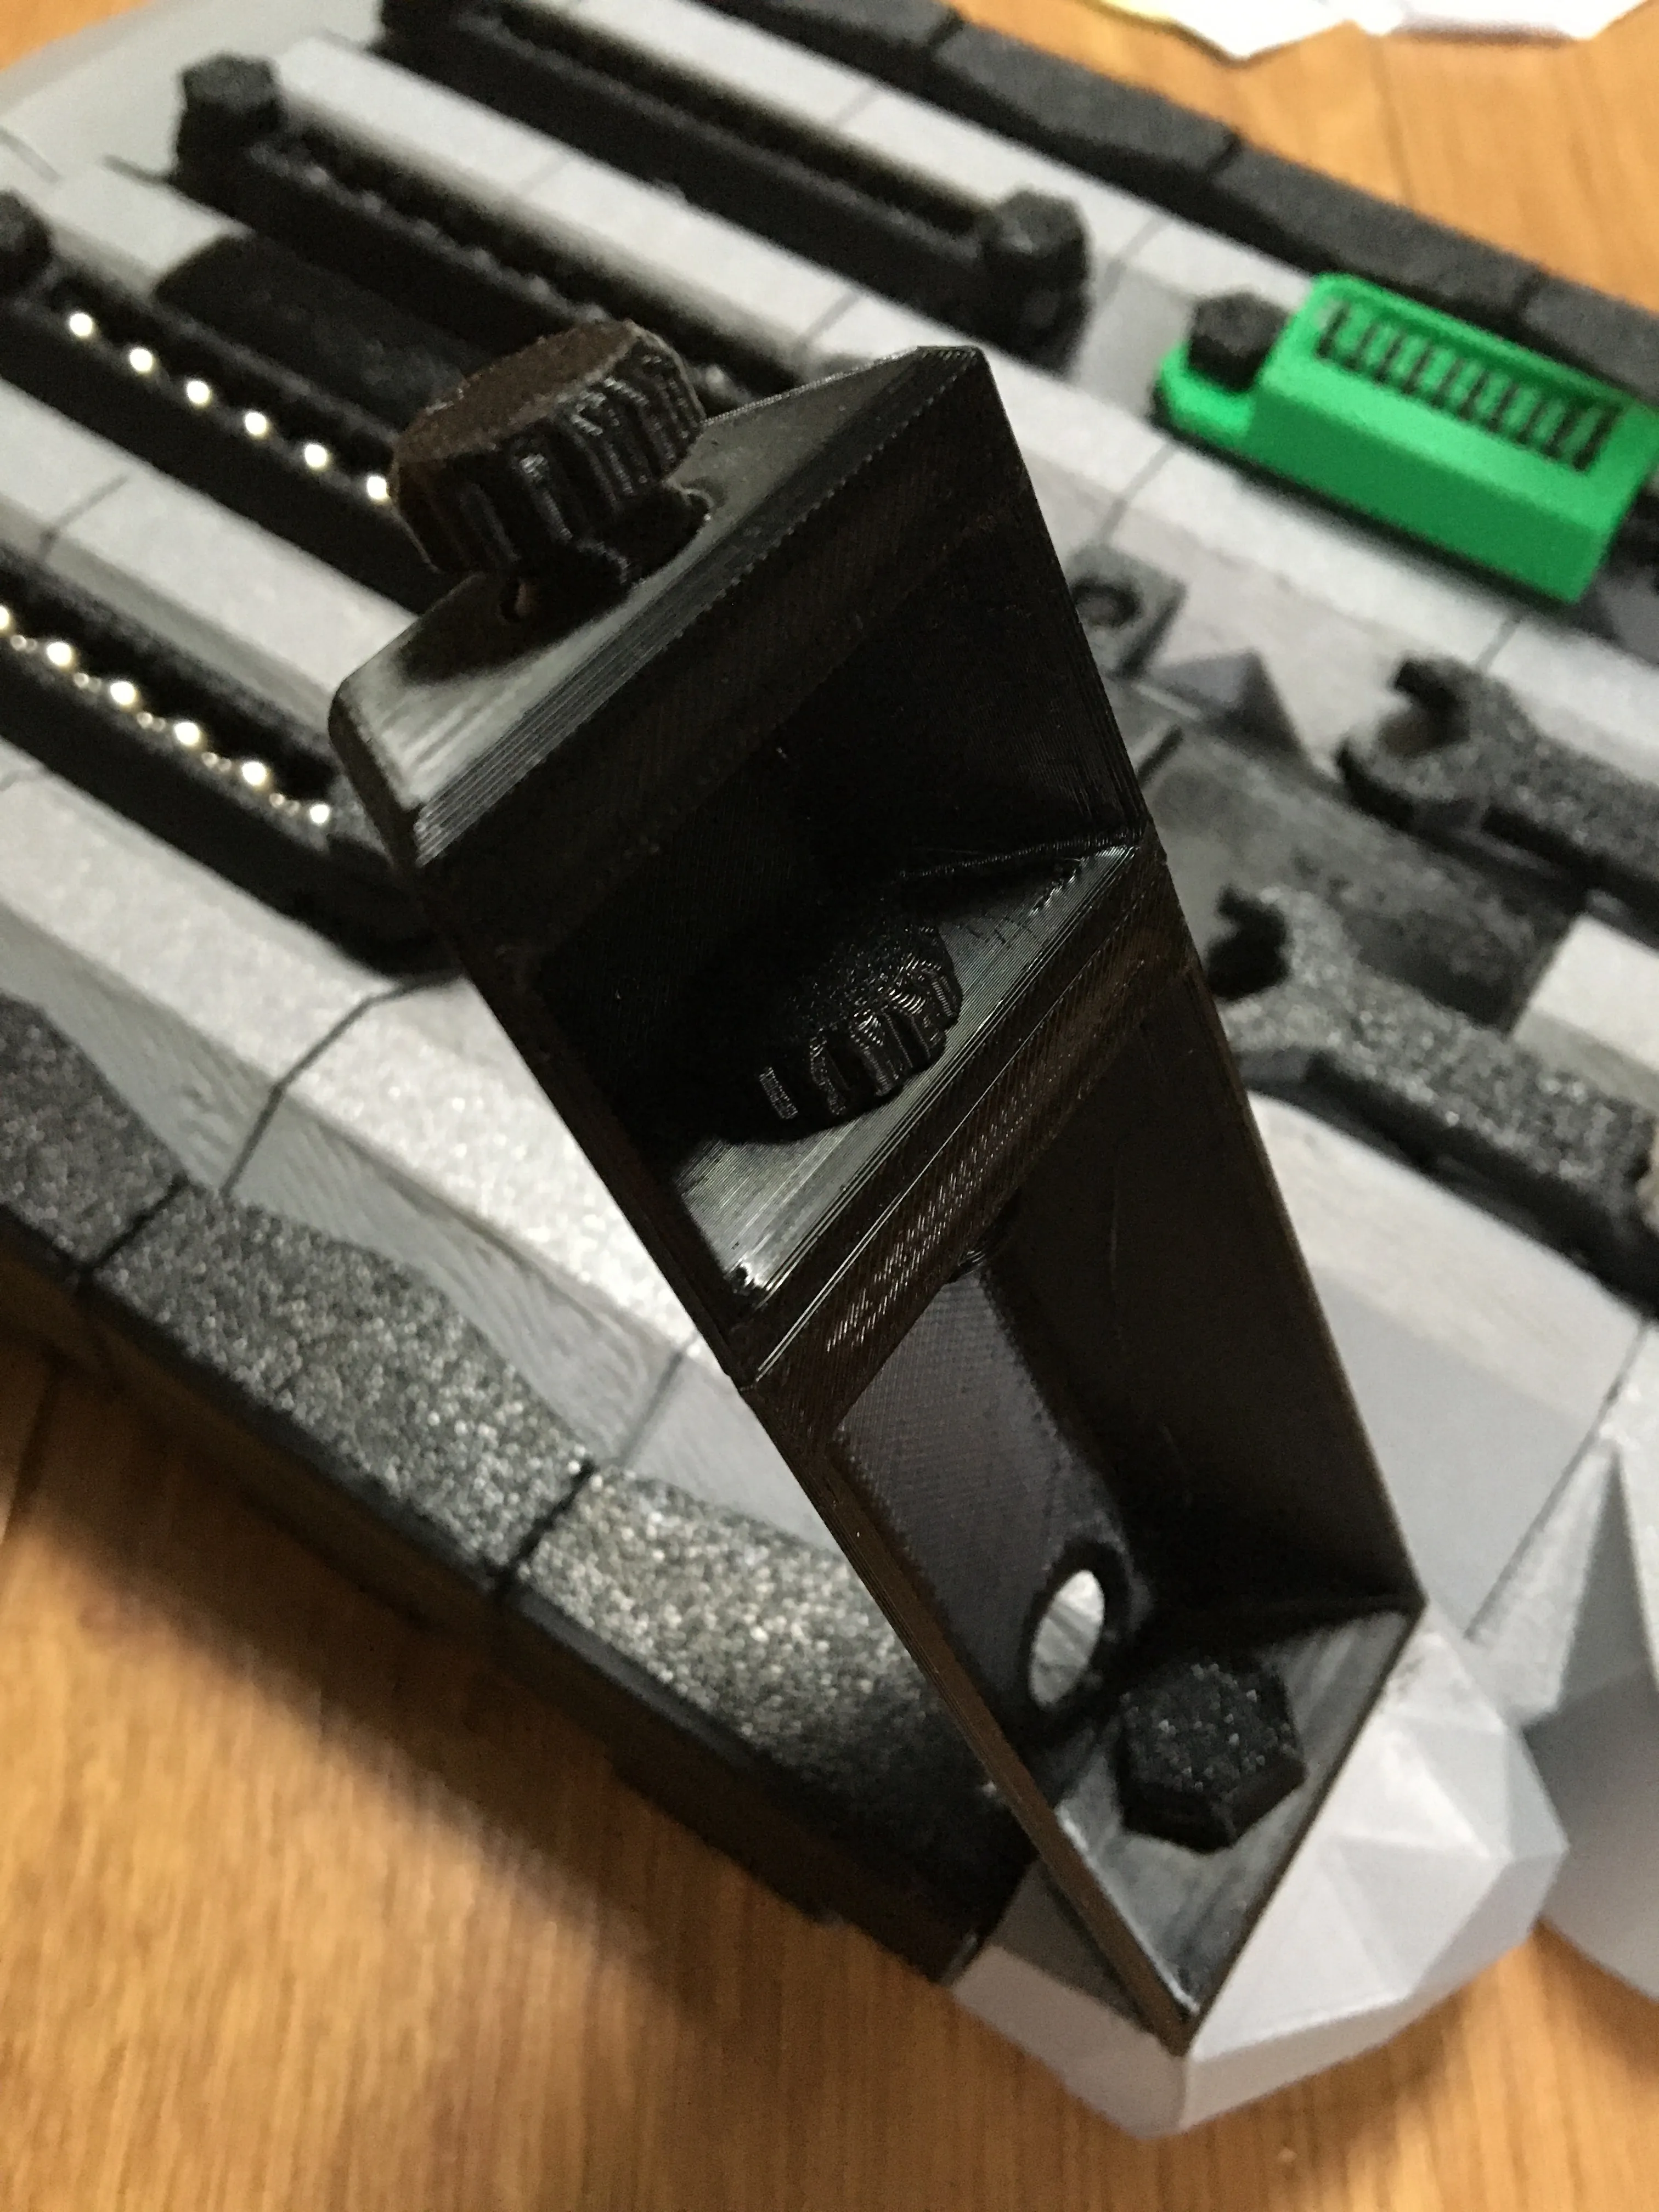
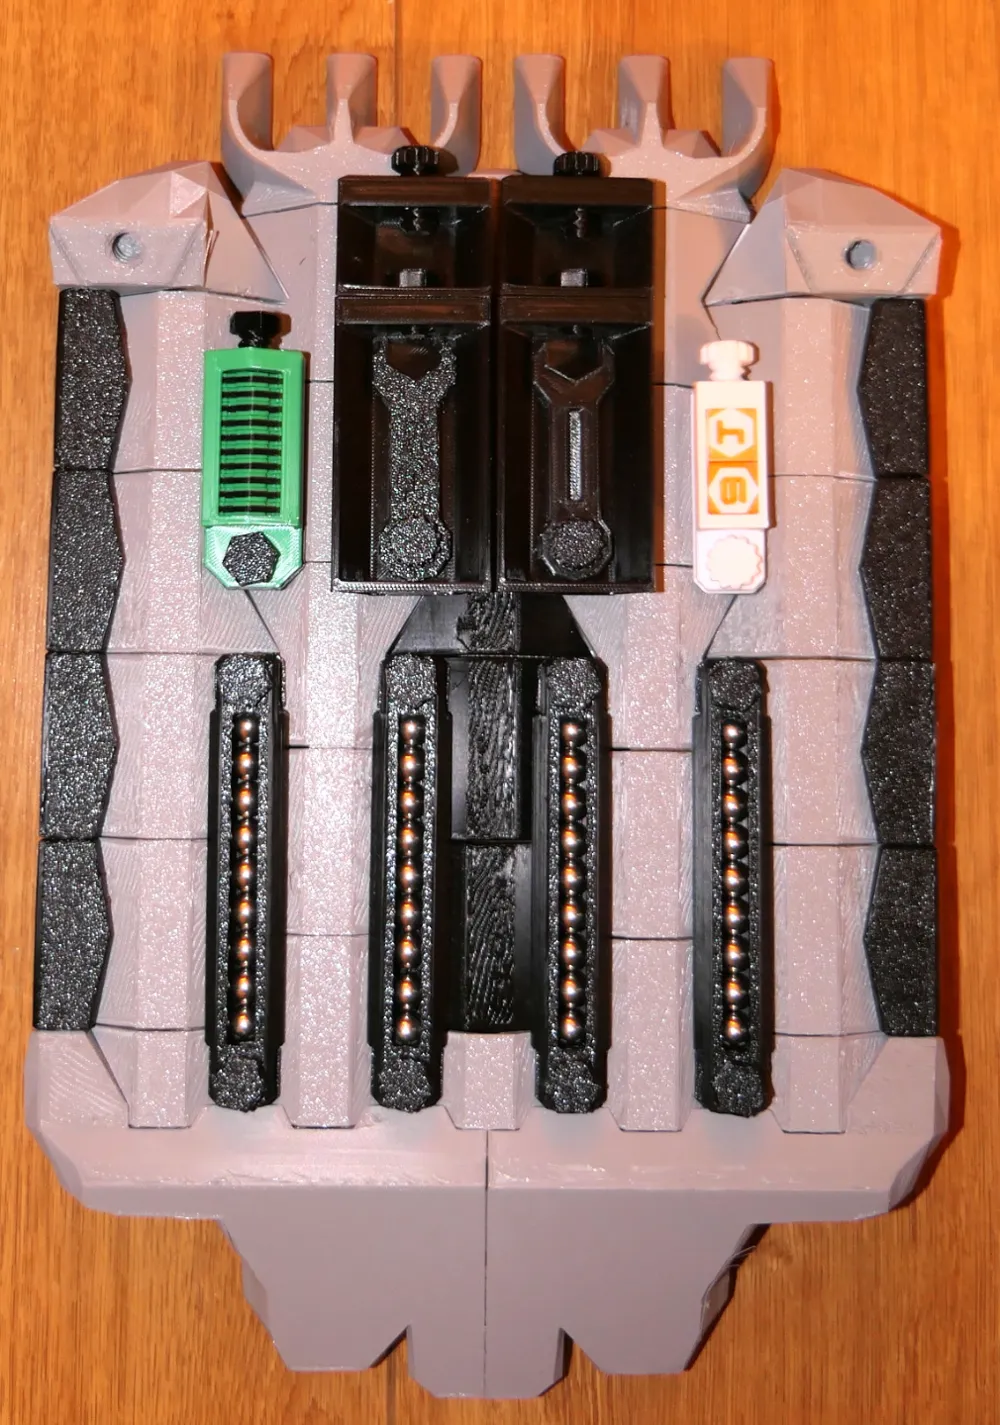
- It features bead holders for 4 players.
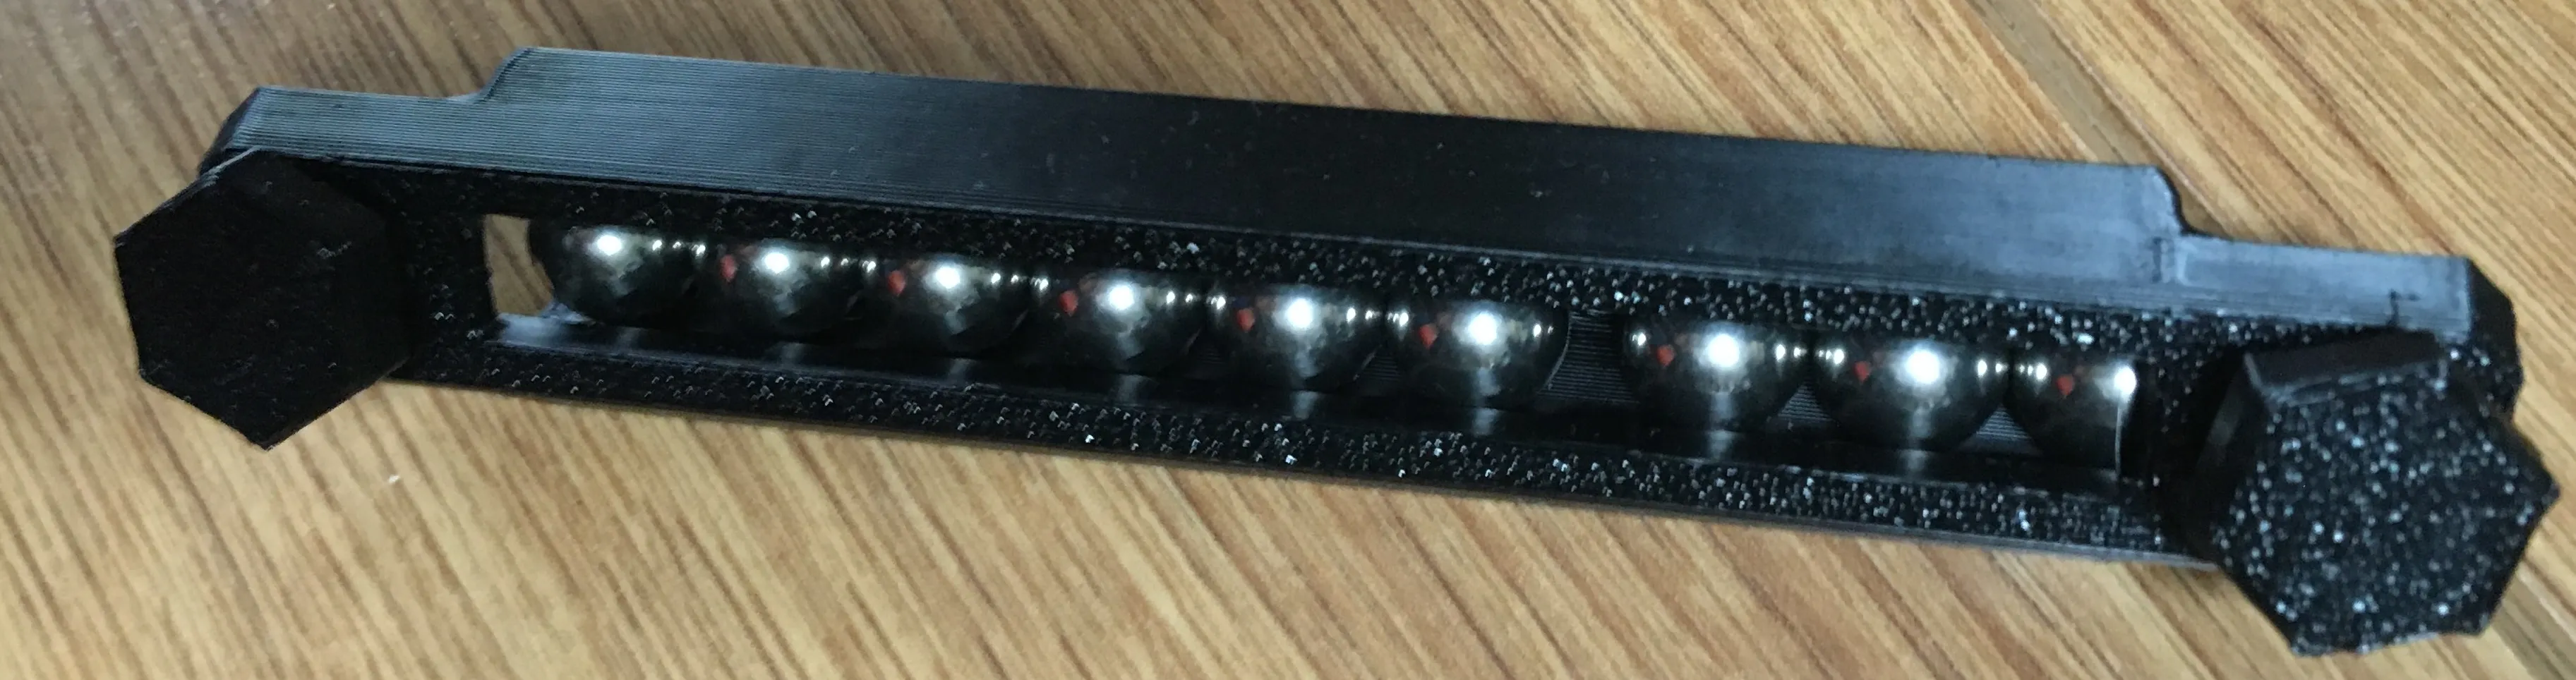
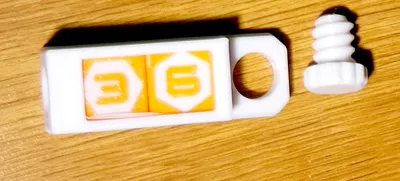
- There are cute tokens to be handed out to the winner of each round, along with a token holder.
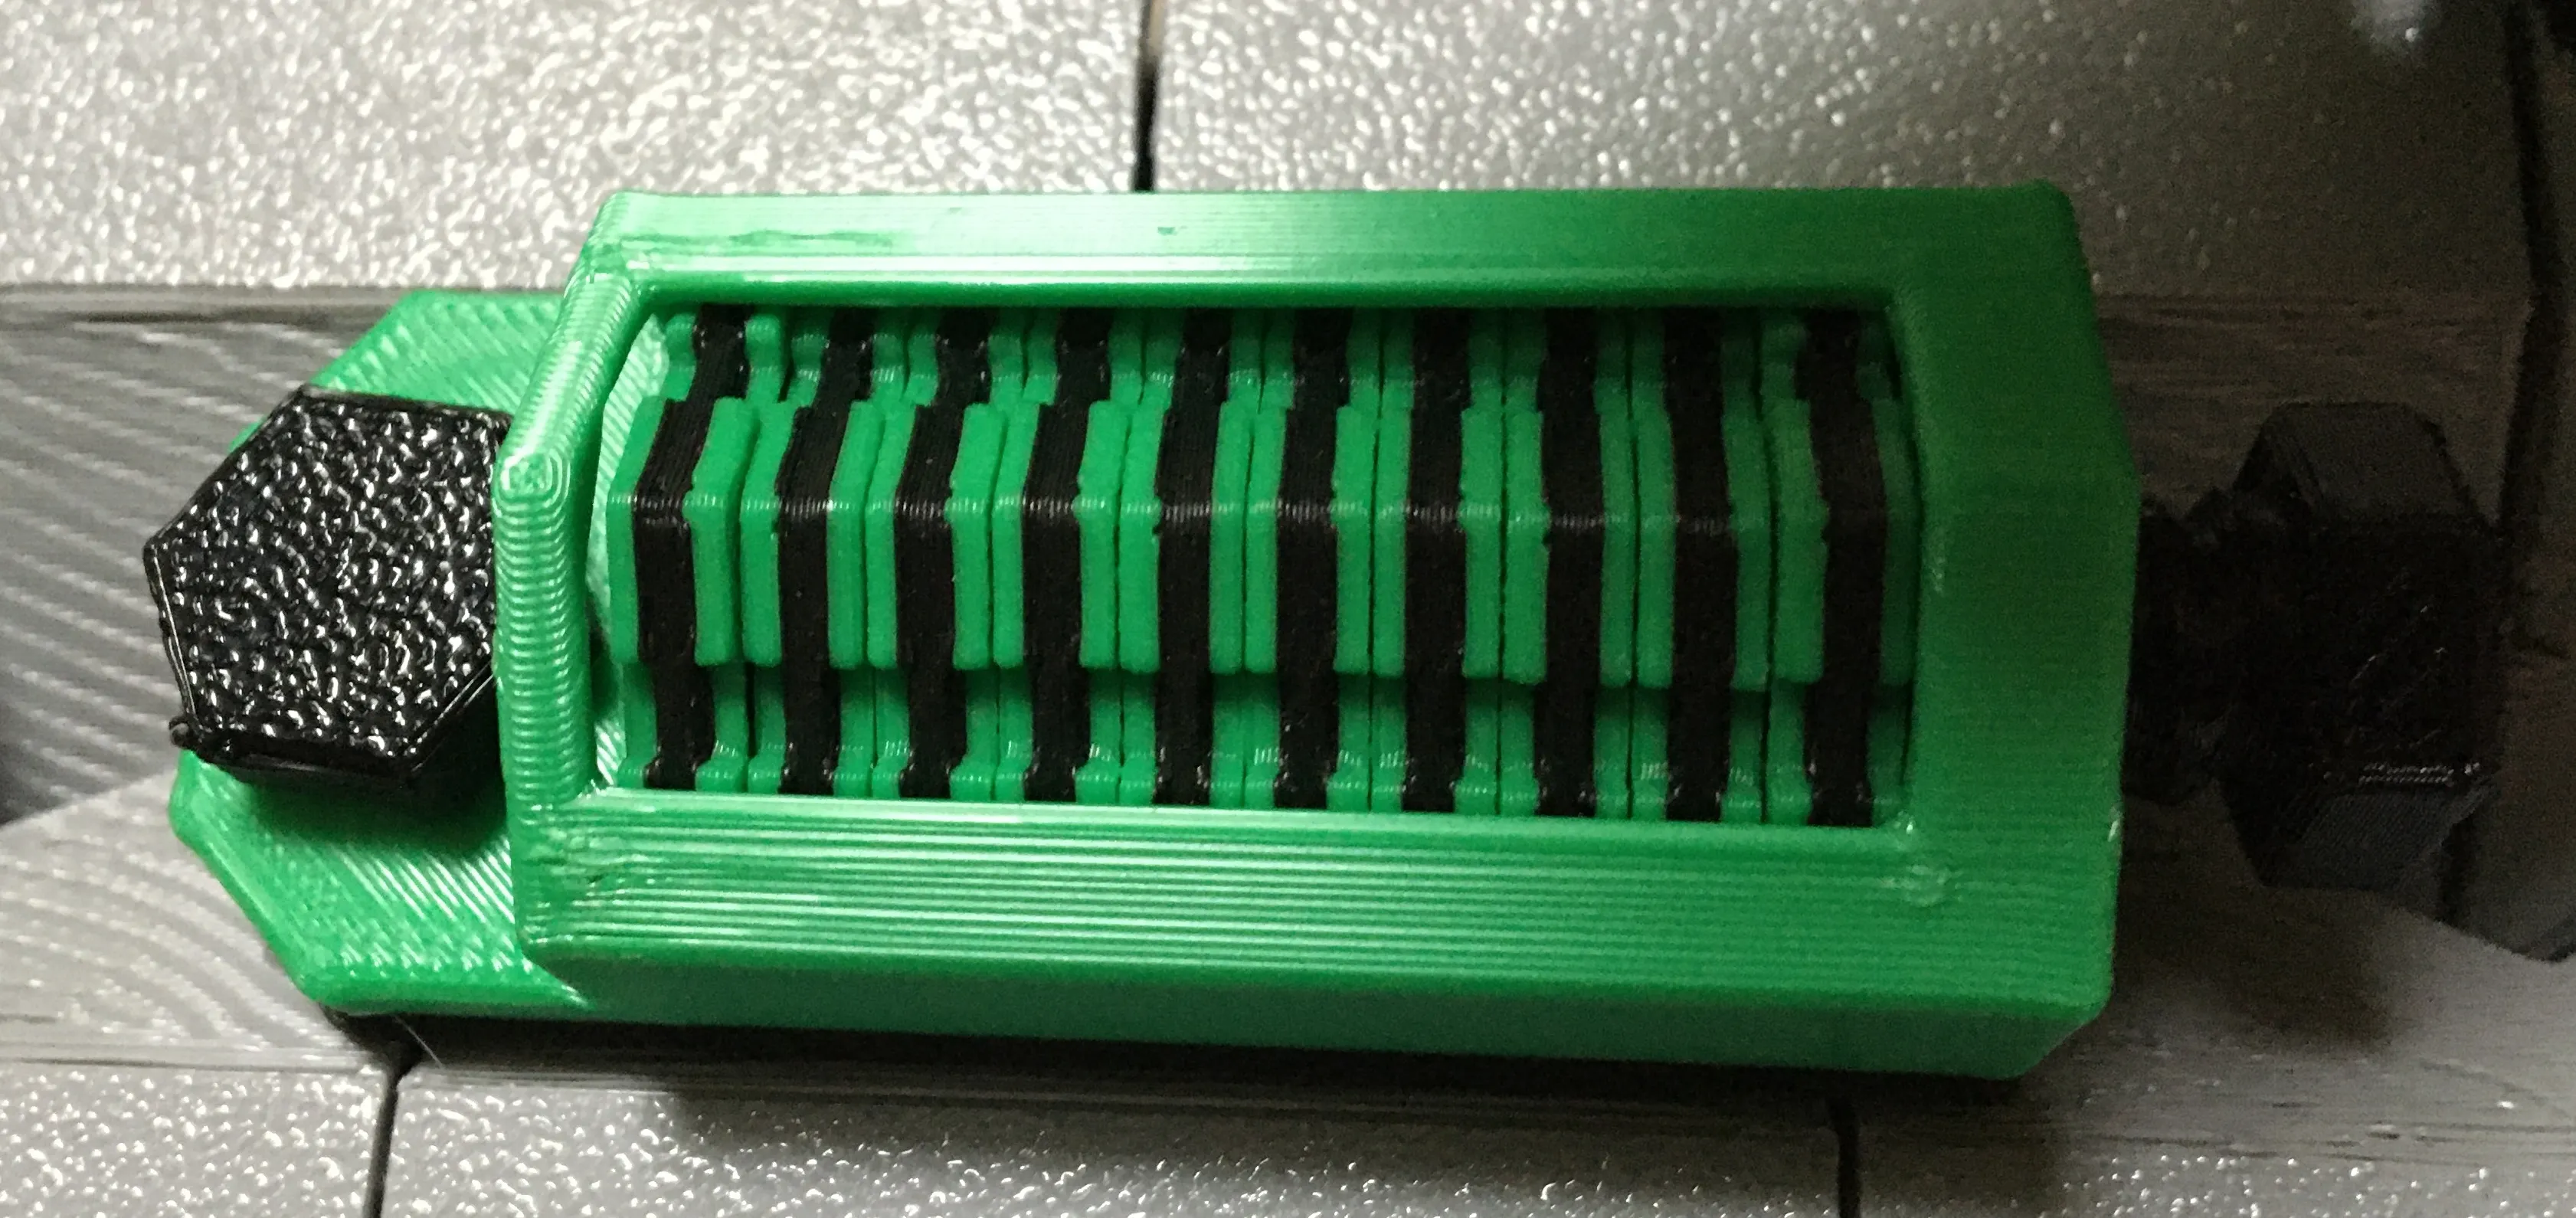
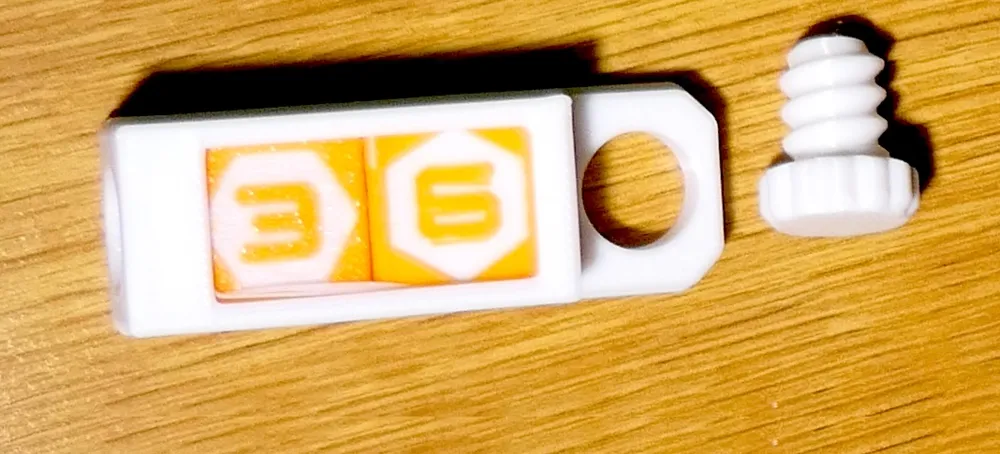
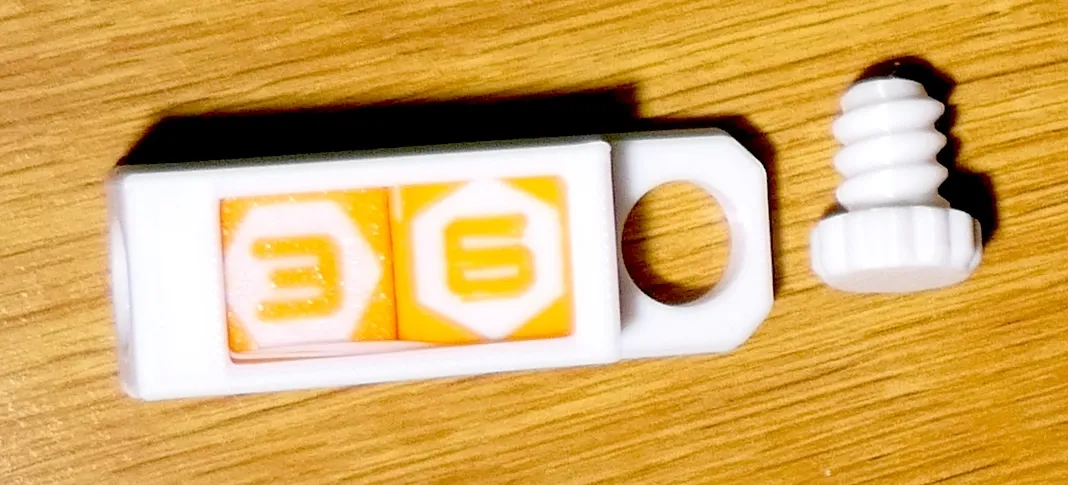
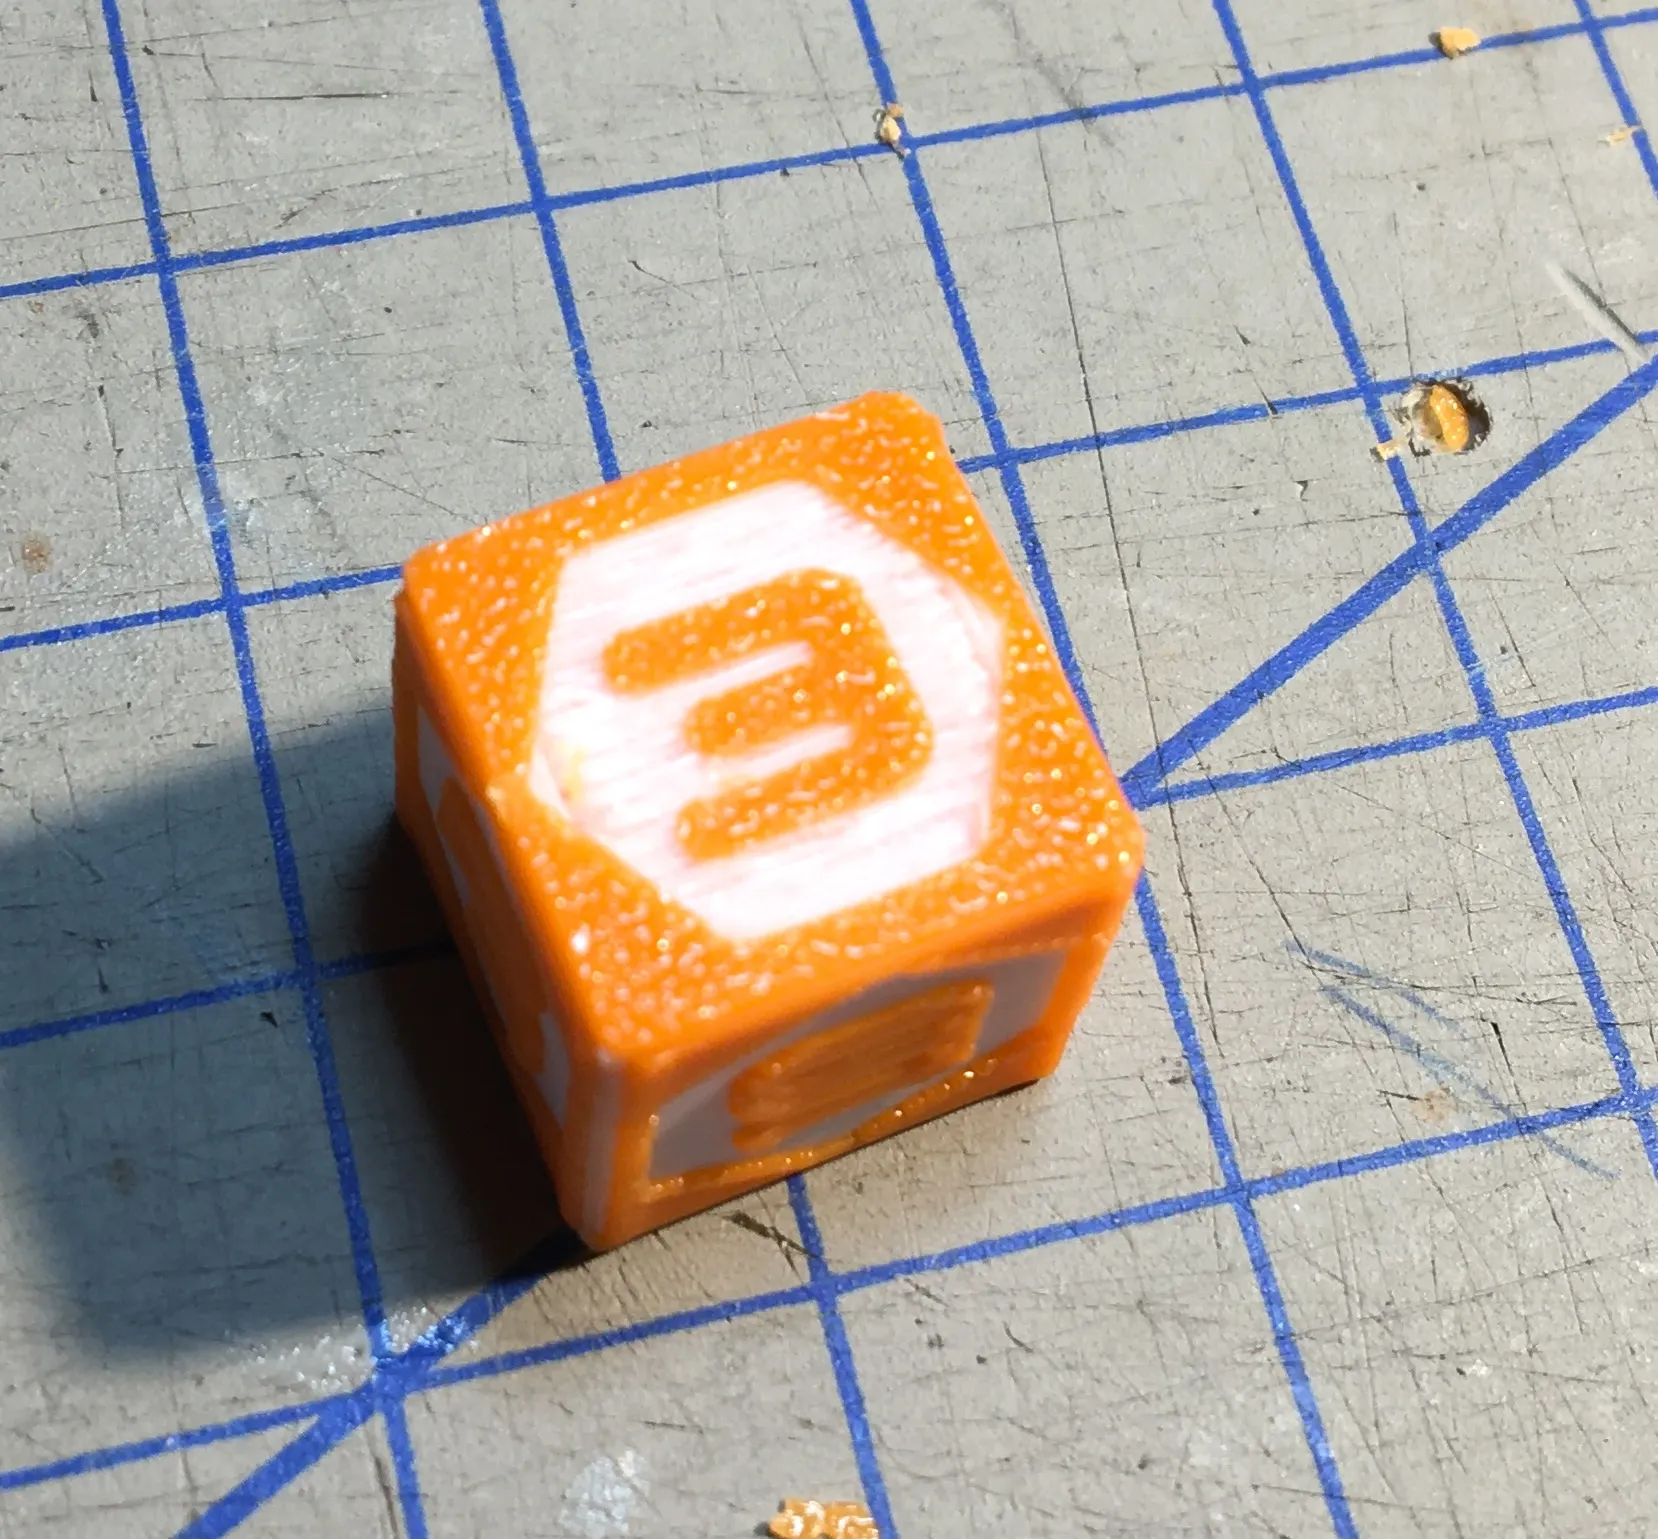
- There is a dice holder, to which I added spiffy looking Hextraction dices (I remixed basic dices by ZDP189 in TinkerCAD).
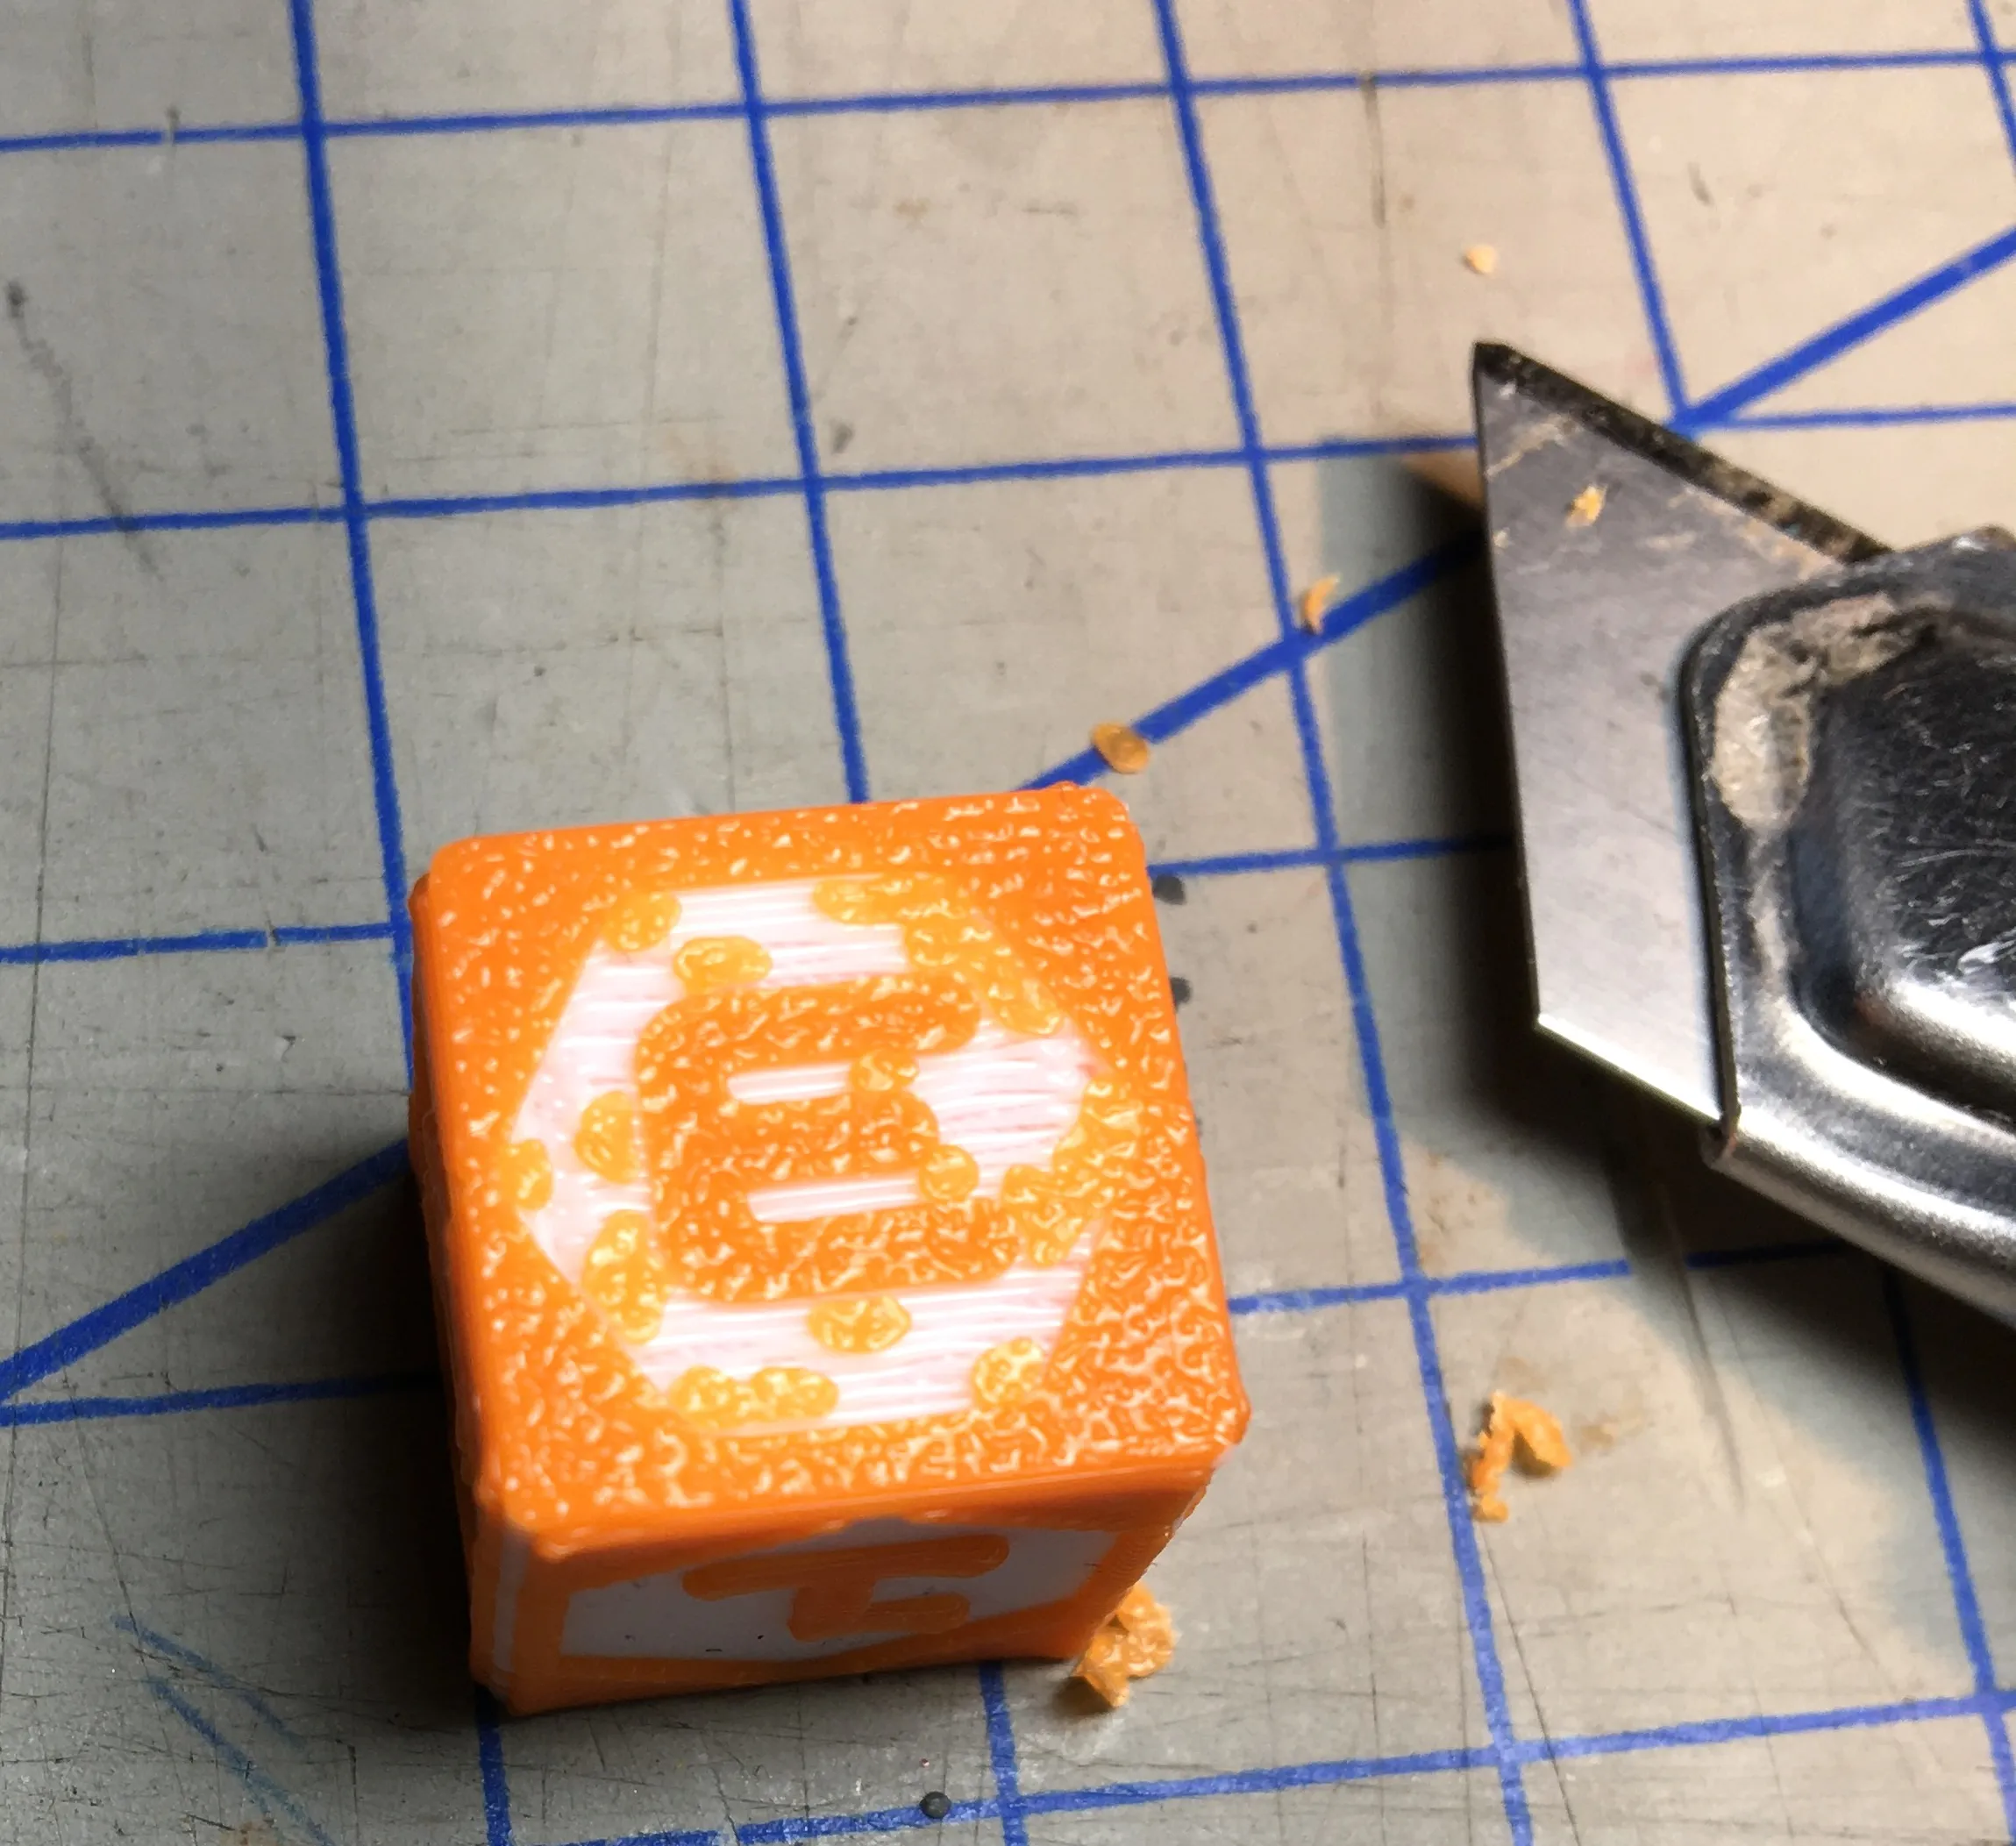
Tip: The dices are printed with the 3 face down with tiny supports. Use a small flat screwdriver or a knife to remove the supports..
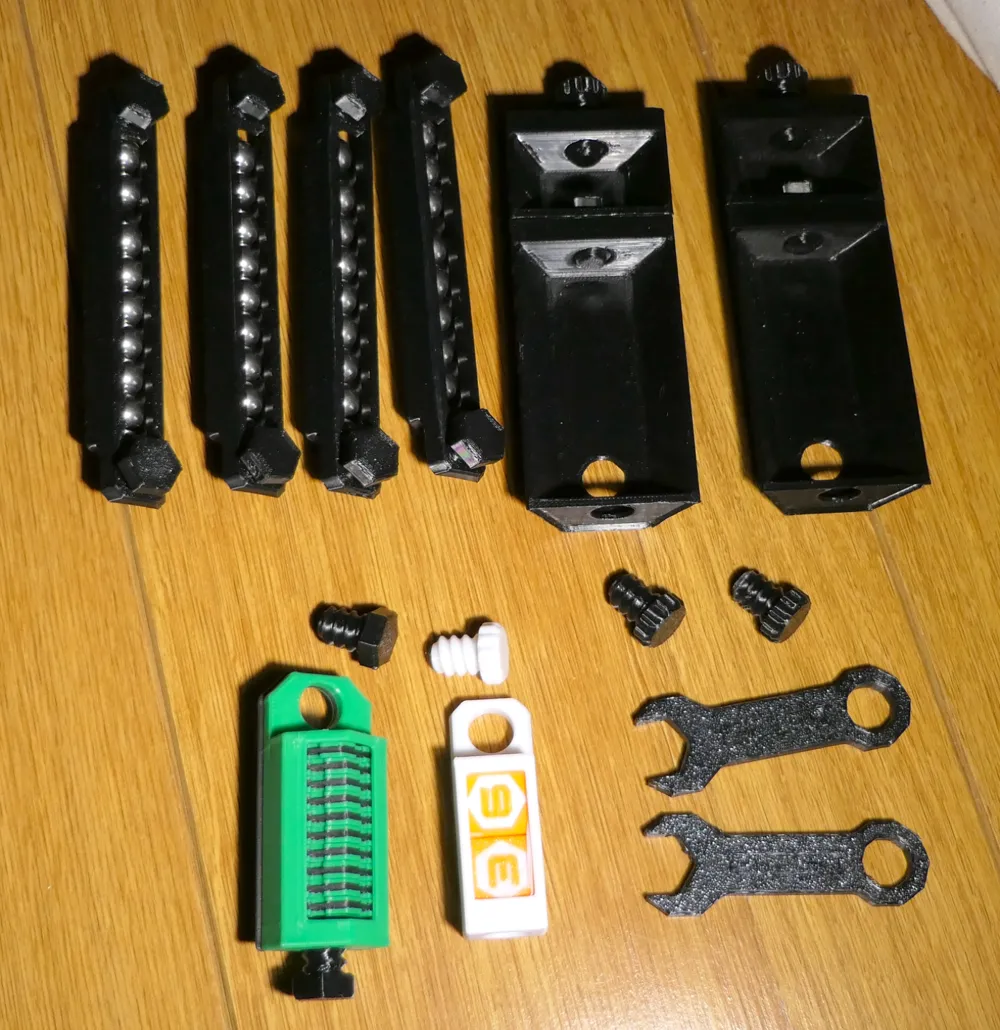
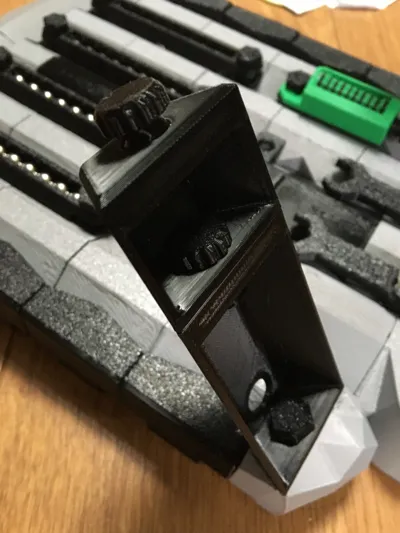
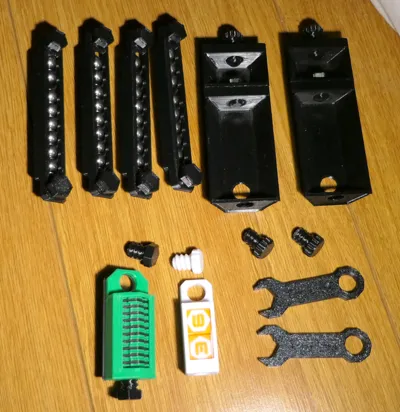
- All of the extras can be screwed to the back of the base using 3D printed bolts and a cute hex bolt spanner, making the board completely portable and easy to stow away!
This webpage covers the base only, originally from the Super Fancy Remix of the Hextraction Game Board by Inaudable.
FYI someone else posted the same board months after I did (Super Fancy Remix of the Hextraction Game Board), except that it does not fit the A1 mini and it lacks all the information and pictures above and the extensive assembly guide below.
Assembly
After printing everything, remove any supports, sand/file down rough edges.
Before glueing anything, test that balls can go freely through EVERY hole, from both ends. If not, sand or file them.
The goals required filing. I used a drill bit to manually carve material out.
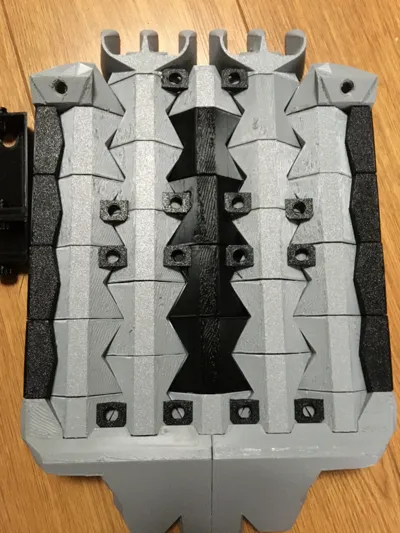
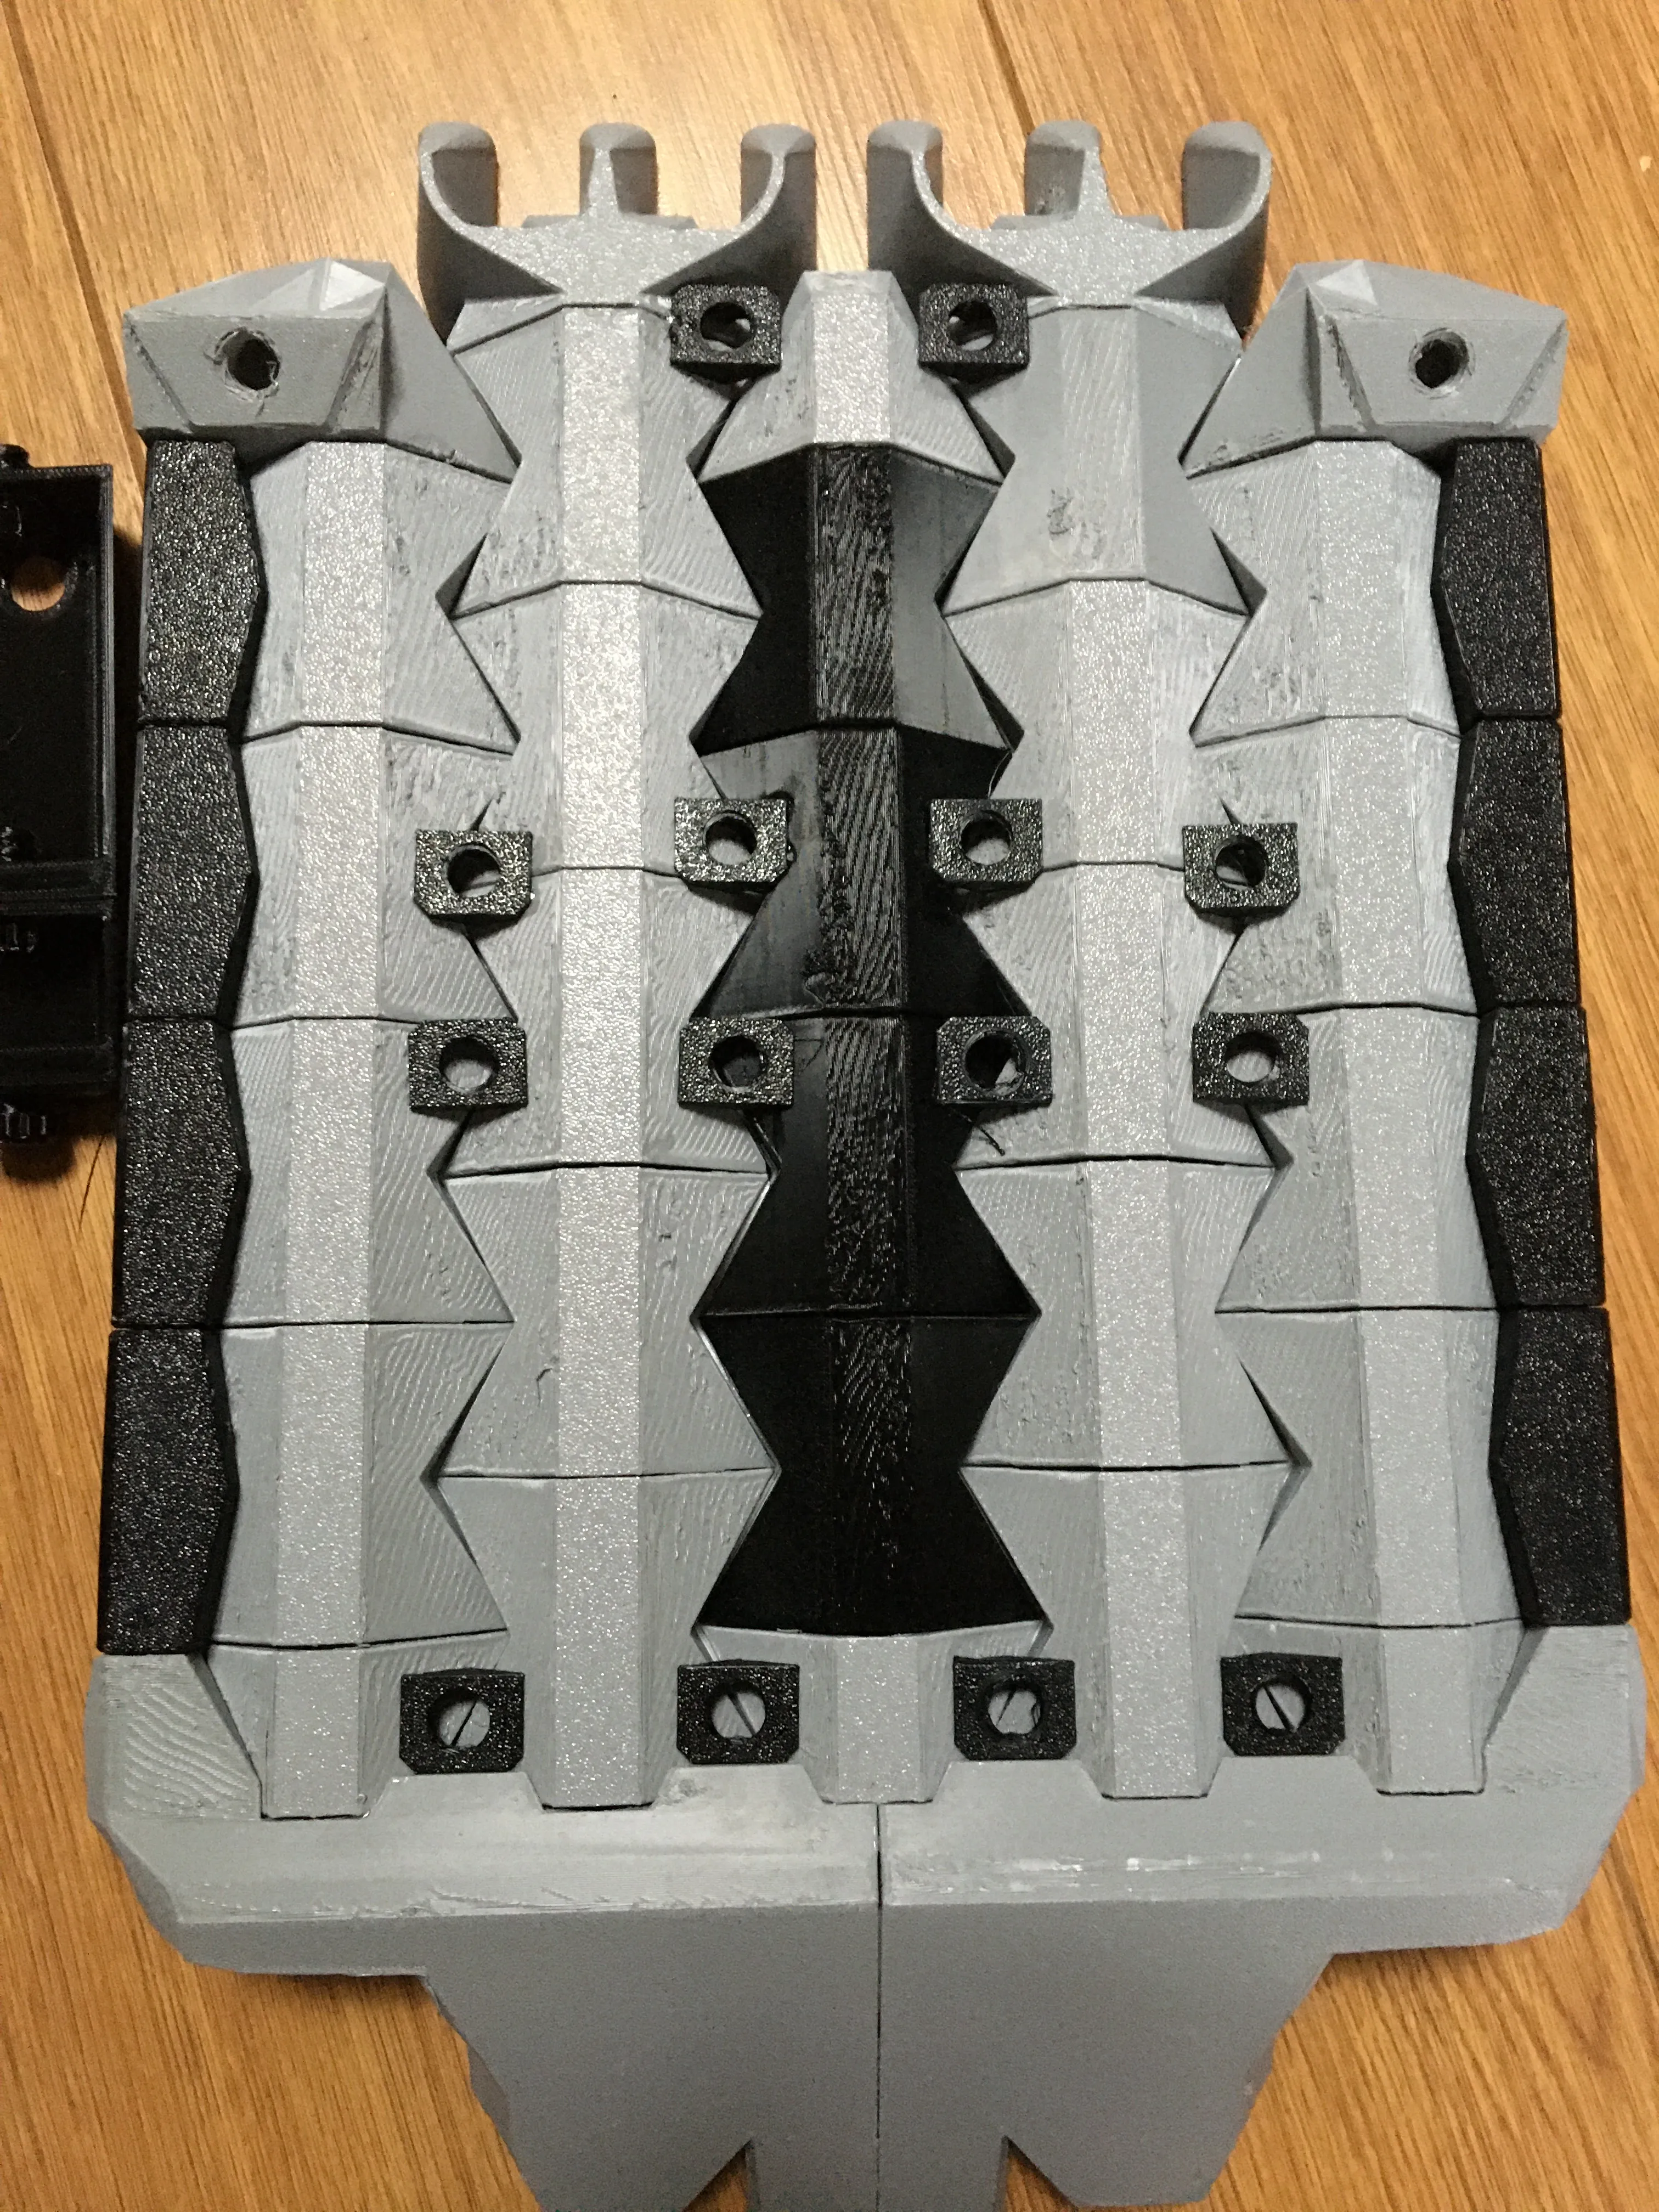
After you are done glueing the grid together (see instructions on Hextraction Super Fancy Board for A1 mini (grid) ), check how each part of the base will fit — most of them can only go one way — then glue them to the underside of the grid in the following order:
- the gutters;
- the half gutters (which go towards the bottom);
- the side gutters;
- the left and right leg supports;
- the two On ramps;
- the top middle gutter;
- glue the two goals halves together (Goal_Right_SmallPrinters.stl and Goal_Left_SmallPrinters.stl )
- glue the aforementioned goals to the grid.
Cyanoacrylate glue is highly recommended.
The mounts for the underside accessories should be assembled in the following order:
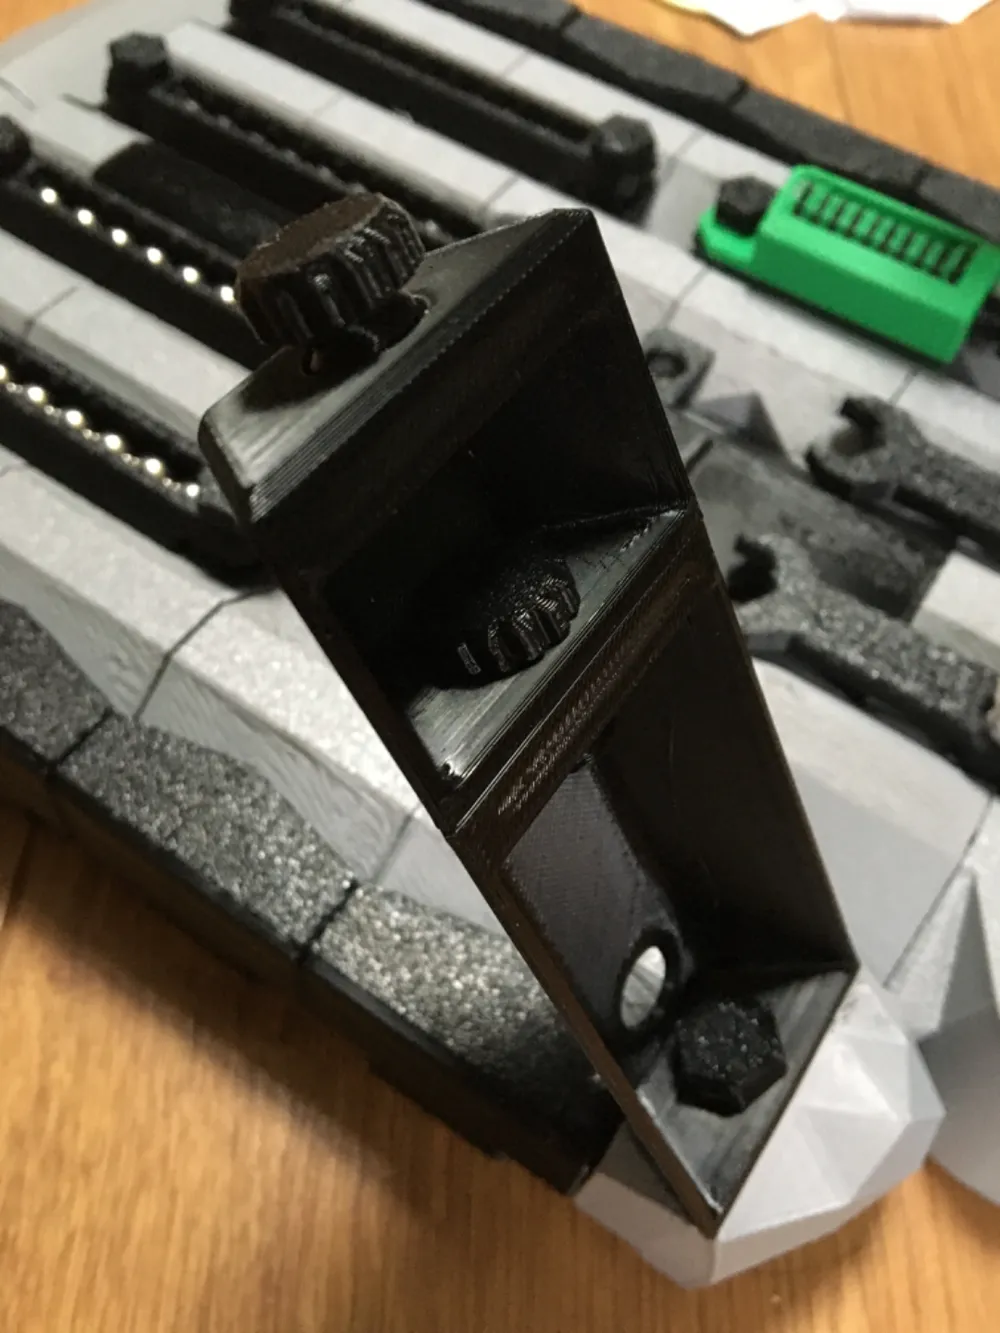
- Note: Mounts have bevels on 2 corners. For each accessory, the bevel of the upper mount should face upwards (ramps) and the bevel of lower mount should face downwards (goals).
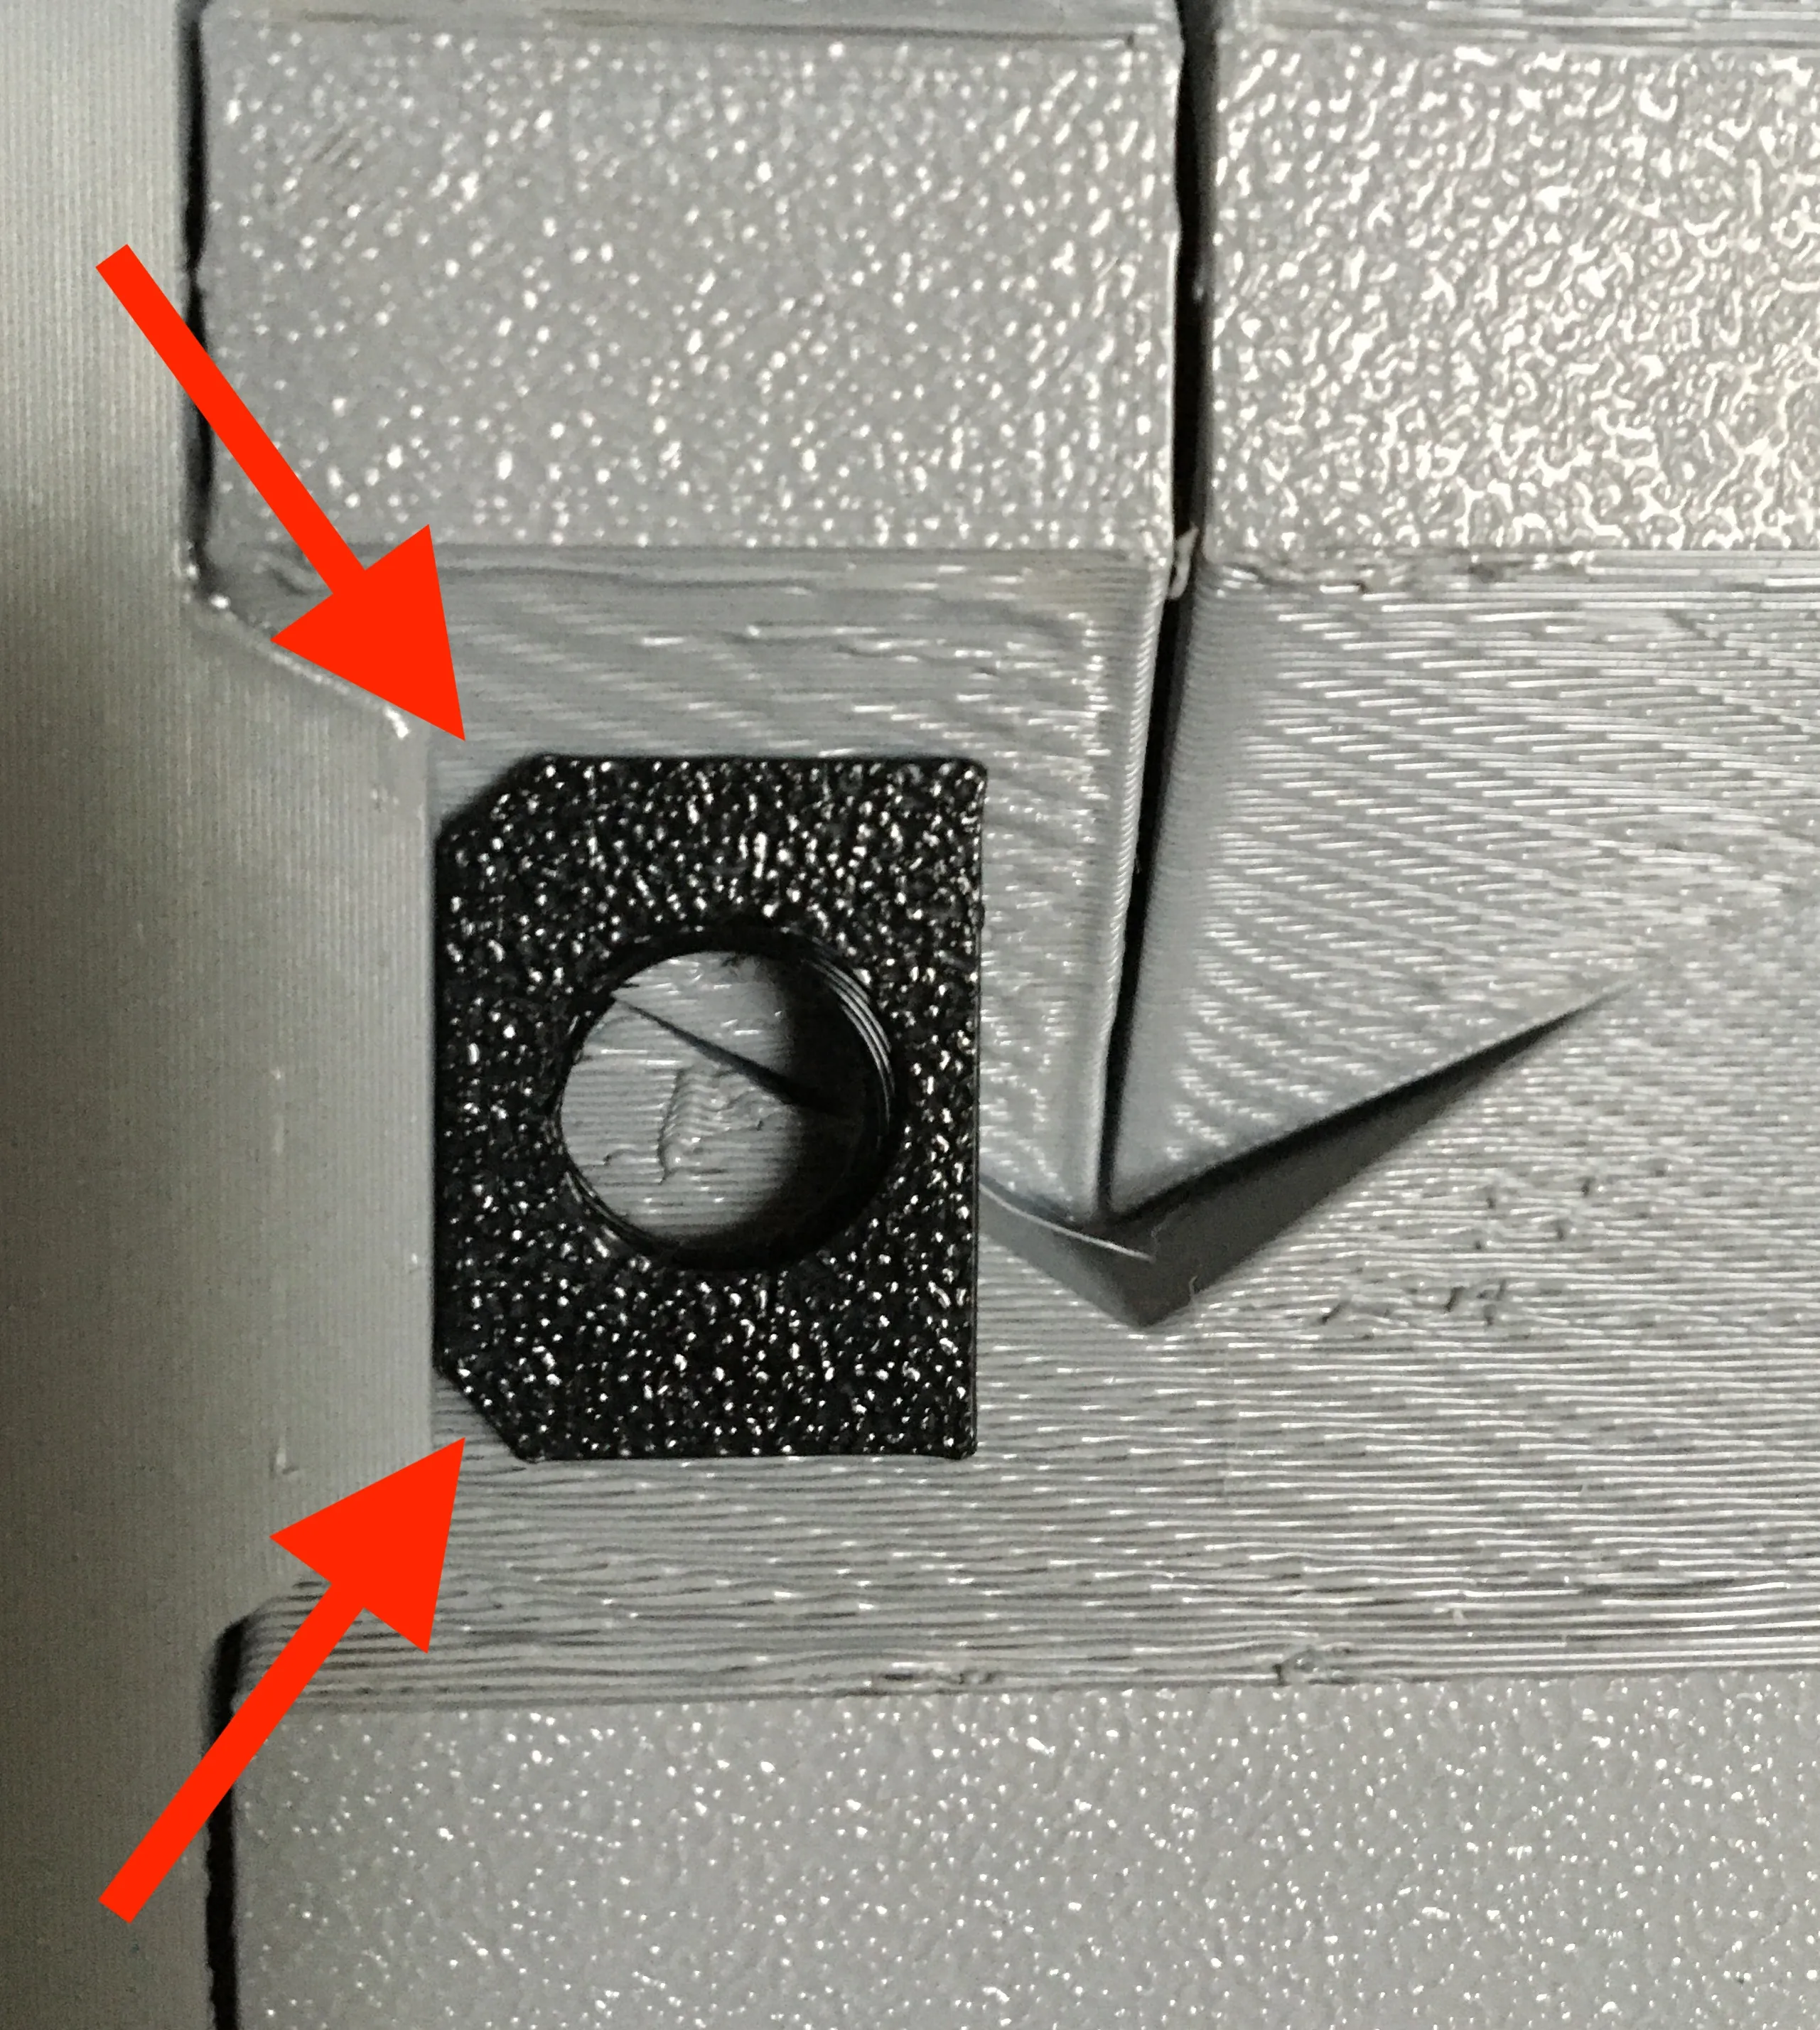
- Start with the mounts for the ball holders (BackMounts.stl)
- Glue the 4 mounts that are closest to the goals (bottom).
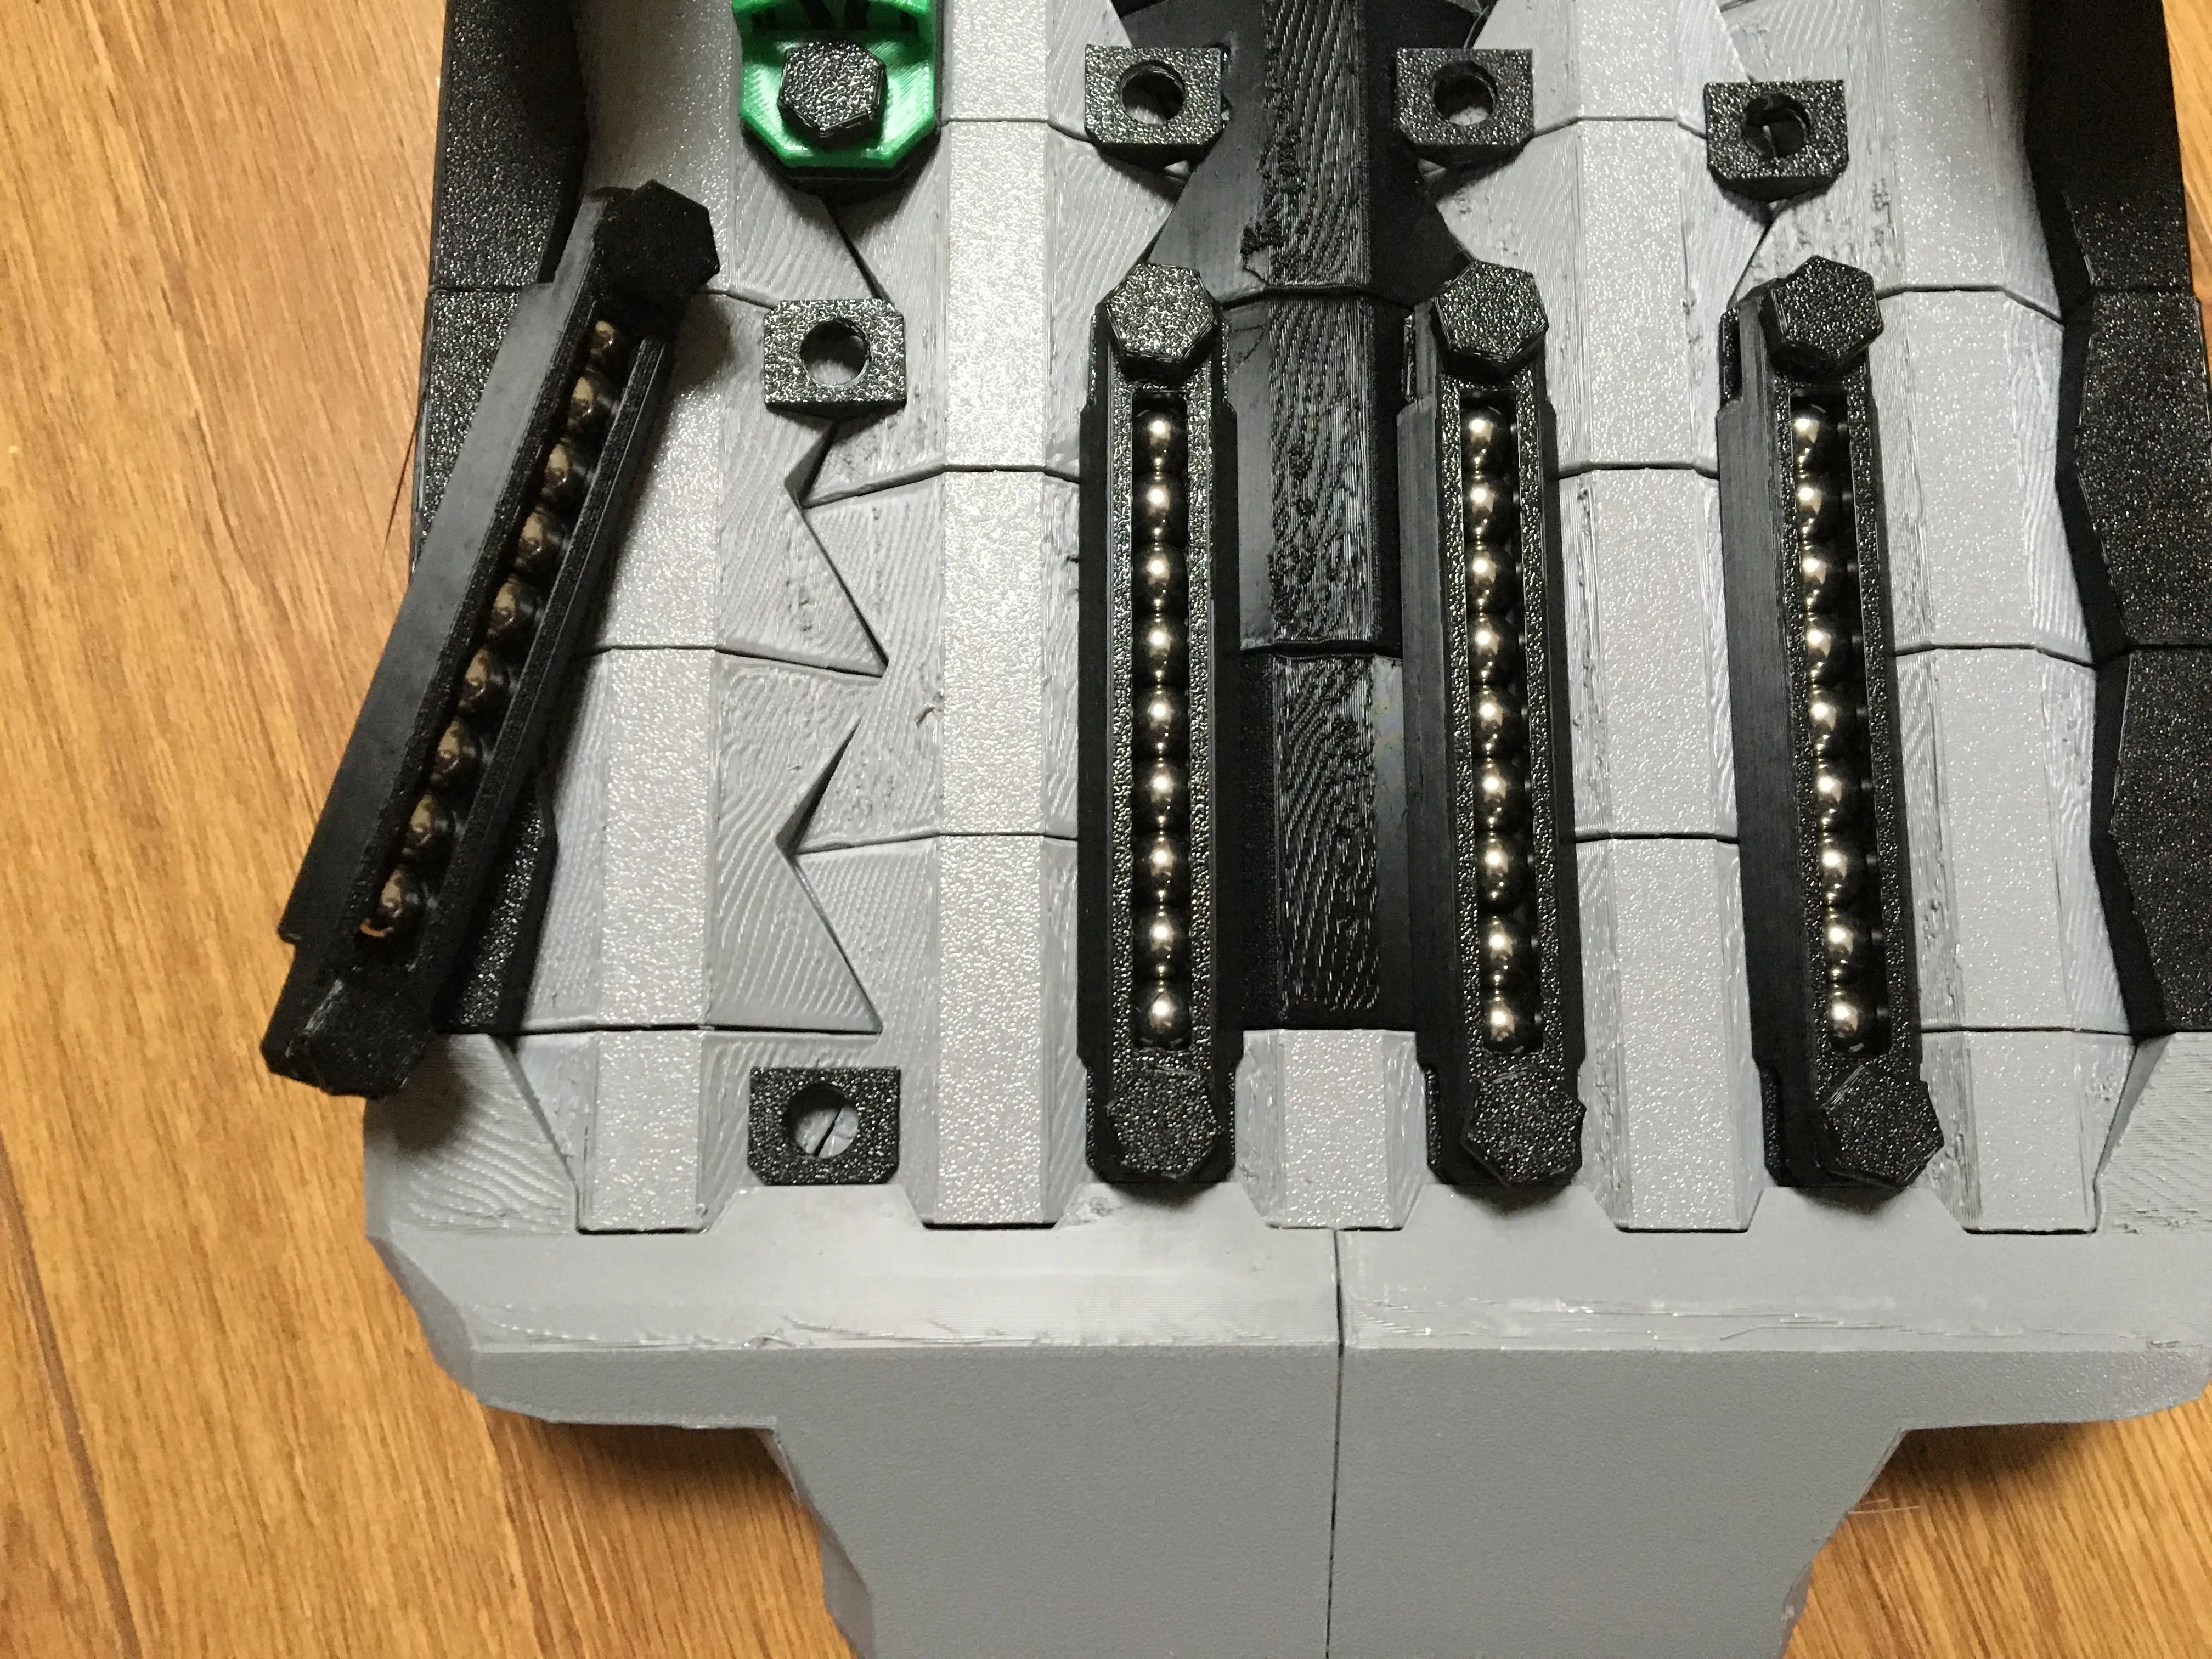
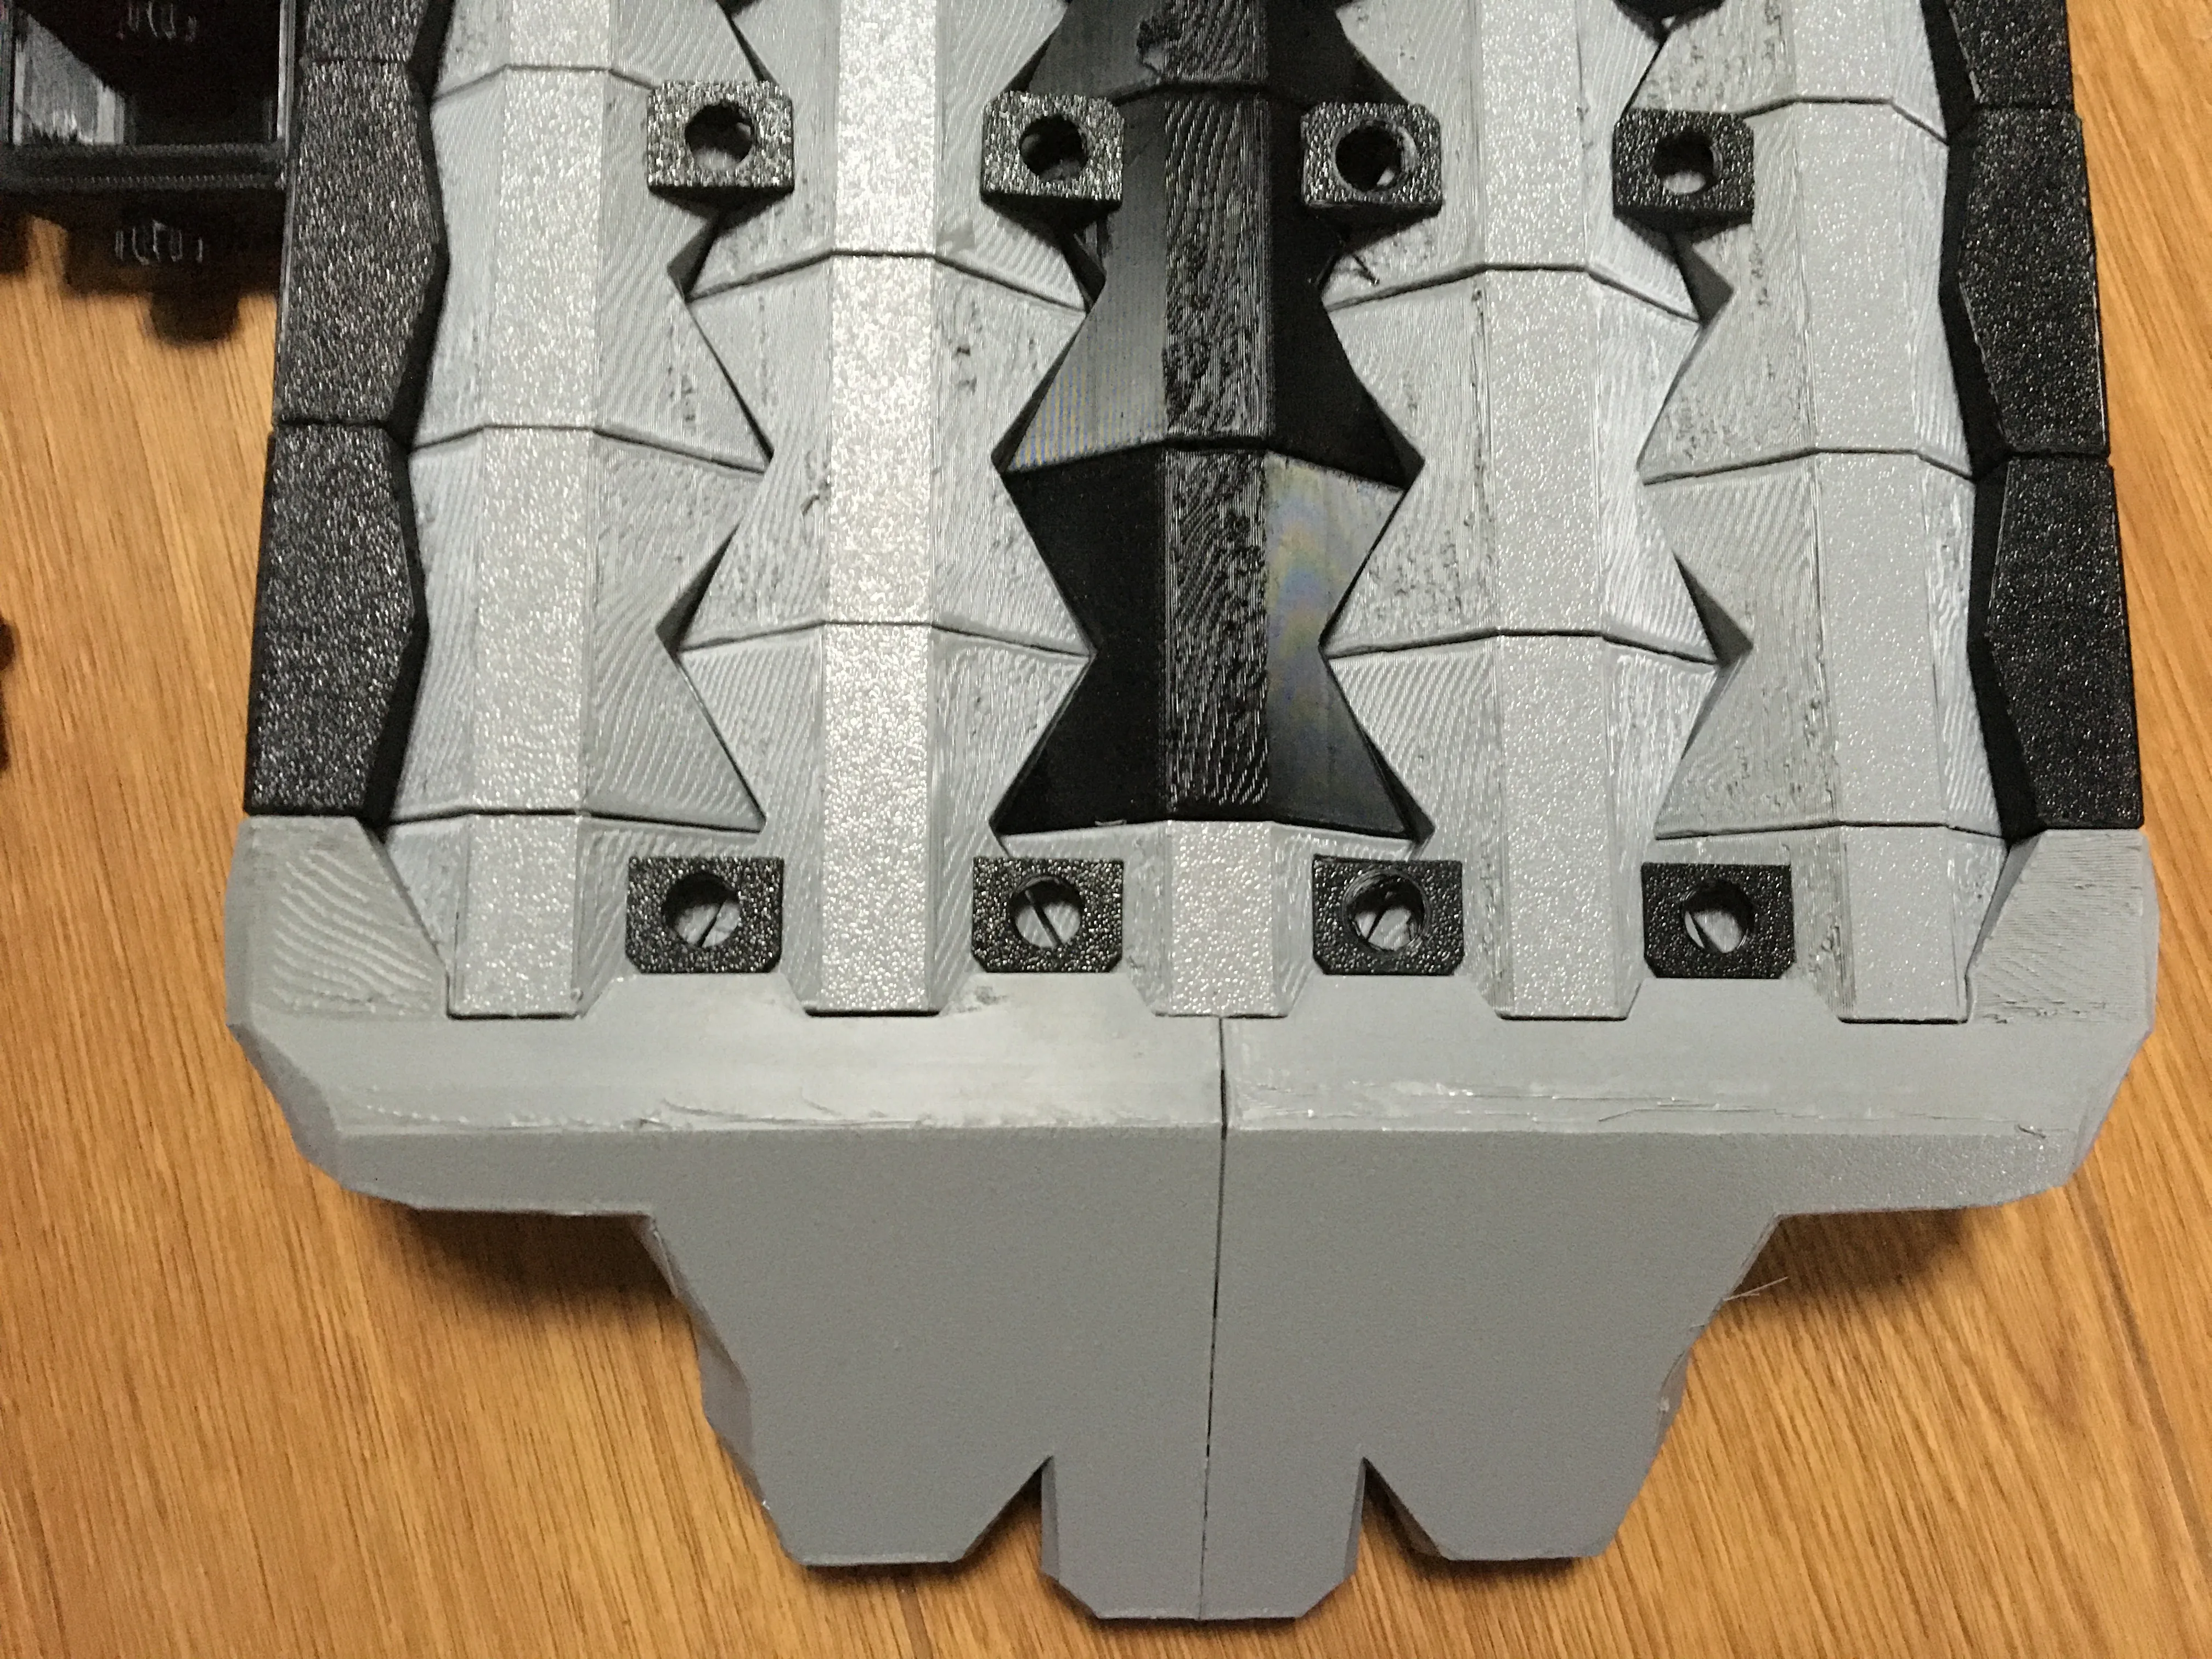
To determine where the corresponding mount for each ball holder will be glued, screw a ball holder into one of the glued mounts, screw a free mount on the other end. Use a pencil to draw a line indicating where you will glue the mount after you unscrew it from the ball holder.
- The next row of 4 mount holders should be 1cm above the last row, making sure the tabs are facing correctly.
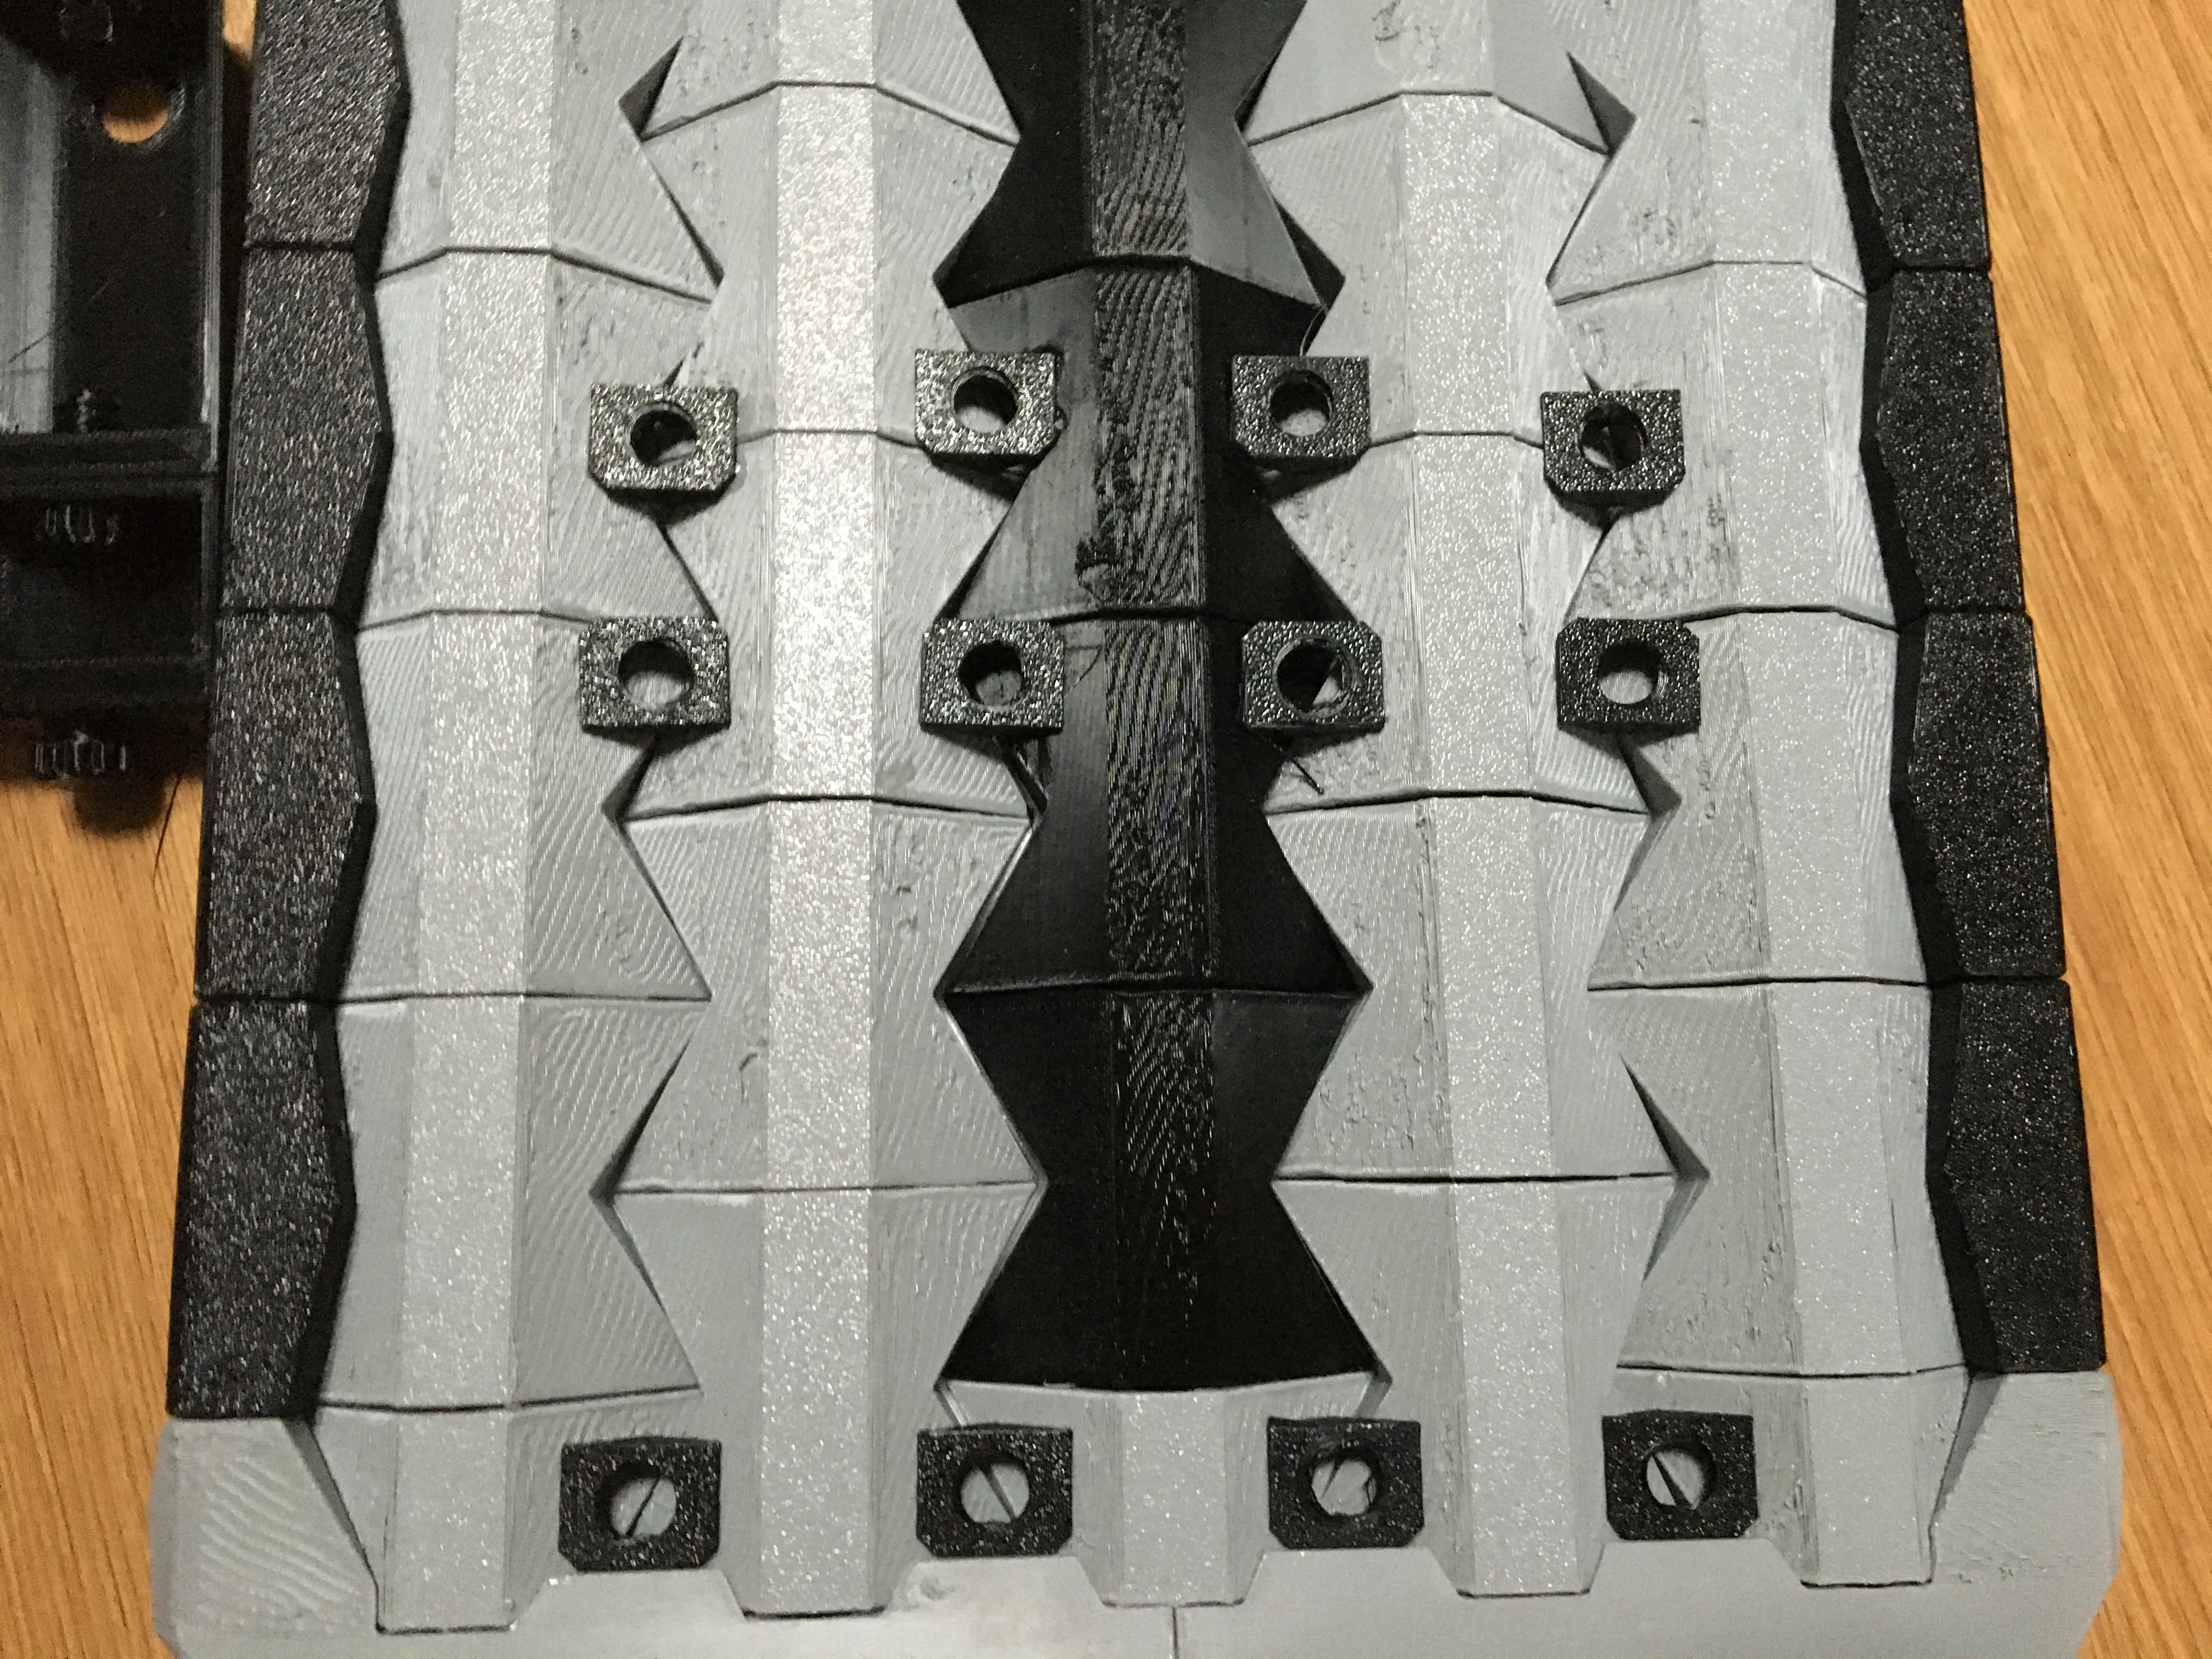
- Again checking carefully mark out where the last row should go by spacing it out as done for the second row.
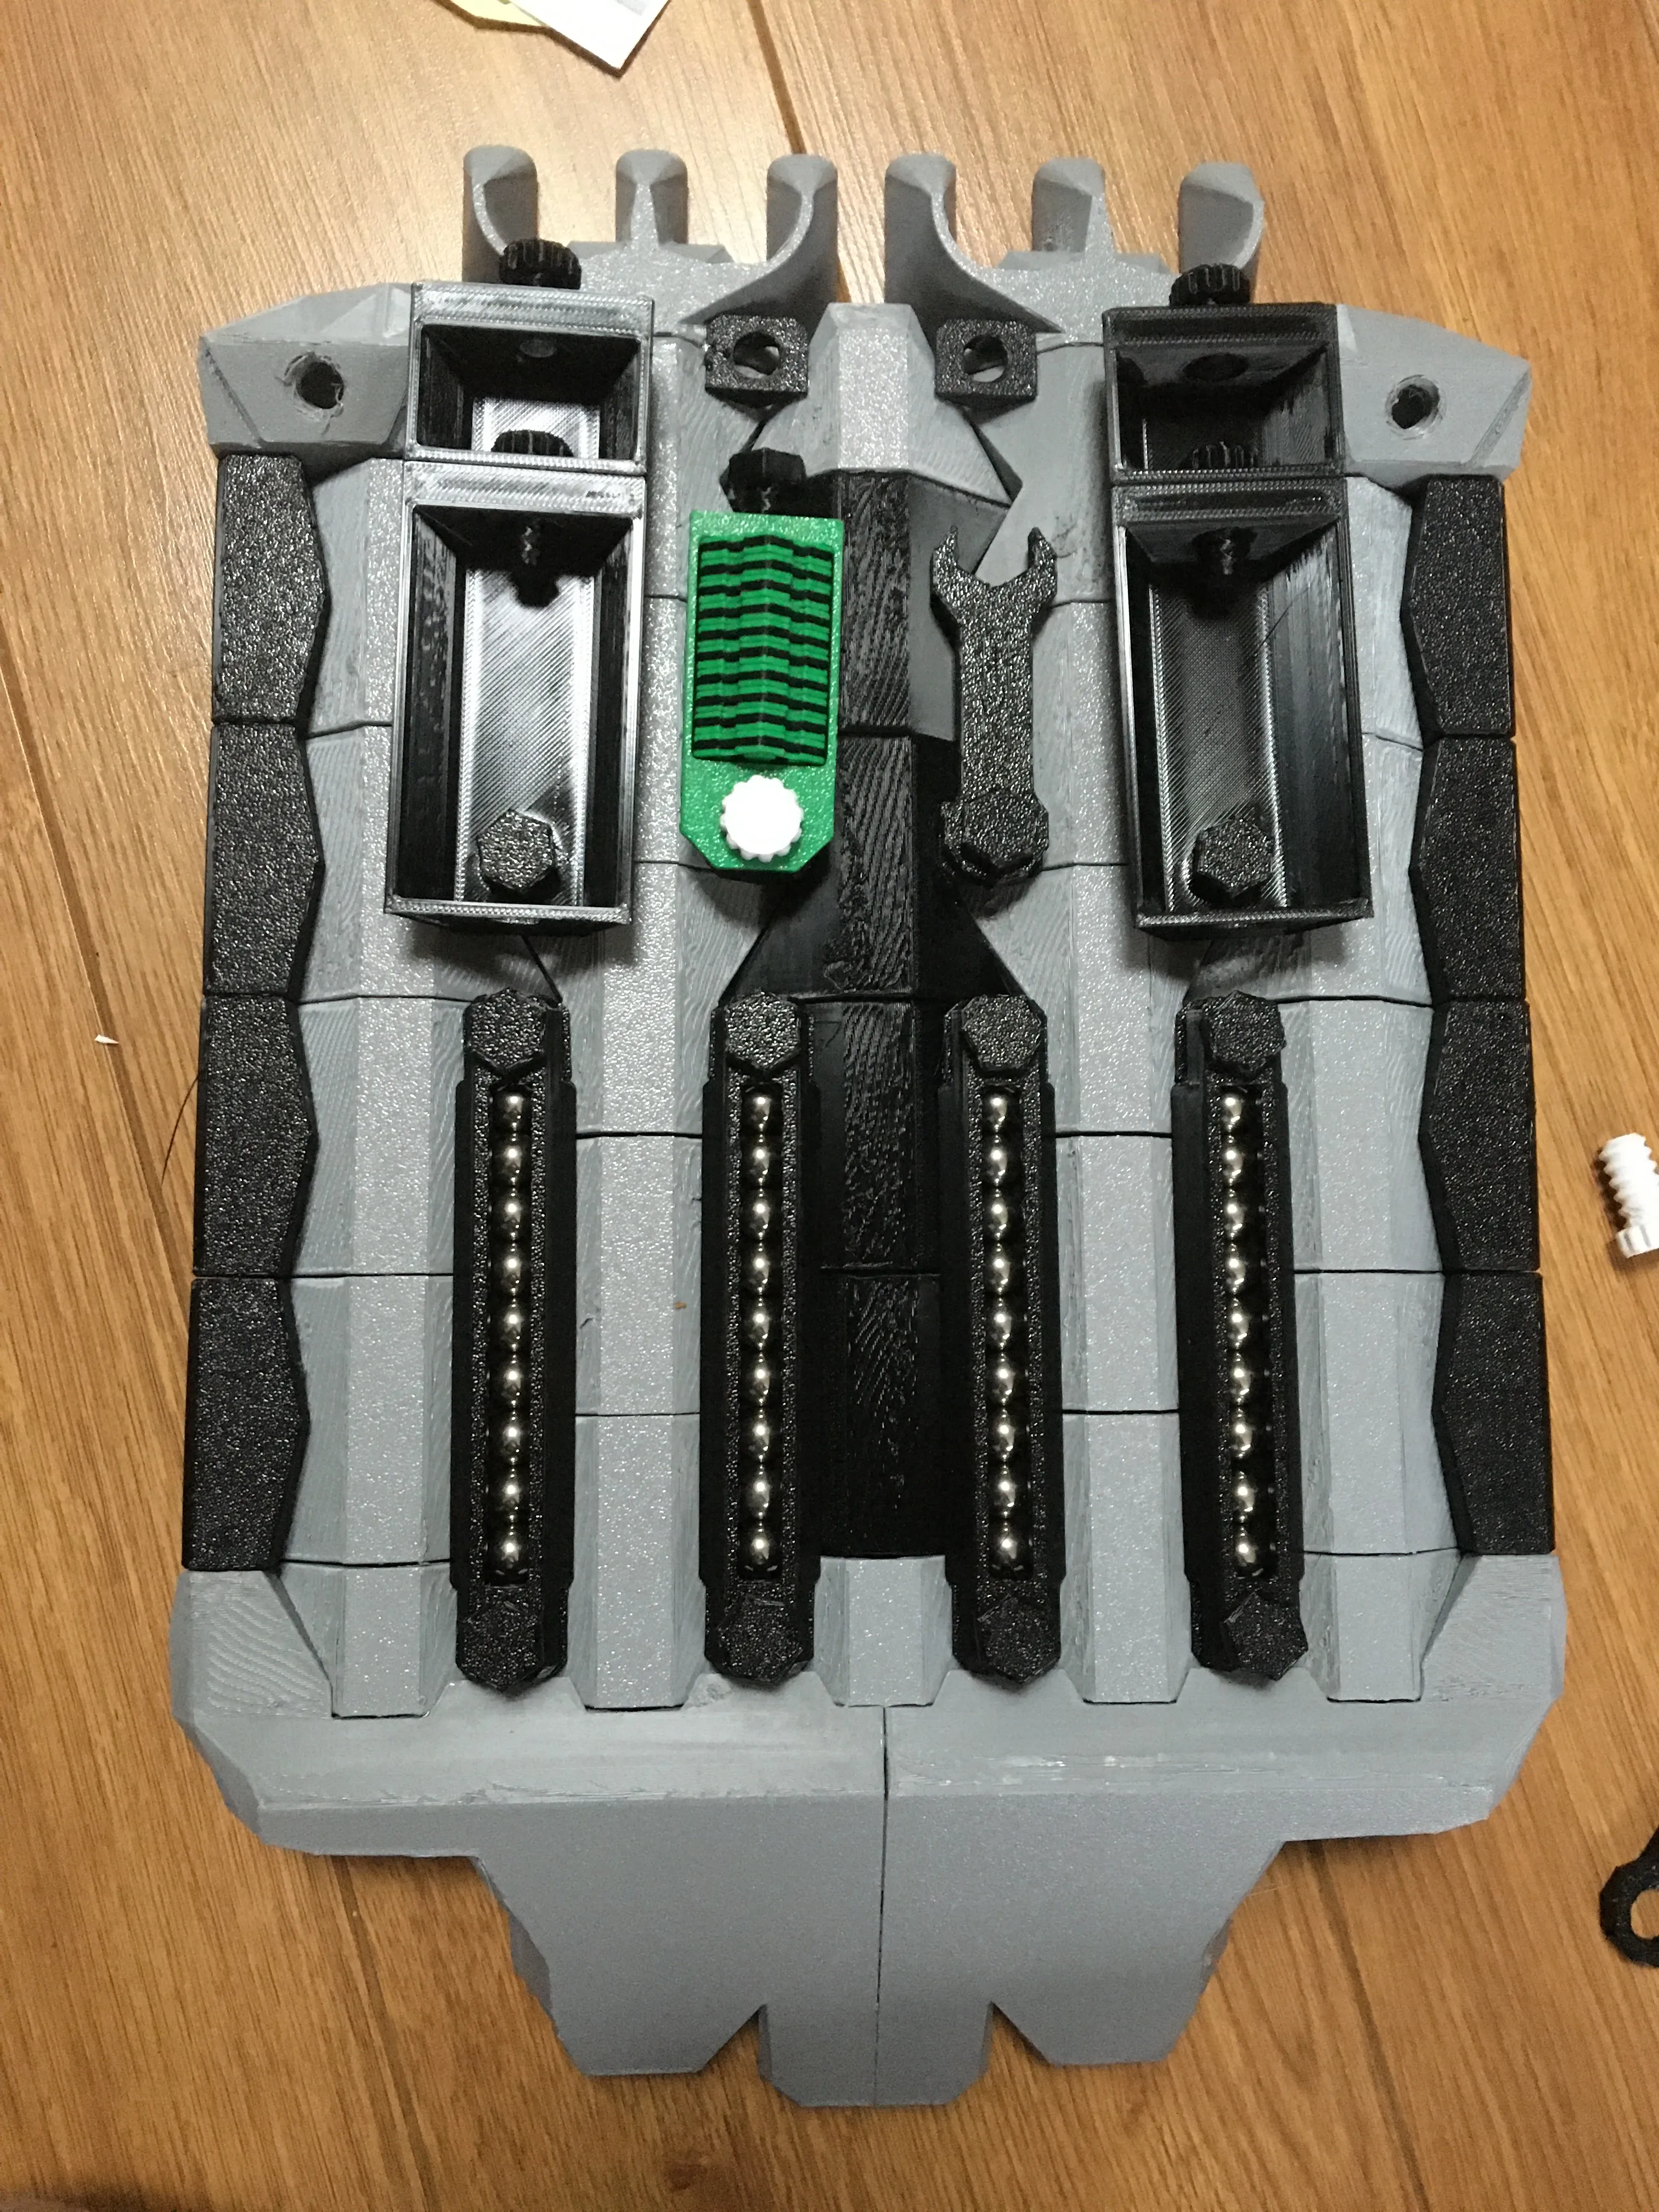
- Here is an overview of the back mounts, along with everything packed and ready to go.
Boost Me (for free)
Any boost will go straight to my 9 year old's DIY fund and it will encourage me to put in the effort to provide as clear instructions as possible (and post additional sets of tiles). Thank you and enjoy the game!
Original Hextraction board by Zack Freedman
and
Super Fancy Remix of the Hextraction Game Board by Inaudable.
are under the following MIT License:
Copyright (c) 2023 Zachary Freedman and Voidstar Lab LLC Permission is hereby granted, free of charge, to any person obtaining a copy of this software and associated documentation files (the "Software"), to deal in the Software without restriction, including without limitation the rights to use, copy, modify, merge, publish, distribute, sublicense, and/or sell copies of the Software, and to permit persons to whom the Software is furnished to do so, subject to the following conditions: The above copyright notice and this permission notice shall be included in all copies or substantial portions of the Software. THE SOFTWARE IS PROVIDED "AS IS", WITHOUT WARRANTY OF ANY KIND, EXPRESS OR IMPLIED, INCLUDING BUT NOT LIMITED TO THE WARRANTIES OF MERCHANTABILITY, FITNESS FOR A PARTICULAR PURPOSE AND NONINFRINGEMENT. IN NO EVENT SHALL THE AUTHORS OR COPYRIGHT HOLDERS BE LIABLE FOR ANY CLAIM, DAMAGES OR OTHER LIABILITY, WHETHER IN AN ACTION OF CONTRACT, TORT OR OTHERWISE, ARISING FROM, OUT OF OR IN CONNECTION WITH THE SOFTWARE OR THE USE OR OTHER DEALINGS IN THE SOFTWARE.
---------------------------
New to MakerWorld?
What are Boosts?
Boosts are a great way to show your support: users get 12 points per boost, and boost are free to you (we all receive 2 free boosts every 2 weeks). YOU even get 5 points when you first boost any model, and 2 points thereafter. You don't have to print a model to boost.
Rating print profiles
Rating a print profile encourages users to post their models: they earn 2 points for each 4 or 5 star rating, and YOU get up to 50 points/month for rating models you printed.
How to rate a model/print profile?
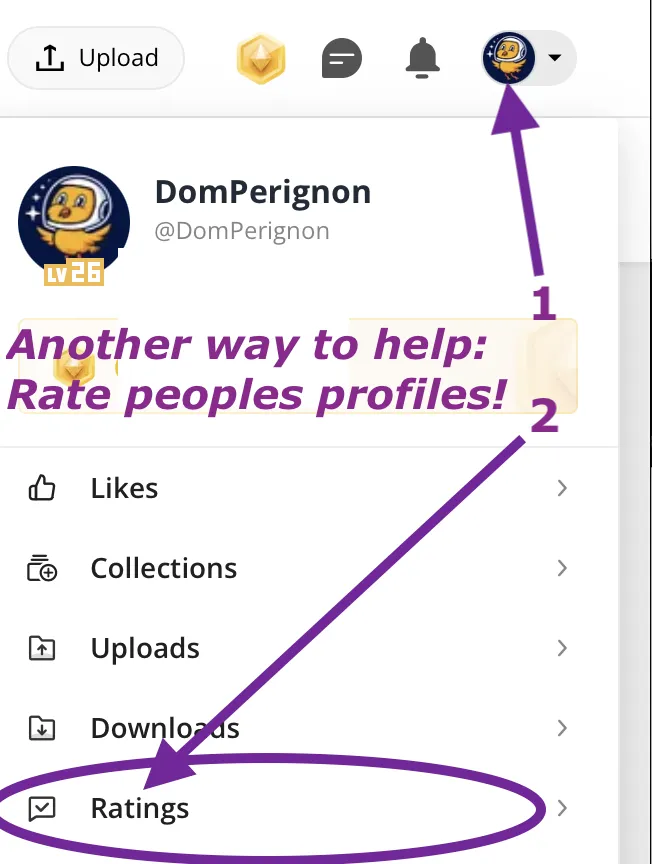
On the Makerworld website, click on your avatar and look for « Ratings » (image below).
- In the Bambu Handy app, tap "Me" at the bottom to find a purple ratings folder.
- In Bambu Studio software (or Orca Slicer), you can only rate the last model you printed in the Device tab, under Print progress.
This remix is based on

License



Comment & Rating (104)