
Storage Rack for the MMSS


Print Profile(2)


Bill of Materials




Description
Boost Me (for free)
I usually don’t ask for this, but I’ve noticed that many creators actively encourage it on other platforms—and it makes sense, as it helps increase visibility. So, if you can follow me, it would make difference. It’s a great way to support my work and show appreciation. For more insight subscribe my blog at: https://designrepcom.com/ This design is freely available for the community, but if you enjoy my work and would like to show your support, you can boost this project. Thanks!
Description and contextualization
A present to you, a Rack for the Mutil-Modular Storage System (MMSS) that I've been developing. Don't go running to buying a ton of filament, first you must understand how this work....
You can do it step by step.
You can start with a simple model, and store it in your closet, some drawer, or card box; a month later, you may buy something else and print the corresponding module to store your precious component or accessories. Someday, you may need a box or maybe a case (if you have to transport your things) to store the modules you already have…
In the limit, some people, need a complete rack, because they have a lot of things (maybe a print farm).
But this rack, on its own, has the Build plate dispenser, and for most people, this project ends there. But you are like my, and make things scalable and that's why this is all modular.
Introduction
This rack serves as a support to the different projects carried out around what I can already call an ecosystem, namely;


- The amount of modules you can add is growing fast:
- MMSS 2x4 Module - Glue Stick and Hexagonal Keys
- MMSS 1x1 Module - MicroSD
- MMSS 1x1 Module - Nozzle Wipper
- MMSS 1x1 Module - Filament Cutter + MicroSD
- MMSS 1x1 Module - Filament Cutter
- MMSS 1x2 Module - Hotend and Silicon Sock
- MMSS 1x3 Module - Complete Hotend
- MMSS 2x3 Module - Small Scraper
- MMSS 2x5 Module - Liquid Glue
- MMSS various Modules - Pockets with Lid
- MMSS 2x3 Module - Spool Holder
- MMSS 1x5 bambu lab original scraper
- MMSS for AMS Modules
- 4x Active extrusion wheel assembly;
- 4x Active support shaft assembly;
- 4x PTFE Tube Fast Connector;
- 4x Driven Support Shaft Assembly
- 1x First Stage Feeder
- MMSS for the A1 printer
- More to come… I'm always adding new modules, please check my profile for the later information, some are free, others are only available as exclusives for members.
- Batteries Modules
- More to come… I'm always adding new modules, please check my Collection for the MMSS for more.
This rack adds now support for the build plates.
 |  |  |
 |  |  |
… and more
Assembly info
Read carefully the explanation that fallows. I've tried to be systematic for anyone to understand. This os not a print of a small toy or a vase, you will need to make decision, so make them informed.
1- Start here - Assemble the base that will serve the build plates. if you have many you can stack them together.
1.1 - All you need, and more, is available withing the file “rack_lower_module.3mf”.

2 - Now you have a choice to make:
2.1 - Stop here on the basic module for the build plates, or;
2.2 - continue to add other parts from the MMSS ecosystem.
If MMSS = 2.1 then;
You will need a cover like this to finish the job, you will find that part on the 3mf file regarding the rack for build plates


Tip:
For the PETG springs (see BOM list), flex the back plate a little for them to slide on the dovetail.

If MMSS = 2.2 then;
- you can add other rack for build plates, if really like build plates :) or;
- add a MMSS box or case, or several of them.
2.2.1 Ok, you need to add more modules on top of the “Base module" that serves the build plates. Now you can choose to continue with the barebone or the complete version.
 |  |
| 2.3 - Barebone rack | 2.4 Complete rack |
If MMSS = 2.3 then;
2.3 Barebone Rack
If you go this way, you will need some new parts that you can find on the 3mf file “rack_middle_modules.3mf”.
This drawing will help you choose the right heights for the spacers, almost all the parts are the same for any modules you choose, with the exception of the top.

Easy, isn't it? ;)
2.3.1 There are some parts that you will need to go up, in what I call, the middle steps. These parts can be found on the 3mf file stated on 2.3 point. You can stack modules on top of each other, most parts are the same, just be careful to choose the “Pillars” A, B or C depending on what you need, these will give you the space necessary for each module (see drawing above).

See does red pins? They have to go with a tight fit, if you notice them loose on the guides or on the Pilar’s see if the filament is calibrated, sometime, certain materials shrink more than others, petg tends to be more stable… anyways if all fails, use the scale tool on the slicer to compensate.
2.3.2 At some point you will reach the top, and you will need to close the rack top.
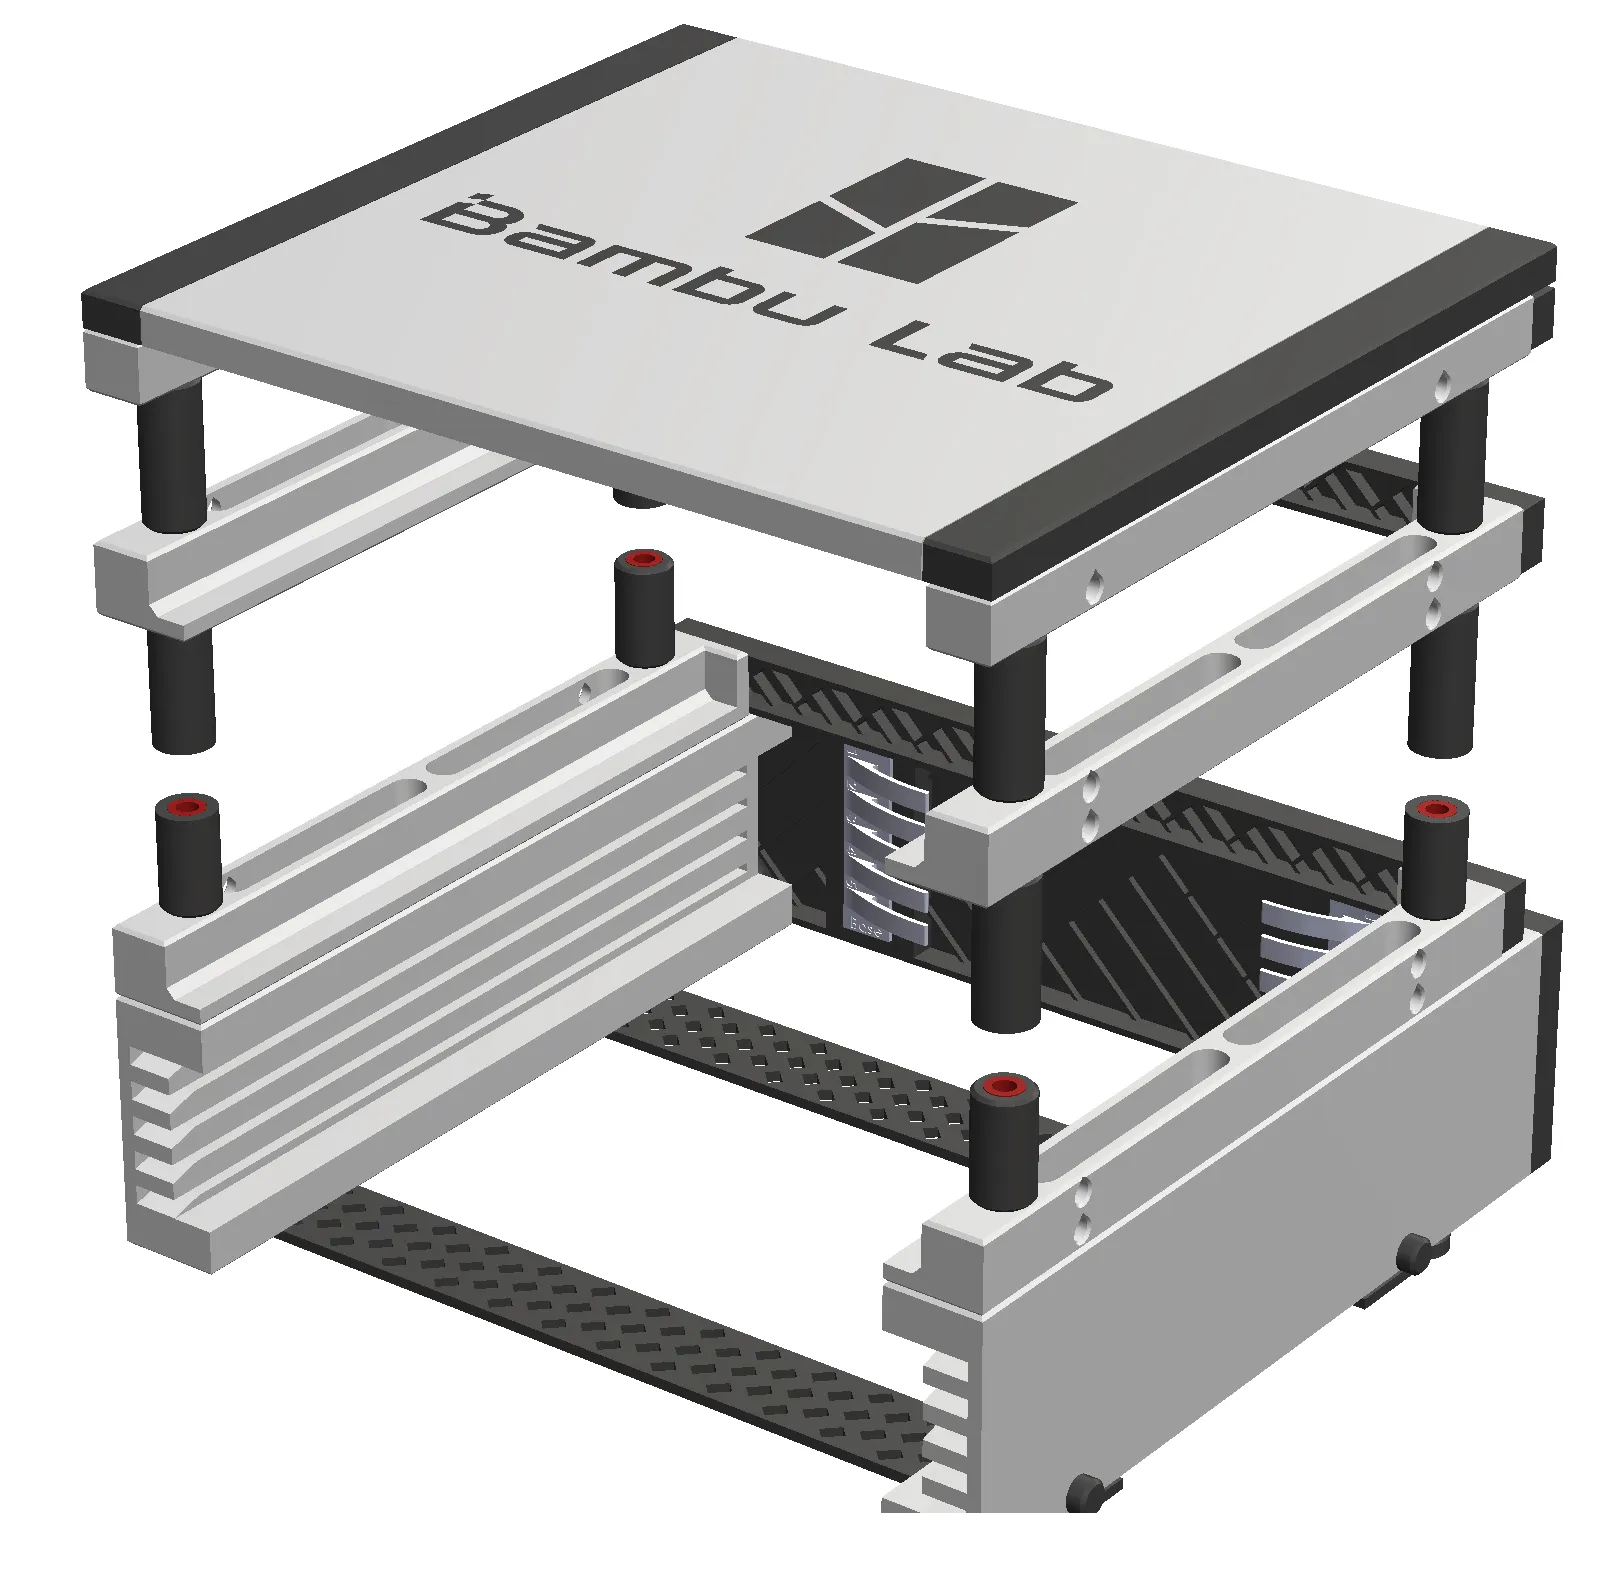 |  |
| 2.3.2.1 - Normal top | 2.3.2.2 - Top made with the lid from the Box for the MMSS |
2.3.3 After choosing the top, you can print the corresponding modules from the “rack_tops_modules.3mf”.
If MMSS = 2.4 then;
2.4 The complete rack - This will add some panels to the side of the rack, making it look like this:

The aspect may vary depending on the modules you have chosen on the previous steps.
2.4.1 You can see that you will need different panels depending on the height of the modules, something very similar to the situation of the Pillars A, B and C.

To print this, you must choose what you need on the file “rack_lateral_panels.3mf”
If you have the “Case for the MMSS” with the lower Lid for the PTFE tubes, use the “Cover E”
If you plan to use the case with lid in one of the middle stages, you should use Pillar C and a new Cover; Cover F (Cover lateral panel_F.step)
Material to use
- If you use this affiliate links to buy filament, it will cost you the same and I will get a small "kickback". Thanks !
- Filament used on this project, choose any color you like. For the greatest result and if your printer can do it, use PLA with carbon fiber, amazing finish! Maybe it is time to test that sample you may have received with your printer (X1C users).
- I've used in this project some PETG too.
- For reference see the BOM list of filament.
Change log:
Sometimes I update or add more print profiles, they can be found under the section “Download STL/CAD Files”

- (19-08-2023) - Minor change to the dimensions for the glue-stick housing.
- (22-09-2023) - Is now much easier to remove the hexagonal keys from their slots. Both step files updates.
- 19-09-2023 - change the diameter of the TPU feet for better fitting. If you already have them, just put a little of TPU filament on the side if you find it to lose.
- 21-09-2023 - Better layout of the “rack_lower_module.3mf” file . Thanks to Amateus3D
- 22-09-2023 - Back_plate_narrow has now stronger “pegs”. File changed “rack_middle_modules.3mf”. Thanks to hoonu.
- 22-09-2023 - Lateral panels pegs should be stronger now. Change to some aspects of the layout on the 3mf file.
- 24-09-2023 - Small change to the small pin diameter, for stronger fit. File changed “rack_middle_modules.3mf”.
- 01-10-2023 - Added a new panel if you decide to use the box with lid in one of the middle stages (see description above in 2.4.1) - Thanks to thedevilsjester
- 10-10-2023 - Some members(1) reported some instability of the structure, namely the configuration that presents the top the “normal top” and already has some modules, so already with a certain height. This update is intended to address those issues. Thus, the updated components are:
- rack_tops_modules.3mf - in there the steps updated are:
- Top_plate_for_back.STEP
- Top_plate_for_front.STEP
- Top_plate_for_Front_right.STEP
- Top_plate_for_Front_left.STEP
- Top_plate_for_BPlate_right.STEP
- Top_plate_for_BPlate_left.STEP
- If the structure is ok to you, that's because the fits are ok and all is working fine.
- rack_tops_modules.3mf - in there the steps updated are:
- 12-10-2023 - Bambu Lab logo was inverted, this can be found on file: “rack_tops.3mf”
- A new version of the pin was added that may offer a better fit in some situations. This new pin is found on file: “rack_middle_modules.3mf”
- 18-10-2023 - Added a lid for the plain drawer: “lid_simple_drawer.step”
Curious About My Tools? Check This Out!
For those of you who often ask about the tools I use to bring ideas to life, this article, The Journey From Idea To Object (Part I), offers some insights into the initial stages. It highlights the use of various tools, including software like Autodesk Fusion for CAD design, Blender for render and Bambu Studio for 3D printing preparation, and other... So, if you're curious about the software and hardware too, that I've incorporate in my workflow, take a look at the link for more details!" – Visit https://designrepcom.com/ for much more.
Documentation (5)
License



Comment & Rating (198)