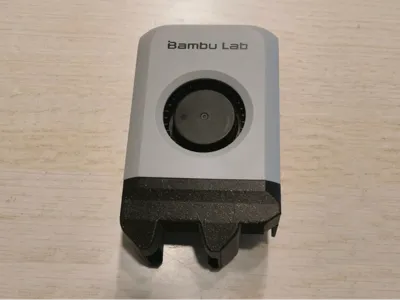
Bambu Lab P1P / P1S Fan Flow Duct


Print Profile(4)


Description
There are multiple models out there that promise better performance than the original but unfortunately none of those really deliver any data, some of them come without printing instructions etc. In most cases they looked like someone made something that looked nice, but did not even try to test it.
I've tested 3 of the most popular ones and was not satisfied - two got worse performance than the original and one was about en par with the original but was tricky to print - so i've decided to make my own. also some of them did not fit dimensionally.

Key Features
- about the same crossection like the original
- less mass than the original
- more uniform cooling
- less turbulence in the duct
- not compatible with X1/X1C/X1E because of the lidar
Performance
The duct allows in principle higher airflow than the original, to get the best results you need to tune in your filament profiles - all of them. If you just swap the duct out, you get improved results but only for filaments that need better cooling. When printing ASA or ABS you may get worse layer adhesion due to the additonal cooling, but on PLA or PETG it is improved
so if you don't plan on swapping out the duct on filament changes, you need to reduce cooling for certain filaments.
Don't get your hopes up high - the improvement is not huge, if i need to squeeze it in a number, you'd get about 5 to 10 % better cooling, or lets say: uniform cooling. So you are not dependet on the bridge direction so much, like on the original design.
For my testing, i disabled the AUX fan - with the AUX fan enabled, the additional cooling effect almost gone
Why?
I like reducing supports especially for testing and prototyping - better cooling means, i can have better bridges and a dirty prototype without using supports, this can shave off huge amounts of time - it won't be that pretty in some cases, but worth for me
BOM
- 1 piece 2x1 mm magnet, Amazon
- 1 piece 4x2 mm magnet, Amazon
- (optional) one spare Front Housing Assembly
(Amazon affiliate links)
Printing
Upright with tree supports supporting all horizontal bottom surfaces - add support blockers for the holes. Print them out of PETG or better ASA/ABS - for minimal mass and thermal stability, use ASA - it will be a piece with below 7,5 g including magnets (compared to 12,5 g for the original).
I've added 2 print profiles for Bambu Studio.
Assembly
Remove the 2 screws for the fan and remove it from the housing - be careful, there is a foam gasket glued on to seal it against the duct.
Then remove the original duct from the front housing, it is held by 2 screws and a few dabs of glue - be careful not to break the tabs, if you want to reinstall it back later. You don't need to remove the 2 screws in the center, then just hold the duct together.

Press in 2 magnets in the holes (you can use needle nose pliers for that) - make sure the polarity of the magnets is correct, when pressed in, they won't come out. If you tolerances a a bit to loose, you can use a dab of superglue to secure them

Mount the duct with 2 screws back on and secure them with a few dabs of glue (2 part 5 minute epoxy works well here and can be removed later on)
Gently insert the fan, make sure the foam gasket sits nice against the duct.

Comparsion
Left is original, right is the new duct - remember, AUX fan was off for those tests aswell - with AUX fan on, the difference is much less severe

Boost Me (for free)
Enjoying my models? Show your support with a Boost! Boosting not only adds a few extra points my way - it also helps cover the material costs that goes into prototyping each design. Every bit of support helps me keep creating fresh, high-quality models for you to enjoy! Thank you for helping keep the creativity flowing 💡✨
Comment & Rating (52)