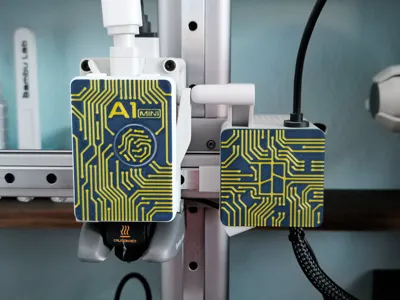
A1 mini PCB X-motor Cover


Print Profile(2)

Description
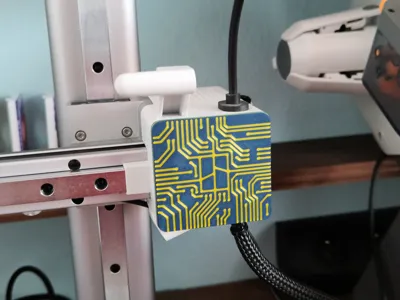
The PCB Face for the extruder can be downloaded from here: A1 mini & A1 PCB Face

Before you start printing, make sure you have a clean plate (Wash it in warm soapy water or IPA). The first layer has a lot of small elements that must stick well to the plate.
I printed on Bambu Cool Plate SuperTack and there are no problems with adhesion of such small elements on this plate.
If you have printed it, please leave a rating.
Before installation, the original front element must be dismantled. Apply force from below the motor cover front lid to remove it as shown in the image..

To assemble the face, proceed in reverse to the disassembly procedure, i.e.: First insert the upper part, then press the bottom.
Boost Me (for free)
Hey! If you like my 3D models, I’d really appreciate it if you hit Boost! 🚀
It’s a big motivation for me to keep creating and sharing new projects with the community.
Every Boost shows it’s worth it – thank you! 🙏
License
You shall not share, sub-license, sell, rent, host, transfer, or distribute in any way the digital or 3D printed versions of this object, nor any other derivative work of this object in its digital or physical format (including - but not limited to - remixes of this object, and hosting on other digital platforms). The objects may not be used without permission in any way whatsoever in which you charge money, or collect fees.
Comment & Rating (61)