Bambu Lab P1 / X1 / X1C / X1CC Filament Spool Switcher & Winder if you use AMS
Bambu Lab P1 / X1 / X1C / X1CC Filament Spool Switcher & Winder if you use AMS


Print Profile(12)


Description
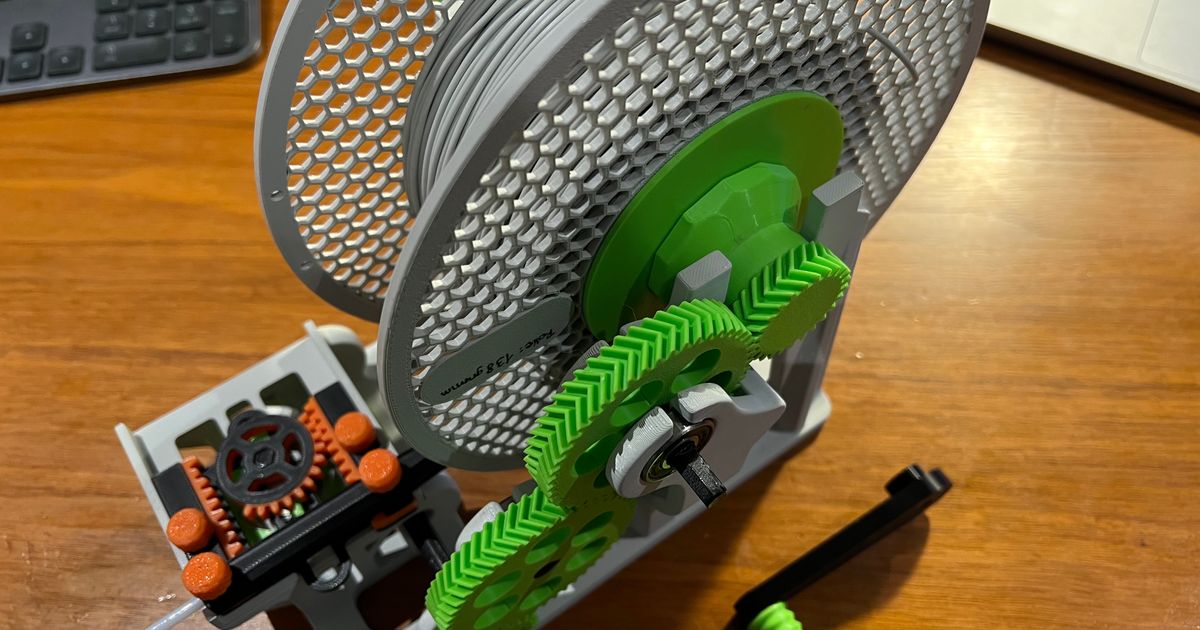
Printed the axis in ABSx, the other parts in PLA. Works mostly fine, had some issues fitting gear over the axis and had to file it down. Sometimes the guide gets stuck, especially if the spool is non-bambu and has the wrong size. Apart from that works fine and is really usefull, getting filament from non-AMS-compatible spools to (Bambu) spools :)
"Purely mechanically controlled filament winder for Bambu Lab P1, X1, X1C or X1CC 3D Printer.
Printed on Bambu Lab X1 CC.
Watch the videos first at the bottom, at the end of the description.
If there is news about the model, you will find out there first.
The model is available for free download and use.
If you still want to invite me for a coffee for my effort, troubles and time (I ran out of filaments a couple of times), you can do it via:
https://paypal.me/mikloskiszely
Please use always bed leveling & flow calibration for this model, especially for the gears and axles!
Bambu Lab P1 should at least be calibrated. (linear advance)
I uploaded some print suggestions as *.3mf files.
(5 print plates for Bambu Lab / Bambu Studio with PEI plate @ the end of the list - attention, not cold plate)
Update:
I tested the "maschine" again and again and it happened to me too: the 45 mm axle (the driven one) broke!
The 3 walls and 25% infil are not enough!
If you haven't printed it yet or broke it, then please print it with:
- 0.16mm Optimal @BBL profile
- 5 or more wall loops
- 100% infill (sparse infill density)
- Rectilinear (sparse infill pattern - set automatically)
- speed outer wall (slow as possible for more accuracy) e.g. max 60 mm/s
- support (yes) normal (auto)
Update 2:
If the stronger printer settings for Axis 45mm are not enough, the you can also print the “Heavy Load” version (see folder “Heavy Load Parts”)
Centering discs:
If you need a special size, you can decrease or increase the next size in the slicer program.
E.g. if you need 51.5 mm, then you can take the 50 mm disc and scale up accordingly before printing.
(51.5 / 50 = 1.03, i.e. print 3% larger)
Reference print settings for:
- Winder Spool Holder Main Body
- Donor Spool Holder Frame
- Winder and Donor Right Hand Spool Axle Nut
- Donor Spool Holder Axle without Gear
- all Spooler Centering Discs (50/55/60/65 mm)
Settings:
- 0.20mm Standard @BBL X1C Profile
+custom settings: - Wall loops: 3
- Outer wall: 60 mm/s
- Infill 25 %
- if you need support, don't do it at the vertical ball bearing openings
support can be used under the filament carriage holder and under the lower ball bearing for the filament sled. (paint it manually)
Print settings for:
- all Gears
- all shafts / axis (except the driven one 45 mm, see above)
- handle or drill adapter parts
- all washers
- and all Filament Guide parts
Settings:
- 0.16mm Optimal @BBL X1C
- Wall loops: 3
- Outer wall: 60 mm/s
- Infill 25 %
- no support needed, except:
all axis with hexagon
please print all parts (gears, axis) horizontally, except:
- Winder Right Hand Spool Axle with Gear 25 teeth or the Heavy Load version
- Winder and Donor Right Hand Spool Axle Nut
- Gear Worm
- Rotary handle - twist grip - axis
- Rotary handle - twist grip - knob
- Donor Spool Holder Axle without Gear
Multiple Prints:
- all centering disc's 2x per spool
- 4 x Washer 3.0 x 8.5 mm
- 2 x Gear with 50 teeths
Additions parts:
- 7 x 608 bearing
- 12-15 cm PTFE tube
- 4 x M3 hexagon socket screw (optional, you can also glue the filament guide & sled)
Have Fun!
Assembly Instructions:
…and how it works:
And troubleshooting (if you have any):
If you have still trouble with the original driven 45mm axis, print the Heavy Load Parts:"
Comment & Rating (440)