Honeycomb Responsive Yoyos


Print Profile(1)

Description
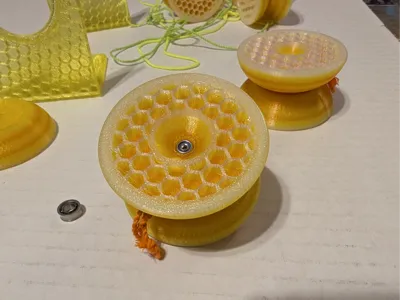
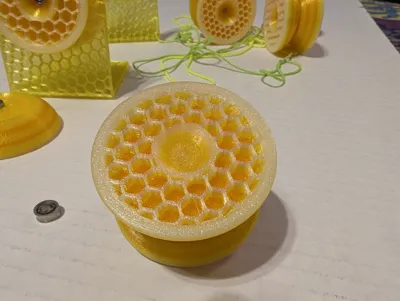
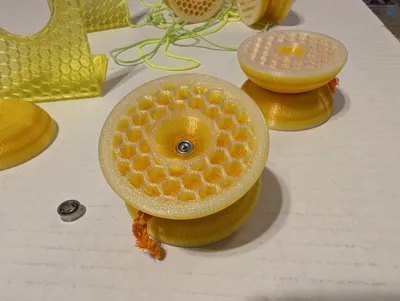
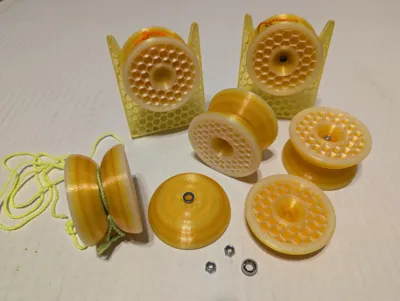
This is a set of responsive yoyos designed to look like a honeycomb. They all have high walls and are great for modern responsive or “0A” style yoyo tricks, with hexagonal shaped recessed holes for the response system. They also features “schmoove grooves” to help minimize unwanted string friction further from the response area.
The fixed axle design uses a 4mm x 20mm stainless steel shelf pin for the axle. The other two are bearing designs, both of which use a 20mm set screw for the axle (either M3 or M4), a pair of nuts, and either an MR85 bearing, or an MR105 bearing (AKA “Size A”).
Assembled specs:
- ~54-58g (using included print profile)
- 34mm width
- 59.5mm diameter
- Recessed hole response system
- Note: you can fill the holes with flowable silicone for a more reliable/snappy response
Printing instructions:
If not using the included print profile, you'll want to select the infill object, and set it to zero walls, zero bottom layers, zero top layers, and honeycomb infill in the 12-15% range. You'll then want to increase the infill of the main body object until the weight of each yoyo half is around 26-28g (around 60%-70% for most PLA and infill patterns). It also prints cleaner if you add a modifier which increases the infill for the first couple of layers above the honeycomb infill to 100% rectilinear. Turn off supports for the fixed axle design, and make sure bridging is tuned. Supports are needed for the nut seats on the bearing designs, and I suggest standard supports with a large x-y support offset (~1mm) to make removing supports easier.
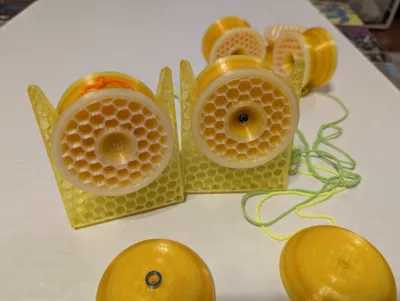
The included yoyos shown in the photos were printed with translucent natural, yellow, and orange PLA filament, in an attempt to make it look like a honeycomb full of honey (all Sunlu brand). All of the colors are done by change at layer for better efficiency and less waste of time/filament, so they don't show up in the prepare tab, but they do show up on the preview tab. Classic yellow and black like a honeybee is a great color combo for these too.
Assembly for fixed axle:
Press fit the axle into place. I like to rough up the ends of the axle with coarse sandpaper and use a small drop of superglue on each end to secure it in place. Without glue, the halves will tend to spread apart after really strong binds. I have found that not all of the axles are precisely 20mm long, so I made the holes slightly on the deep side and you may want to set the gap using stacks of playing cards (I like an 8 Bicycle brand playing card gap). If any glue squeezes out of the hole and into the gap or on the axle, use a folded paper towel to remove it thoroughly before the glue dries.
Once the glue has dried, untwist the end of a yoyo string, slip it on to the yoyo, wind it up, and start throwing!
Assembly for bearing designs:
Remove supports, and make sure the recess for the nuts are clean and flat. Place a nut in the recess, and while pushing firmly thread the axle through the nut and into the yoyo body from the outside, all the way through. Do this to both halves. I've found this helps keep the threads of the nut lined up with the threads cut into the plastic by the axle, which keeps everything tighter. Then repeat on one half, but stop when the axle is flush with the top of the nut, flip it over, place the bearing on the post, start threading the other half of the yoyo on, place the second nut in place, and push the nut down firmly while threading it together all the way. A small drop of loctite on the ends of the threads is required if using regular nuts to keep it from working itself loose with play, and can help even if using lock nuts.
Non-3D printed parts list:
- One yoyo string (bulk poly like Kitty Fat or Sochi Fat seems to work well)
- Fixed Axle:
- One 4mm x 20mm stainless steel shelf pin (something like this: https://www.amazon.com/dp/B0D1VF3P4C?ref=ppx_yo2ov_dt_b_fed_asin_title&th=1)
- Bearing design:
- One 20mm long grub screw / set screw (either M4 or M3 depending on which model you print)
- Two nuts with threads to match the axle (I prefer nylon locking nuts, but any M4x0.7 nuts will work)
- One bearing (MR85 or MR105/"A")
Once assembled, put your favorite string on, and starting throwing trapeze stalls, lunar stalls, and kickflips!
Edited 19 Mar 2025:
- Added a version of the MR85 yoyo with an M3 axle instead of M4
- Added a matching display stand
- Minor changes to bearing seat geometry
License
You shall not share, sub-license, sell, rent, host, transfer, or distribute in any way the digital or 3D printed versions of this object, nor any other derivative work of this object in its digital or physical format (including - but not limited to - remixes of this object, and hosting on other digital platforms). The objects may not be used without permission in any way whatsoever in which you charge money, or collect fees.
Comment & Rating (3)