AMS Lite Saver Snag Cutter V1.0


Print Profile(2)


Description
Boost Me (for free)
I have spent a lot of time and care creating and updating this model. Please support this effort!
What is this?
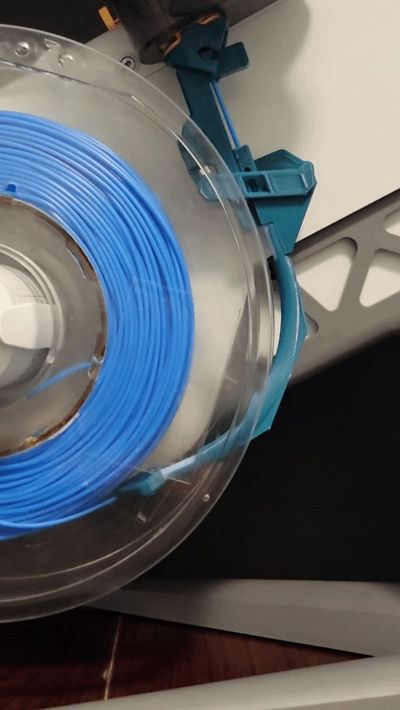
This is an AMS Lite Saver unlike any other. Not only does it prevent wear and tear on your AMS Lite Reeder Funnel, but it also prevents snags and obstructions from delaying your print!


Alternate Versions
- Standard AMS Users please see https://makerworld.com/en/models/957400
- Non-AMS Users please check back soon for a universal version.
Change Log:
- Version 1.0 - 2/20/2
- Complete redesign for better fit and function.
- Version 0.1 - 1/18/25
- Initial prototype upload
NOTE: I am actively updating this model as I receive feedback, so if you have any issues please message me and I will work with you to resolve them. Also, check back often for the next improved version!
How does it work?
This AMS Lite Saver differs from the other options because it has a mechanism that automatically cuts the filament if a tangle or an obstruction (taped or kinked end of the spool) is detected. This feature is turned on or off with a slider lock. Cutting the filament when a snag is detected allows the printer to automatically switch to your backup filament by setting up the Auto Switch function. If you are running a long print, this can save you hours of delayed print time! If you don't have the Auto Switch function activated, it gives you a few minutes to take action while the printer continues to use the filament in the tubes. At this time you can re-feed the filament manually for an uninterrupted print.
Process WITHOUT Cutter
- Snag is detected by the printer.
- Printer immediately pauses and the spool is retracted.
- Warning is displayed “Filament or spool may be stuck”
- Printer remains paused until the issue is fixed manually
Process WITH Cutter and WITH Auto Refill enabled
- Snag is detected by the Cutter (not the printer).
- Filament is cut.
- Printer detects the end of the filament.
- Printer continues to print uninterrupted until all filament in the tubes is depleted.
- Printer switches to the refill spool automatically and continues to print uninterrupted.
Process WITH Cutter and WITHOUT Auto Refill enabled
- Snag is detected by the Cutter (not the printer).
- Filament is cut.
- Printer detects the end of the filament.
- Printer sends a warning message that the end of the filament has been detected and needs attention, but the print is not paused.
- Printer continues to print until all filament in the tubes is depleted (this takes a few minutes).
- Printer pauses if the tube is depleted before the issue has been fixed.
- Printer remains paused until the issue is fixed manually
- If issue is fixed before the filament in the tubes is depleted then the printer continues uninterrupted.


Compatibility
AMS Style
- This is compatible with all AMS Lite for the A1 series printers.
- It is not compatible with the standard AMS. For the Standard AMS please use https://makerworld.com/en/models/957400.
- For a universal version please check back soon.
Spools
It is compatible with all spools. However, narrow spools should placed in AMS positions 2 and 3.
Filament
Some engineering-grade materials such as PA-CF may be too tough/strong/hard for the mechanism to cut. If you have trouble try using a new sharp blade.
Materials Needed
Filament - The cutting trigger force is dependent on the filament stiffness. I tested with standard PLA, but if you use a different material the trigger force may be too high or too low. Refer to the “Trigger Tuning” section below.
Filament Cutter - Spares may have been included in your printer shipment, and you can purchase them at the Bambu Store (bambulab.com - Store - Select Region - Search for “Replacement Filament Cutter”).
PTFE Tube - Approximately 6 inches (150 mm) of 4 mm OD PTFR tube is required. See Assembly Instructions for length details.
AMS Tape Saver Multi-Tool (Suggested) - This is a helpful tool that helps hold and cut the Teflon tubing. https://makerworld.com/models/1129422

Mechanism Overview
- Actuate the Cutter mechanism by moving the Slide down into the Body. To adjust the trigger force see the “Trigger Tuning” section below.
- Reset the Cutter mechanism by moving the Slide up out of the Body until it clicks and stops.
- Lock the Cutter by sliding the lock to the Right until an (X) is visible (note that the mechanism must be in the reset position to lock).
- Unlock the Cutter by sliding the lock to the Left until a circle is visible.
Assembly, Installation, Removal, and Disassembly Video:
Assembly Instructions
NOTE:
Due to the asymmetry of the AMS Lite, each spool position (1, 2, 3, and 4) has a unique configuration.
Positions 1 and 4 are easier to access, and positions 2 and 3 are better for thin spools. You might want to strategizes how you use these instead of installing them in every position.
Pay attention to the instructions and models to make sure you assemble the appropriate parts for the appropriate position. A numbered token is included in the model to help keep track of the parts. Use the image below to identify parts.

Note the AMS Positions:

1. Cut Teflon Tubing
The AMS Lite Tape Saver Multi-Tool is recommended for cutting the following lengths:
All Positions: Cut a Teflon (PTFE) Tube section to 1/4 inch (6 mm)
Positions 1 and 4: Cut a Teflon (PTFE) Tube section to 5-1/2 inch (140 mm)
Positions 2 and 3: Cut a Teflon (PTFE) Tube section to 5-3/8 inch (137 mm)
2. Attach Teflon Tubes to Slide, Brace, and Guide
- Locate the proper Slide, Tube length, and Brace options for the position being assembled.
- Remove all bed adhesion tabs and smooth the attachment points.
- Insert the 1/4 inch tube into the hole at the bottom of the Slide.

- Insert the Tube into the hole at the top of the Slide.
- Push the Tube in slightly and rotate firmly clockwise (righty tighty) to install the tube fully. The end of the tube can be observed through the hole in the back of the Slide when it is fully installed.
The AMS Lite Tape Saver Multi-Tool is helpful for grabbing and twisting the tube.


- Align the Brace and Slide as shown below and insert the Tube into the Brace.


- Insert the Tube into the hole at the back of the Guide.
- Push the Guide in slightly and rotate firmly clockwise (righty tighty) to install the tube fully. The end of the tube can be observed through the hole in the front of the Guide when it is fully installed.
- The AMS Lite Tape Saver Multi-Tool is helpful for grabbing and twisting the tube.


Unthread the Guide slightly to align the Guide so that it is perpendicular to the Slide.

3. Assemble the Arm into the Slide
- Locate the proper Arm option for the position being assembled.
- Orient the Arm as shown and slide the shaft into the slot.
- Rotate the Arm 90 degrees toward the Slide.

4. Attach the Cutter
Caution: The cutter is sharp! Handle with care.
- Insert the Cutter into the Slide slot and snap the pins into the Arm holes.

5. Attach the Body
- Locate the proper Body option for the position being assembled.
- Remove all bed adhesion tabs and smooth the attachment points.
- Line up the pins on the Body with the slots on the Arm.
- Insert the Slide into the Body while inserting the pints into the slots.
- The Slide will snap in place.

- Note that you can disassemble the mechanism by pushing a piece of filament into the hole on the side of the Body while pushing the Slide out of the Body.

6. Attach the Lock
- Locate the proper Lock option for the position being assembled.
- Push the Lock into the Body until it snaps into place.

7. Attach the Bracket to the AMS Feeder
- Remove all bed adhesion tabs and smooth the attachment points.
- Locate the proper position on the AMS Feeder.
- Attach the Bracket to the AMS Feeder Funnel by squeezing the tabs toward each other and pushing the Bracket onto the Feeder Funnel.

- Make sure to attach the Bracket so that the openings face towards each other as shown. Positions 1 and 4 are opposite of Positions 2 and 3.

8. Attach the Body to the Bracket
- Slide the Body into the Bracket as shown.
- Note that the Body prevents the Bracket from being removed from the Feeder Funnel because it prevents the Bracket tabs from bending.


9. Removal and Disassembly
- To remove and disassemble you perform the assembly instructions in reverse.
Setup and Features
NOTE: A different technique for loading and unloading the AMS may be best for your individual setup depending on how you have it mounted and how easily you can access different spool positions.
1. Load the Spool
- Rotate the AMS Lite Saver away from the spools until they snap into place.

- Insert the spool into the AMS Lite.
- Narrow spools should be installed at positions 2 or 3 to prevent rubbing of the spool wall on the AMS Saver.

2. Insert the Filament
Ensure the Cutter lock is engaged so you do not accidentally cut the filament while loading it! The (X) is visible when the Cutter is locked.

- Insert the end of the filament into the tube Guide.
- Feed until it reaches the Feeder Funnel.

- Release the Feeder Spring tension by pushing the button on the side.
- Grab the filament passing through the Body and push it into the Feeder.
- The feeder will detect the filament and begin automatically loading it the rest of the way.

4. Use during printing
- After the filament loading sequence has been completed, unlock the Cutter by sliding the lock to the Left until the circle is visible.
- Ensure you have the “Auto Refill” option enabled on the printer (if you have a backup spool).
Note: If you find that the cutter is triggering too soon or too late refer to the Trigger Tuning section below.

5. Remove the filament
- Ensure the lock is in the locked (X showing) position.
- Push the filament into the Feeder slightly to release the feeder roller.
- Retract the filament by rotating the spool backward until the filament end is seen in the Body gap.

- Grab the filament coming out of the Guide and pull out of the Tube.
- Be sure to not let the end of the filament go free and get tangled.
Remove the Spool.
Trigger Tuning
The material you use to print the model may be softer or harder than what I used for development. A softer material will create a weaker spring resulting in a lighter trigger and less force to activate the cutter. The inverse is true for harder material. If you are having issues with the cutter triggering too soon (cutting without a tangle) or too late (AMS feeder can't feed) don't worry. I have you covered.
The Slide part has the plastic spring incorporated into it, and there is a number on the back of the Slide indicating the thickness of the spring. The default Slide is marked with "1.8" indicating a spring thickness of 1.8 mm. A thicker spring will compensate for triggering too soon, and a thinner spring will compensate for triggering too late. Plate 6 has the different Slide spring thickness models. Compared to positions 2 and 4, the parts are mirrored for Positions 1 and 3. Make sure you print the correct version. The spring thickness is engraved on the bottom/back of the parts. The thickness numbers appear mirrored/backward on the parts for positions 1 and 3.
If you have a cutter triggering too soon, look at the back of your Slide part and note the number. Print the plate with the Slide spring one increment thicker. Remove the current Slide and replace it with the thicker version. For example, if you have a "1.8" on the back of your Slide, then you should print the 2.0 mm model. Test this new spring thickness and see if you are still encountering triggering that is too soon. If it is still triggering too soon then keep increasing the spring width until you find a Slide spring that triggers at the appropriate time. Let me know if you are still having issues and I will help.
Boost Me (for free)
Did you know that the sooner you use all your boosts the sooner Bambu Labs will refill them!? :D
Please check out the other models on my profile too!


License
You shall not share, sub-license, sell, rent, host, transfer, or distribute in any way the digital or 3D printed versions of this object, nor any other derivative work of this object in its digital or physical format (including - but not limited to - remixes of this object, and hosting on other digital platforms). The objects may not be used without permission in any way whatsoever in which you charge money, or collect fees.
Comment & Rating (137)