Search models, users, collections, and posts

Together 3D
@Together3D
3.9 k
55.3 k
109.2 k
60.5 k
Social Media Links
Bio
Husband & Wife duo ❤️ Designing for Dungeons & Dragons and fun game related items Interested in selling our designs? Join our Commercial Membership! Interested in collaboration? Contact us at: 📨Together3dprints@gmail.com An overview of tilesets that are included in the commerical licence, can be found here: https://docs.google.com/spreadsheets/d/1IHzV0OVgYjPoRxCEkMt2npTjCFHBzRm2_QzBiGgoR48/edit?gid=0#gid=0
Achievements

MakerWorld Guardian
Active more than 20 days out of last 30 days UTC time

Contest Winner
Won 1 model contest award.
Popular Model
1 model more than 5,000 successful prints.

Popular Creator
More than 1,000 followers.

MakerLab Innovator
Export 172 models created by MakerLab

Stellar Reviewer
Rate or Comment 590 different models
Pioneer Maker
Print successful 327 different models and 8,335 hours
Recent Article
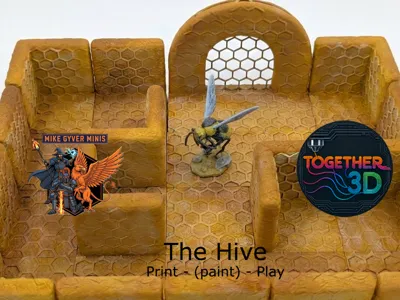
The Hive - Mike Gyver Minis x Together 3D combo
The Hive - Mike Gyver Minis x Together 3D combo The Hive is a collaboration project between Mike Gyver Minis and myself, Together 3D. Where we combine our strenghts into a ready to print and play miniature adventure.Mike Gyver Minis supplies the high quality detailed miniatures and I create the envionment where your party can encounter them. The spark of inspirationEvery project starts with inspiration, and for this modular hive tileset, that spark of inspiration was a single, jaw-dropping image. When fellow miniature designer Mike Gyver Mini’s sent over a picture of an in progress sculpt —an incredibly detailed, terrifyingly epic wasp - inspiration struck.This giant wasp deserved his own hive and we decided to make it work.The goal: a complete print (paint) and play adventureWhen playing tabletop RPGs (like dungeons and dragons), you are building a world and making your players live it.We decided to combine our strengths and work towards a complete package: epic miniatures to encounter in a matching setting.With Mike Gyver Mini’s incredible creatures providing the threat, and my modular tilesystem providing the environment, we are trying to make the hive world come alive.How it grewWhen I looked at the giant wasp Mike Gyver Minis made, I immediately thought of a hexagon tilepattern. But after testprinting it wasn’t how it should be. It felt flat and with not enough detail to match the Giant Wasp. After adding extra texture, it felt more in synch.However, finding a way to keep the same style in the different tiles needed to build a map, proved a challenge. Multiple designs were scratched because they felt “off” with the Hive-vibe.But, every input and test made it better to end up where we are now:a fully functional Hive-tileset, with epic giant wasps to interact with.Designing is not a solo hobbyYou might think designing is a solo hobby, because you are sitting behind your PC by yourself - right? It is not, and that is the beauty of it.Mike Gyver Mini’s and I have been bouncing ideas back and forth for a while. Hyping each other up, asking advice (even though not always implemented 😏).What now?Is the hive done? Oh no - this infestation is just getting started.Expect even more modular tiles and perfectly matched miniatures to join the hive in the near future. What do you think would be a great addition to the hive?You can check out the ever growing collection of The Hive here.
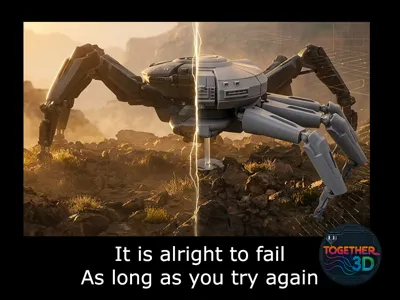
It is alright to fail - As long as you try again
It is alright to fail - As long as you try againOn the 27th of January I started to design “The Queen”, a supersized 6 legged spider like robot from the game “Arc Raiders”, made by Embark Studios.I wanted it to be epic, as epic in the game. Which meant I wanted it to be huge. I wanted to make it so that the print plate would be maxed out. And when assembled, the previous models I made from the game would be in scale with this monster of a robot.I wanted it to be able to move like in the game. Posable in a way you like. Giving space to creative dioramas.I wanted it to be printable. As supportless as I could. To make sure the amount of wasted filament would be minimal.Step 1: reference materialI started my process as usual:Go into the game with a free loadout, screen capture on, turning and running around in game to capture all the angles of that giant robot.After dying a few times, I got the reference material I needed and was ready to start.Step 2: designingsmooth sailingsI started off great! The bottom leg had amazing detail and I loved building it up in Blender. A speed up youtube video of me making the bottom leg:https://youtu.be/s-VcfQ9Jthk Week 1 flew by, creating the legs with as much detail as I could. Trying to make sure they were as accurate as possible, but printable. One of the great challenges when creating something from a game.  But then we came to the body…Keeping printability and functionality in the back of my head. I cut the design up in multiple parts:Bottom bodyConnectorMiddle part (so it can rotate)Upper head I knew I had to make concessions with the body, to keep it printable.I started with the lower body. But quickly came across multiple technical difficulties. Curves I wanted to make that I never had done befor, the conflict of game VS printability. It was a lot.After I was finally happy with the lower body. I loaded it into Bambu slicer…. and found out I had a major design error making it unprintable.Going back a version or 4, I was able to fix it thankfully. But it took so much time to get the error out…   But on to the next part!The middle body was thankfully pretty easy. But I had to scale it so the legs could be next to it. But okey, done! Then the head… I procrastinated SO much on that part.  In game it is a combination between straight and curved and I-could-not-get-it-perfect. It drove me INSANE.I printed 4 versions, trying to get the perfect curve. The leg capsule was another ordeal… I had to make a lot of concessions on that part compared to the in game reference, and it didn’t feel right.I got discouraged. Thankfully my husband motivated me to just make a cube, test out the system and go from there.That easy step helped a lot.  Posable: joints, joints and more jointsI normally make designs with balljoints. An easy system where you click a ball into a hook. But, the ball joint system didn’t match with the looks of The Queen. And therefor I couldn’t bring myself to use it.I made my very first hinge. Trying to get enough tension so that the joint would hold, but still would be posable.  I spend a whole week trying to get the hinge to the perfect friction. But every time after posing the part a few times, it would fall flat and lose tension. I had to scratch the whole idea of a hinge. Discussed the model with different designers and thankfully came up with a solution: a joint that is posable when assembling, but stays still when assembled. Still, I never made anything like that. I cursed Blender for a full night but in the end I combined Blender made models with old school basic Tinkercad stuff.  Step 3: AssemblyAfter I got the joints to work, I had to incorporate it into the design in a way that matched the vibe.Luckly cut outs in Bambu Studio were the answer to change the cut outs easily and adjust after printtesting.Every joint is 7 different parts. So I spend a full night assembling the prototype. When assembling, I was ecstatic! FINALLY! the model was done!  Step 4: Collapse & FailThe model collapsed. The legs swiped away on my table. We tried adding anti slip, I changed the position of the legs with different connectors, I reprinted every part with less infill, trying to lower the weight of the body. Nothing worked. The assembled body stood on my desk for a full week. Staring at me. Judging at me. You failed.  Step 5: Stand tall (and add a base)After a few motivational speeches of my husband. We decided that no way those tiny legs would hold a giant body like that. And it is just a real life limit. The answer: a base! I could facepalm myself that I didn’t think of that sooner. But, then again.I wanted it posable and epic… and a base can be very in the face.I saw it as my personal pillar of failure. Step 6: CompromiseI wasn’t happy. Not by a long shot.I loved the design I made, but the functionality wasn’t as I wanted (gravity is a *****).I couldn’t deal with the fact that it wasn’t how I wanted it. I worked so hard towards it and in the end, it felt like I failed.Not the design itself (I still think those legs are killer awesome accurate), but the total package wasn’t as I envisioned it. After (yet another…) motivational speech of my husband, a compromise was found:Make it a Makerworld Remixable exclusive.That way people can use the design and change it, the way they like it. And I thought that was perfect (o what I had in my mind). Giving this 2 month mental ordeal to the creativity of others is the perfect way to end this adventure.It does justice to the design, but gives opportunity to make it even better. I look forward to see what people do with the design.   Final thoughtsI told my husband to stop me if I ever mention designing something like this again… But then again, I know I will again in the future. It is alright to fail, as long as you learn and try again.And I learned a LOT working on this project. And next time I go to the harvester event, you know I’ll bring some extra wolfpacks and throw it right at her. Just as a thank you, for this learning experience. On to the next project creators! 💗
Testing out Chroma Canvas
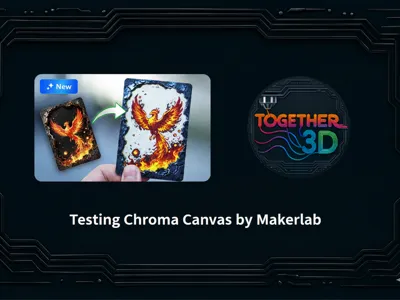
Testing out Chroma CanvasMakerlab (Makerworld) released a new feature: Chroma Canvas. A tool to generate a 3D printed image in layers, by simply uploading an image, selecting the color scheme you want and generating the result. A technique a lot of 3D enthousiast are familiar with by the program “Hueforge”. A notification you receive when opening the tools mentions this:Hueforge prints have been my go-to print for when I have to create an easy present with a “WOW”-factor. When gifting money it is something that makes the gift more tangable, and shows the epicness of 3D printing without to much hassle.  A subrscription to Hueforge is on my wishlist for over a year. So I was very eager to test this free tool by Makerworld. So, here are my findingsWhat does Chroma Canvas do?Simply put: It paints your picture in 3D. The tool analyses the color differences in the image you upload, makes you chose a color scheme and generates a file that tells the printer when to print in what color on what layer.The software calculates the exact thickness of each colored layer, taking into account the filament's translucency. This layering and blending creates the illusion of many colors and gradients, even if you only use a few spools. It then provides the instructions for where to pause and swap colors in your 3D printer's slicing program. Testing processTo clarify: mistakes were made, this part describes my searching/learning process. I started with the following image:It is a screenshot from the game “ARC Raiders” by Embark Studios. It is an image out of the codex of the game. The goal is to make a Chroma Canvas christmas ornament with it. So I don't want the full image.Using Photoshop I cut out a circle:Saved it, and was ready to go. Chroma Canvas really talks you trough it. When you upload an image, it already tells you what stepts to expect.So when Uploaded, I could chose between the different color schemes. Since a leaper in the game is one very dangerous ARC enemy, I chose the fire-scheme. i like that it already says how many colors you'll need and the different options you have.The same image in a “mono” scheme, gave this result:I was exited, exported it, switched the colors in my AMS and pressed print. My first result was adorable!OptionsAfter that I looked a bit further in the Chroma Canvas options. Finding a 2nd tab with size settings:You can also change the gradiants of the colors by simply sliding the graph. The visual changes almost instantly, so it's very easy to reset and play with it:You can even change the colors on the image itself: But to be honest, I was just super hyped for the result.I changed my size too 80 mm x 80 mm (the size I want) and kept the plate thickness.By changing the shape to round, I basicly had what I wanted.The only thing is I couldn't seem to find a scaling or aligning tool. Making it possible for your image to be in the perfect centre or changing the dimensions of the image, and therefor making sure you get the size you want.You can scroll to scale, but this wasn't accurate enough. it was or to small, or to big. There is probably something I'm missing, or you're supposed to change the size in Bambu slicer itself. Anyway, I settled for this:And like that, print number 2 was ready to go!Figured it outWhile waiting for that to print. I figured out that you're not supposed to do the cutting in advance. But rather upload the whole image, and use the range as a cut out tool. That makes it even easyer.So with the full image uploaded, I cut out a 80x80 mm circle like I did in Photoshop:When going back to palette, you see the result, a nice cut out circle. Perfect 80x80:Export, selecting your printer and the correct nozzle (standard is 0.4).Looking in Bambu Maker you can see the original square size:When sliced, you see the lovely colors:as well as the coloring scheme:While it was printing, I designed a quick inlay for the disks to be put in, to be able to hang it in our Christmas tree. As reference, I used a 0,4 tollerance for the cutout. And a border of 3 mm on each side (so 6 mm in total larger disc then the insert). I made the cut out go in for 1,2 mm and it was perfect. Just a dab of glue and done.  Final resultFinal thoughtsConclusion: I'm blown away. The fact that this tool is free to use, makes personal gift giving around the end of the year so much more fun.I see myself (and even my kids) upload images, tweaking it only a little bit, and printing epic personalised images for the whole family. I'm still looking for the correct way to size the images I put in, since scrolling to size up and down is a very big leap and I can't seem to find a size-slider.So if I missed this function: let me know! If it's not there: I look forward that it will be added 😉 The only thing that is bound to happen, is a giant flood of Chroma Canvas prints on Makerworld. But let's be honest, Hueforge was already a big part of Makerworld. And since I have a christmastree that has at least 10 hueforge christmas ornaments made by other designers in it, I'm not complaining.  Now I can just make them myself, with Chroma Canvas.Ready to try it out? You can find the tool at “MakerLab” Happy printing! Marjan, from Together 3D P.s.: there is also a foreground function and a hole-maker, but I didn't need that so did not discuss that. I will test it out in the futur.