
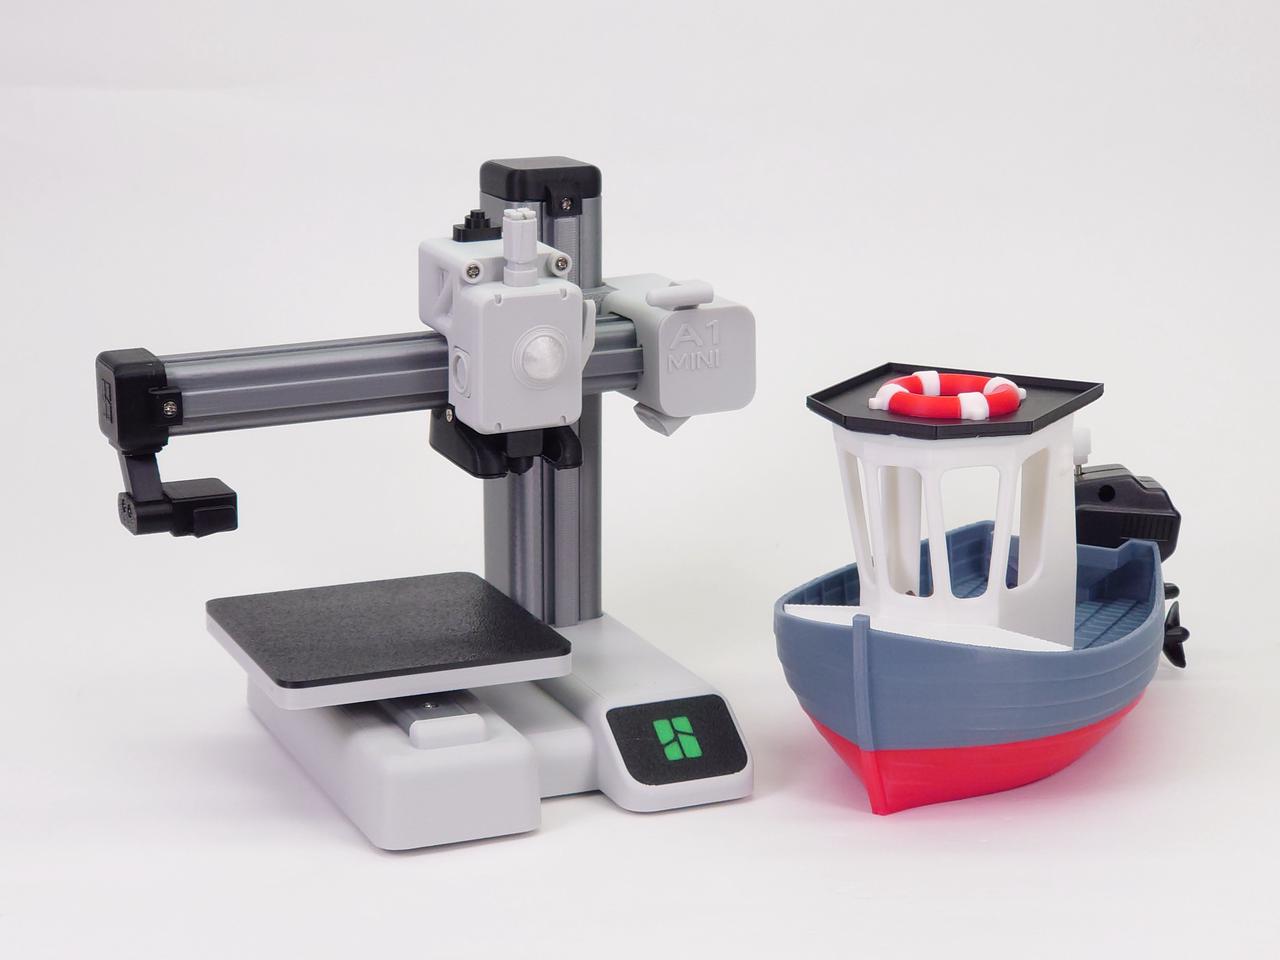
In some designs, a long bridge span exists with no support structure beneath it. This causes steep overhang angles during printing, resulting in filament sagging. Filament sagging can make the printed object look bad or cause issues with its function. vandragon_de ‘s Wind-up Motor Boat and Bambu Lab's A1 Mini Wireless Charger illustrate the bridging issues.
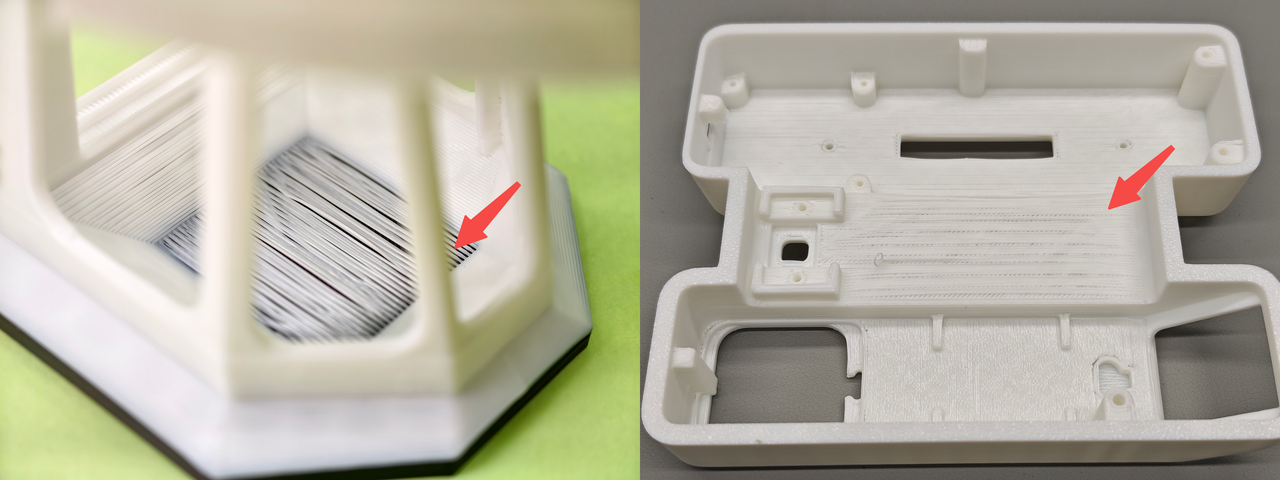
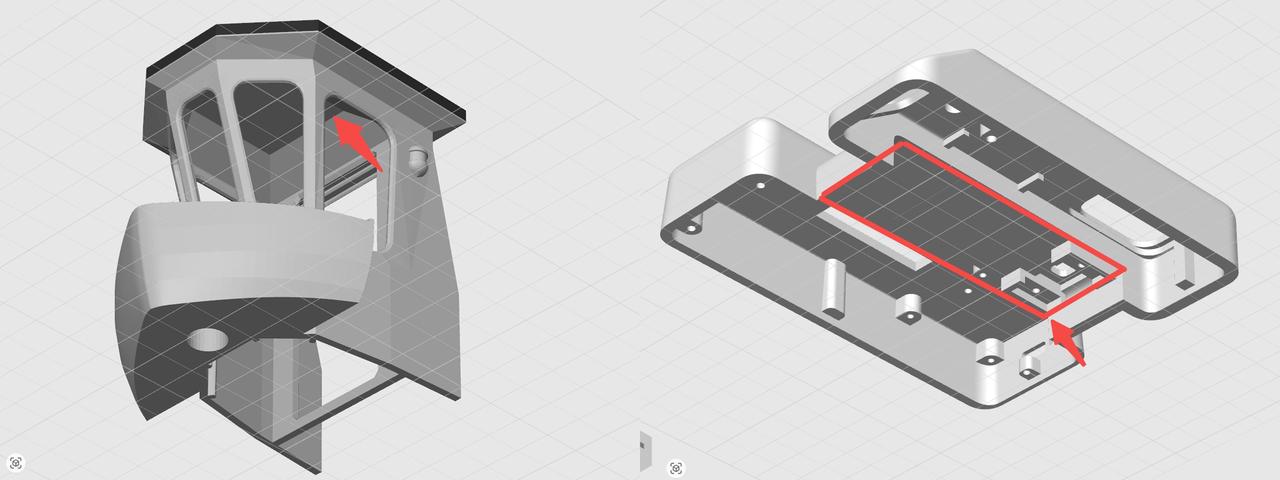
To ensure print quality, using support structures while printing bridges is usually required. If a bridge is too long and no support structure is underneath it, the filament tends to sag. Taking vandragon_de's Wind-up Motor Boat as an example, you can see that the cabin's interior roof has a long bridge span. If no support structure is used, this may lead to filament sagging. Filament sagging can impact its appearance and height accuracy. A similar situation exists at the base of the A1 Mini Wireless Charger.
If you encounter similar problems, the following methods will help you resolve them. Next, we will go over how to handle the issues of short bridging and long bridging.
- Short bridge span: Adjusting settings in Bambu Studio.
- Long bridge span: Designing a chamfer and manual supports via CAD fixes
Short bridge span - Do I need a support structure?
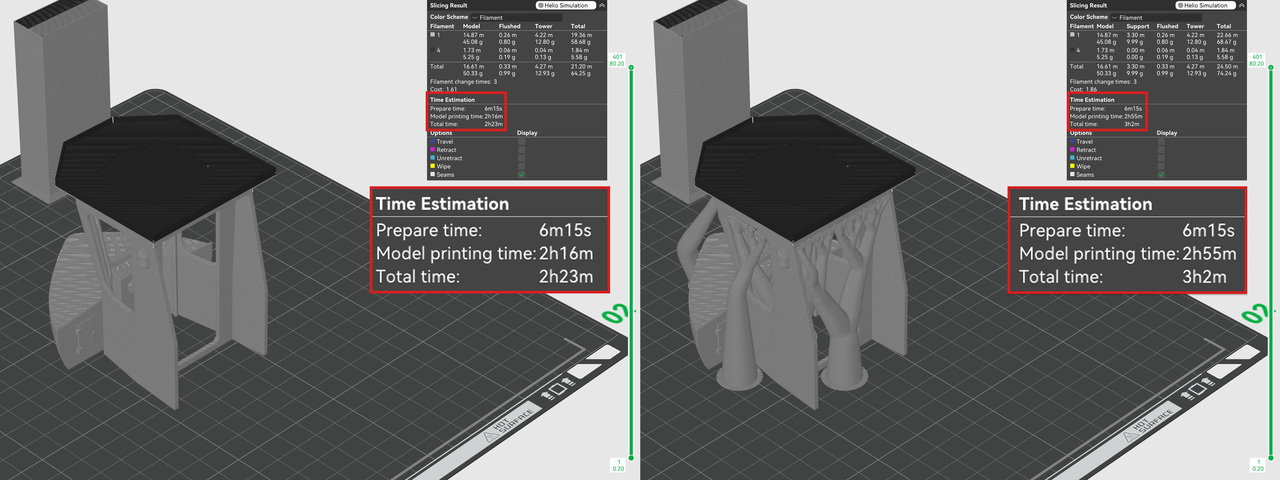
Not all bridge spans can lead to issues. If bridge spans are 12 mm to 25 mm, not supporting them can maintain the appearance quality and size accuracy. This method saves time and materials for printing support structures. It also avoids the hassle of removing supports in tight spaces. The image below shows the difference in printing time with and without the support structure. Using support, the total printing time is 182 minutes. Without supporting the bridges, the total printing time is 143 minutes. This results in a saving of 39 minutes.
Long bridge span
Chamfering method
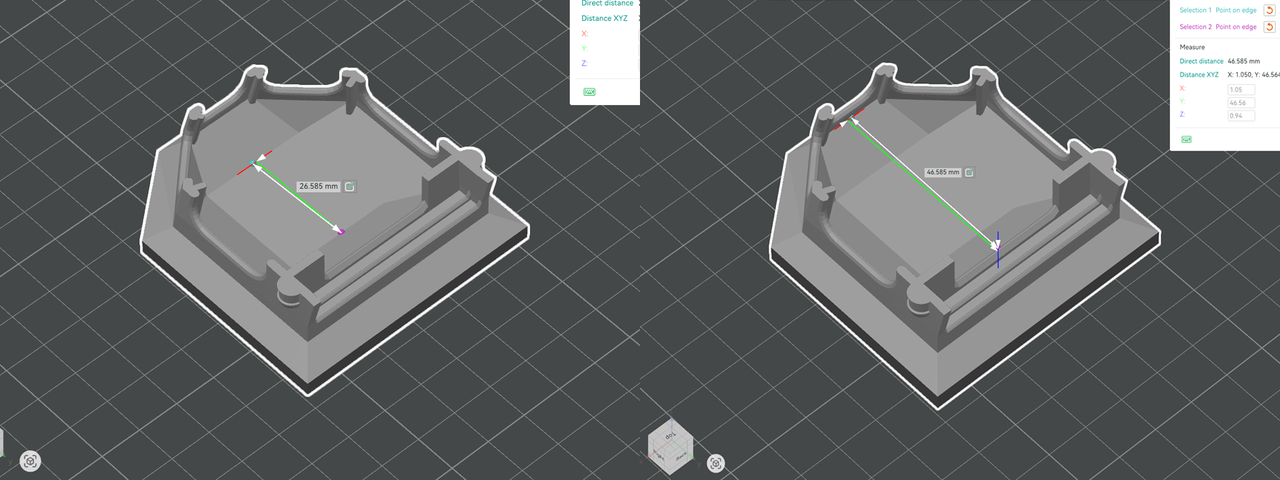
If bridge spans exceed 25 mm and the design permits chamfering, adding a chamfer can reduce or eliminate part of the bridge span. This helps control filament sagging effectively. The bridge span drops from 46 mm to 26mm. This change happens by adding a chamfer at the spot where the cabin's inner wall meets the interior roof, as seen in the Wind-up Motor Boat model.
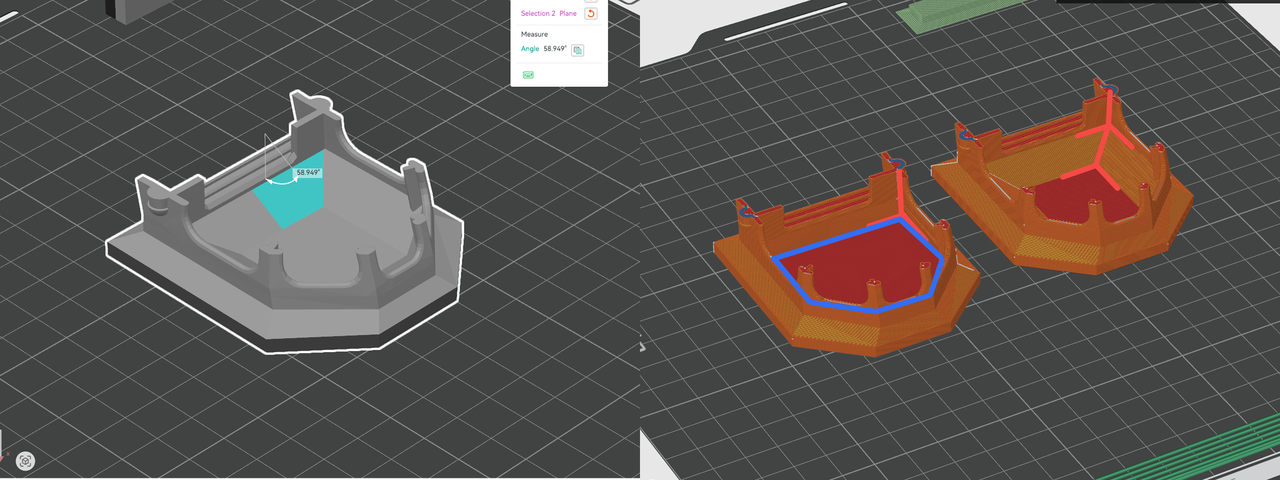
We recommend setting a chamfer angle in a range of 45° to 60°. A chamfer angle can be set to a maximum of 70° to follow specific design criteria. The image below demonstrates the details of a chamfer application.
Manual support design methods
If bridge spans exceed 25 mm and chamfering isn't allowed, you can manually draw a support structure. This helps control filament sagging effectively. This constraint can happen when the area requires face-to-face assembly with another part. This constraint can also occur if chamfers can't reduce the bridge span enough to an acceptable range. For the A1 Mini Wireless Charger, the image below shows where to draw a support structure by hand.
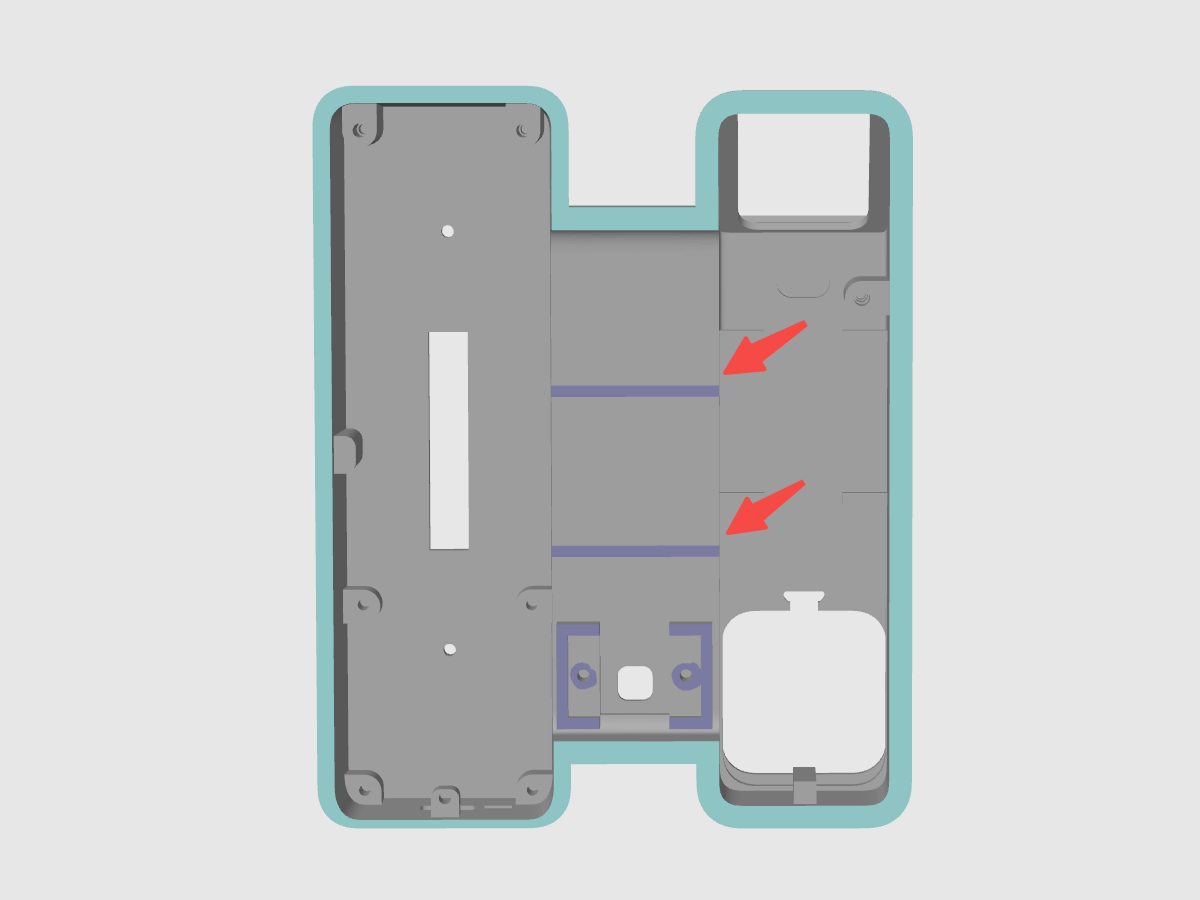
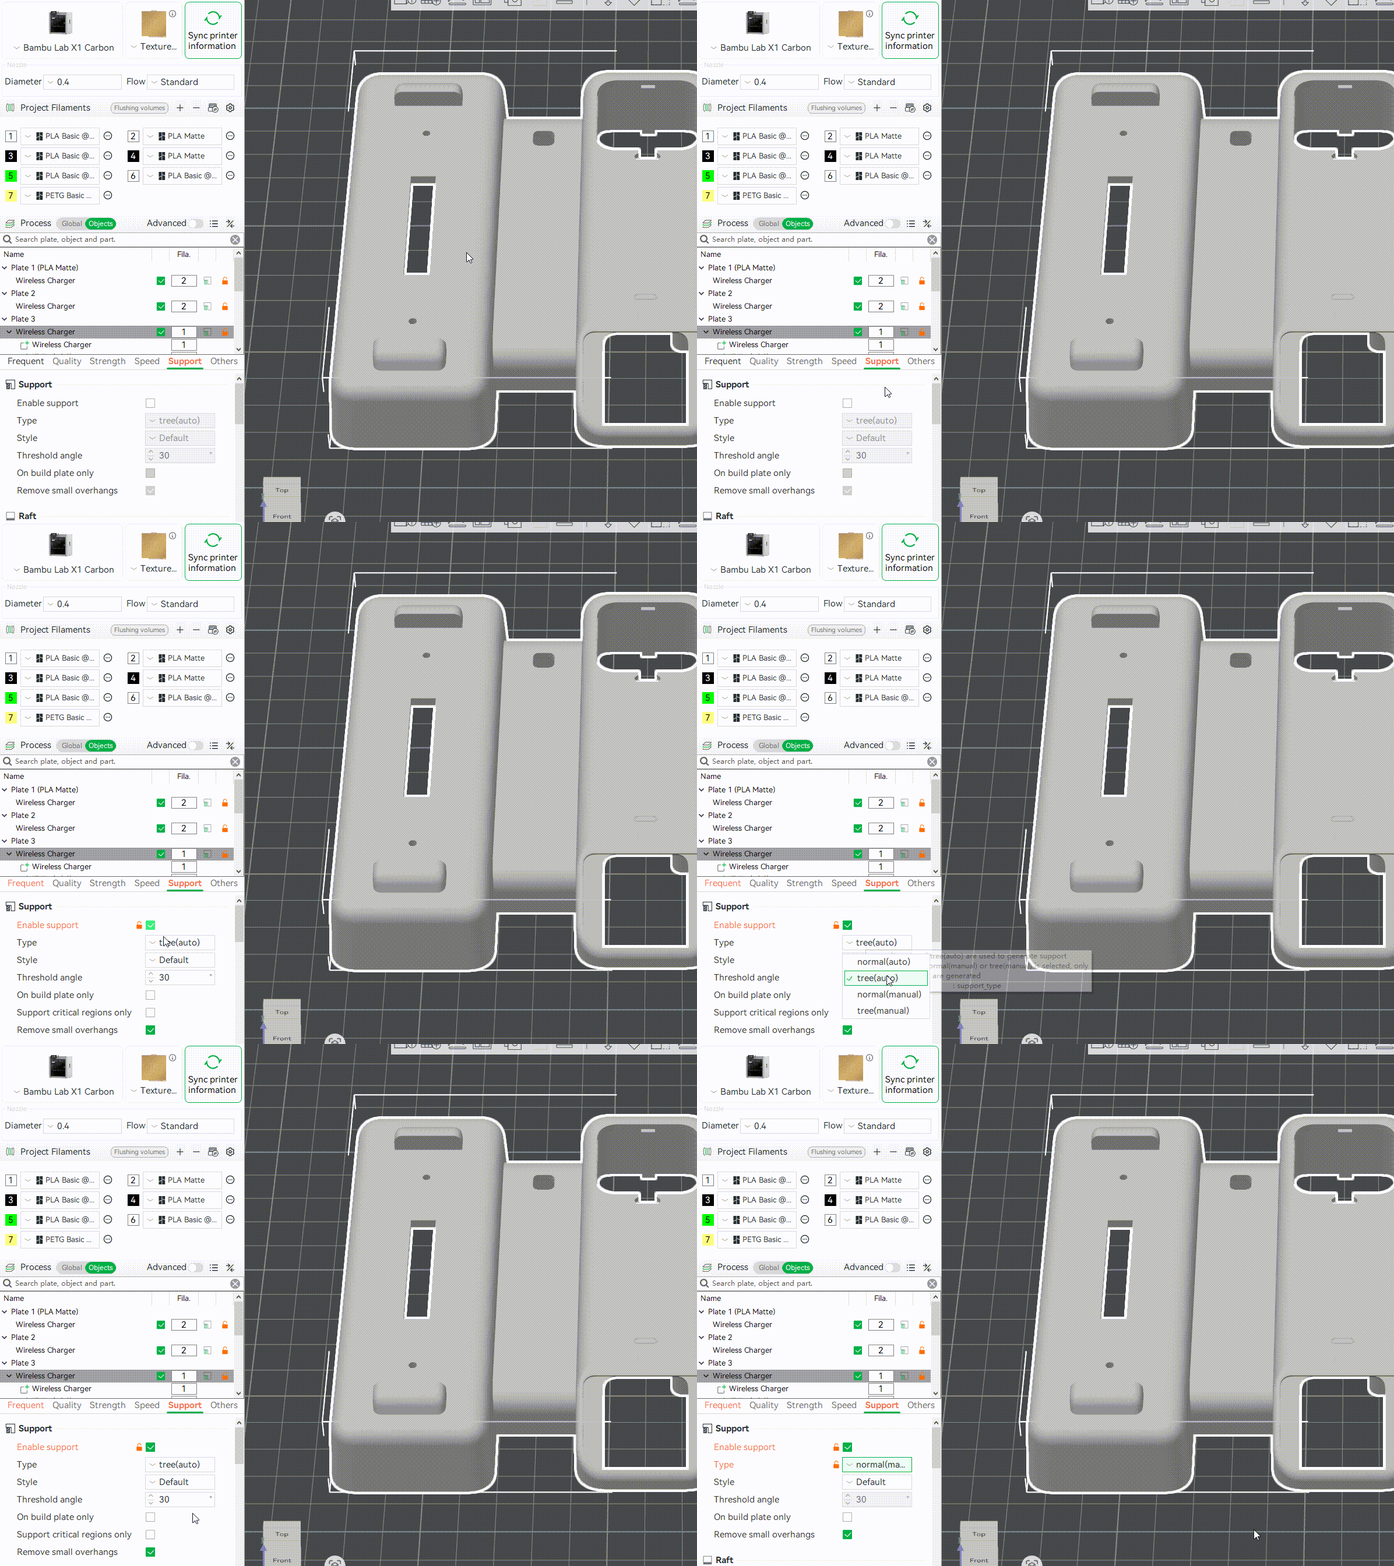
Draw a support structure manually by following these steps. In Bambu Studio, first, activate 'Enable Support'. Then, set the Support Type to 'Normal (Manual)'.
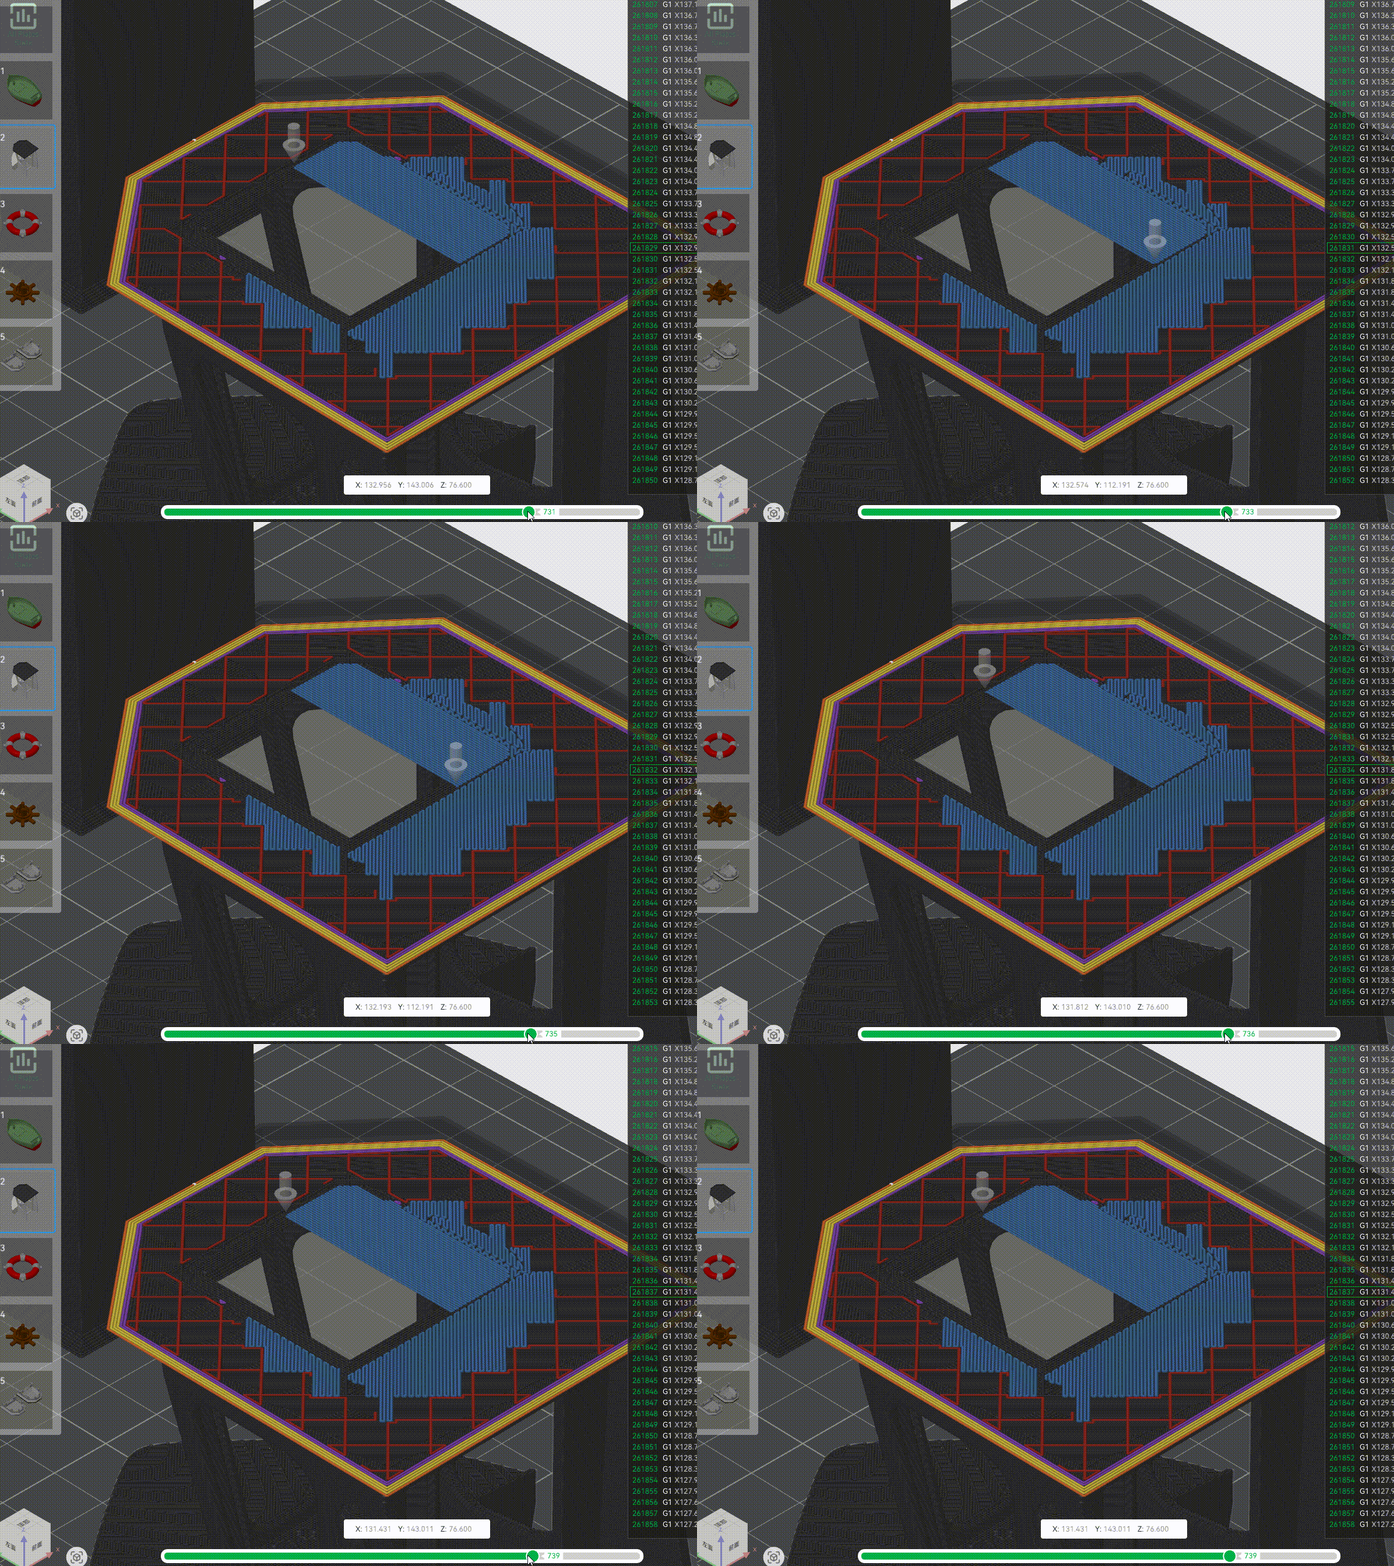
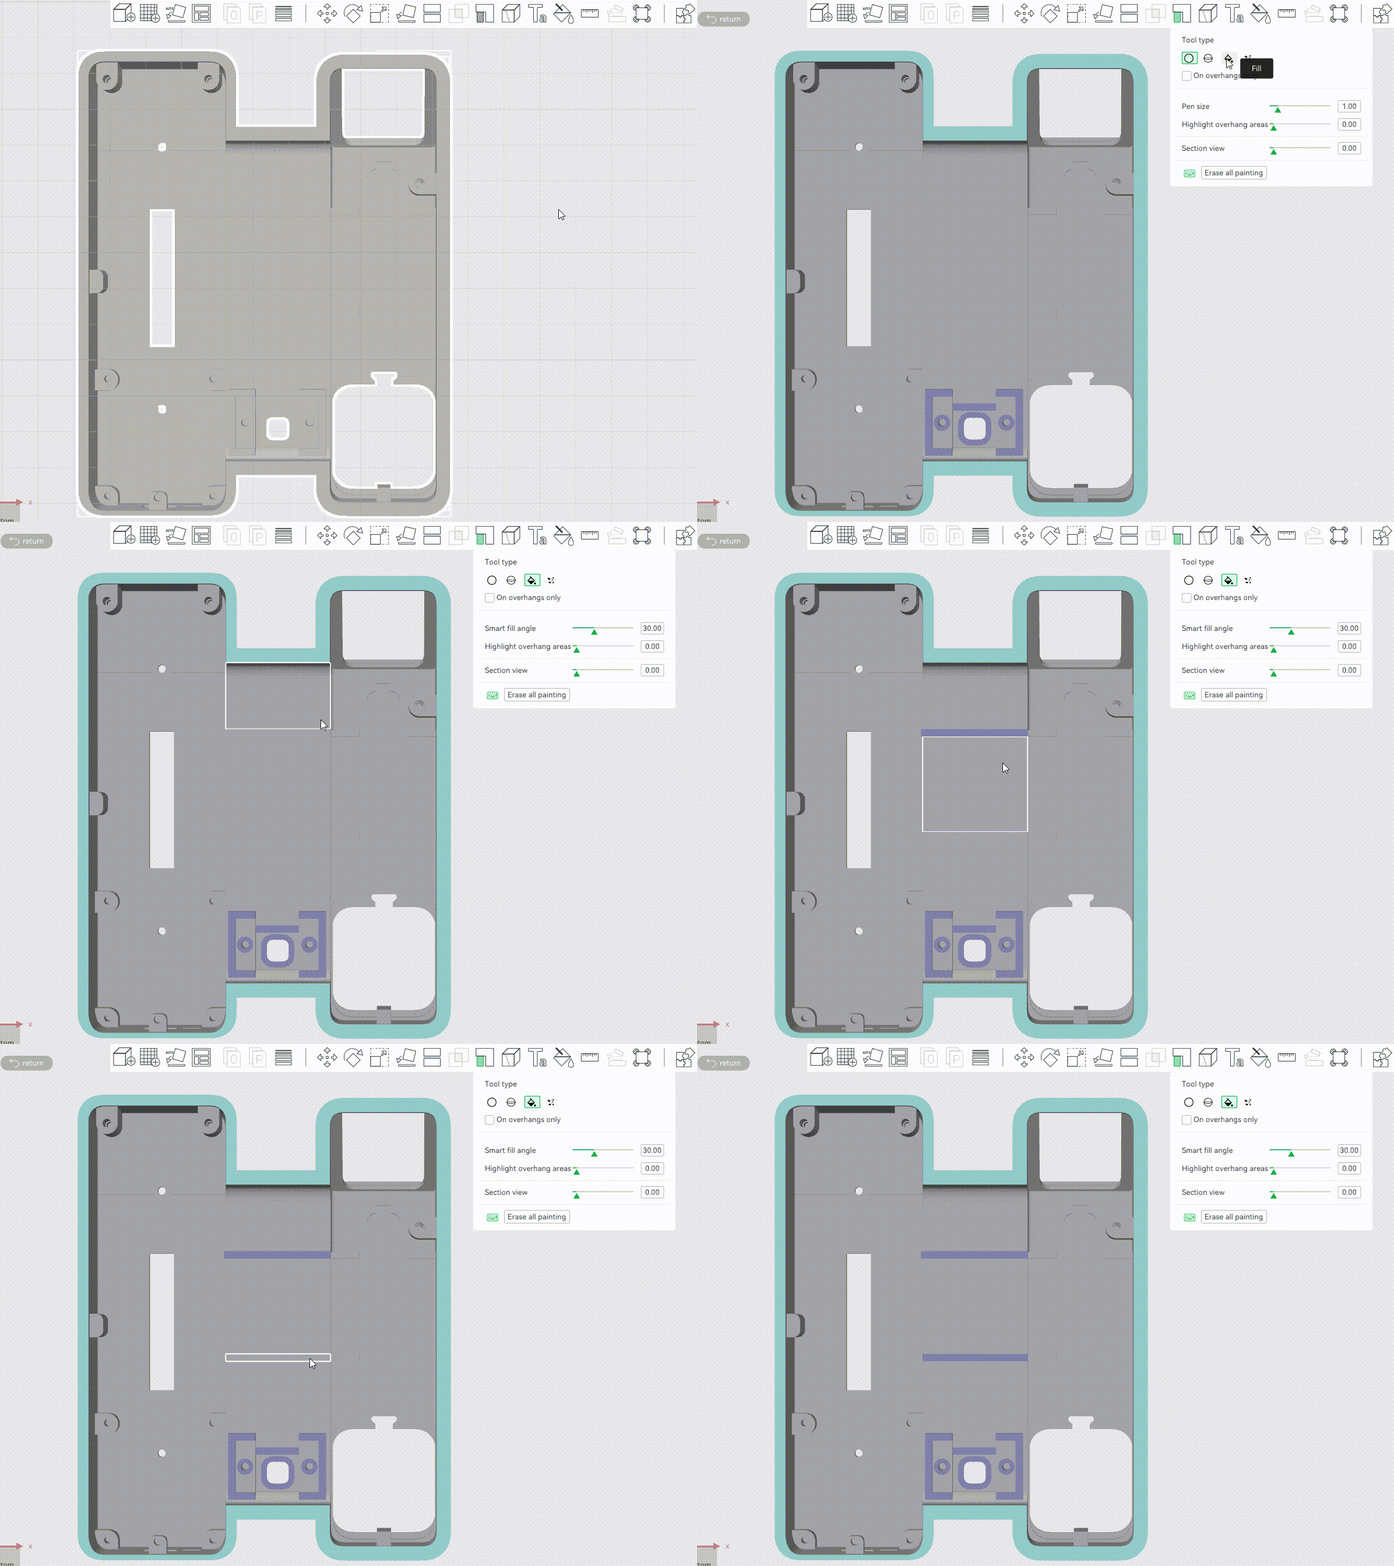
Next, choose the flat part of the base. Then, draw a support structure in the middle area. The two support structures help to divide a long bridge span into shorter bridge spans. That helps to avoid filament sagging.
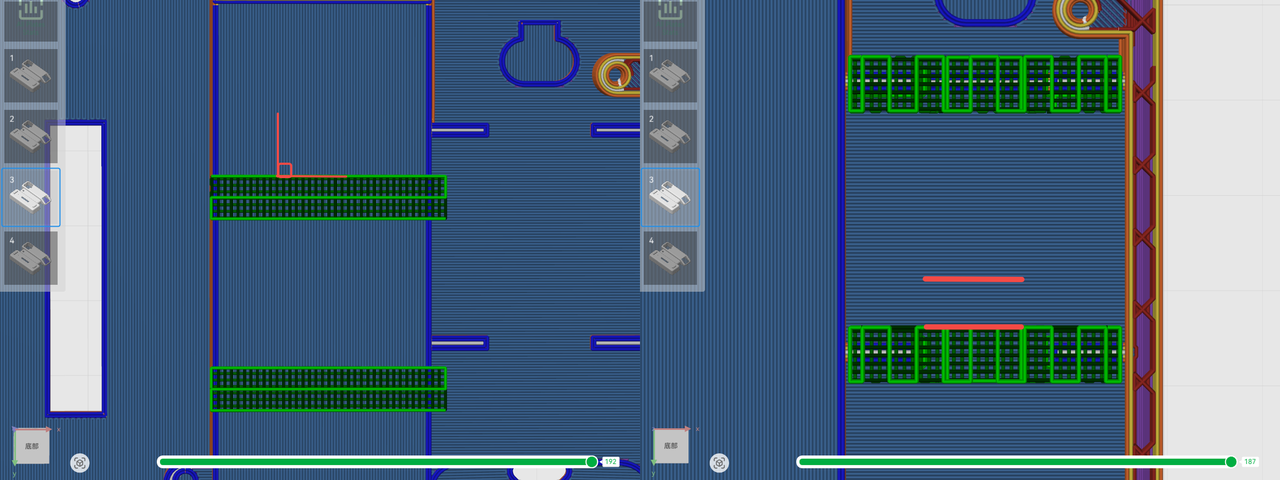
Slice your file and navigate to the layer that contains bridging. We recommend setting the angle between the bridge direction and the support structure to 90°. This vertical cross-layout can provide uniform support for all bridging lines.
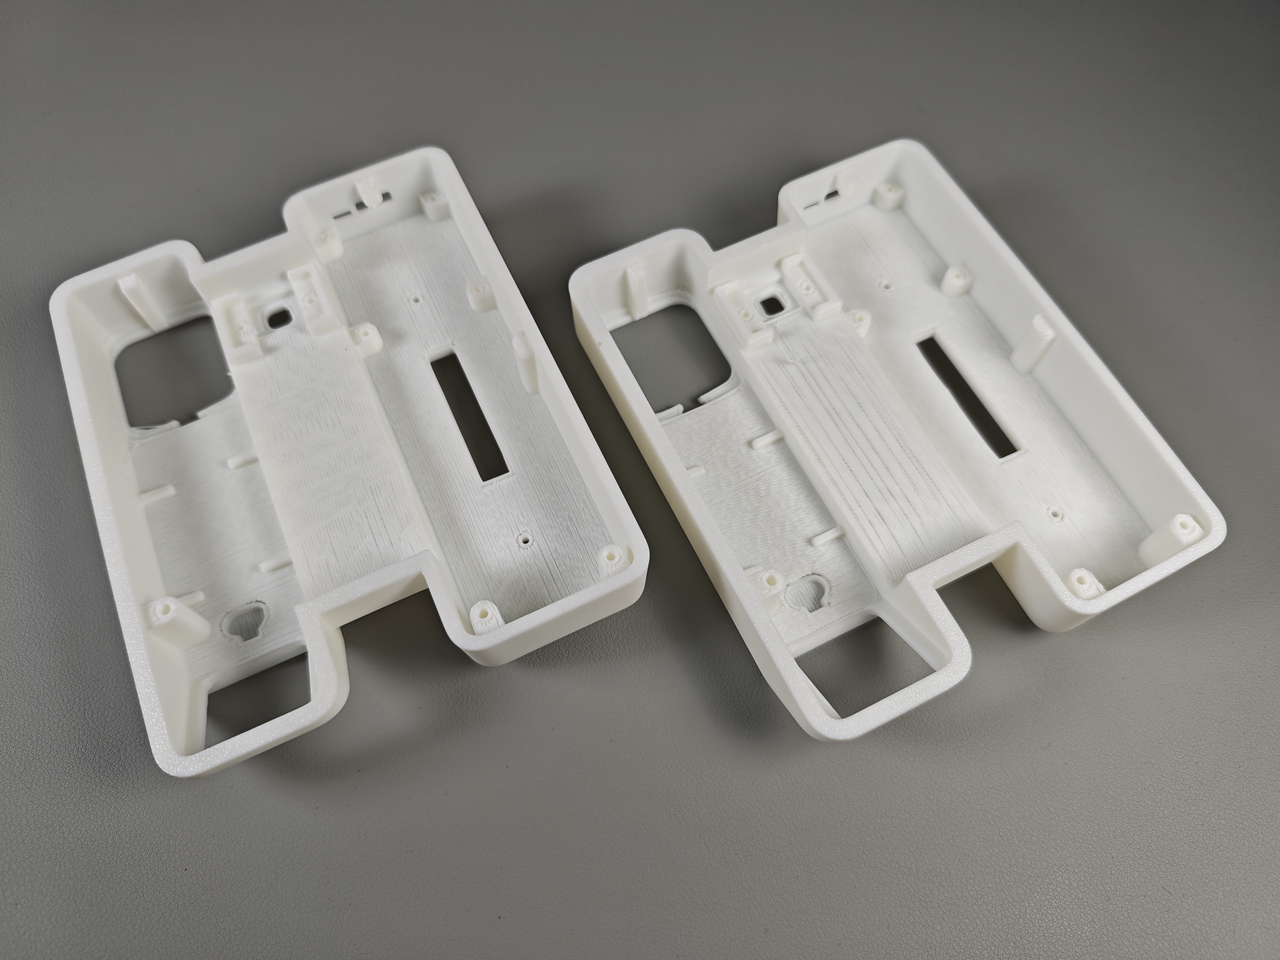
The left image shows the result of using manually drawn supports. The right image displays the effect without them.
This article shares practical ways to improve bridging in flat roof structures. By effectively adjusting settings, using chamfer design and manual support design, it can address the different challenges of short and long bridging and improve print quality.
Supplementary reading:
[1] Bambu Lab Wiki, "Bridge settings,“ 2024
[2] All3DP, "3D Printing Troubleshooting Guide," 2025
[3] Bambu Lab Wiki, "Bambu Studio Modifier Operation Guide," 2025
These articles might help you as well — take a look!
Ways to Fix Filament Sagging in Supportless Holes
Ways to Reduce Line Detachment in Dome Structures
If this guide sparked ideas or felt familiar, share your thoughts in the comments — let’s chat! Like and save if it helped.


