Very Annoying 69 Screw Gift Card Box


Print Profile(2)


Description
Another annoying gift box! Now sized for gift cards/money!
I have another annoying gift box design that was made to fit my MTG commander deck box design.
This one is sized to fit a gift card (or cash if folded up) and has a total of 69 (nice) screws.
If you've seen my other gift box, this one has the same tricks in it, just a bit simplified.
- All of the screws use the special triangle bit instead of a regular flathead.
- All of the screws around the sides are reverse thread.
- All of the reverse thread screws have a dot on the end to easily tell which one is reverse when assembling.
- There are 5 captive screws split between the top and bottom ribbon pieces.
The box is separated into 4 layers.
- Ribbon
- 2 short ribbon pieces
- a top ribbon piece
- a bottom ribbon piece
- 40 long screws
- 5 of these will be captive
- a triangle bow/screwdriver broken into 2 pieces to print better
- an extra bow/screwdriver handle
- a bow stand
- 2 bow shims (to hold the stand to the box)
- Outer Box
- 2 outer box pieces
- 9 long screws with reversed threads
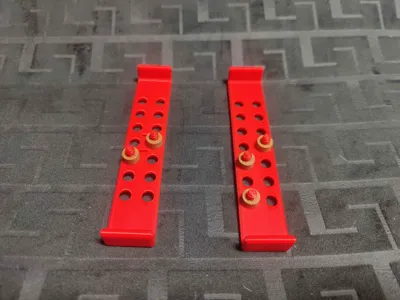
- Inner Box
- 2 inner box pieces
- 16 short screws
- 4 short screws with reversed thread (around the sides)
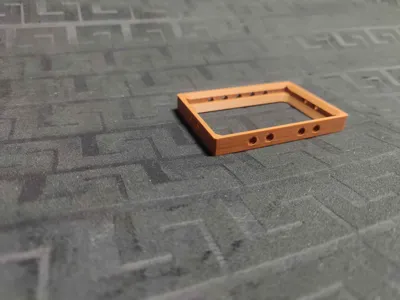
- Screw Frame
- a box frame
- a box base piece (all regular thread)
- a box lid (all reversed thread)
- 5 nuts to keep some screws captive
Assembly Instructions
 | Start with the frame |
 | Put in the base |
 | Add your gift card/ cash/ othe small flat gift |
 | Put the lid on top |
 | Put the inner box pieces around the frame |
 | Screw in the 16 regular short screws on the top and bottom of the inner box. Use the triangle bit for this. I found that its easier to use the bit on its own then tighten with the handle on it. Screw in the 4 reversed thread short screws around the sides of the inner box. |
 | Put the outer box pieces around the inner box. Screw in the 9 reversed thread long screws around the sides of the outer box.
There is one extra hole that does not have a spot to thread in. You can print an extra short screw and captive nut to turn this into a captive piece or glue in a short screw so it'll be impossible to remove. |
 | Put on the short ribbon pieces and screw in the 12 regular long screws. |
 | Find the top ribbon (the one with the extra slits in the middle) and add long screws where there are holes on the top of the frame (also having those slits). |
 | Find the bottom ribbon (the one without the extra slits in the middle) and add long screws where there are holes on the bottom of the frame (also not having those slits). |
 | Add captive nuts to the screws from the last 2 steps. You will probably need to use the handle with the triangle bit for enough torque. Tighten them so they do not rattle but not too tight so that it is hard to turn. |
 | Put the top and bottom ribbons on their corresponding sides lining up the captive nuts into the holes in the frame. Screw in the remaining 23 regular long screws. |
 | Insert the bow shims into the 2 slots on the top. I pushed it upside down on a table to get them in all of the way. There should be ~2mm of plastic still above the ribbon. |
 | Put the bow stand on top of the shims. (The bow stand here is from an older design. The new version will not have the extra space around the shim) |
 | Put the triangle bit into the bow stand and put the handles on both sides of the bit. (The stand may not hold on very tight to the shims, but should be enough to keep it in place when giving the gift.) |
 | You now have the completed annoying gift box! |
License
You shall not share, sub-license, sell, rent, host, transfer, or distribute in any way the digital or 3D printed versions of this object, nor any other derivative work of this object in its digital or physical format (including - but not limited to - remixes of this object, and hosting on other digital platforms). The objects may not be used without permission in any way whatsoever in which you charge money, or collect fees.
Comment & Rating (199)