
Mechanical Calculator (Addition & Multiplication!)


Print Profile(6)


Description

🧮 I designed a 3D-printable mechanical calculator that can perform ➕ addition and ✖️ multiplication!
Available in 3 Styles: 🐸 Froggy, 🔢 Basic, & 🐵 Monkey!
Entirely 3D-printable, no extra parts required!
Boost Me (for free)
Huge thanks to everyone who likes, downloads, and comments on my models! All my models are free and always will be, but if you REALLY like this one, please consider boosting it or subscribing to my YouTube channel. Cheers!
How to Use It

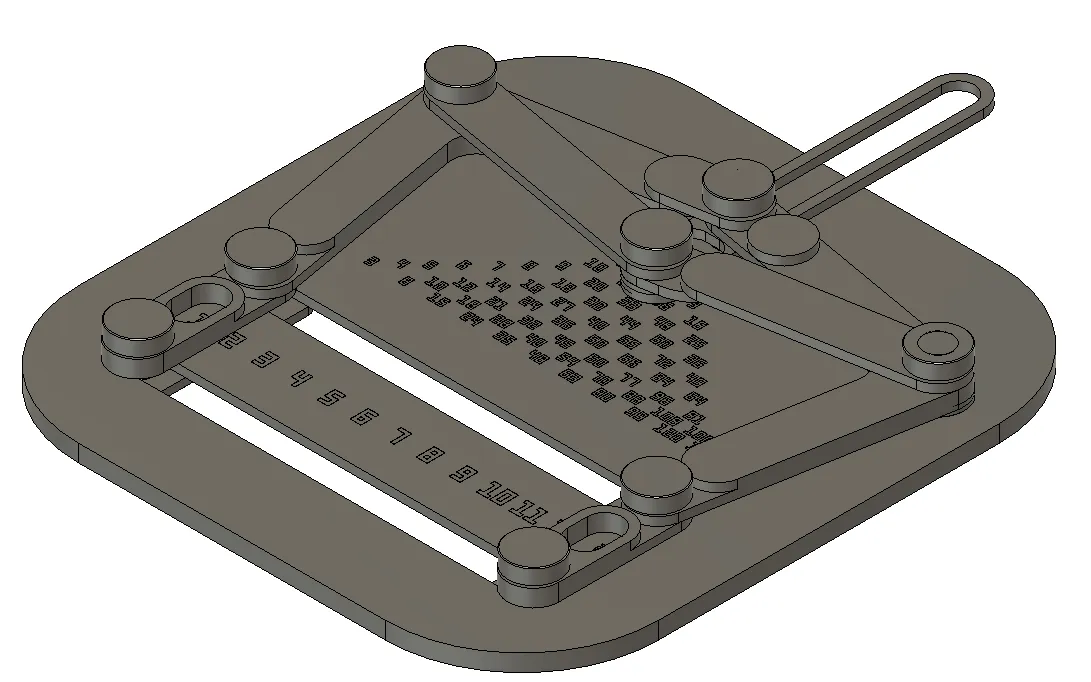
Move the feet to the numbers you want to add/multiply and the hands will point to the answer!
There are 2 bases available to print: ✖️ Multiplication and ➕ Addition.
How it works
📐 This mechanical calculator operates using a planar hinge mechanism involving symmetrical isosceles right-angled triangles. The hypotenuses of these triangles slide along number lines, while their vertices are connected, forming a hinged rhombus. By placing the sliding points on different integers, the calculator determines the midpoint of these integers to display the results. This model is based on the expired “educated monkey” patent from 1915.
Assembly Guide
Froggy Version (and Monkey Version):
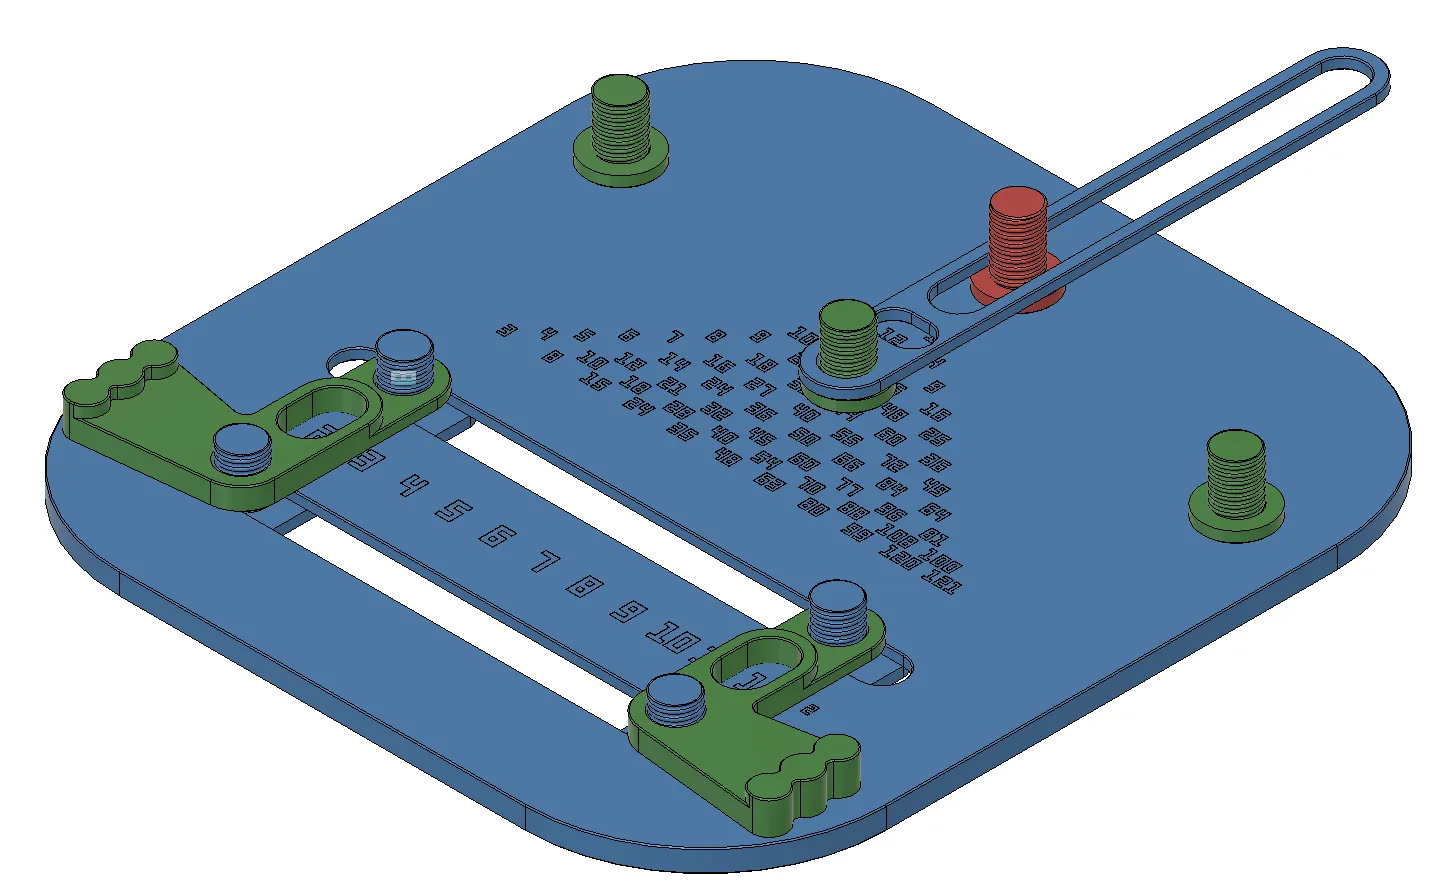
Step 1: Place the Screws, Feet, and Vertical Bar onto the Base.
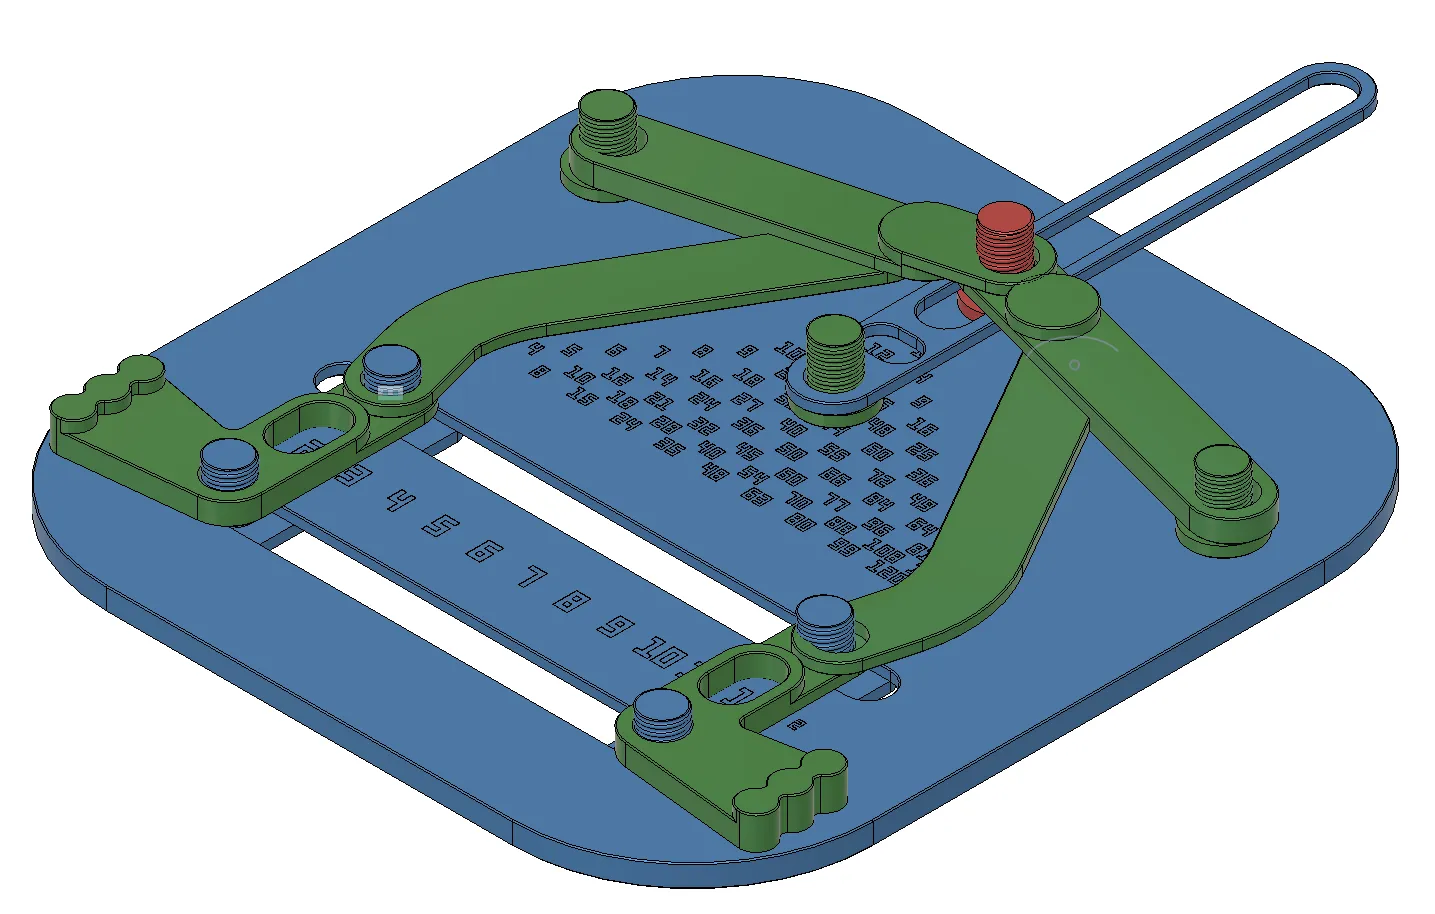
Step 2: Add the Legs. The Left Leg must go on top of the Right Leg as pictured.
Step 3: Add the Right Hand. (Note: The Right Hand is thicker than the Left Hand)
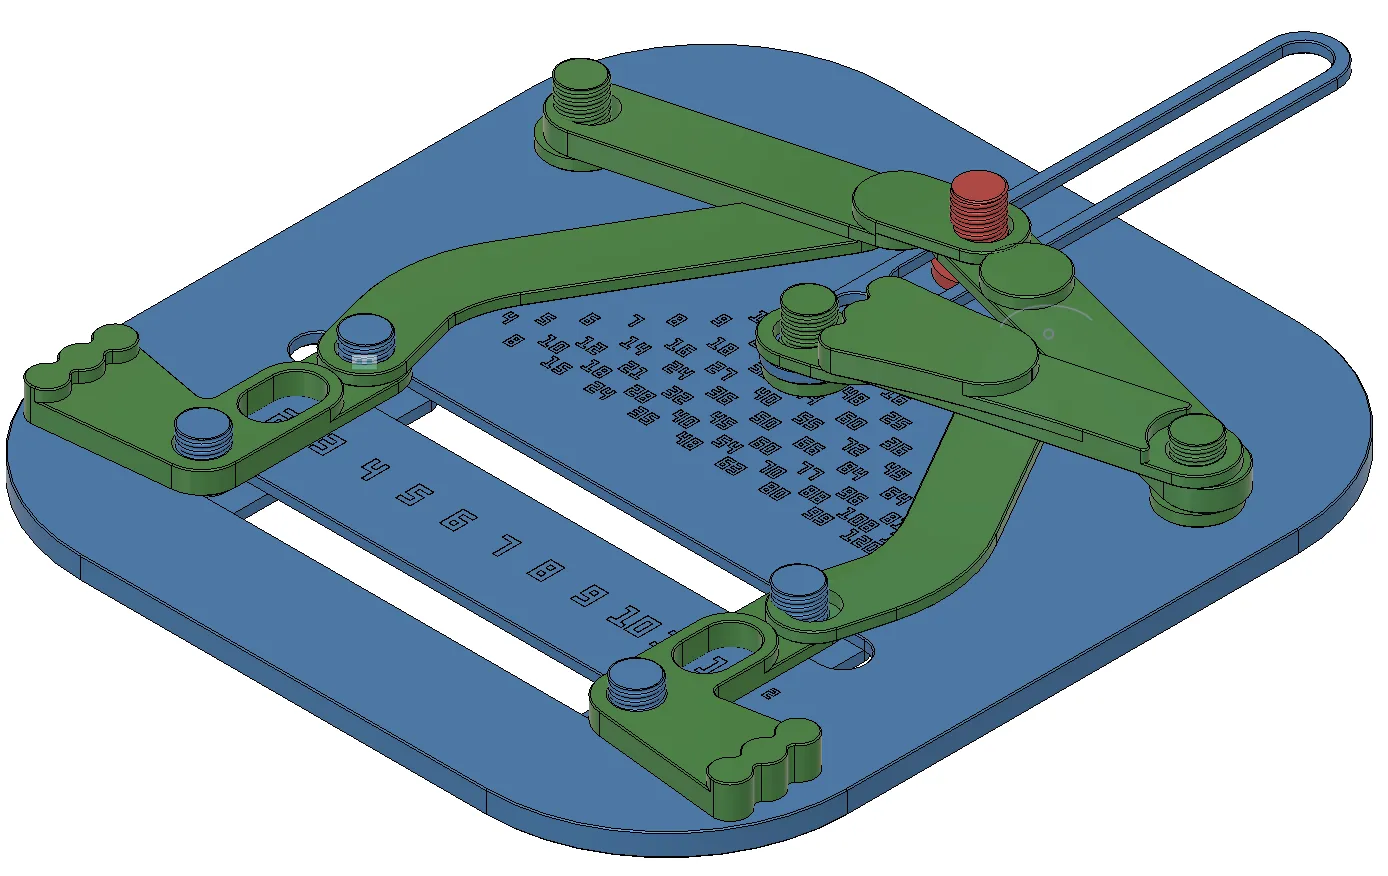
Step 4: Add the Left Hand.
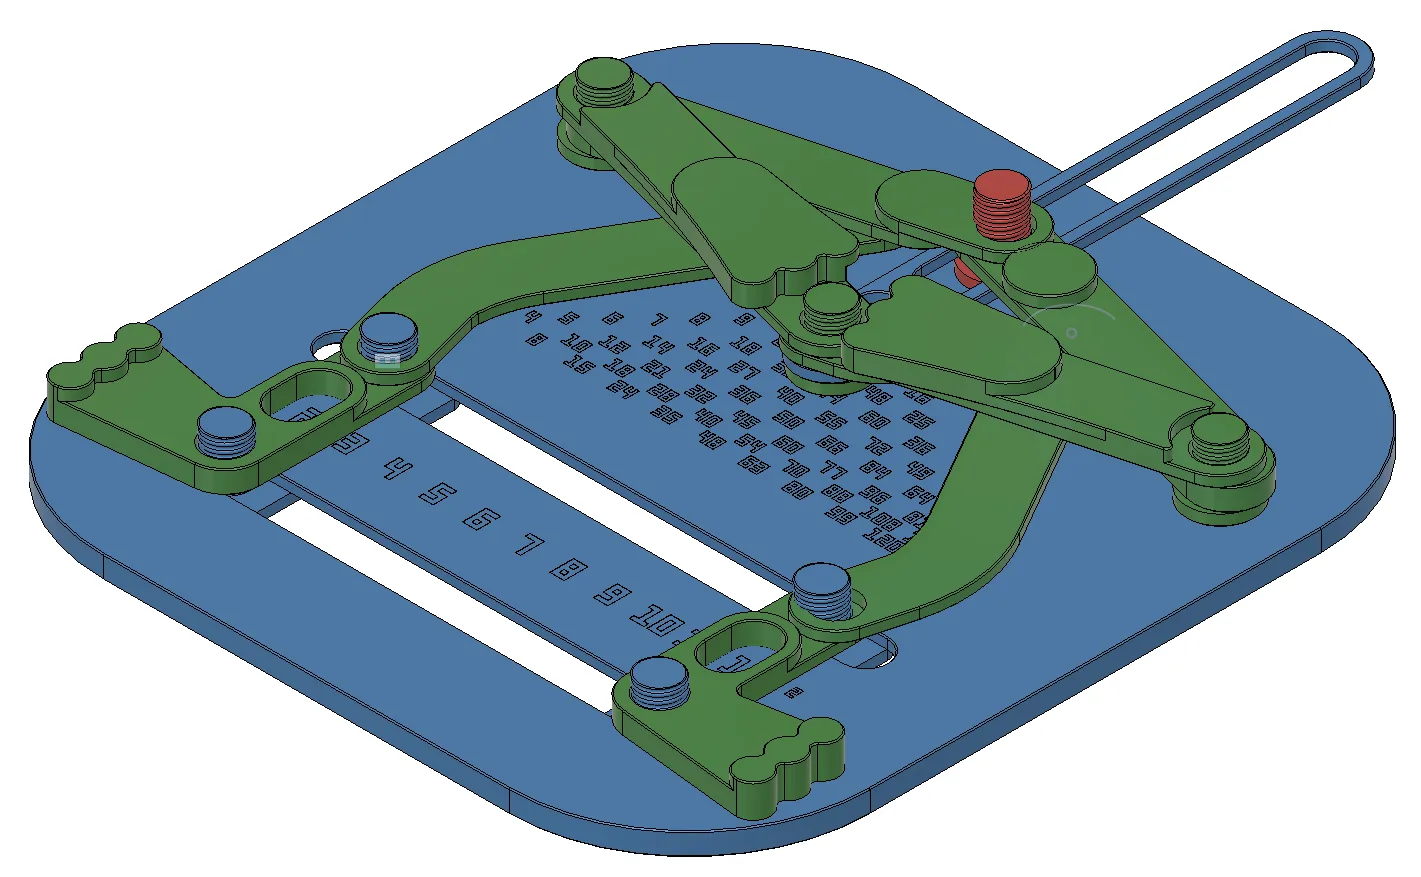
Step 5: Add the Face.
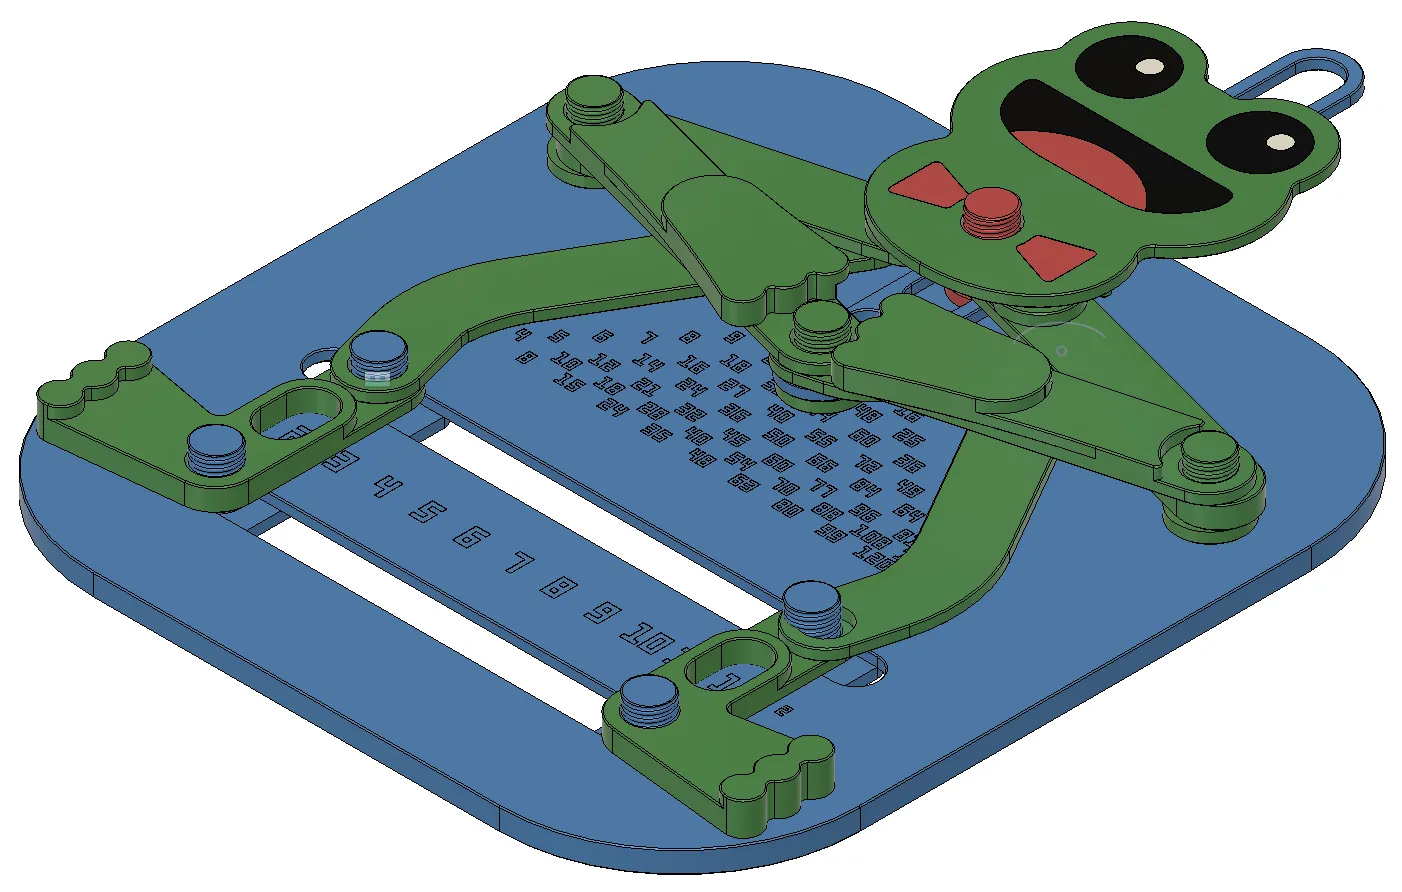
Step 6: Add the Nuts. You may need to tighten/loosen them for smooth operation.
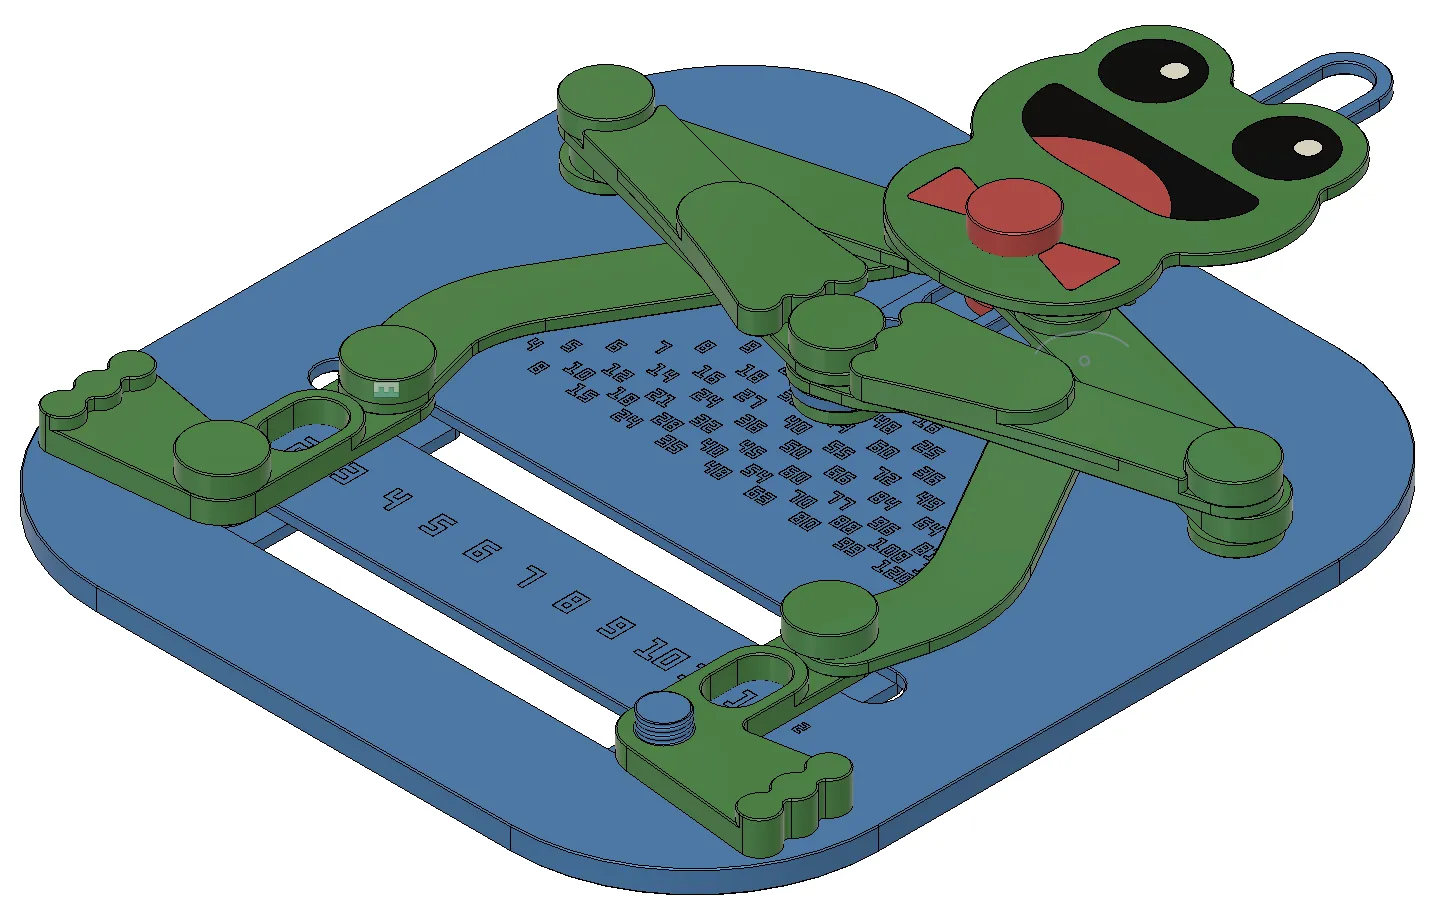
Step 7: You're done!

Basic Version:
Step 1: Place the Screws, Feet, and Vertical Bar onto the Base.
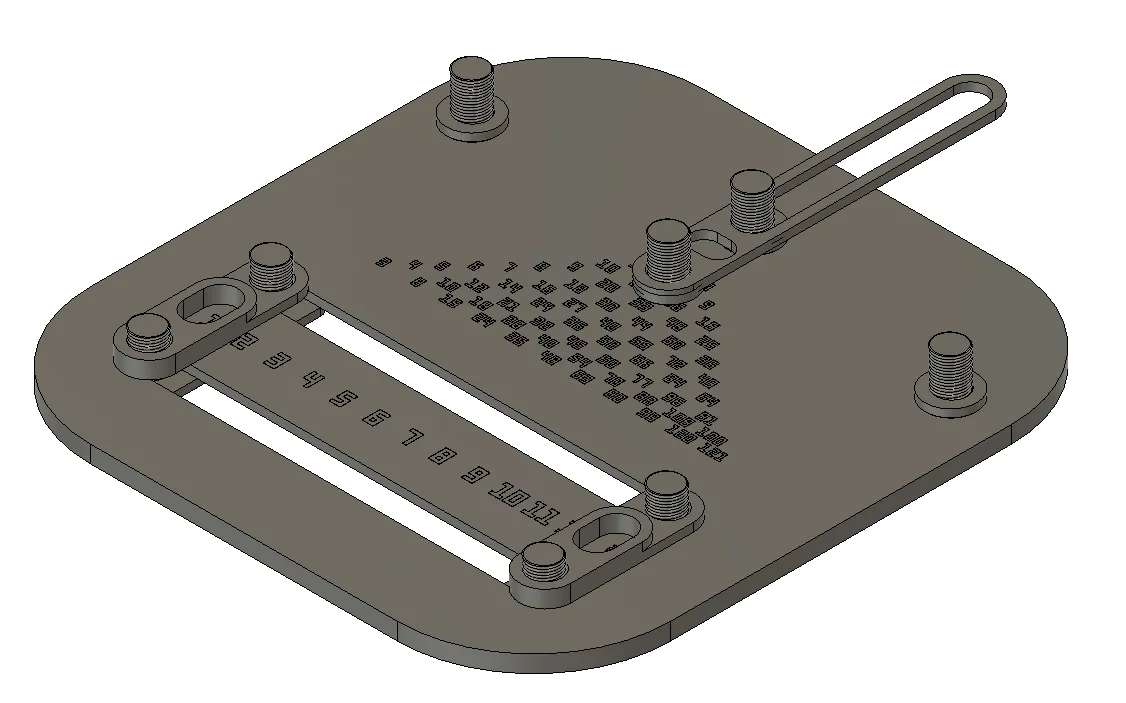
Step 2: Add the Legs. The Left Leg must go on top of the Right Leg as pictured.
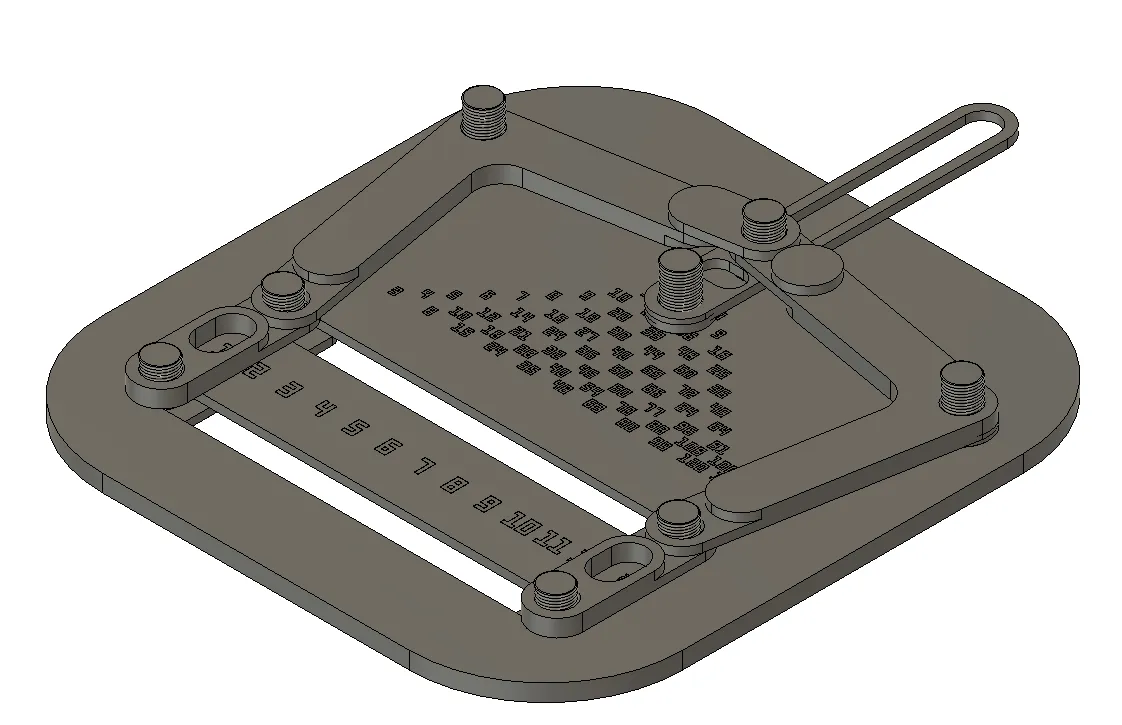
Step 3: Add the Right Hand. (Note: The Right Hand is thicker than the Left Hand)
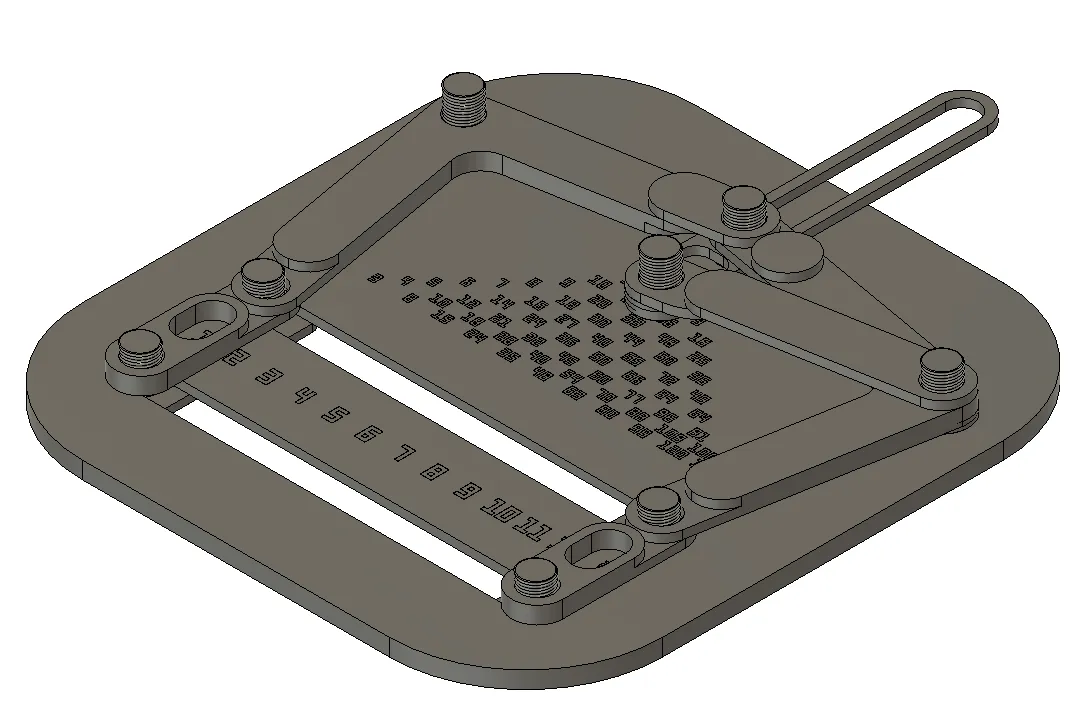
Step 4: Add the Left Hand then add the Nuts. You may need to tighten/loosen them for smooth operation.
License

You shall not share, sub-license, sell, rent, host, transfer, or distribute in any way the digital or 3D printed versions of this object, nor any other derivative work of this object in its digital or physical format (including - but not limited to - remixes of this object, and hosting on other digital platforms). The objects may not be used without permission in any way whatsoever in which you charge money, or collect fees.


Comment & Rating (168)