
608Z, 6000Z, 6001Z Roller Bearing V2




Print Profile(9)


Description
Updates
10 December 2025: Added a 6001Z roller-bearing variant, including a dedicated print profile.
4 February 2025: Added a 6000Z roller-bearing variant. This version includes a 2 mm screwdriver slot on the rollers to help with the initial break-in, if needed. More variants from the 60X/X bearing family may be added in the future, and the title will be updated accordingly.
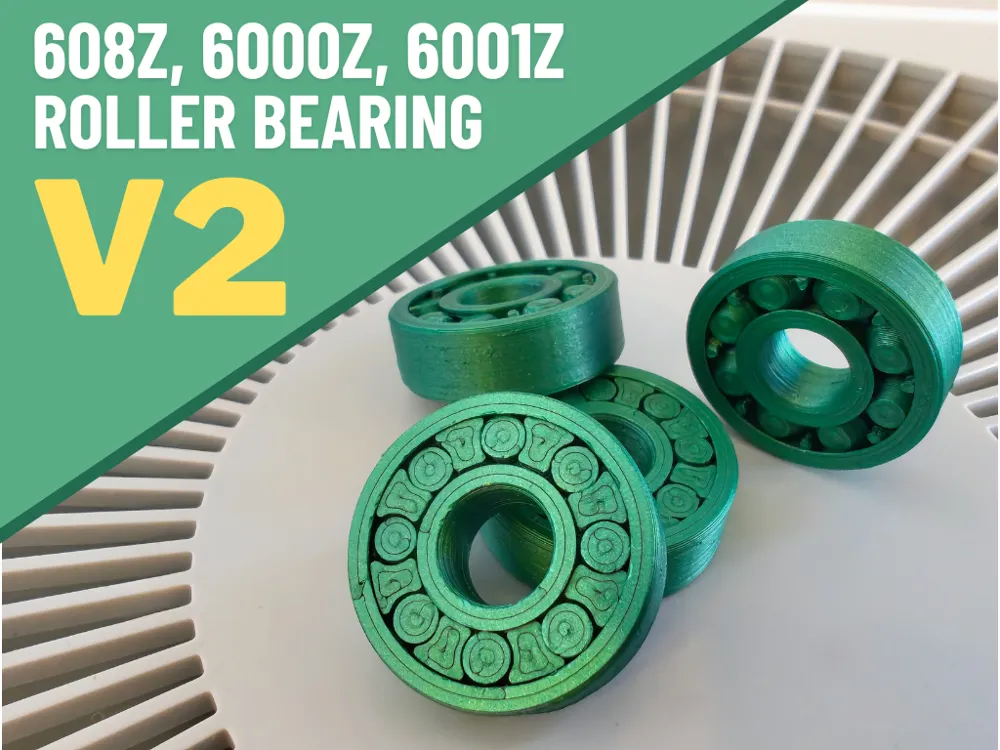
Thanks to everyone who liked and supported my first version of the 608 Roller Bearing. Your feedback inspired me to create a new and improved 3D-printed 608 roller bearing. Unlike the first version, which relied primarily on low-friction, this design uses a true rolling-bearing principle. After hours in front of the CAD, printing, testing, and redesigning, it is ready to share! Like my previous model, this one follows my O.L.S. Design principle: Optimal tolerances for Low friction and Stability.
Printing Tips
- Use the included print profile. It was specifically tuned for the tight tolerances required by this design.
- Ignore the “floating region” warning in Bambu Studio.
- Ensure a well-cleaned bed for reliable adhesion.
- Smooth PEI is recommended for the best results.
- If the bearing is too loose or tight, it is likely due to under or over-extrusion.
- If the first layers are melting, try lowering the bed temperature or moving the model to a different location, as there may be hotspots on the heat bed that cause this issue.
- Avoid materials that string heavily, as stringing can significantly reduce bearing performance.
Post-Processing / Break-In
To free the bearing from any micro-adhesions after printing:
- Push the cage and rollers back and forth along the bearing axis a few times.
- Rotate only the outer ring for about one minute to break in the rolling surfaces.
- For the 6000Z version, use the integrated 2 mm screwdriver slot on the rollers if additional initial movement is needed.
Important
In rare cases, users have removed the cage after printing, possibly mistaking it for a support structure. Do not remove the cage - it is an essential part of the bearing that keeps the rollers properly spaced and aligned.
Let the rolling begin!
If you need a spool roller, you can check the Ultimate Spool Roller for 608 bearings. JediPieHut's simple and sleek design is specially designed for these bearings, for which I thank him!
You can check my other models HERE.
Boost Me (for free)
If you like my work please boost, like, rate or comment. This will help me to continue materializing my ideas in this new world for me. Happy printing!
Membership
By subscribing, you’ll be helping me continue to create unique and high-quality 3D models.
License

You shall not share, sub-license, sell, rent, host, transfer, or distribute in any way the digital or 3D printed versions of this object, nor any other derivative work of this object in its digital or physical format (including - but not limited to - remixes of this object, and hosting on other digital platforms). The objects may not be used without permission in any way whatsoever in which you charge money, or collect fees.


Comment & Rating (5208)