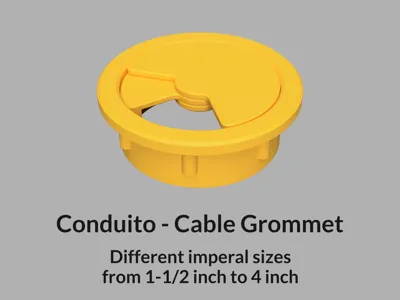
PTFE Cable Grommet, 1-1/2 to 4 inch


Print Profile(2)


Description
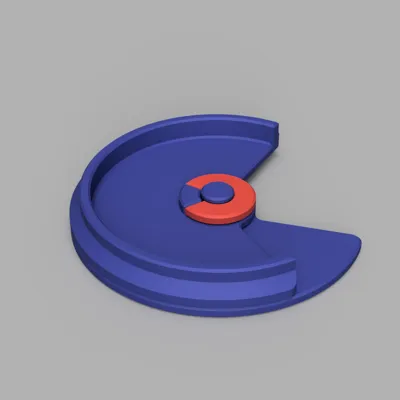
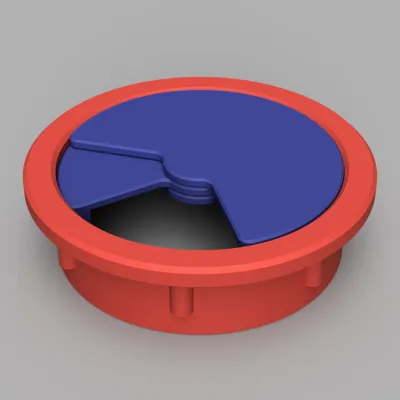
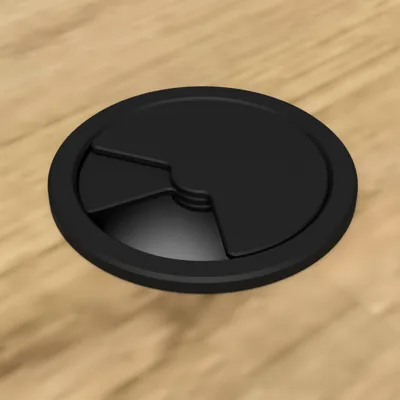
Everyone is familiar with the various types of cable grommets for furniture panels. With Conduito, you now have the option to use a version specially optimized for 3D printing. By carefully studying existing models, I developed a variant tailored for 3D printing. This design allows you to produce a cable grommet directly with your own 3D printer.
Conduito is available in a wide range of drill diameters, both in metric and imperial units. The available diameters range from 35 mm to 125 mm and from 1 3/8 inches to 4 3/4 inches. Calculating the diameter of the cable grommet is straightforward: drill diameter minus 10 mm (approximately 0.39 inches). The plate thickness should be at least 15 mm (approximately 0.59 inches).
Collection of all metric (mm) sizes:
https://makerworld.com/en/models/54074-metric-cable-grommet-35-to-125-mm#profileId-182906
Keywords: Cable Grommet, Desk Grommet, Wire Grommet, Cable Port, Cable Hole Cover, Cable Pass-Through, Cable Outlet, Kabeldurchführung, Kabeltülle, Kabeleinlass, Kabeldurchlass, Passe-câble, Pasacables
Additional Download: USDZ File for Augmented Reality
A USDZ file is also available for download as part of this project. The USDZ file is especially useful for virtually placing the model, for example on a table or floor, to check its size, proportions and appearance in the room before 3D printing.
The USDZ format allows you to view the 3D model in augmented reality (AR). Apple devices such as iPhone, iPad and Mac support USDZ files natively, so the file can be opened and viewed directly in Safari, Mail, Messages or the Files app – no additional app is required. Users of other operating systems (e.g. Android or Windows) need a dedicated USDZ viewer or compatible 3D software, such as Adobe Aero or Blender (with USDZ plugin), to view the file.
Filament
When choosing the right filament, you have a variety of options. Depending on your individual requirements and the desired end result, a particular filament type may be particularly suitable. Here's an overview of the recommended filament types and their advantages:
- PLA: This filament is easy to print, environmentally friendly, and offers a good surface quality. It's especially suitable if you value easy processing and a clean print image.
- PETG: PETG combines the best properties of PLA and ABS. It's robust, flexible, and resistant to many chemicals. So if you want a model that's both stable and flexible, PETG might be the right choice.
- ABS: Known for its high strength and durability, ABS is ideal if you need a model that's particularly resistant to mechanical stresses.
- ASA: This filament is UV and weather-resistant, making it ideal for applications exposed to direct sunlight or other weather conditions.
- Nylon: Nylon is extremely robust and flexible, making it an excellent choice for models exposed to high stress.
Slicer Print Settings
The print settings provided here are designed for a 0.4 mm nozzle and a layer height of 0.2 mm. The settings can be easily found in most common slicing programs like Cura, PrusaSlicer, or BambuStudio/OrcaSlicer.
- Slicer-Unit: metric/mm
- Wall generator: preferably Arachne
- Walls: 3
- Top layers: 5
- Bottom layers: 5
- Infill density: from 20%
- Infill pattern: Any

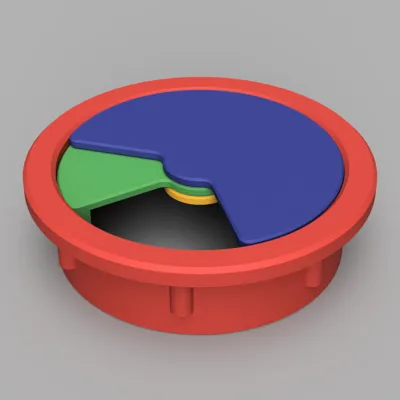
Assembly
The assembly of Conduito is completed in three clear steps. Follow these instructions to ensure that all parts are correctly and securely mounted:


Boost Me (for free)
✨ Enjoyed this model? Show your support with a Boost and help me bring even more creative ideas to life. Every Boost keeps me motivated to share new designs and contribute to the community.
Membership
☕ Love my designs? Support my work with a Coffee Membership or unlock commercial rights to sell physical prints with my Commercial Licenses. Join my community and help me create more innovative models!
Legal Notice: Manufacturer names are mentioned solely for compatibility description and do not constitute a recommendation or endorsement. No business relationship exists with the mentioned manufacturers. Trademarks are property of their respective owners. This model is an independent design and has not been authorized, sponsored, or otherwise approved by the mentioned manufacturers.
License
You shall not share, sub-license, sell, rent, host, transfer, or distribute in any way the digital or 3D printed versions of this object, nor any other derivative work of this object in its digital or physical format (including - but not limited to - remixes of this object, and hosting on other digital platforms). The objects may not be used without permission in any way whatsoever in which you charge money, or collect fees.
Comment & Rating (113)