Modular Cyberdeck & Panel Generator - Apache 1800


Print Profile(1)
Description
🚀 Welcome Maker!
Thank you for checking out this model. All of my designs are fully tested and optimized for multi-material or standard printing.
🖨️ Recommended: Use the official print profiles provided for the most reliable, dialed-in settings.
🎨 Show off your prints! Don't forget to upload your print photos and share your makes in the comments—I love seeing your color choices!
------------------------------------------------------
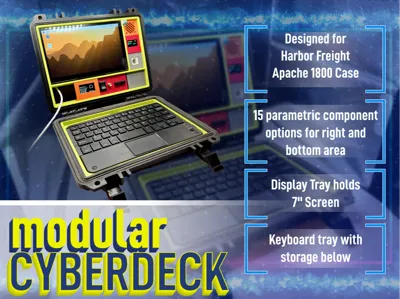
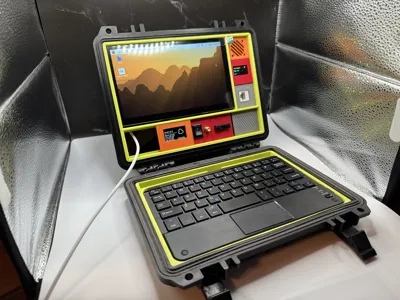
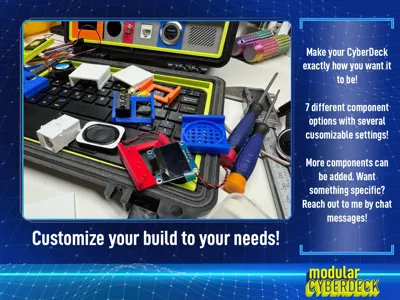
Transform your Apache 1800 case into a fully functional, portable workstation. This project is a comprehensive mounting system designed to turn custom hardware into a professional-grade cyberdeck.
The heart of this build is a dynamic panel generator. Using the "Customize" feature, you can build component rails for both the right-hand vertical area and the bottom horizontal area, ensuring your deck has exactly the ports, screens, and switches you need.
Key Features
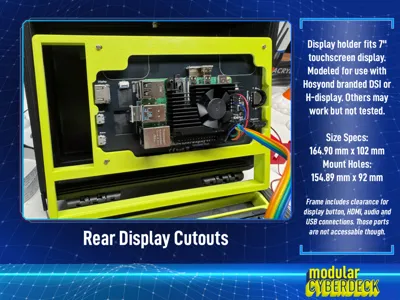
- Display Compatibility: Specifically designed for the 7" Hosyond DSI display (or H Display). It is also compatible with other 7" screens, such as those from Elecrow, provided the mounting holes and physical dimensions are identical.
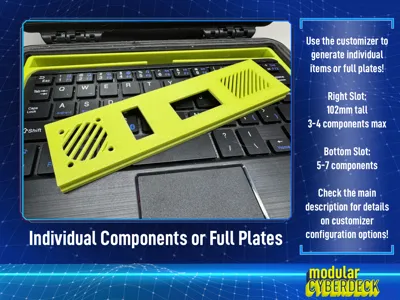
- Ultimate Modularity: Customize the Right Rail (102mm) and Bottom Rail (204mm) independently.
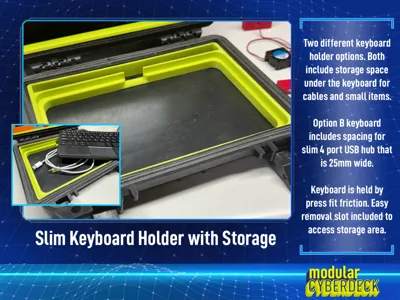
- Two Keyboard Options: Includes two "press-fit" keyboard holders designed for the mini slim keyboard (200mm x 126mm).
- Internal Storage: Both options feature a cavity beneath the keyboard to tuck away cables and small components.
- Option B: Features a dedicated mounting area for a slim Sabrent 4-Port USB Hub (25mm wide).
- Total Customization: Print the panels as single units for a clean look, or print individual components in different colors for a high-contrast "tech" aesthetic.
- Surface Effects: These panels are perfect for specialized build plates! Use textured, smooth, or holographic plates to apply carbon fiber patterns or light-shifting effects to your faceplates.
- Prototyping Plate: Use Plate 4 to print test samples. This allows you to verify printer tolerances and component fitment before committing to a full-length panel print.
Panel Customization Guide (The Generator)
Press the CUSTOMIZE button to generate your own STL files.
1. Plate Configuration
- Panel Mode: Choose Standard Right (102mm vertical) or Standard Bottom (204mm horizontal). Both include a built-in 1.5-2mm clearance gap for easy installation. Use Manual to create individual components or custom-sized sections up to 204mm.
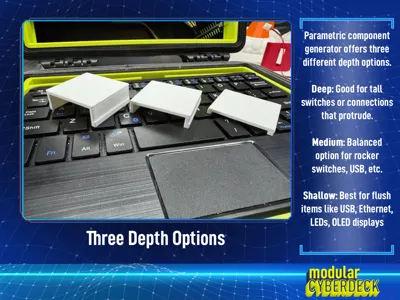
- Total Target Height (Depth):
- Deep: Recessed deep into the cavity. Ideal for tall toggle switches or bulky buttons.
- Medium: The balanced standard. Fits most general hardware applications.
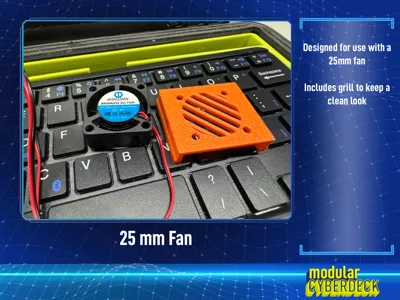
- Shallow: Sits nearly flush with the display mount. Perfect for OLEDs, fans, and bulkhead connectors like USB/HDMI.
- Extra Component Padding: Add global spacing between modules to avoid crowding.
2. Custom Logo Settings - EXPERIMENTAL
Add a personal touch to your deck using the Negative Cut Logo module.
- Upload your own .SVG file.
- Adjust Scale and Rotation (essential for vertical right-side panels).
- The logo is recessed 1mm into the faceplate. To keep it a single-color print, set Logo Color to "White."
Available Component Modules (Slots 1-8)
Select up to 8 slots (typically 3-4 for the right rail and 5-7 for the bottom).
- None-Spacer: Insert a blank gap of any size to organize your layout.
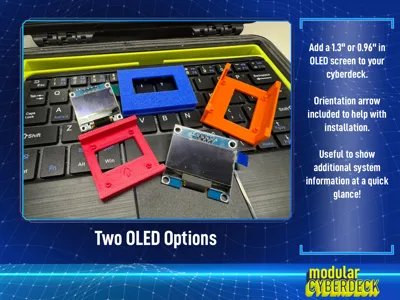
- 1.3" & 0.96" OLED Screens: Perfect for system monitors (CPU/Temp). Includes a physical orientation arrow on the back to ensure you mount the screen right-side up.
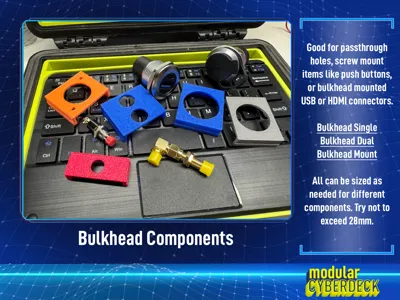
- Bulkhead (Basic, Dual, Mount): Standard holes for HDMI, USB, SMA (antenna), or push buttons. The "Mount" version includes specific screw holes for secure fitment.
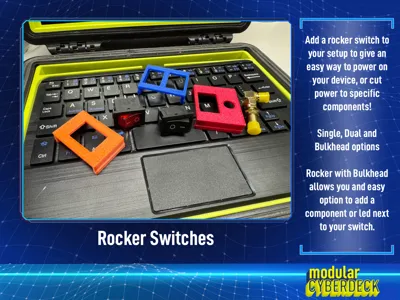
- Rocker (Single, Dual, Bulkhead): Mount standard rocker switches. The Bulkhead variant is great for adding an LED indicator or an antenna port right next to the power switch.
- Fan 25: A dedicated mount for 25mm cooling fans.
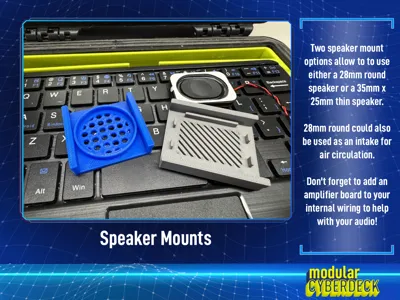
- Speaker 28: A circular mount with a decorative hexagonal front grill for 28mm drivers. Pro Tip: Leave the speaker out to use this as a stylish air intake.
- Speaker 35x25: A rectangular bracket designed for mini speakers, featuring integrated wire channels to prevent pinching.
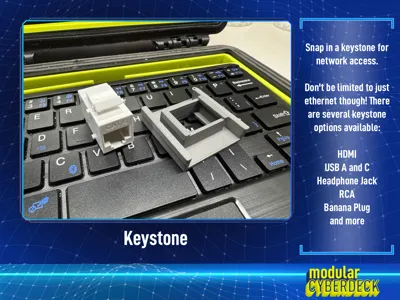
- Keystone: Fits any standard keystone jack (Ethernet, HDMI, USB, Audio).
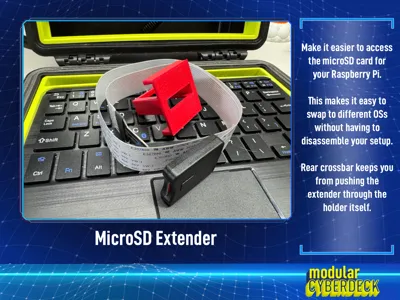
- MicroSD Extender: A snug, press-fit mount for MicroSD ribbon extensions. Brings your card slot to the front for easy OS swapping without opening the case.
- Negative Cut Logo (Experimental): Recess your own SVG logo into the rail surface.
Assembly Note
When placing the printed parametric components into their respective slots, it is best to have the frame out of the Apache case. The flex of the outer edge will help with inserting the components. I recommend working from the outside in.
Display Used in MY Build
These are the two displays I used to design around for my project. The mounting points are separated 154.89mm width and 92.00mm height apart:
- Display
- Hosyond 7" DSI - This was my first build. The lower 800x460 display made it harder to see for me so I upgraded to the H Display
- Hosyond 7" H Display - Same mounting points as the DSI, but higher resolution!
- Integrated connections on the sides are not usable
- Dual speakers included but component not added yet
- Alt Option - Elecrow 7" Display - Looks to be the same as the H Display from Hosyond.
License & Support
This project includes a FREE COMMERCIAL USE LICENSE. You are encouraged to print and sell physical parts to your customers!
- Restriction: Please do not sell or redistribute the STL/Digital files.
- Support: if you find this tool useful for your business or hobby, please consider leaving a Boost or supporting me via my "Buy Me A Coffee" link!
Boost Me (for free)
Leave a boost! They help me continue to make projects and prints!
I did use AI (Gemini) to help generate this item description, but I provided the detail of the features and components. Gemini just helped me get things in the right order and formatted properly. - Mike
------------------------------------------------------
💡 Found this model useful? If you love this design, please consider giving it a Boost 🚀! Every bit of support helps cover prototyping materials, filament, and the time spent refining designs to keep sharing them with the community.
🤝 Connect & Support
- 🛠️ Explore More: Check out my other models here
- ☕ Fuel the Creativity: Support me on Buy Me a Coffee
- 📸 Share Your Work: Rate this model and upload a photo of your print!
Boost Me (for free)
🚀 Support Future Designs! Every model is a labor of love and extensive testing. If you appreciate the work that went into this, leaving a Boost 🚀 is the best way to keep new projects coming! Thank you for printing, rating, and being a part of the maker community!
Comment & Rating (23)