A1 Pen Plotter


Print Profile(1)

Description
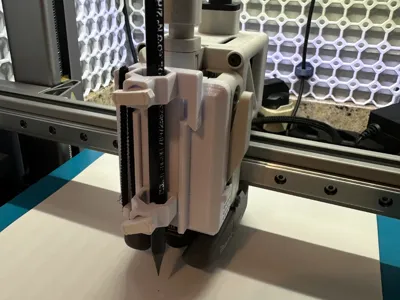
I designed this pen plotter for my Bambu Lab A1 to help my daughter with homework, party decorations, and creative projects.
The design uses a simple rubber band mechanism to keep the pen in constant contact with the paper. It also relies on modified G-code to function correctly, so please use it at your own risk.
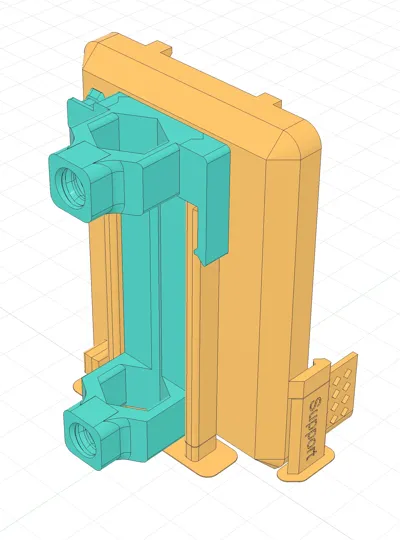
The model comes pre-supported, and I’ve also included a version without supports for those who prefer to tweak their own settings.
Printer setup
- Replace the cover and set the plotter to the raised (up) position.
- Place the paper on the build plate (use multiple sheets to avoid scratching the surface) and secure it with magnets. Make sure it is firmly fixed, as the bed will heat up to around 20°C (minimum required for the printer to operate), which may cause the paper to warp slightly.
- Home the printer.
- Lower the plotter and insert the pen or pencil into the holder, making sure the tip is touching the paper. Tighten it in place.
- Raise the plotter back to the upper position.
How to use
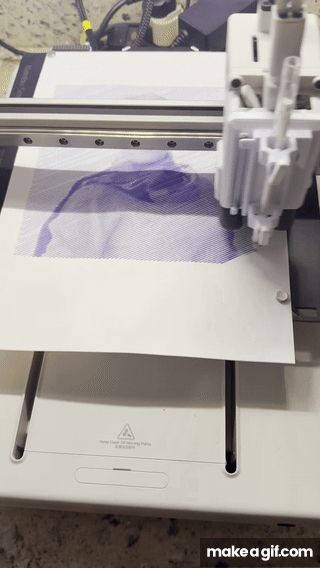
- Find an image (for example, search for “tiger coloring page” on Google).
- Convert it to SVG using: https://picsvg.com/ (use transparent background).
- Import the SVG into your slicer.
- Scale it to fit your printable area.
- Set the model height to 0.2 mm — this ensures a single layer print (one pass of the pen).
- Before you send it to the printer you will have to choose “external filament”
⚠️ IMPORTANT
Always raise the plotter after every use.
This prevents the pen from hitting the bed during the initialization phase.
How the startup sequence works
When you start a print, the printer will begin moving and then pause for about 30–60 seconds while performing internal checks.
After that:
- The printer will home the print head
- Raise it a little
- Then wait approximately 10 seconds
👉 This is the moment when you should lower the pen plotter.
Once lowered, the printer will start drawing and continue until the job is complete.
⚠️ After the drawing finishes, manually raise the plotter again to avoid any collision during the next initialization.
Documentation (1)
License
You may create derivative works based on this object, provided that all such derivative works are published exclusively on the MakerWorld platform and include proper attribution to the original creator. You may not share, upload, host, distribute, or publish this object—or any derivative work of this object—on any other digital platform, marketplace, or distribution channel. Commercial use of this object and any derivative works is strictly prohibited. This includes, but is not limited to, selling, renting, sublicensing, or using the object in any context in which you receive monetary compensation or other financial benefits.
Comment & Rating (38)