Search models, users, collections, and posts
BRP D.E.S.S. DIY Key & Split-Post System (Dooped)
IP Report


Print Profile(1)
0.16mm layer, 2 walls, 100% infill
Designer
1.6 h
1 plate
Open in Bambu Studio
Boost
7
21
15
0
18
6
Released
Description
Work in progress :
I'm currently working on a method to make this DIY accessible to anyone. Stay tuned.
Overview
This 3D model allows you to create a functional backup D.E.S.S. key for your Can-Am, Sea-Doo, or Ski-Doo at home. It is a more affordable alternative to dealer programming or 3rd-party services. By following this method, you can keep your original key safely at home and avoid sharing your key's data with anyone else.
How it works: The BRP D.E.S.S. system (2015-2026) uses two components to start the engine:
- A Magnet: This activates the machine and keeps it running.
- An RFID Chip: This contains the security code. The machine only needs to "read" this code once when you press the start button to start it.
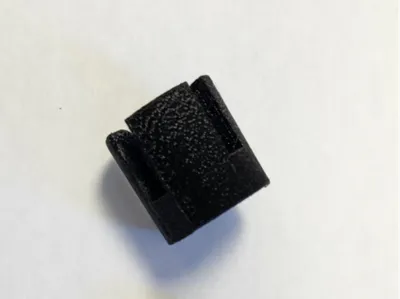
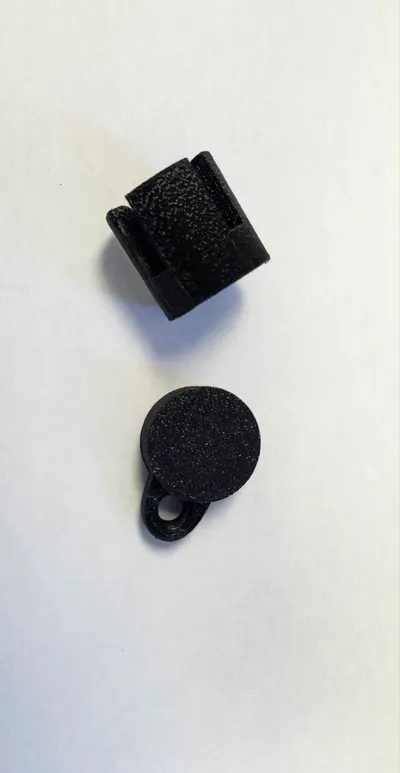
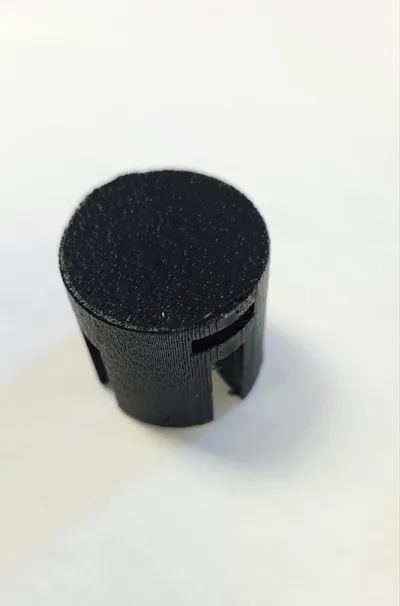
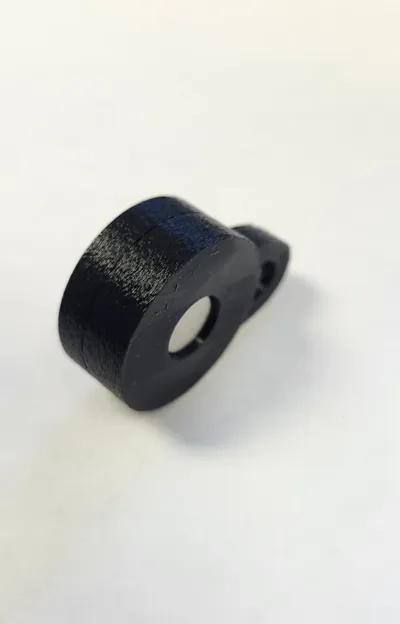
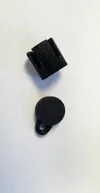
The 2-Part Design
This model is designed in two separate pieces for maximum flexibility:
- Part 1 (The Receiver Clip): Stays clipped onto the machine’s post to keep the magnets in place tus the machine running.
- Part 2 (The Key Case): Contains the chip. You only need to tap this against the post to start the engine, then you can put it safely in your pocket while you ride.
- Optional: If you prefer a traditional feel, you can glue both parts together to mirror the OEM "all-in-one" key.
Materials Needed
- Magnets: Two 3mm x 10mm neodymium magnets (or just one if you plan to glue the parts together).
- The Chip: A compatible chip
- The tools + ship : @TODO Link coming soon . . .
Step-by-Step Instructions
1. Identify & Write to your Chip
- please read this post for a how to guide : https://www.can-amforum.com/posts/1342941/
2. Printing the Case
- Use the provided print profile.
- The profile includes a Pause Command. When the printer stops, insert your programmed RFID chip into the slot and resume the print to seal it inside.
3. Assembly
- Insert the magnets into both parts make sure they are in the proper orientation so they can stick together.
- If you want a one-piece key, glue both parts, this this case you only insert 1 magnet to the clip-on part.
- If you want the "Pocket Key" style, keep them separate. Simply clip the clip-on part to the machine, tap your pocket key to start it, and enjoy your ride.
Compatibility
This system works for all BRP machines using the RF D.E.S.S. ball-and-socket system from 2015 to 2026, including:
- Can-Am: Outlander, Renegade, Maverick X3/R, Defender, Commander.
- Sea-Doo: All models (Spark, GTI, GTX, etc.).
- Ski-Doo: REV Gen4 and Gen5 platforms (Summit, MXZ, Renegade, etc.).
License
This user content is licensed under a
Creative Commons Attribution-Noncommercial
Comment & Rating (15)