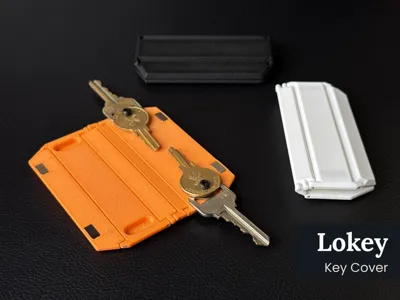
Lokey - Key Cover


Print Profile(1)
Bill of Materials


- 1mm x 150mm Aluminum Rods x 1: https://amzn.to/41I41yE
Description
Boost Me (for free)
If you appreciate my work and would like to see more of these projects in the future, feel free to support me with a free boost. Thank you so much!
Meet Lokey, the sleek, modern key cover. Tired of fumbling for the right key? Lokey transforms your daily carry with a clever, compact design that keeps everything you need in one secure, easy-to-use tool.
Features
- Powerful Magnetic Lock: A robust magnetic system snaps shut with a satisfying click, ensuring your keys are secure and won’t accidentally unfold in your pocket.
- Holds Up to 6 Keys: Comfortably store and organize up to six standard keys, transforming your messy jumble into a streamlined tool.
- Ergonomic Grip & Leverage: The rigid, thoughtfully designed body provides a comfortable grip and extra torque, helping you open even the most stubborn locks with ease.
- Sleek & Pocket-Friendly: Engineered for a perfect fit in your hand and your pocket, Lokey combines minimalist aesthetics with everyday practicality.
Required Hardware
For this build, you will need the following components:
- (4x) 10mm x 5mm x 2mm bar magnets
- (4x) 1mm x 150mm Aluminum Rods (exact length is flexible)
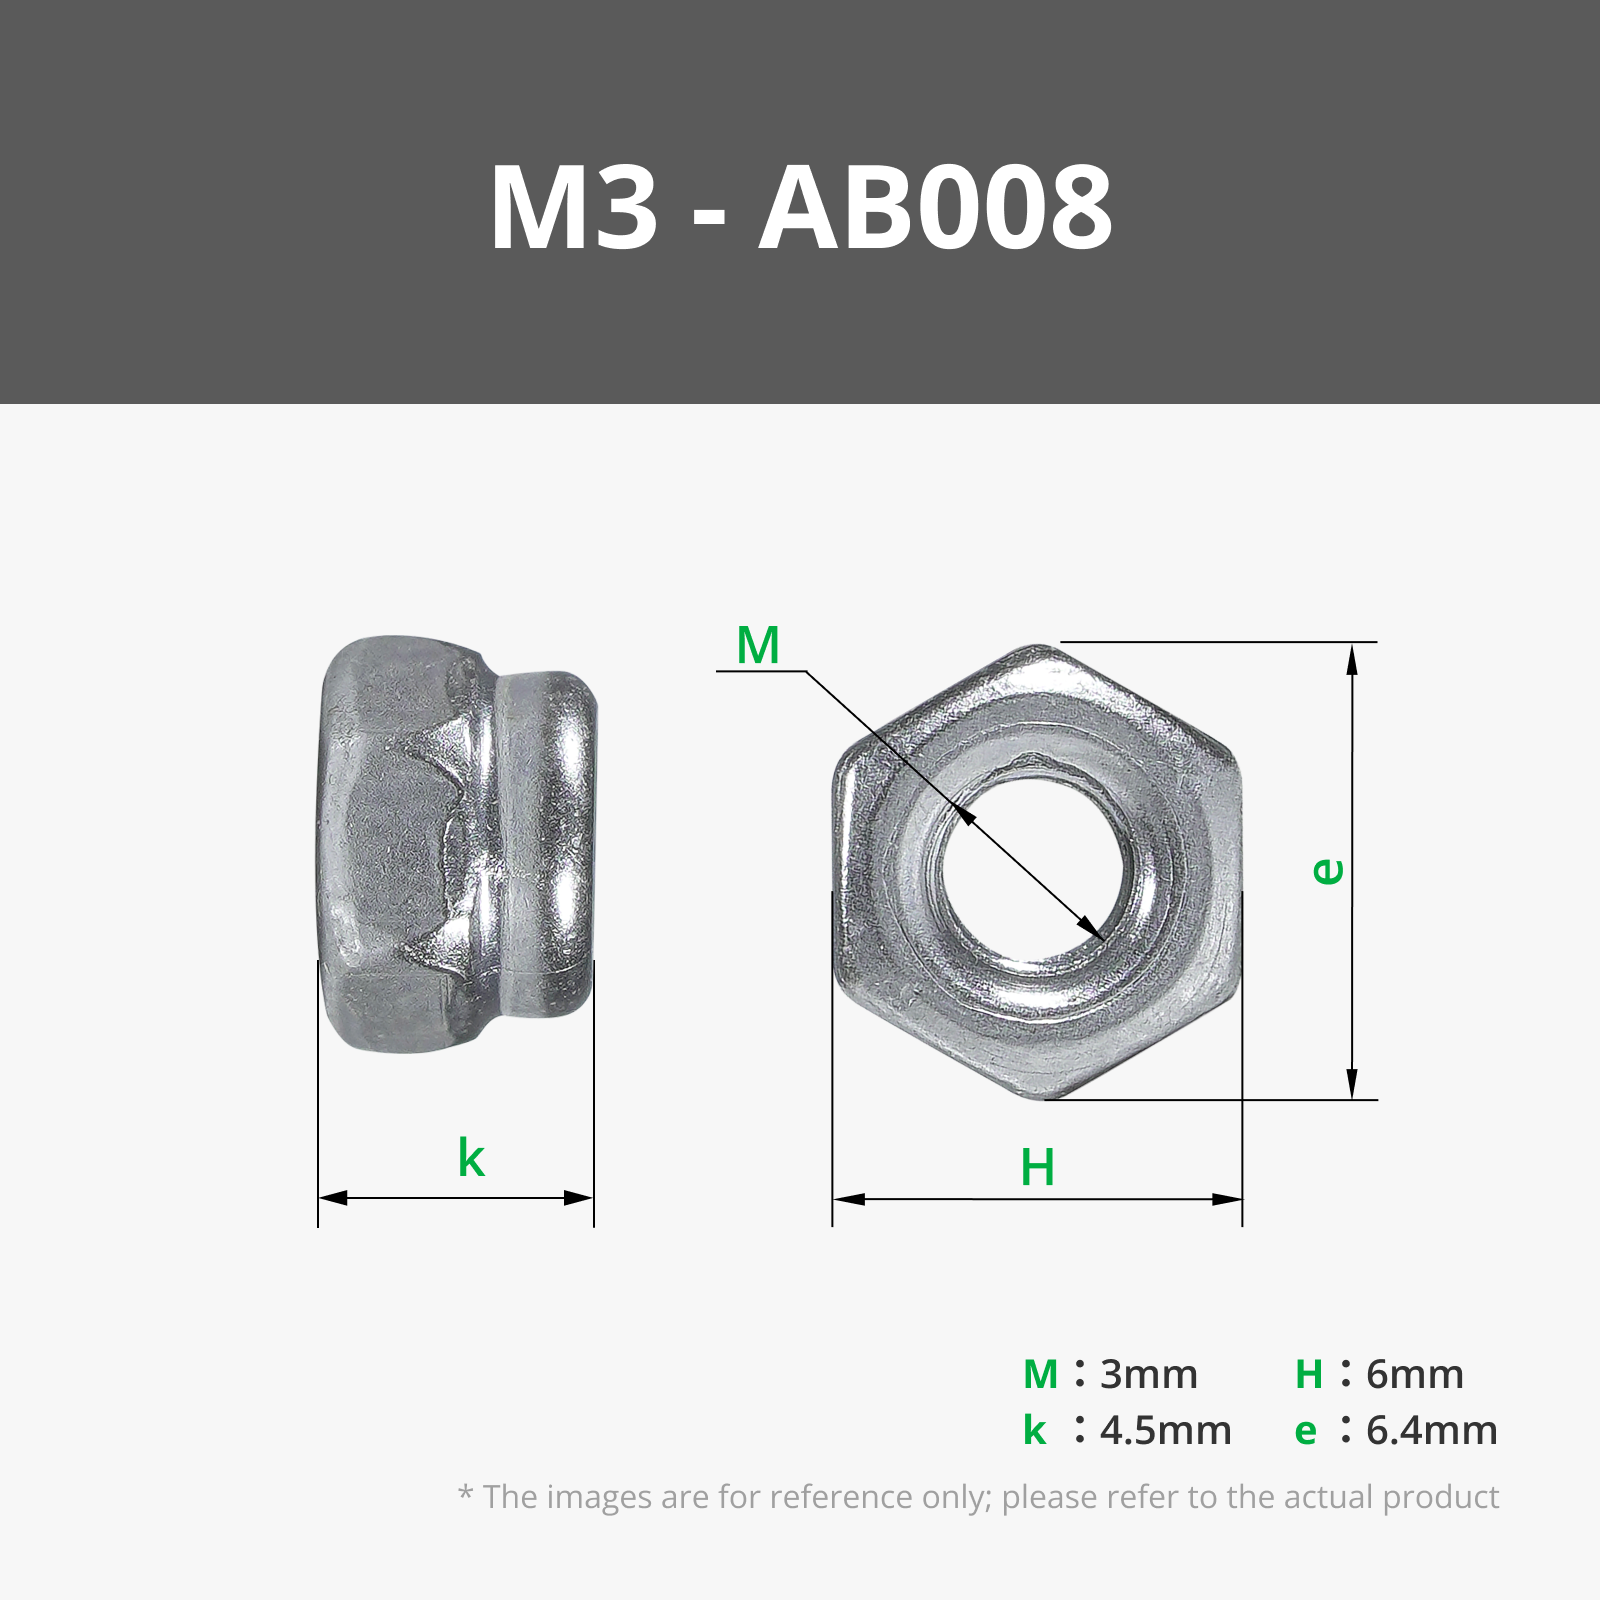
- (2x) M3 x 8mm Socket Head Cap Screws
- (2x) M3 Nylon Lock Nut (or standard nuts, if you enjoy constant retightening)
- (Optional) M3 Flat Washers (if key holes are oversized)
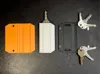
Assembly Instructions
- Arrange Printed Pieces: Lay out all printed parts to ensure you have everything in the correct orientation and order.
- Insert Aluminum Rods: Carefully guide and push the aluminum rods into the hinge joints. If you feel resistance, a small piece of filament may be blocking the path—gently clear it and continue. Trim the excess with flush cutters.
- Insert Nylon Lock Nuts: Press the lock nuts into their recesses on the backplate until they sit nearly flush.
- Install Keys & Screws: With the lock nuts in place, stack your keys and tighten the screws to your desired tension. A hex key or driver will be necessary.
- Enjoy: Get to know your new favorite tool. You’ll quickly discover the best ways to flick, open, and use it with a little practice.
Boost Me (for free)
If you appreciate my work and would like to see more of these projects in the future, feel free to support me with a free boost. Thank you so much!
License
You shall not share, sub-license, sell, rent, host, transfer, or distribute in any way the digital or 3D printed versions of this object, nor any other derivative work of this object in its digital or physical format (including - but not limited to - remixes of this object, and hosting on other digital platforms). The objects may not be used without permission in any way whatsoever in which you charge money, or collect fees.
Comment & Rating (2)