
Solar Panel Pole Mount with MPPT and Battery Case
Print Profile(1)

Bill of Materials


- 2x0,5 mm² Cable x 1: https://amzn.to/435iYe1
- Waveshare Solar Power Management Module x 1: https://amzn.to/4k9uI6i
- JST Connectors x 1: https://amzn.to/4k9TB1K
- 10W 12V Solar Panel x 1: https://amzn.to/3GFI8Zt
- 18650 LiIon Battery x 3: https://www.akkuparts24.de/Samsung-INR18650-35E-36V-3500mAh-Li-Ion-Zelle
- M3 Screws and Nuts x 1: https://amzn.to/3GKbV3b
- M5 Screws and Nuts x 1: https://amzn.to/4dboNv9
- HM-IP SWO-PR x 1: https://amzn.to/3GGtjWj
Description
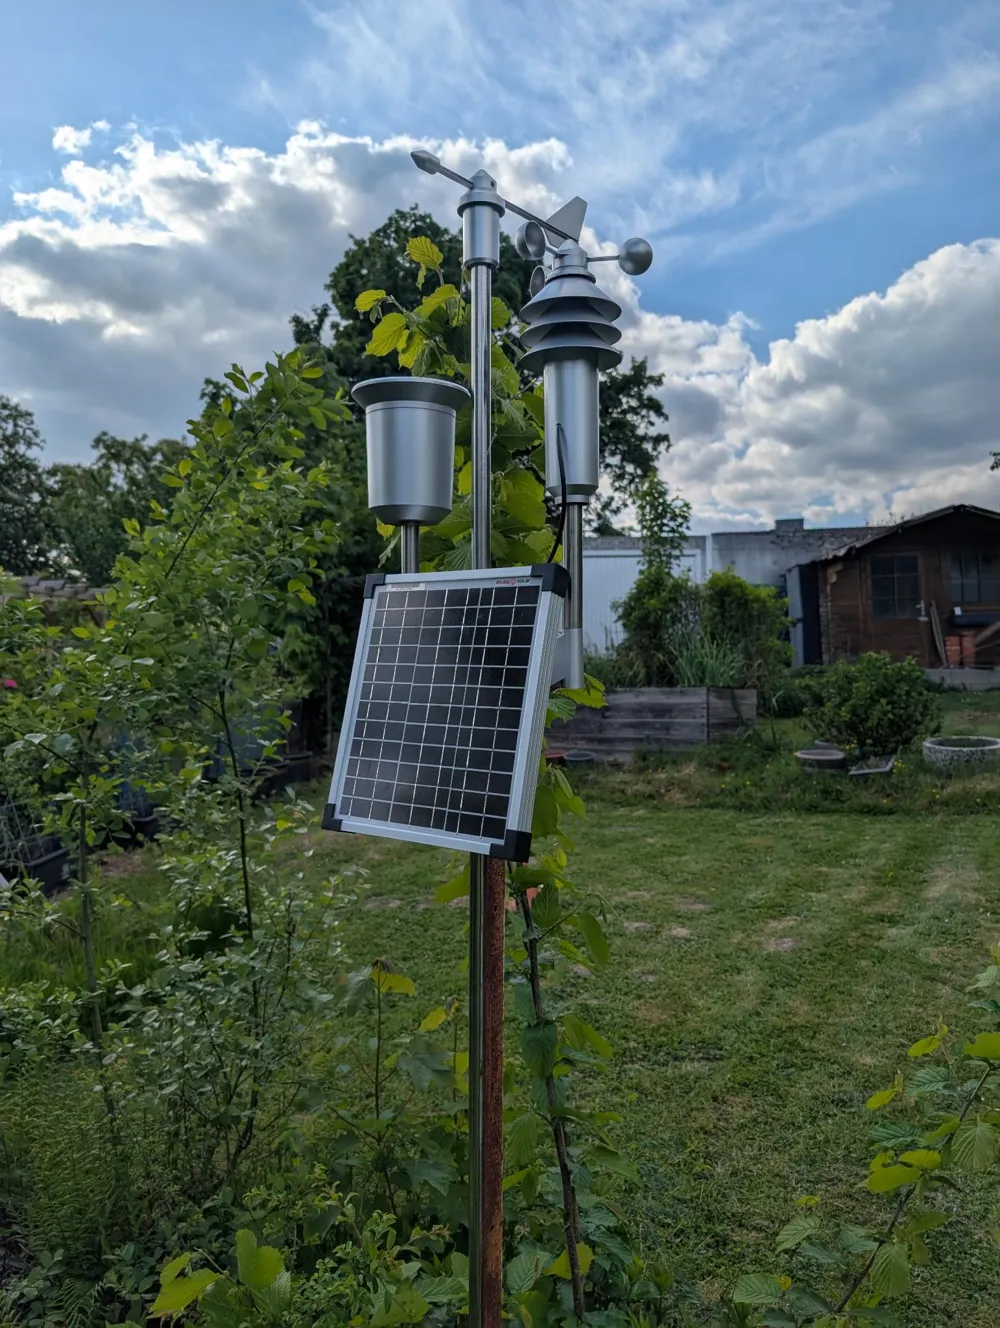
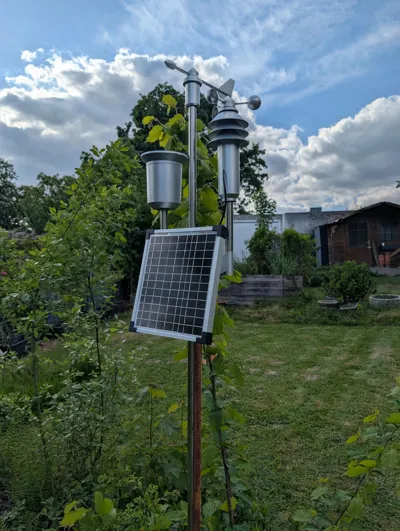
The battery of my Homematic IP HM-IP SWO-PR regularly died (probably due to age of the electronics). I got tired of replacing batteries every 3-4 weeks, so I decided to replace the batteries with a solar panel and LiIon rechargeable batteries. This setup will likely work for other weather stations or whatever device you want powered, as long the voltage is between 3V and 5V.
In my setup, the original power supply were 3 AAA batteries (actually 4,5V). The 5V output of the power management module works fine for that. When replacing 2 AAA batteries, some versions (mine did) of the power management module have a 3,3V output.
I used dummy batteries to connect the 5V output to the weather station.
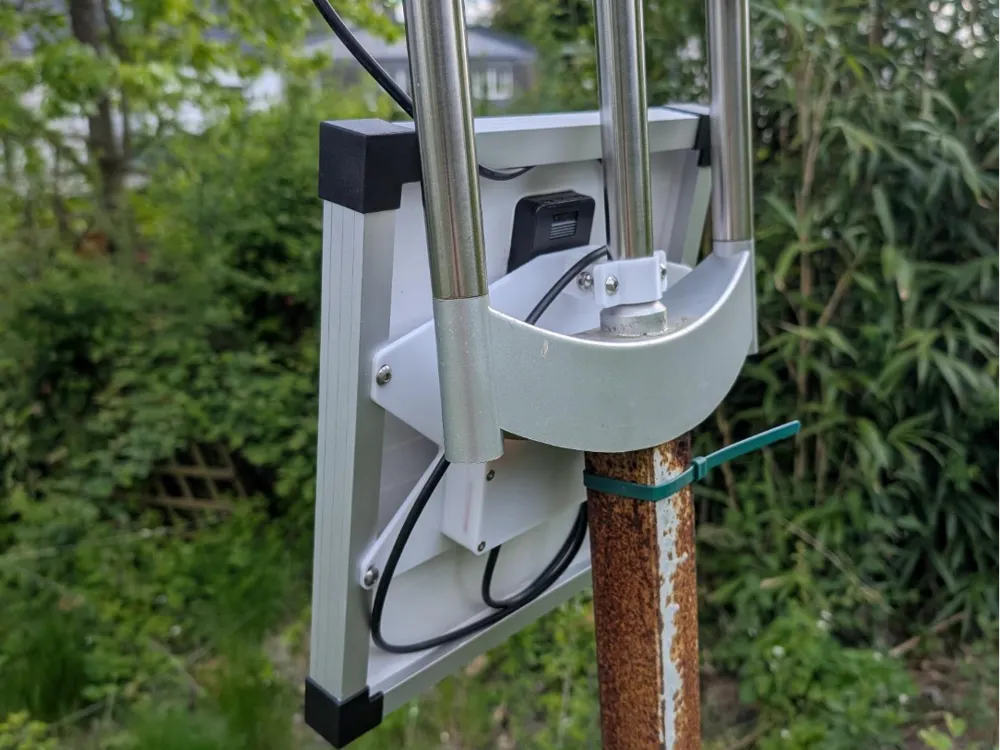
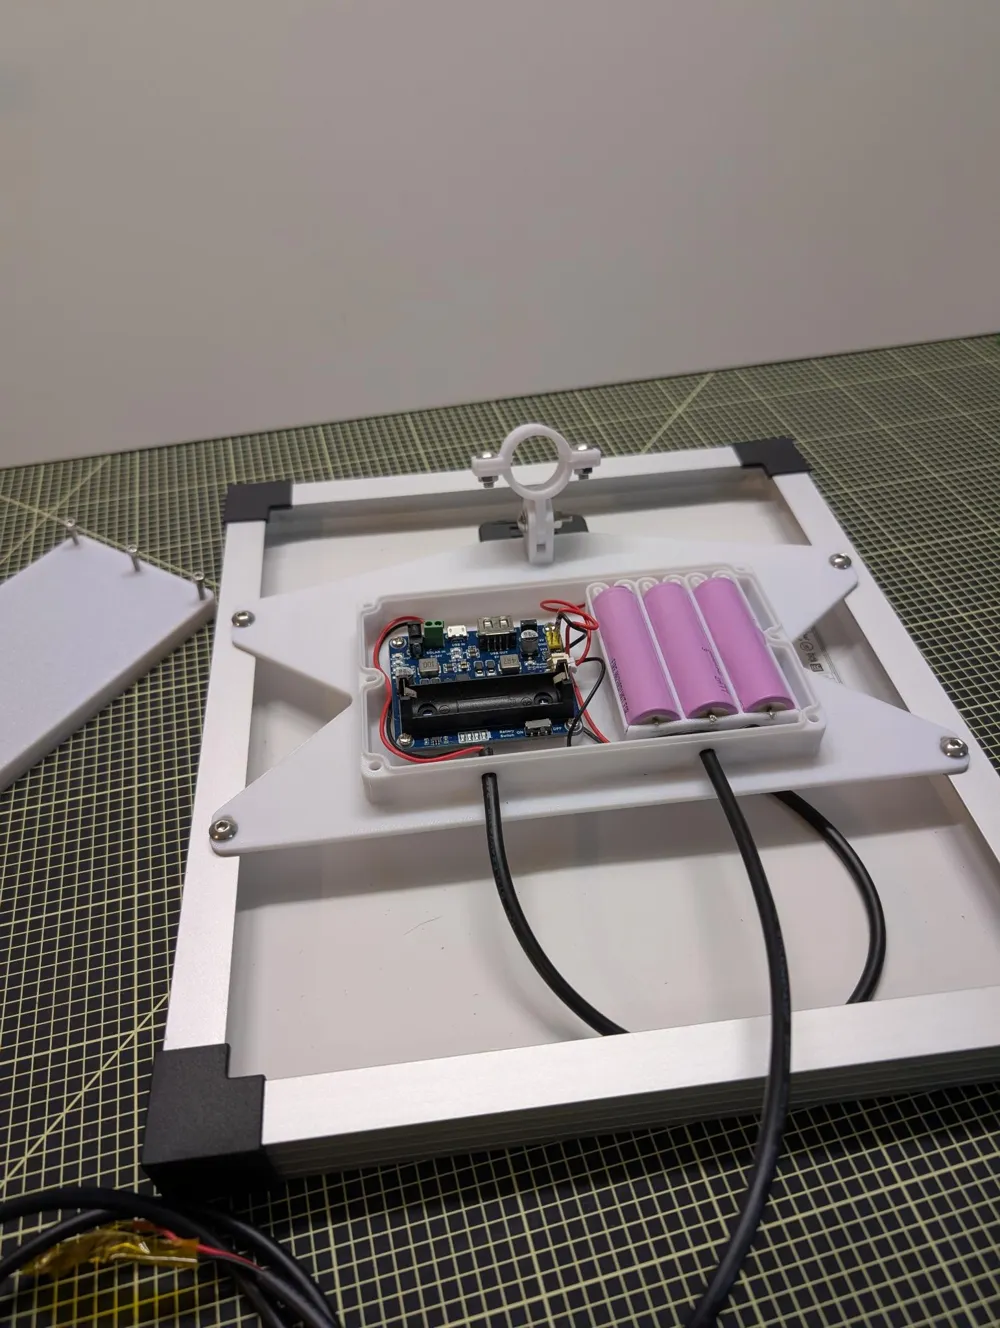
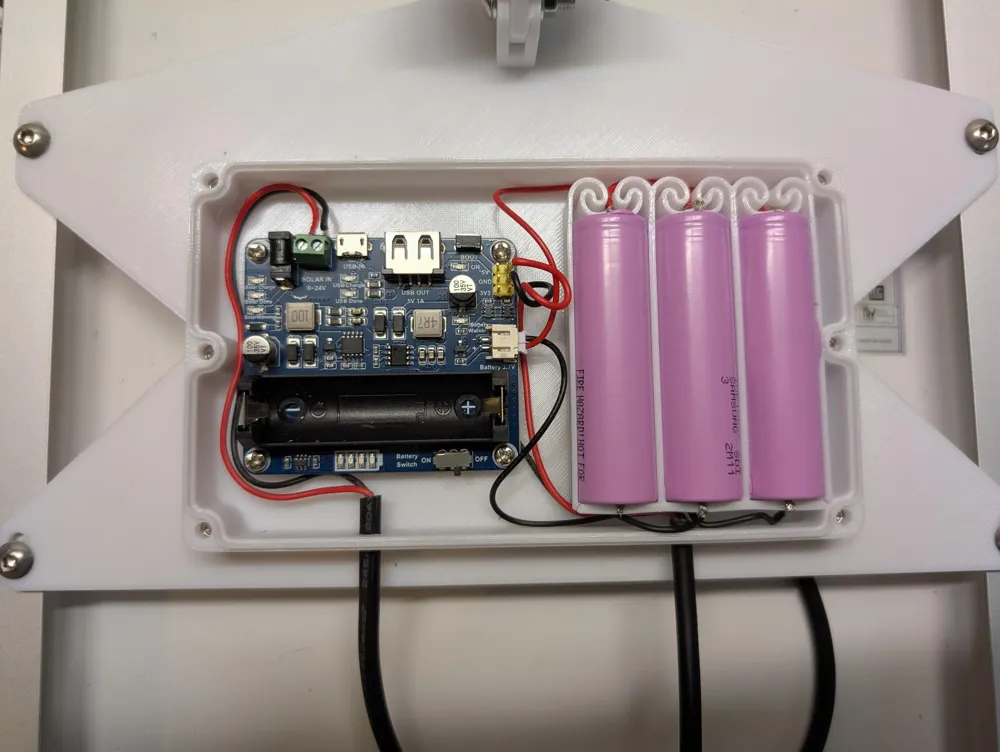
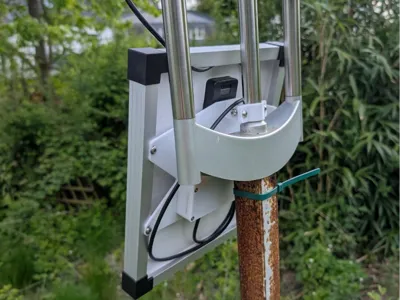
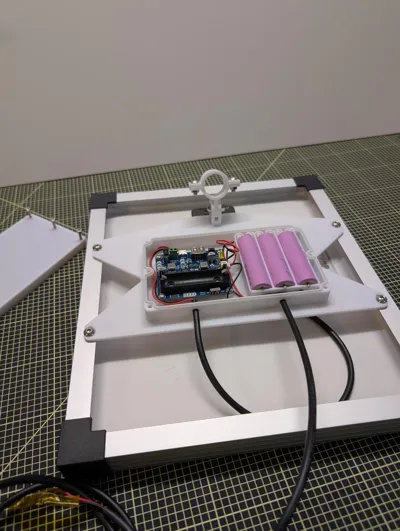
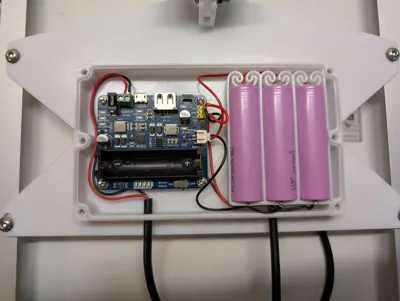
The setup is screwed in the mounting holes of the solar panel. All the electronics fit into the (hopefully) watertight case.
The watertight case was generated using an OpenSCAD model by pb-tec on Printables. The battery holder is by @vasichkin on Makerworld.
I designed the baseplate and pole mount in FreeCAD. The source files are attached If you need to adjust to the mounting holes of the solar panel or the diameter of the pole. The original dimensions are:
- Pole Diameter: 22,5mm
- Mounting holes in Solar Panel: 245x100+-5 mm
The three parts (baseplate, case and battery holder) were put together directly in the slicer. The uploaded version is the one I originally printed. Mind the pause at layer 66 to insert the M3 nuts while printing.
To seal the case, I used kitchen rubber bands.
Components
I used the following main components:
- Waveshare Solar Power Management Module: https://amzn.to/4k9uI6i
- 10W Solar Panel: https://amzn.to/3GFI8Zt
- 3x 18650 Liion batteries: https://www.akkuparts24.de/Samsung-INR18650-35E-36V-3500mAh-Li-Ion-Zelle
Other smaller parts are listed in the BOM below.
Considerations
If you consider printing this, I would recommend replacing the case in the print profile with the v2 case that I also uploaded (or even better generate your own case using OpenSCAD, so it fits your parts). In the v1 I confused the orientation of the middle screws and only noticed that they are on the short edge after printing (duh…). v2 has the middle screws on the long edges where they should belong. Also, I would recommend scaling the battery holder to 101%-102% (as also recommended by @vasichkin in the description of the original model), the batteries barely fit with my original 100% scaling.
Also, the power management module has several LEDs. I consider changing the lid to include a small window (e.g. with an acrylic glass insert) so the status can be monitored. (… or if you do not want them to be seen, do not print this in white, as the LEDs will shine through and light up your yard ;-) )
Assembly
- Connect wires to the connection box of the solar panel
- Wire up battery holder, connecting plus to plus and minus to minus, add JST connector
- Screw in power management module
- Solder power output wire to “5V” and “GND” pins
- Screw the baseplate to the solar panel
- Connect solar panel to “SOLAR IN” connector
- Insert batteries
- Connect JST connector to “Battery 3,7V”
- Insert rubber or silicone band to seal lid
Do not forget to “power on” the power management module before closing the case.
This remix is based on


License



Comment & Rating (1)