"Wind Your Business" Rope/Cord Winder Reel


Print Profile(3)


Description
Boost Me (for free)
If you like my designs, please consider boosting me to show your support!
***PLEASE CLEAN YOUR BED PROPERLY BEFORE PRINTING. DAWN DISH SOAP(Or Equivalent) AND HOT WATER THEN DRY WITH PAPER TOWEL OR AIR DRY!! NOTHING ELSE NEEDED!! THIS WILL ENSURE YOUR PRINT IS SUCCESSFUL***
## These models printed as shown but if you dont clean your bed properly and have adhesion issues, then you can add a brim or mouse ears. I test all my prints and it is proven to print as I set it up. ##
"Wind Your Business" Rope/Cord Winder Reel
I printed mine in PLA but would recommend using ASA, ABS, PETG, etc. for out door uses to prevent warping in heat.
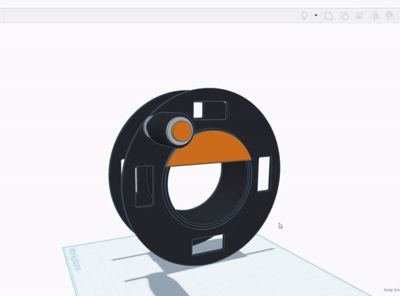
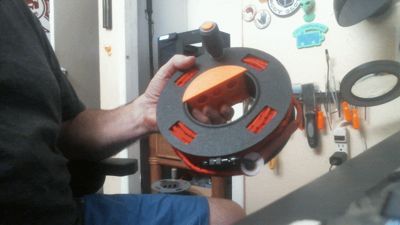
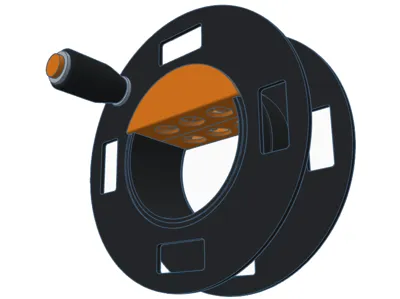
My rendition of a rope/cord winder reel Designed in Tinkercad for the purpose of storing my magnet fishing rope. Took some time but I think I just about got it all dialed in. 65ft of 6mm rope shown and fit just right.
Can also be used for Christmas light storage, hiking, rock climbing rope, camping or whatever you can think of.
## IMPORTANT make sure to insert "Knob Pin" through bottom spool hole BEFORE ASSEMBLING SPOOL or you may not be able to get it apart to put it in##
NOTES:
- The support in the grooves of the spool ends can be a little tough to remove but, if you can get a small pick or something under it you can usually pull to remove it in a big chunk (SEE PIC) I recommend using a Q-tip and applying a thin layer of grease or vaseline into the grooves to help the reel slide smoothly
Spool assembly is pretty simple, align the 2 inner slots with the inner tabs and press them together, you may want to add some glue as I did to make it a permanent bond.
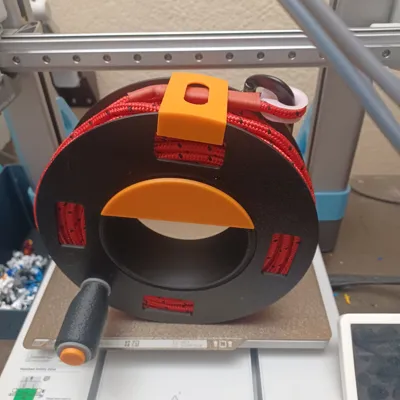
Center grip handle may be snug(Iput a thin coat of vaseline/grease on the protrusion before and it seemed to help it slide together) but place one half on each side of spool through the center hole, align the groove as you press them together. From my experience once you get the grips locked together they are nearly impossible to seperate without breaking them
The Knob I put "fuzzy" texture on it for cosmetic looks and grip.
The Knob Pin supports can be removed by first use a small pick or screwdriver etc to poke into the center hole at bottom move it around a bit and i was able to remove it all in one piece. The outer shell supports can be cut away with your cutters or pliers once you get it started it seemed to peel away pretty easily and slid off the end. It will fit very snug by design.
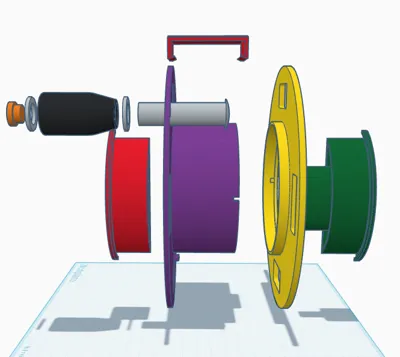
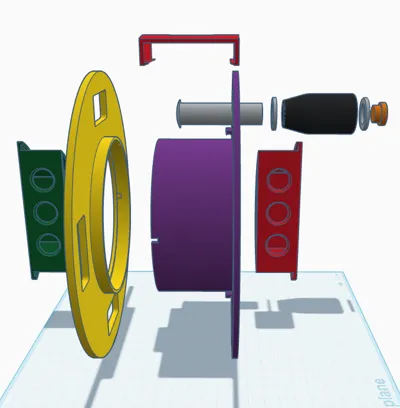
- Exploded view Below to show assembly


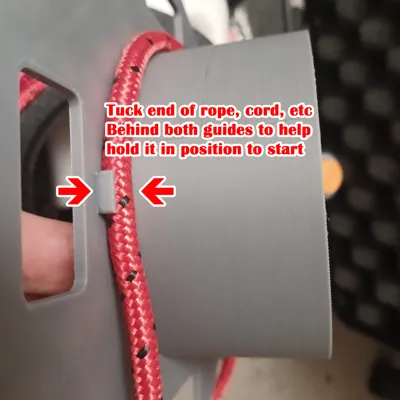
Changelog: added lock clip tie off to hold end of rope, string, cable, etc. 4/27/25
Membership
Join my Commercial Membership and enjoy selling rights for all of my models for as low as $3 per month.
License
You shall not share, sub-license, sell, rent, host, transfer, or distribute in any way the digital or 3D printed versions of this object, nor any other derivative work of this object in its digital or physical format (including - but not limited to - remixes of this object, and hosting on other digital platforms). The objects may not be used without permission in any way whatsoever in which you charge money, or collect fees.
Comment & Rating (56)