Rotho Evo Total Protection MMS Dry box


Print Profile(1)

Description
This is an MMS System within a box to keep the filaments dry. It has been inspired from the Bambu Lab MMS project here:
https://makerworld.com/en/models/89050#profileId-396991
The bearing covers and the washer are the same as the Bambu Lab MMS.
So, the Bambu Lab MMS is great but it uses a lot of filament and the enclosure was not really air tight. So I have decided to inspire from this great work to make a design that would fit in boxes I already have: Rotho Evo Total Protection which come with a gasket ensuring that it is air tight. I wanted to reach following goals:
- Air tight to keep filament dry for a long time
- No need to open the box to change the filament that is used, so it stays air tight until a spool is empty
- Easy to move, so I can have multiple boxes and I can quickly use the filaments
- size should stay similar to the box itself
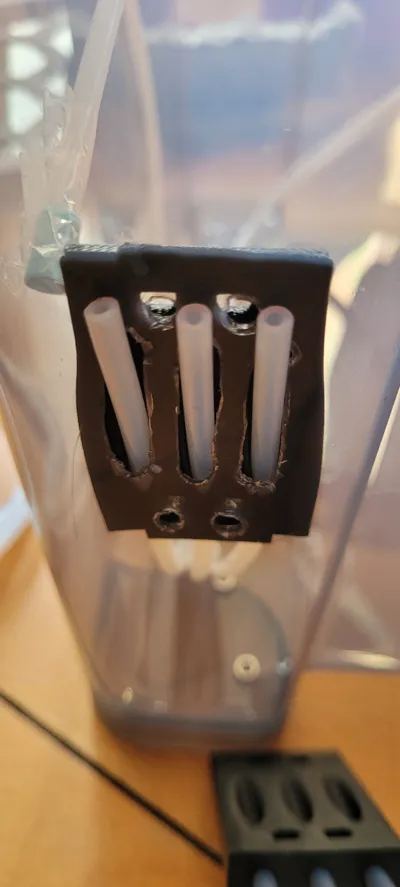
The box can hold 3 spools and in order not to have to open the box to rewind the spool when I need to change filament it has a side part with 3 PTFE tubes inside the box with a dead end. When you want to change the filament you do following steps:
- Unload filament
- Once the filament is cut detach the tube from the MMS to the Printer (I use: https://makerworld.com/en/models/234822#profileId-251213)
- Pull out the filament from the printer
- Pull in the filament to one of the tubes inside the box
- Load the filament
- Once loaded connect attach both tubes
This resulted this model. To build it you will need:
- 2x 8mm rods of approx 28cm long
- 12x 608ZZ bearings
- approx 3.6m of PTFE tube
- 8x M3 approx 10mm screws with nut
- a few meters of adhesive foam
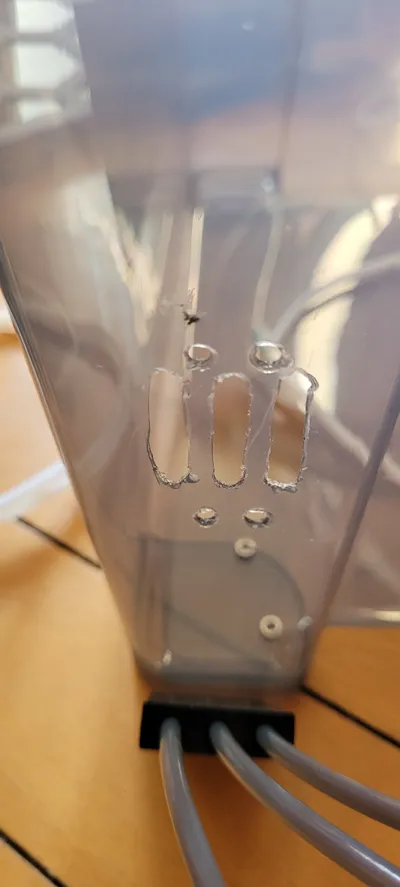
- a soldering iron to make holes in the box and a cutter to make the cut out nice and flat
For the Filament output there is a helper part which allows you to make marks where you need to make the 2 first holes. Do the holes and place the elements, then do the other holes. On the inside part, tape some adhesive foam to ensure air tightness.
For desiccant I made bags out of some textile, feel free to design a receptacle :).
Important note: As PTFE Tube might have slightly varying OD, use the last plate to test it out before printing the real parts. If it's too tight, adapt the value in Quality → Precision → X-Y hole compensation.
I won't make a more detailed assembly guide for now, but I might do in the future if the need arise.
Comment & Rating (0)