
Cyberpunk Dice Tower - High Detail Illuminated Model





Print Profile(5)
Bill of Materials




Description
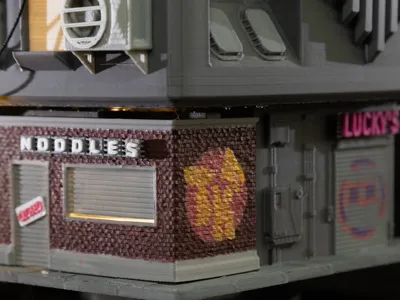
This dice tower include high-detail in a 360-degree miniature with many LEDs for a cyberpunk vibe. No soldering is required and all of the electronic components are available from Maker's Supply.
Model Features
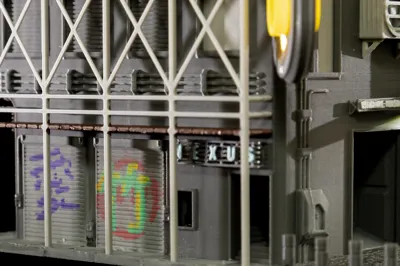
| Details surrounding the model include textures, lights and templates for layering on graffiti in addition to using Make My Sign to customize one of the signs. |  |
| I've tried to add as much detail as I could and also stencils are included so that you can paint on graffiti to the walls. |  |
| Although not minimal, the tower should be small enough for most tables & works for standard-sized dice. Larger dice may get stuck. |  |
Post-Processing, Painting & AMS
- The print profile utilizes AMS in a limited capacity but AMS is not required. All parts can be printed in single colors and painted - I utilized painting for the version of the model in these photographs.
- For the Make My Sign portion, you can choose to not orient the sign face-down or use manual filament swaps if you don’t have access to AMS.
- I painted portions of the model using acrylics after printing the core components in a dark gray base.
- The graffiti templates work well with paint pens such as Sharpie Creative markers. I like to overlap them or rub off some of the paint while still wet. Also, it can be fun to use the template as an outline for an overlapping color.
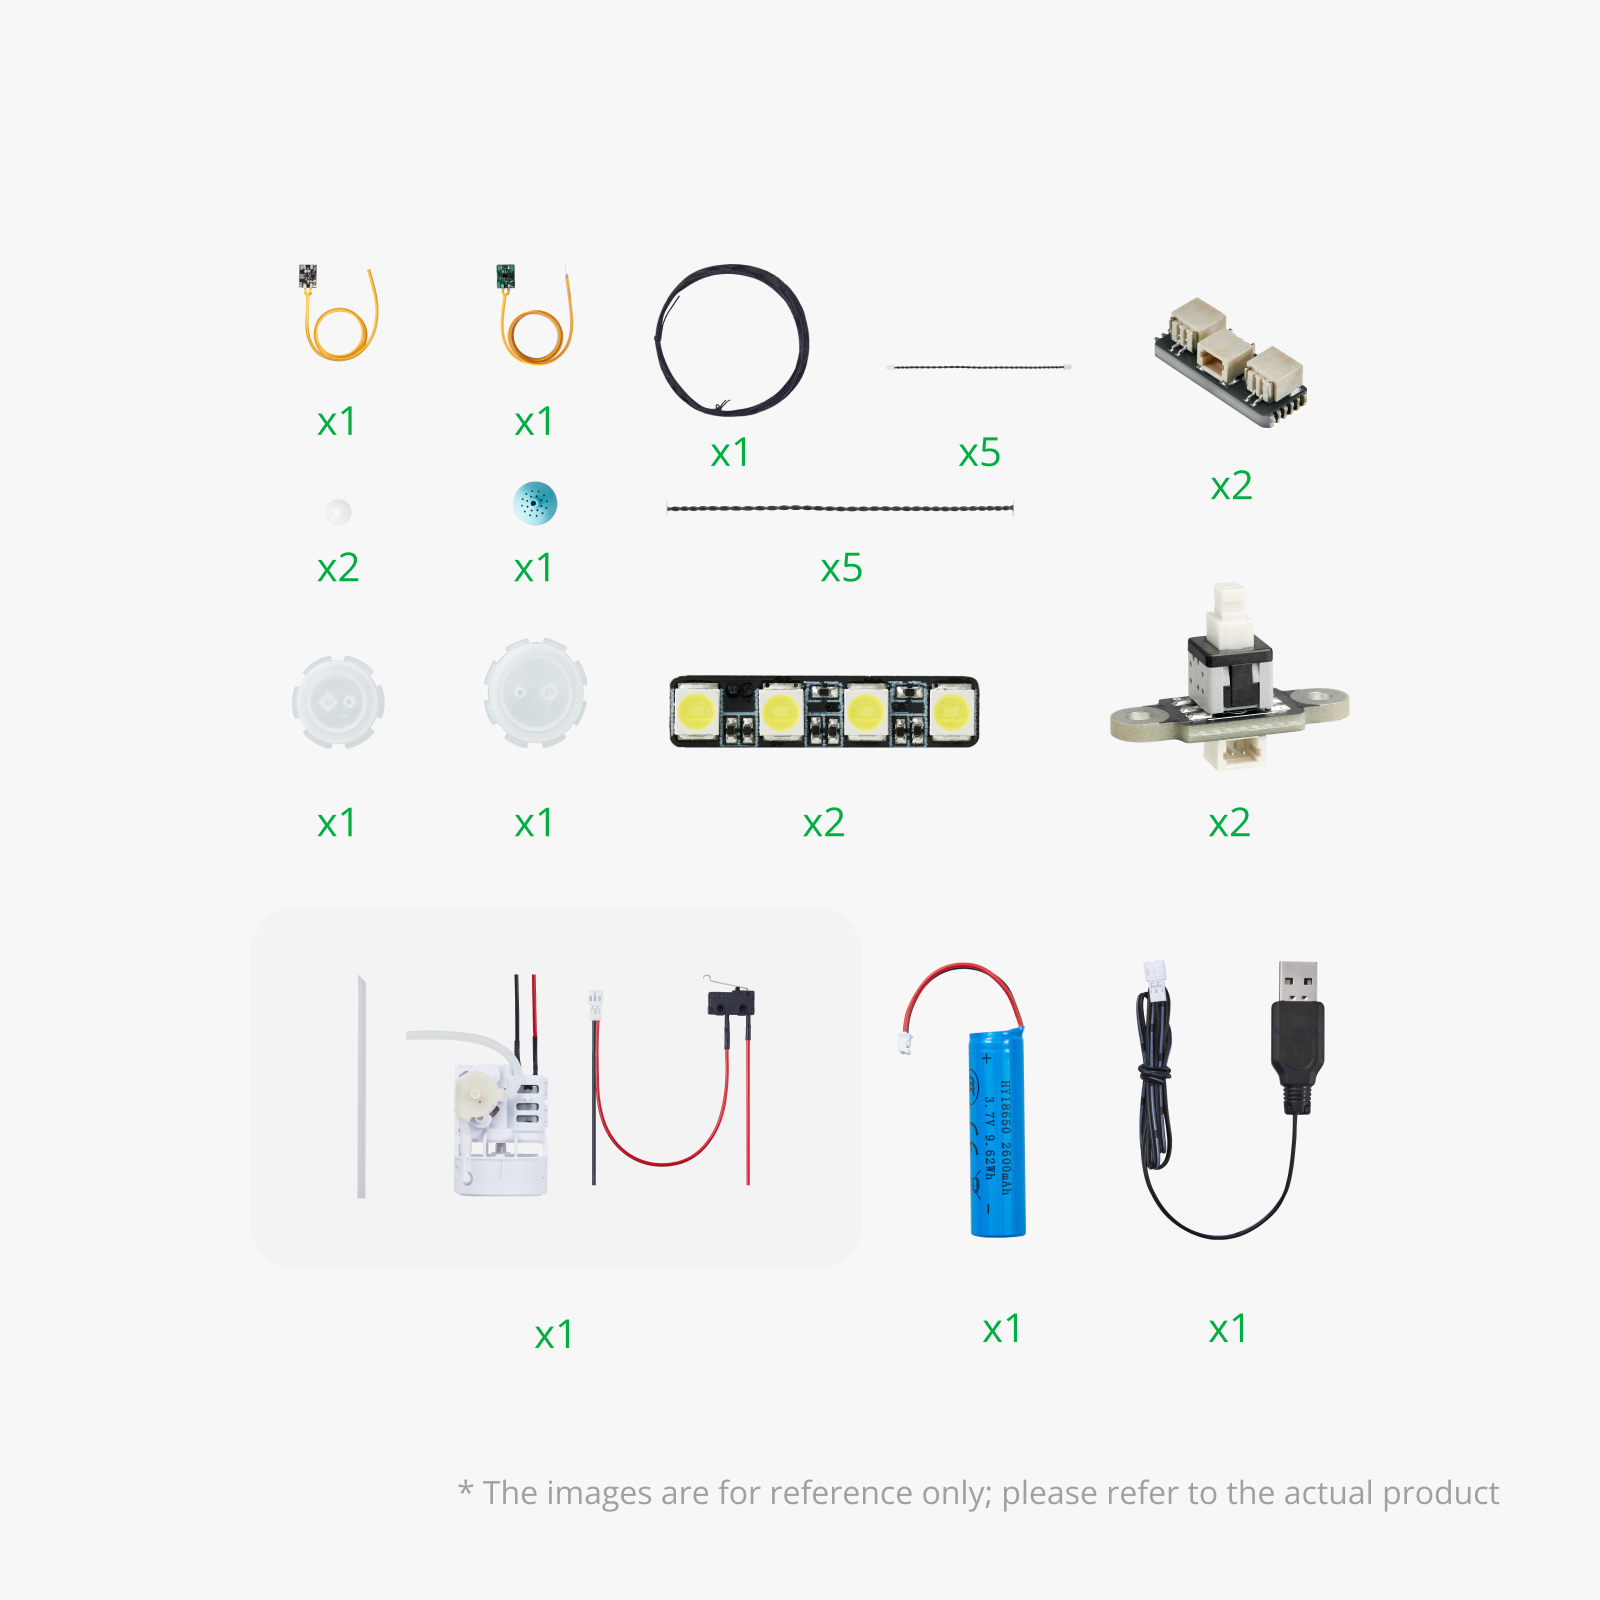
Updated Bill of Materials & Instructions
This model was updated in 2026 to include a new set of electronic components. While staying very close to the same price, this change results in:
- Easier assembly with fewer tight spaces within the model.
- A single power source (the original used 2 battery packs)
- Rechargeable battery instead of AAAs
- Fewer total components
Not sure if you have components for the 2024 or 2026 version? The easiest way to know is that the 2026 version includes the Bubble Kit. Although the bubble portion isn’t used, this didn’t add cost to the Bill of Materials since it allowed for me to remove an additional LED and Power Distribution board. Plus, you have a bubble kit to use in other projects!
Did you buy components for the old version? Don’t worry - you can find the assembly instructions attached in the documentation and separate profiles for the ‘2024 version’ in this project.
Printing tips
- Supports are required for the main base to support the cantilevered portions of the building. I did not use support for the bridged sections at the tops of doorways and windows.
- The main base and air conditioners can be printed in a textured plate but I would recommend smooth plates for the remaining components as the plate side will be visible.
- I have printed this model on a P1S. Although a profile is available for bed slingers such as the A1, I have not printed the models on a bed slinger.
- Filaments used in these photos were Bambu Matte & Basic PLAs as noted below. Translucent/light color (not transparent) PLA should be used for sign letters and window screens. Quixel scans were utilized for the concrete bollards along with Kit Bash textures.
Updates
- 5/21/26: 2026 Version uploaded with revised Bill of Materials & assembly instructions.
- 2024 version is available in a separate print profile and a separate assembly PDF.
- Additional tweaks to 2024 version (for accessibility improvements for power buttons) made on 5/31/26
- 5/5/25: Slight movement of one sign on a plate to restore A1 compatibility within the Handy app.
Boost Me (for free)
If you enjoy my models and would like to support me, please consider sharing a boost!
Membership
Want to sell prints of my models? This Commercial Membership grants you a license to all of my MakerWorld models!
I love creating models to share for free, personal use. If you enjoyed this model, please consider buying me a coffee or joining me on Patreon.
Documentation (2)
License

You shall not share, sub-license, sell, rent, host, transfer, or distribute in any way the digital or 3D printed versions of this object, nor any other derivative work of this object in its digital or physical format (including - but not limited to - remixes of this object, and hosting on other digital platforms). The objects may not be used without permission in any way whatsoever in which you charge money, or collect fees.


Comment & Rating (301)