I update, revise and improve my design for my fixes very often. Please only use my Print Profile (Labelled as Designer or SPStudio) to ensure this fix is updated & work well. Profile with Non-Designer tags may be of poor functionality or non updated model.
Click on Like if this model helped you in some way. It is very important and will help increase the exposure of this design to more people who might need it. Cheers!
Announcement
New and Improved V2 Versions for the Ams Buffer Fix Before Buffer and After Buffer have just been released. Do check them out in my profile to see what are the improvement. Thank you for your continuous support.
Introduction
Failed to pull back filament error can be caused by multiple different variables & factors. This is a part of an series of Ams fixes that i have designed which can complement each other when used together. I do suggest you install all my fixes together for the 0ptimal effect to help your filament travel properly across the entire system which in turn can help improve, reduce or remove any potential Ams errors.
I have grouped all fixes into their respective Collection for ease of searching what to install.
V2 Collection are improvements done on the shortcoming of V1 Collection. Feel free to try V2 Collection and if it doesn't work properly then you can try the V1 Collection. You can easily find each of the Collection by clicking on the Collections tab on my profile.
Unfortunately there isn't a single fix that can 100% work for everyone. What works for others, may not work for you but my fixes is definately a great place to start and have worked for majority of the users. My fixes are precisely measured then modelled. A Proper Fix would have the highest chance to reduce or solve the error.
If you are too bored to read the entire lengthy write up explaining the need for this fix, here is the TL:DR.
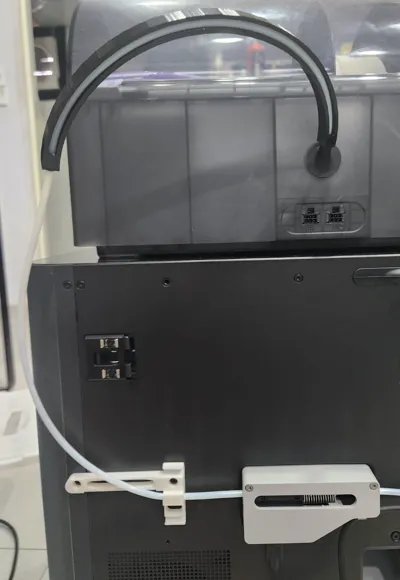
What is this? Ams Fix - Stack the Ams on tp have a Ptfe tube holder that is curved, bent and also compressed in a way that it will prevent any deformation of the Ptfe tube by gripping the tube at the middle part of the mount yet it allowed the front part of tube to move and flex within an acceptable measured range.
Who needs this fix? You encounter problems and errors during printing when you attempt trying to stack your Ams on tp of your Printer and Bambu Labs advice to you is place the Ams on the right or left side of the printer then this is the fix for you.
Have this fix been tested?
This fix have been tested for on 1 X1C, 1 P1P and 2 P1S for than 92200 retractions.
Why choose this fix instead of other similarly designed fix?
This is ez to print but yet its pretty precisely measured for the angle of the curvature. It looks like a semi circle but i can assure you its not just a semi circle holder. The degree to the bend and curve even down to the 2 ends how its designed have been measured and after countless trial and error i arrive at this is the proper curvature that will allow the filament to pass through with a smooth movement with the least amount of friction.
Installation Video
Plz look carefully at how the different 2 ends, one round hole one square hole is installed. It's very crucial please follow exactly.
Please do not thread the Ptfe along the curvature. As per install instruction you should go in 1 end then the next end then insert the cable into the rear of the Ams then adjust the tip of the end to near the exit. Then finally you press down the rest of the tube into the fix.
Running Loading And Unloading, Look Carefully to see how the filament go through and the mount moving. If your set after install looks very differently means you could have installed it wrongly.
This part have to be as close to the Ams exit as possible. Also make sure you push the Ptfe tube all the way INTO the Ams before you align this part to be close to the exit. Then finally you press the Ptfe into the mount at the middle part which will tightly hold the Ptfe.
Important Notes:
Note 1: Please follow the instructional video carefully its very important.
Note 2: The Ptfe tube in the holder is designed to move and flex as the filament go through it. Its intentional and there must be at least 10 to 15 cm of space behind the printer for the measured flexing motion to happen.
Note 3: Capricorn Ptfe will not work unless if its the same O/D as the Bambu specification tube
Note 4: The fix is designed to be tight in the middle part. Its normal as stated above it helps to ensure the tube remain in the proper curvature angle. You will need to press the Ptfe into the middle part of the holder. The end that connect to the rear of the Ams is designed to be loose (Square End) and able to flex easily. The other end (End with a round hole) is designed to let the Ptfe tube pass through snugly. If this sounds confusing then please follow the installation video carefully.
Note 5: This fix will work on all Ams including Hydra or Non Modified Ams.
Important
This would be the most ideal route for the Ptfe tube if your Ams is on tp of the printer. Its basically a huge C. Please try to make the Ptfe route like this. The most ideal length of Ptfe is 62cm IF your Ams is on tp of the printer with NO riser. 62cm will be able to give you this perfect route.
If you have a riser just adjust the route to be somewhat similar for the proper effect.
What Mod / Fixes / Enhancement do i offer?
Please don't download the wrong one. Only those in the photos below is designed by me who painstakingly took a lot of time to measure carefully and design just to get it working. #SupportOriginal Love you guys for all the support so far!
Friction - The cause of most of the Ams filament failed to retract problem.
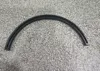
As shown in the following photo, the Ptfe tube that connects the Ams to the Ams Single Buffer HUB may and is often bent in an angle due to the printer placement like too close to the wall or foreign objects pushing against the Ptfe tube behind the printer or simply because of the height or placement of the Ams unit.
All of these creates bends or pressure on the shape of the Ptfe tube in turn creates a lot of friction, as the Printer and Ams is equipped with multiple sensors, these friction will cause filament not passing through the Ams to the printer smoothly and thus causing the Ams Failed To Retract Filament Error and similarly related errors.
This information is also written in Bambu wiki
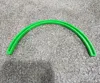
So what is the possible solution to the problem? Firstly we need to reduce friction for filament passing through Ptfe tubes? Simple! A good curvature Angle. If we optimise the angle of the Ptfe it will allow the filament to go through with the least amount of friction and pressure.
So what i have created to solve the problem? I have measured then created about 20 different test prints of curvature needed to allow the filament to move from the Ams to the printer extruder smoothly and freely and retract back with the least amount of pressure and friction. This fix can solve also wear issue on the Ptfe tube as less friction means less wear.
What do i need in additional to installing this printed fix part? Nothing.
Additional Notes
The error itself is complicated and non definitive. Whatever cause the error today might not be the same area that cause the error again, same with person A and Person B setup, as the error itself is mainly due to tension with friction triggering the sensors in the machine.
I would suggest you download and try and install all my fixes together for the proper effect as together they will ensure a smooth delivery of the filament with much lesser friction (read write ups) and hopefully that will help and reduce or resolve the error. If you use only one or 2 of the fixes the error could still happen as there are still other area might still be causing excessive friction.
This user content is licensed under a Standard Digital File License.
You shall not share, sub-license, sell, rent, host, transfer, or distribute in any way the digital or 3D printed versions of this object, nor any other derivative work of this object in its digital or physical format (including - but not limited to - remixes of this object, and hosting on other digital platforms). The objects may not be used without permission in any way whatsoever in which you charge money, or collect fees.


Comment & Rating (931)