Gridfinity Drawer for US General Series 2 Tool Box
Gridfinity Drawer for US General Series 2 Tool Box


Print Profile(3)


Description
I've finally sat down and documented my way of implementing Gridfinity grids in the Harbor Freight 26" toolbox i have.
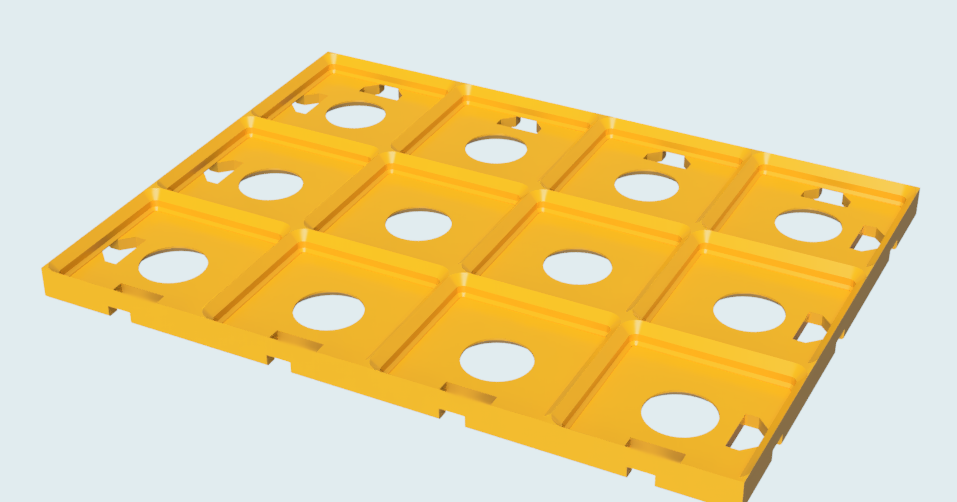
Drawer Layouts
The internal space of each drawer is 546mm by 490mm. My Printer can print a maximum of 256mm x 256mm, so the biggest grid i can print is 6x6. The drawer can handle 13x11 bins, and has 22mm left on the sides and 38mm left on the front/back. You will need 572 6x2mm magnets per drawer.
My grid layout is therefore like this:

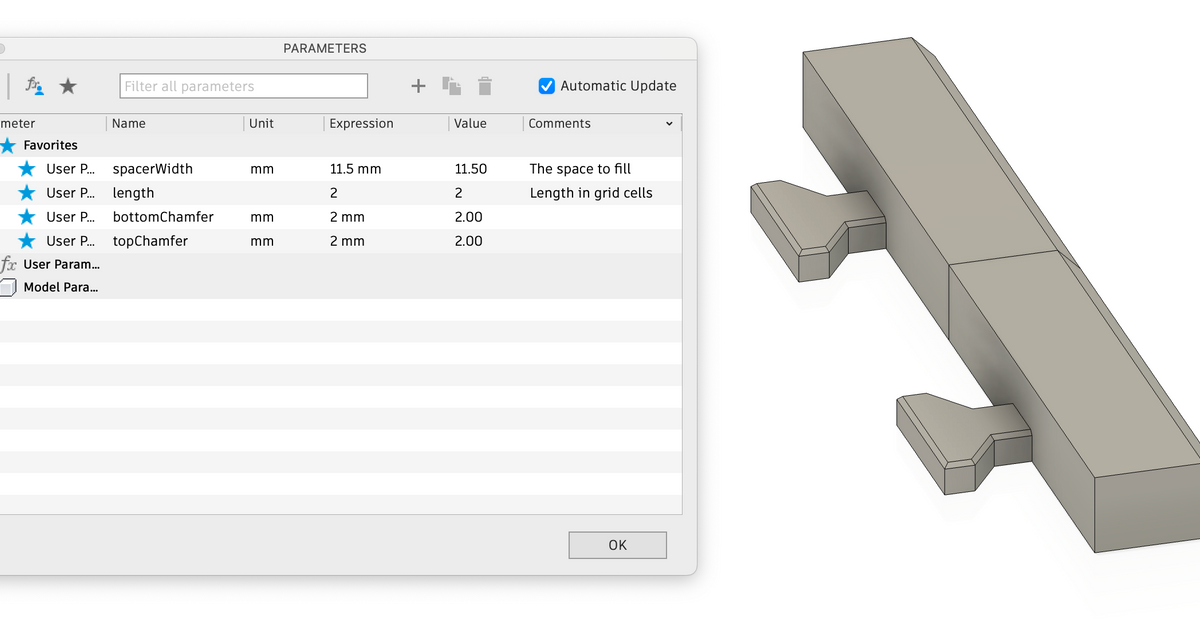
On the front spacer i added a little “wall” so i could use it to drop long drill bits, rods, or extenders. It's simple but makes more use of the drawer. I also added notches where the drawer hardware would interfere with the spacer.

Bin Heights
It has 8 drawers of different heights. Here are the measured heights and tallest possible bins for each drawer. Thanks to the spacer, you don't hit the drawer lip and can use the full height of the drawer even on bins in the edge grid.

I have been using 5U for the first three drawers with no issue, even leaving the “rubber” mat that came with the drawer installed under the gridfinity grids. However, my suggestion is to stick with 8U for drawers 4 and 5 - the slack between the drawer and the drawer above is too tight and either it won't fit well (due to production tolerances of the drawer and drawer bends - bins in middle vs edge of drawer will have slight height differences). In this picture, blue is 8U and Purple is 9U. The drawer closes with both, but my opinion is that purple is too tight. It's probably the same for drawers 7 and 8 - stick to 19. I didn't try it, though - let me know if you do try.

Print Settings
Important: To print 6x6 you will have to change the printer settings and remove the “bed exclusion area”. To print the 6x6 do not use the Bambu Handy app. Bambu provides instructions here:
https://wiki.bambulab.com/en/knowledge-sharing/print-volume-limitations . Make sure you use the little tool Bambu provides in that article.
Other than that, nothing special - use the default slicer settings. For some long spacers it chooses to add a brim, but I hate brims so I turn it off and it worked just fine. YMMV.
I have printed with 0.4mm nozzle and .2mm layer height, and aslwo with 0.6mm nozzle and 0.3mm layer height and the difference is practically invisible. 0.6 will be much faster.
Comment & Rating (3)