
Easter Garden - Kit Card Set
Print Profile(4)


Bill of Materials
















Description

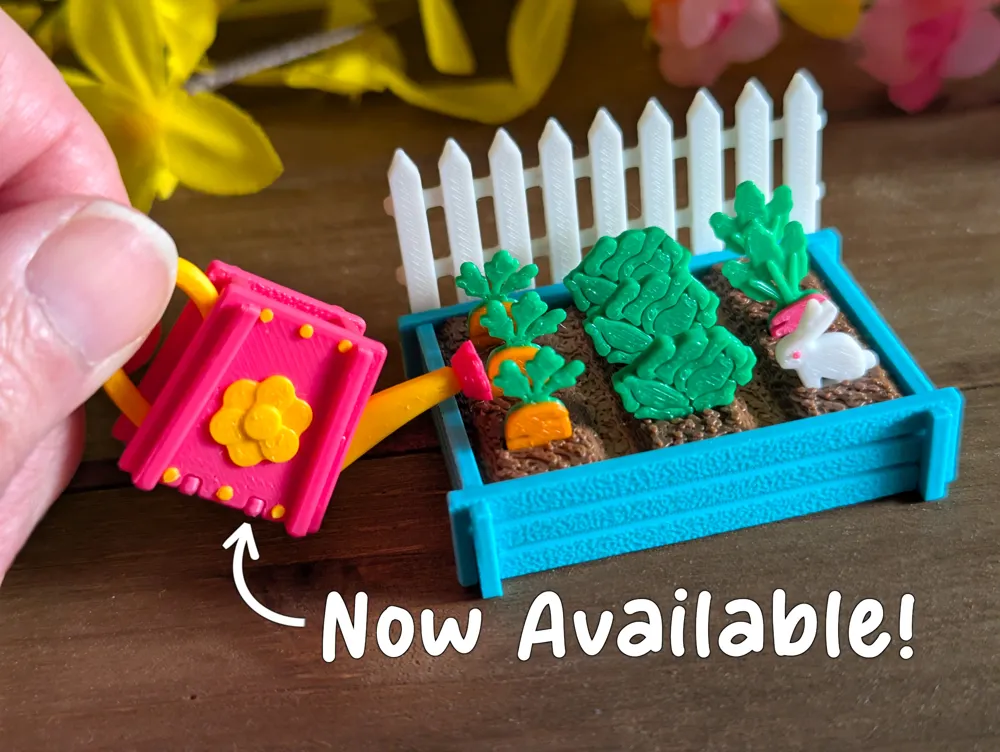
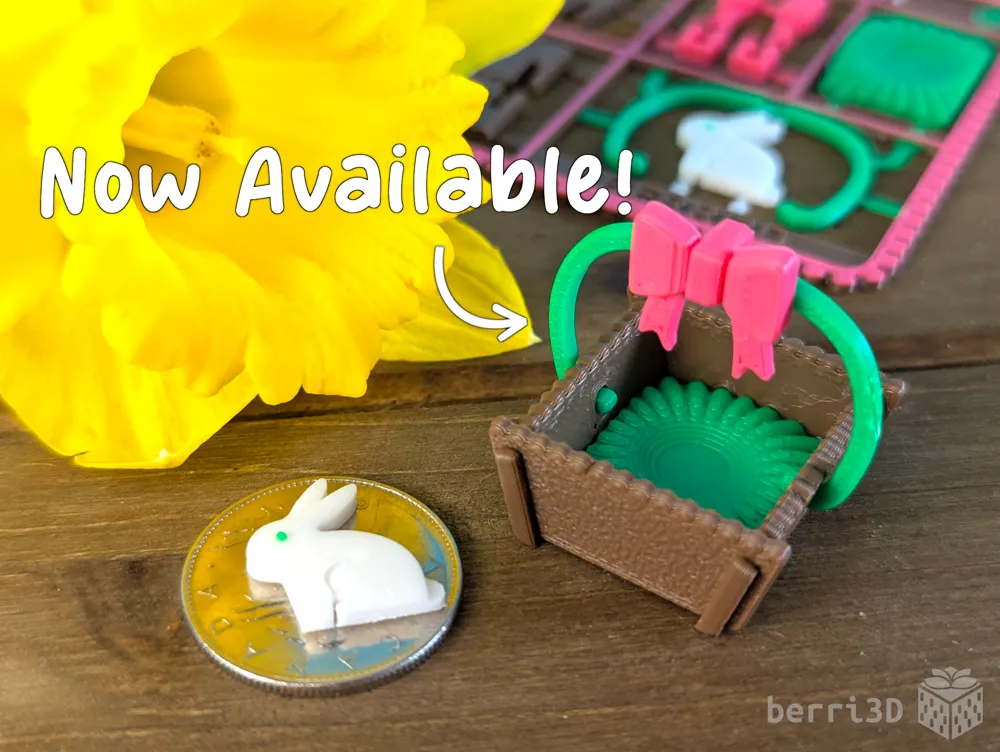
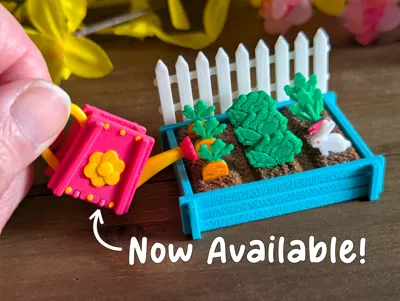
Mini Garden Accessories now available!
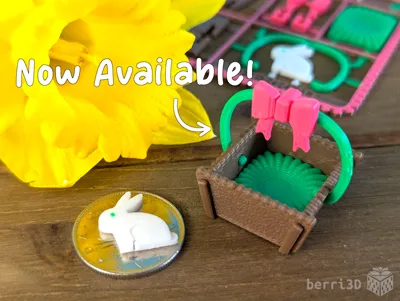
Easter (or veggie) Basket: https://makerworld.com/en/models/2613733
Watering Can: https://makerworld.com/en/models/2667424
🥕 Before you print: Please read Special Considerations below 🥕
🧼 Clean build plate is a must 🧼
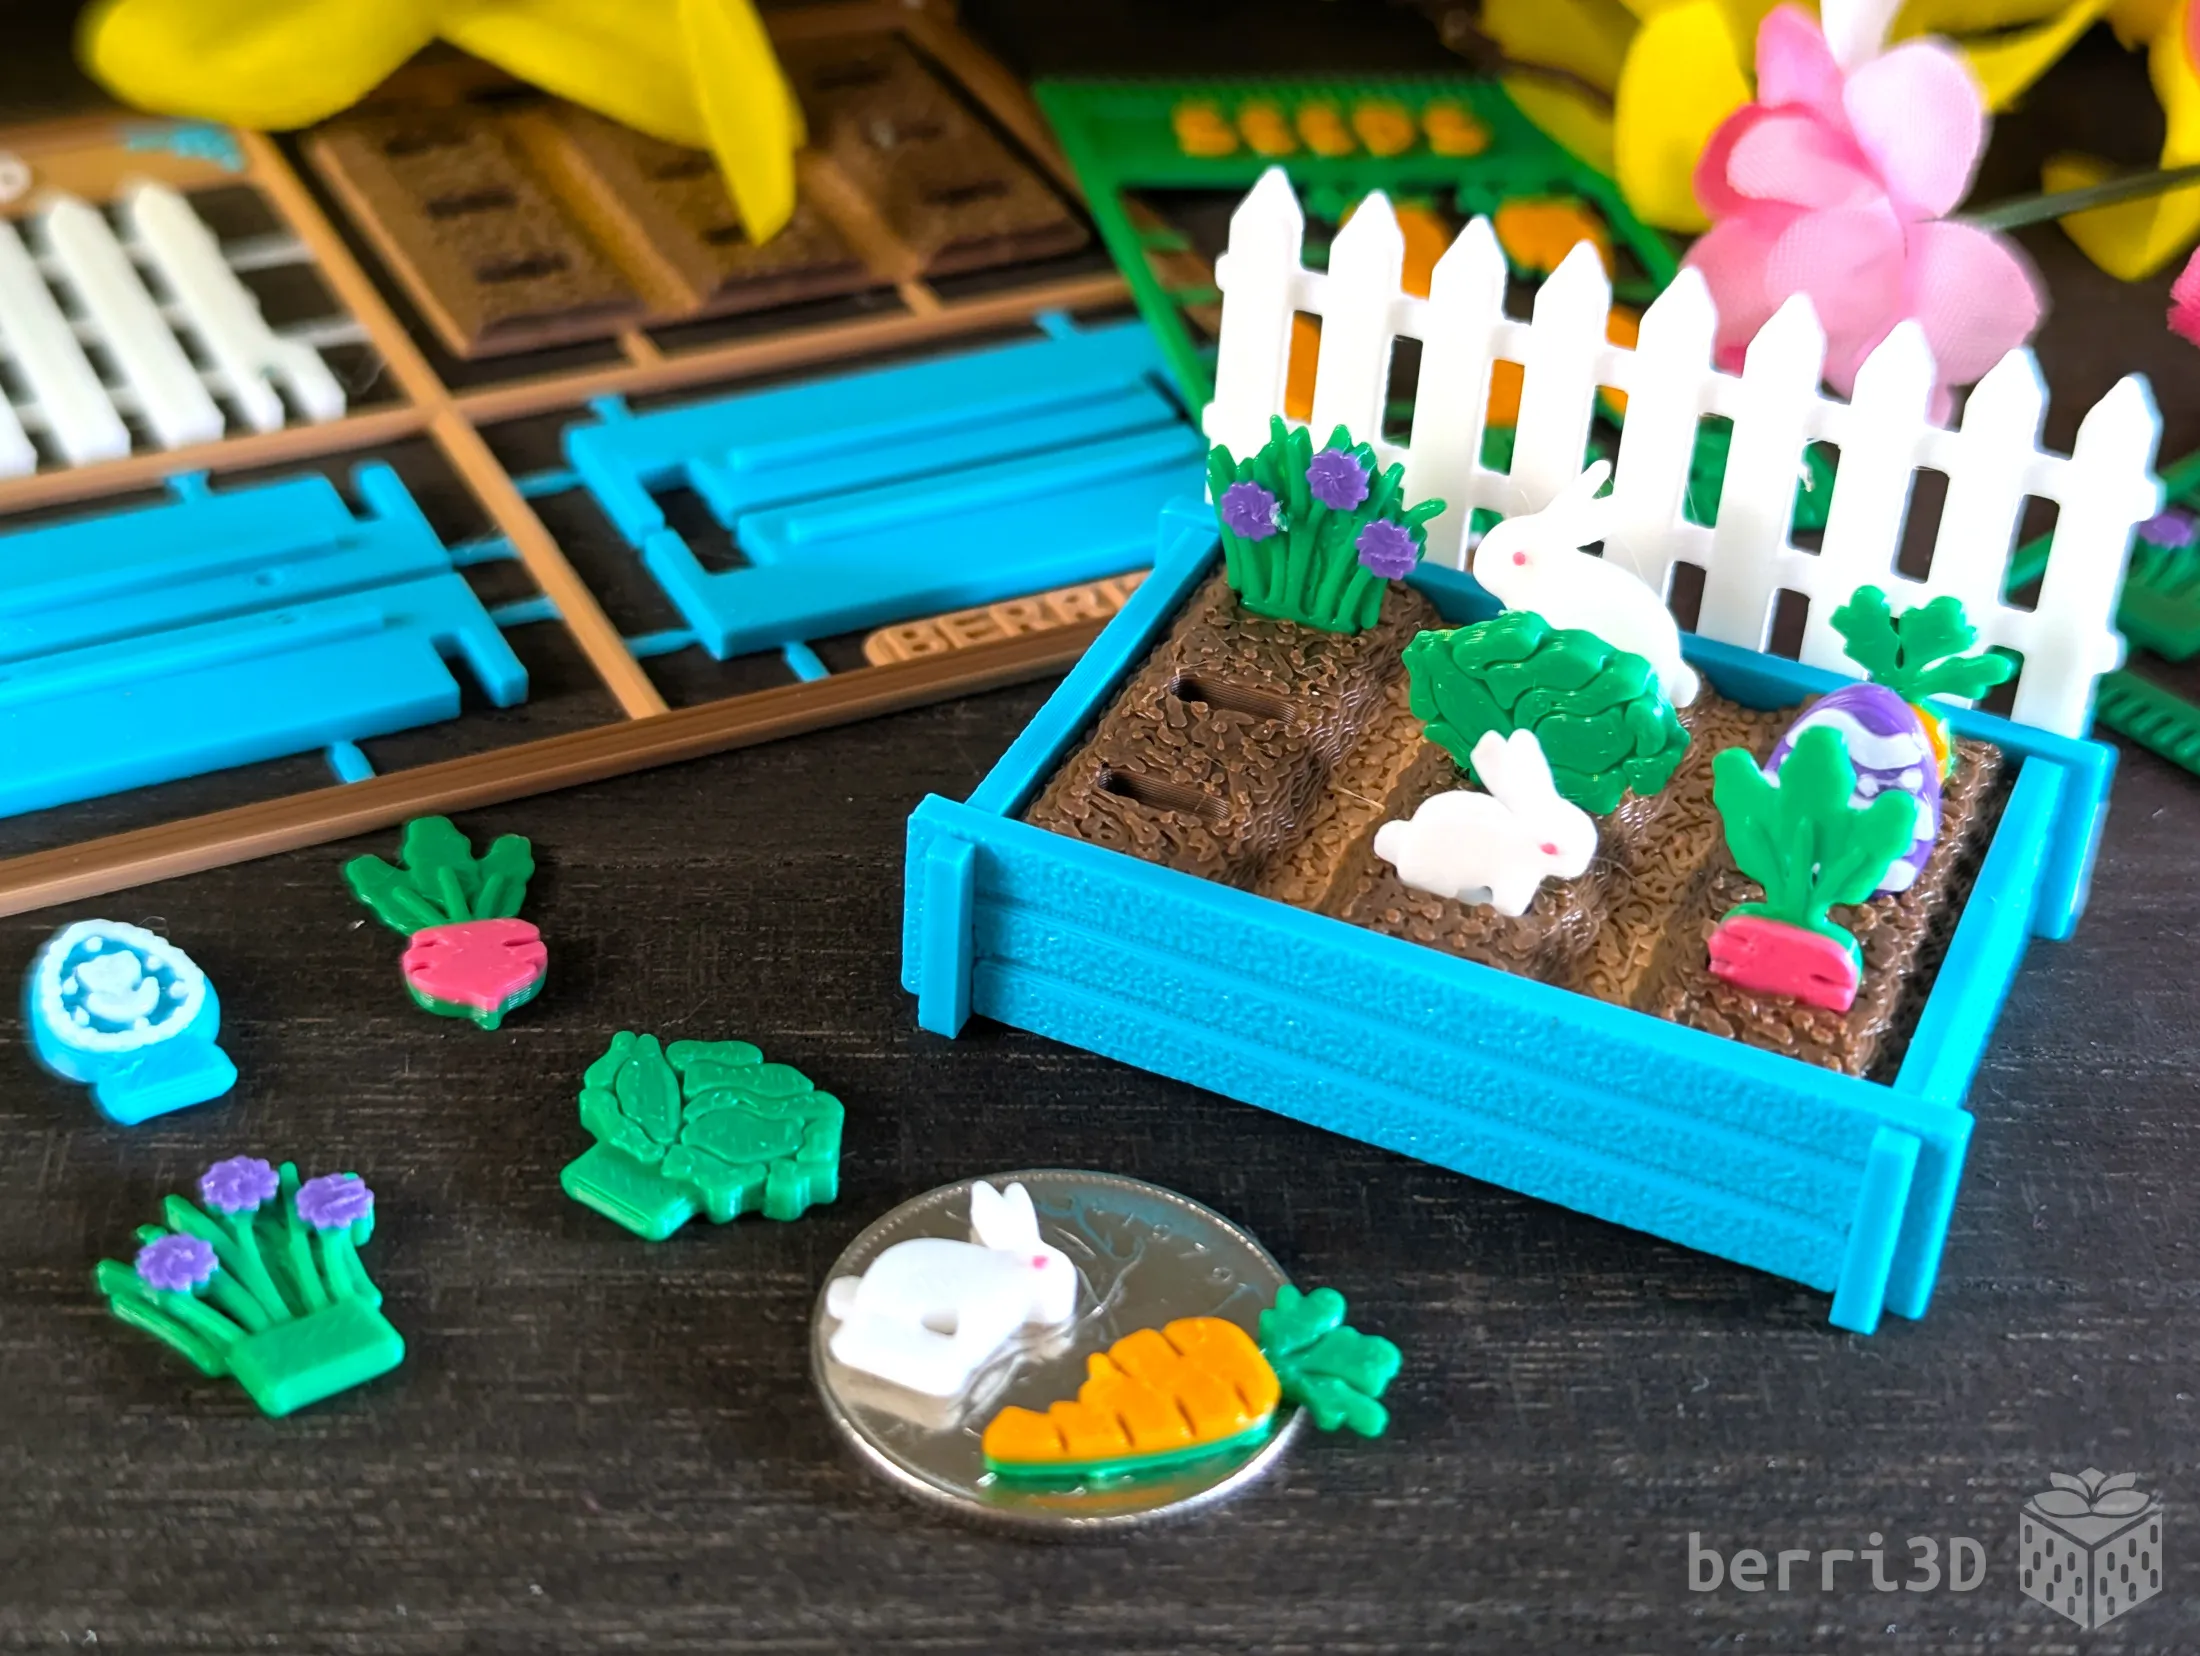
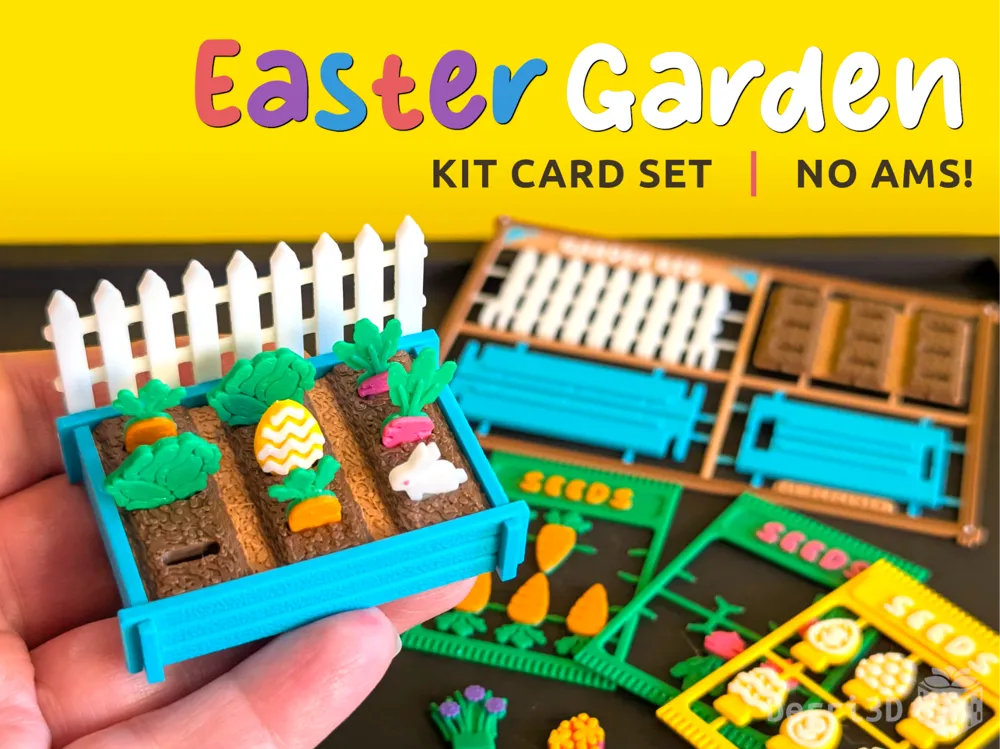
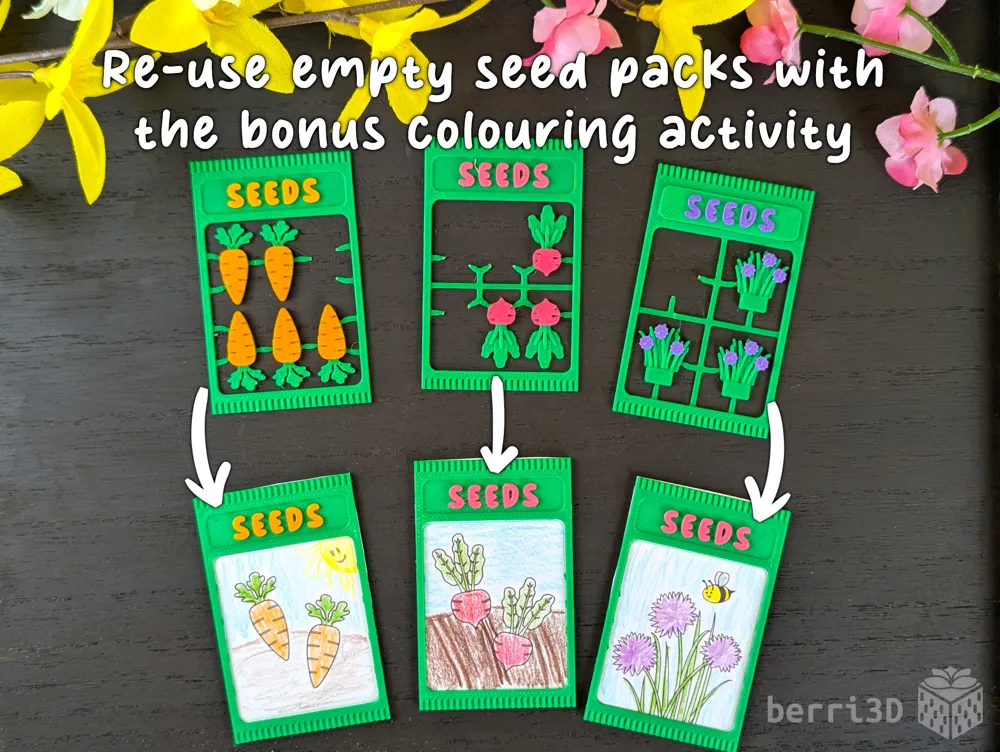
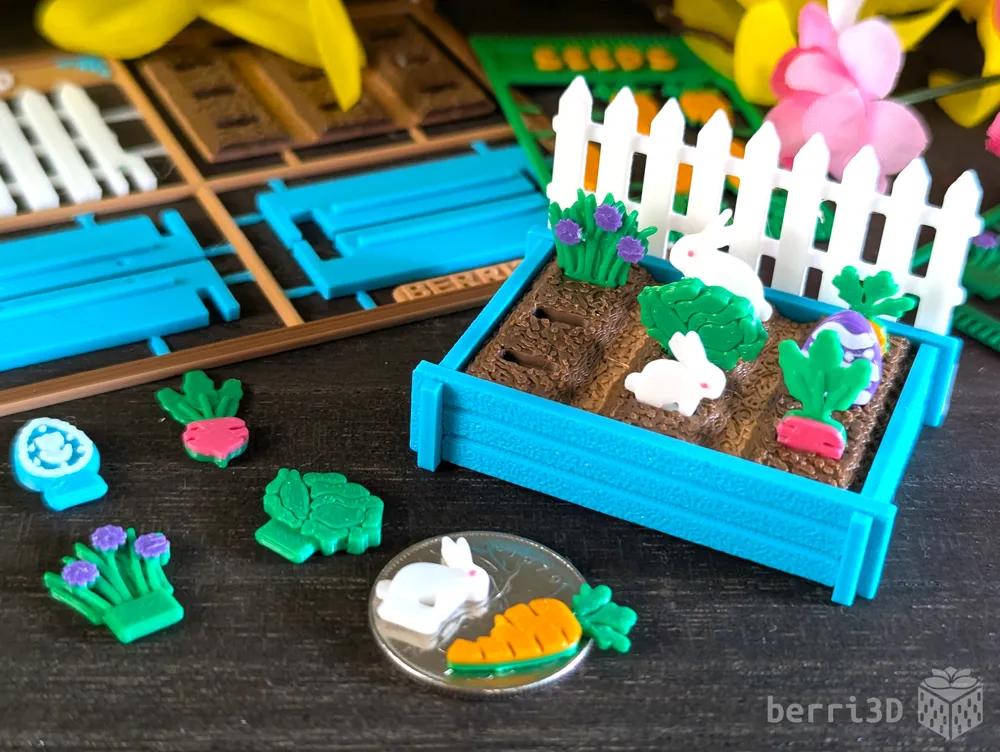
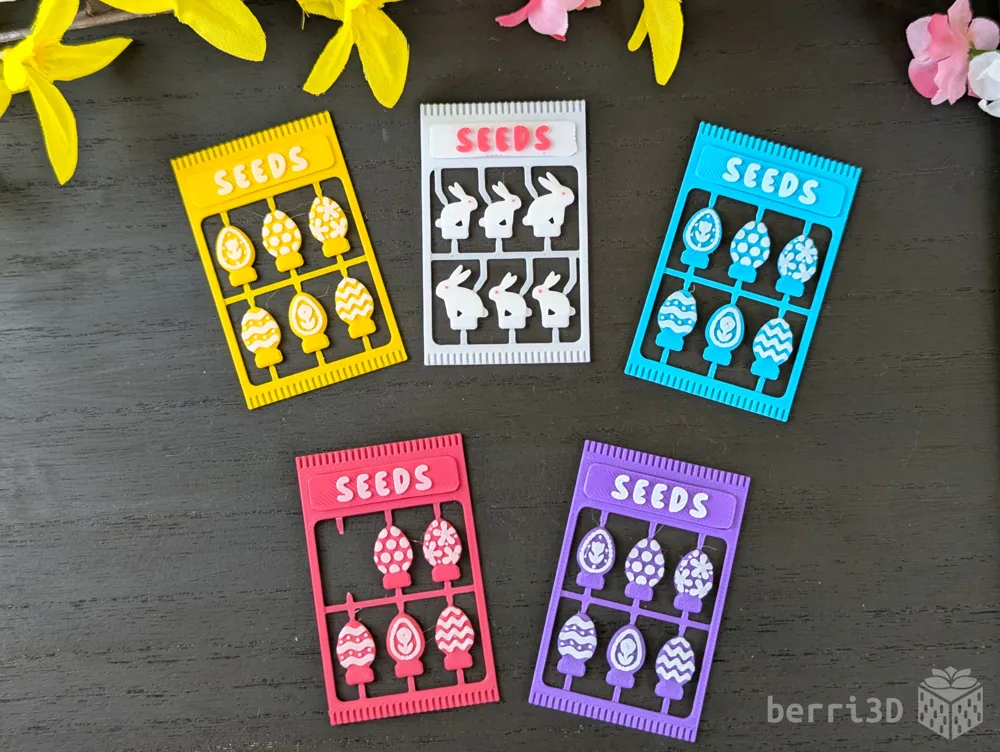
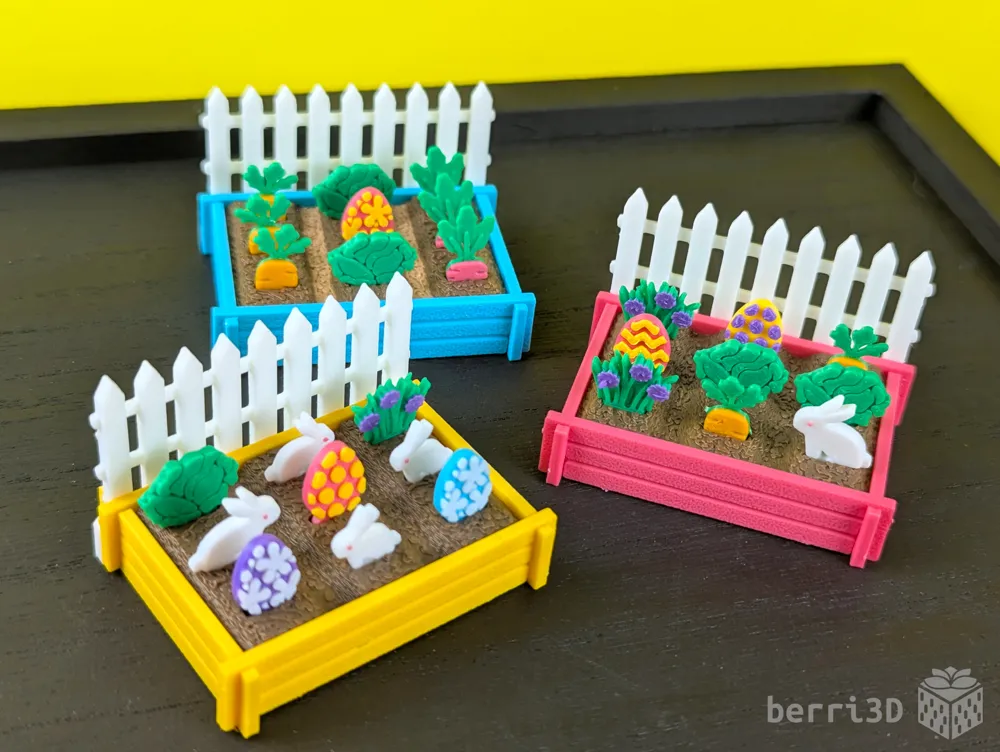
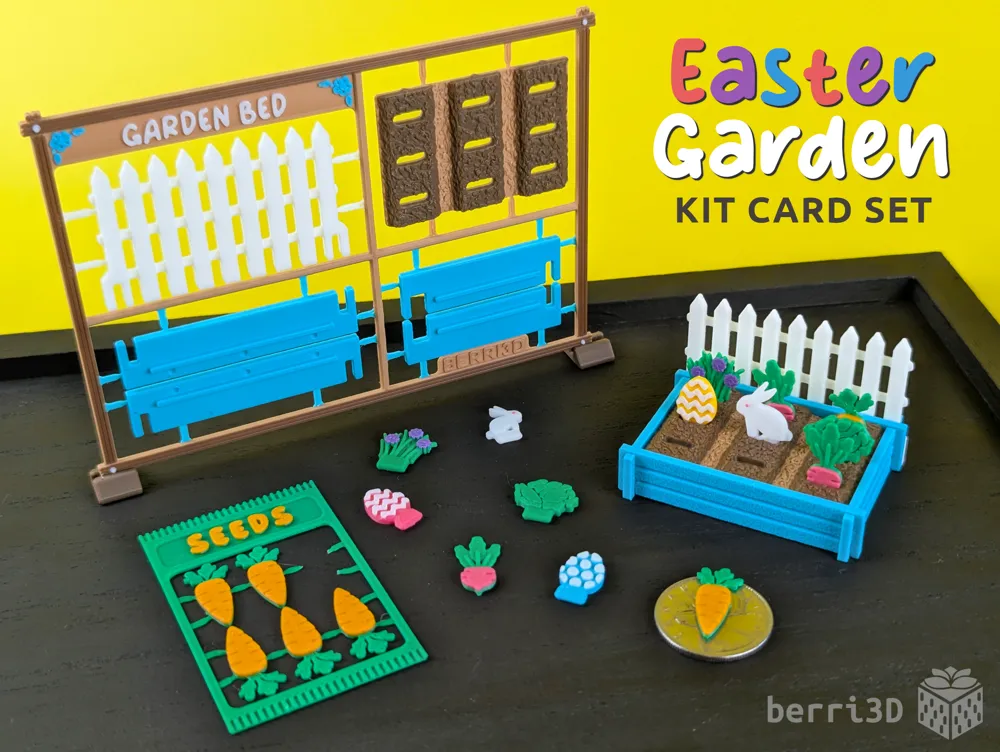
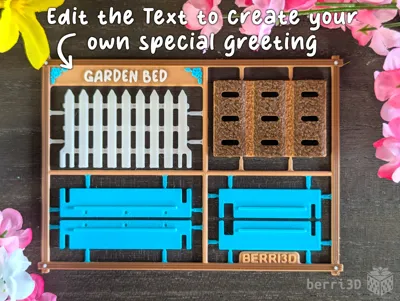
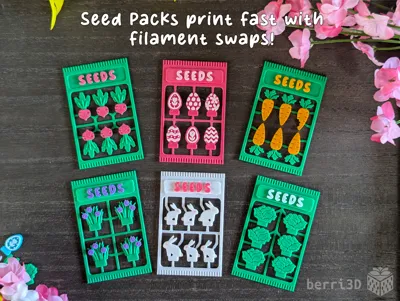
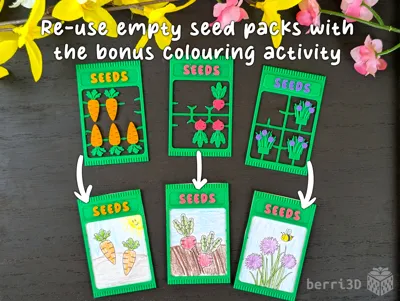
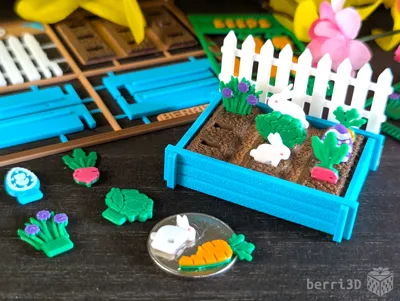
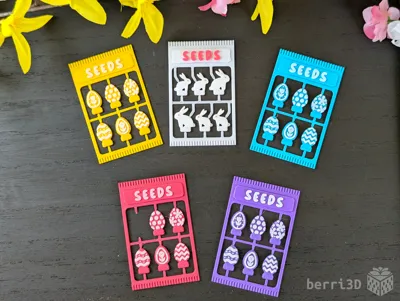
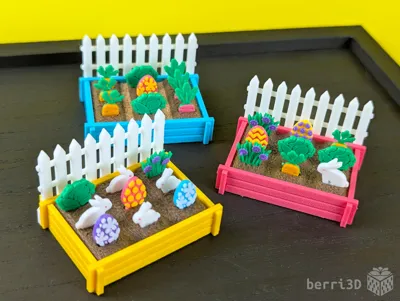
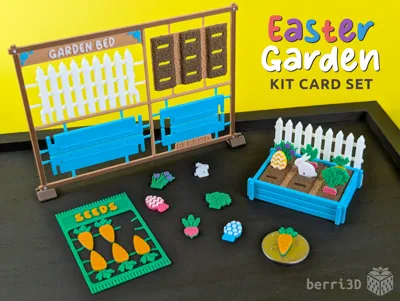
This kit card set builds a mini vegetable garden, complete with Easter Eggs and hungry bunnies! Print only the “seeds” you want for planting or trading with friends. Once the seed packs are empty, use them with the included colouring sheet to create pretend packets or create fridge magnets.
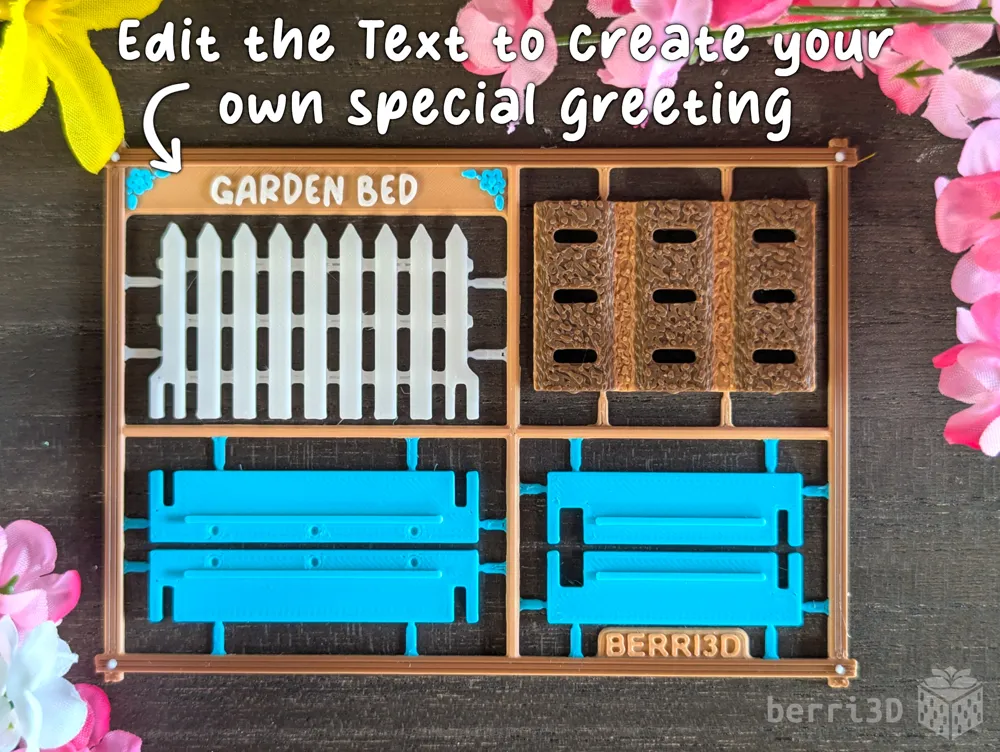
Garden Bed Kit card
- Print with or without the frame
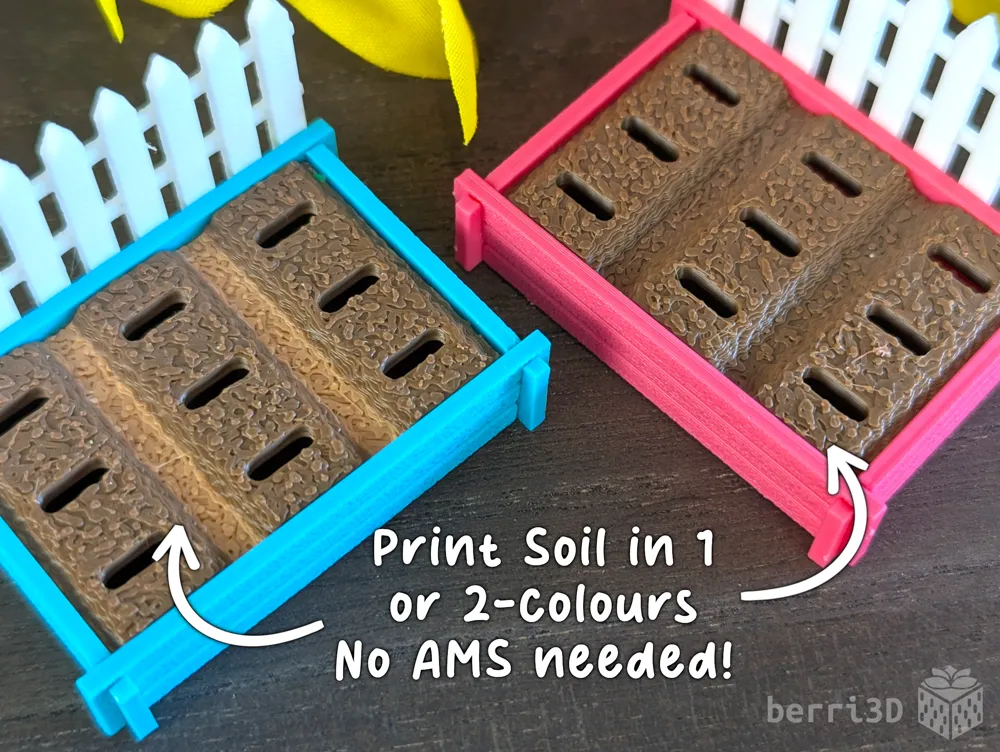
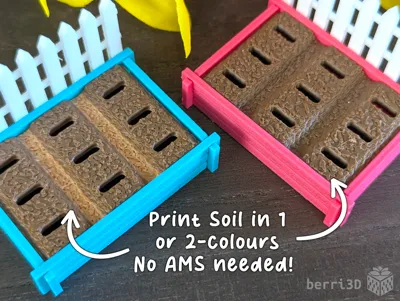
- 2 variations of card (3-colour or 4-colour dual toned soil)
- Either version prints in ~1.6h
- Text is editable in Studio (change language or greeting to suit)
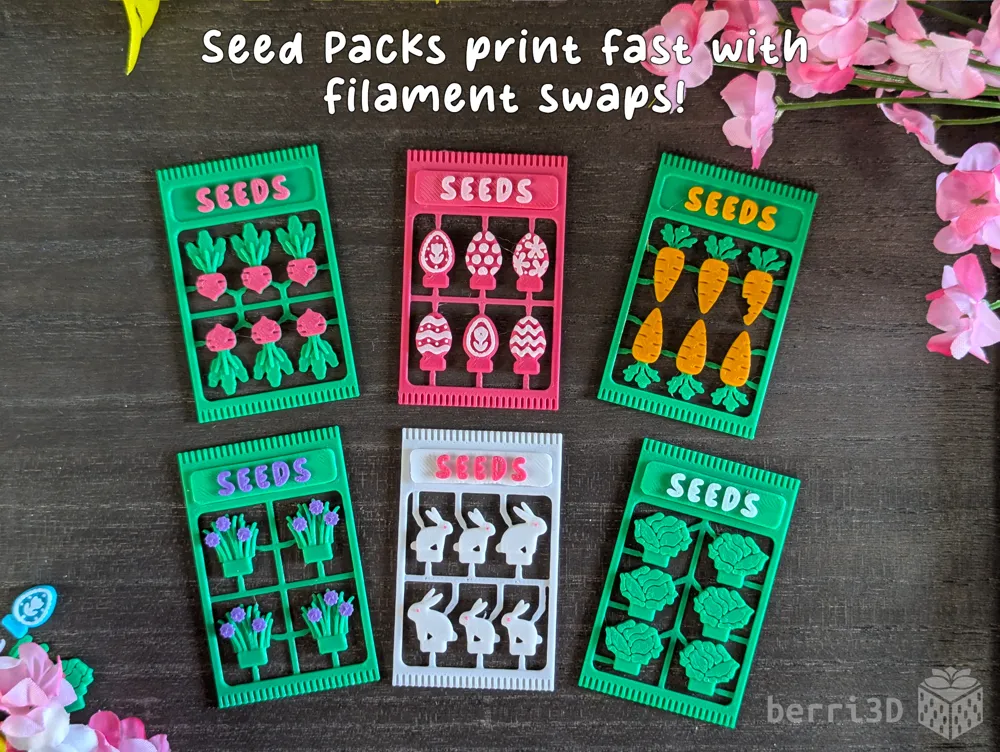
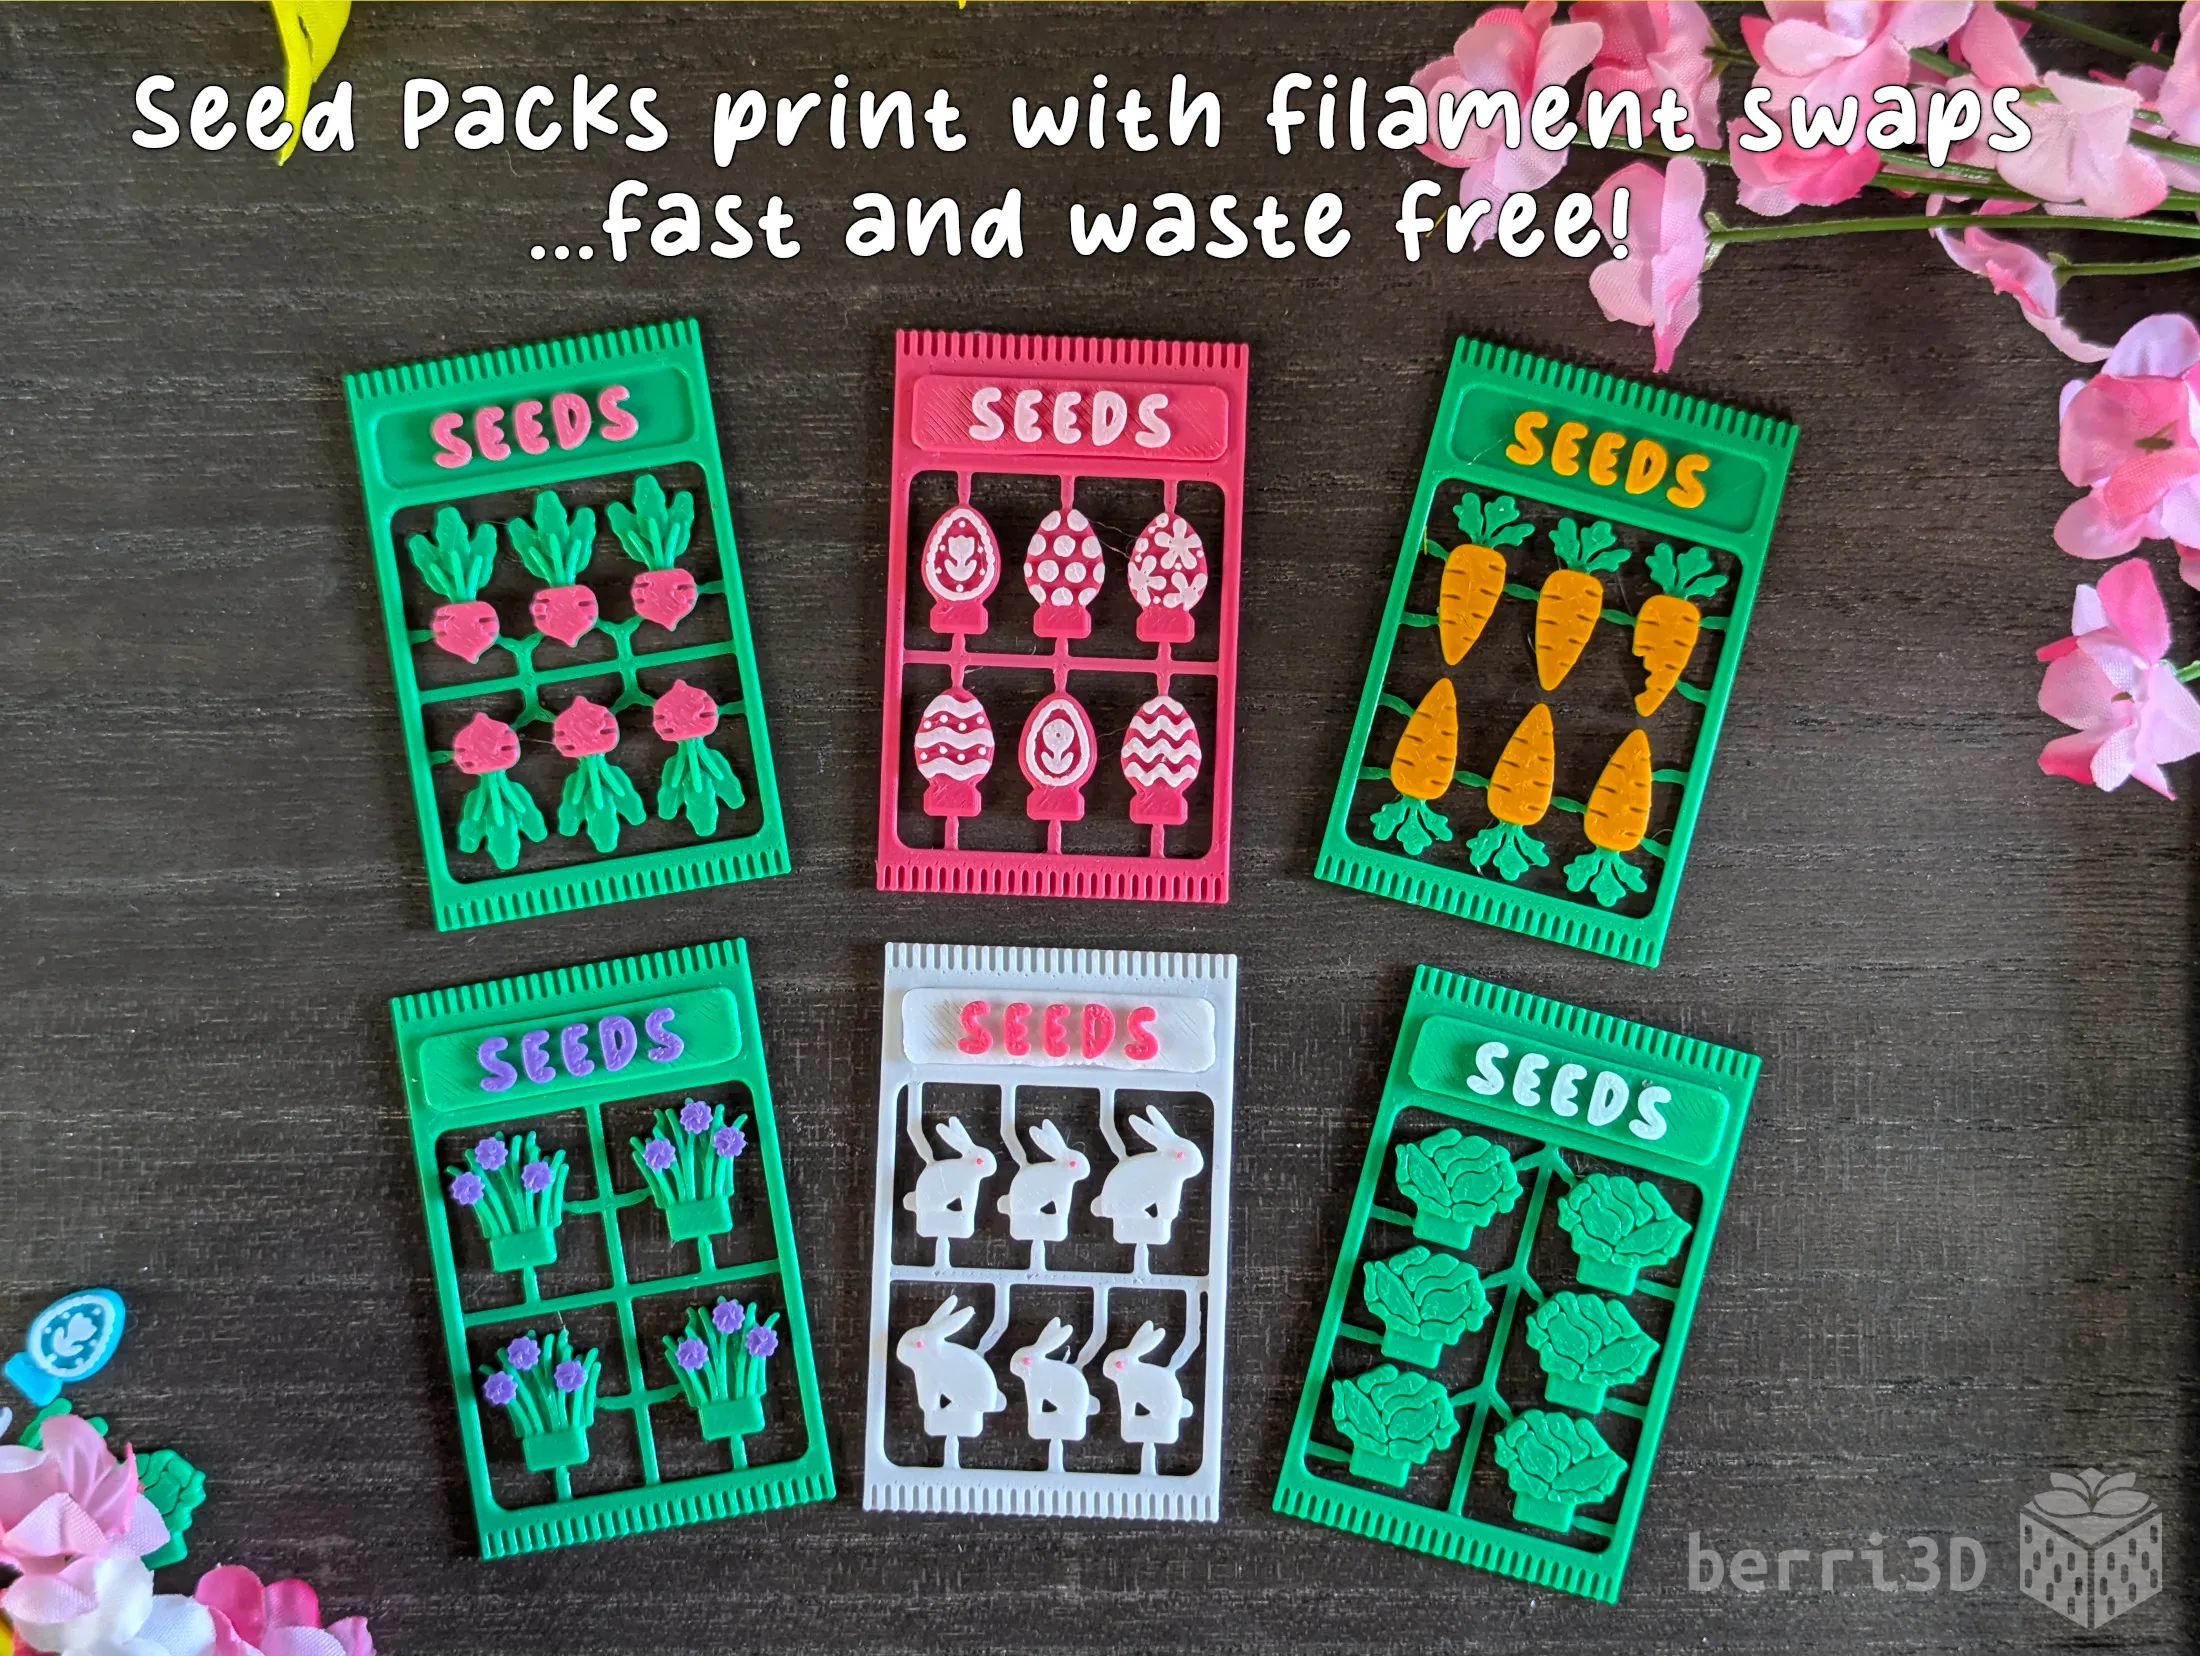
Seed Packs
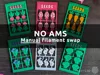
- Prints with filament swap (no AMS needed, no purge waste)
- Don't want to swap filament? Single colour profile available.
- Leftover frame can be used with a colouring activity
🥕 Seed Packs 🥬 4-6 seeds each |
|

🐇 Table of Contents 🐇
Please don't let the length of this page scare you. Most people don't have problems with my models as I rigorously test everything I create. But for the few that do, having solutions and tips ready-to-go is quicker than waiting for me to answer ☺️
If you're already familiar with printing kit cards and filament swap printing, you can skip most of the following (except Special Considerations) and go straight to section 2 for the assembly guide.
- Special Considerations – if you read nothing else, please read this section
- Assembly – diagrams and building tips
- Bonus Activity – reuse the seed packs for a fun craft!
- Print Information – best practices, tips, process settings, filament recommendations
- Filament Swap Printing – how it works, includes reference chart for non AMS users
- Text Customization – how-to for those who haven't done it before
- About – design inspiration, commercial licensing, etc.
1. Special Considerations – please read before printing
- ⚠️ Small parts. Choking hazard. This is a miniature. It is not suitable for young children.
- ⚠️ Flush cutters or sharp pointed scissors required. If you don't want to cut out parts, print the separate parts instead.
- ⚠️ Adult assistance required for assembly. Kids ages 8+ should be able to assemble the garden bed on their own.
- ⚠️ Clean build plate required. Small details will get dragged if the plate isn't clean. Print profiles contain settings which will help adhesion but cannot perform miracles 😥. Please see this wiki article for correct plate washing procedure.
- If you scale up the models yourself, I make no guarantees of model quality or fit as I haven't tested it myself. You will also need to change the slicer commands for any profiles (AMS and no AMS) that contain filament swaps. See the section titled Filament Swap Printing for more information.
- The parts are snap fit though some glue may be advisable for certain parts or if it will be played with.
- “Seeds” fit loosely in the garden; they are designed to be moved around. They will fall out if the garden is moved or jostled.
- Textured build plate recommended when printing kit cards. The sprue points are fragile and can break upon removal from a high-tack plate such as smooth PEI or some of the newer “blue” plates.
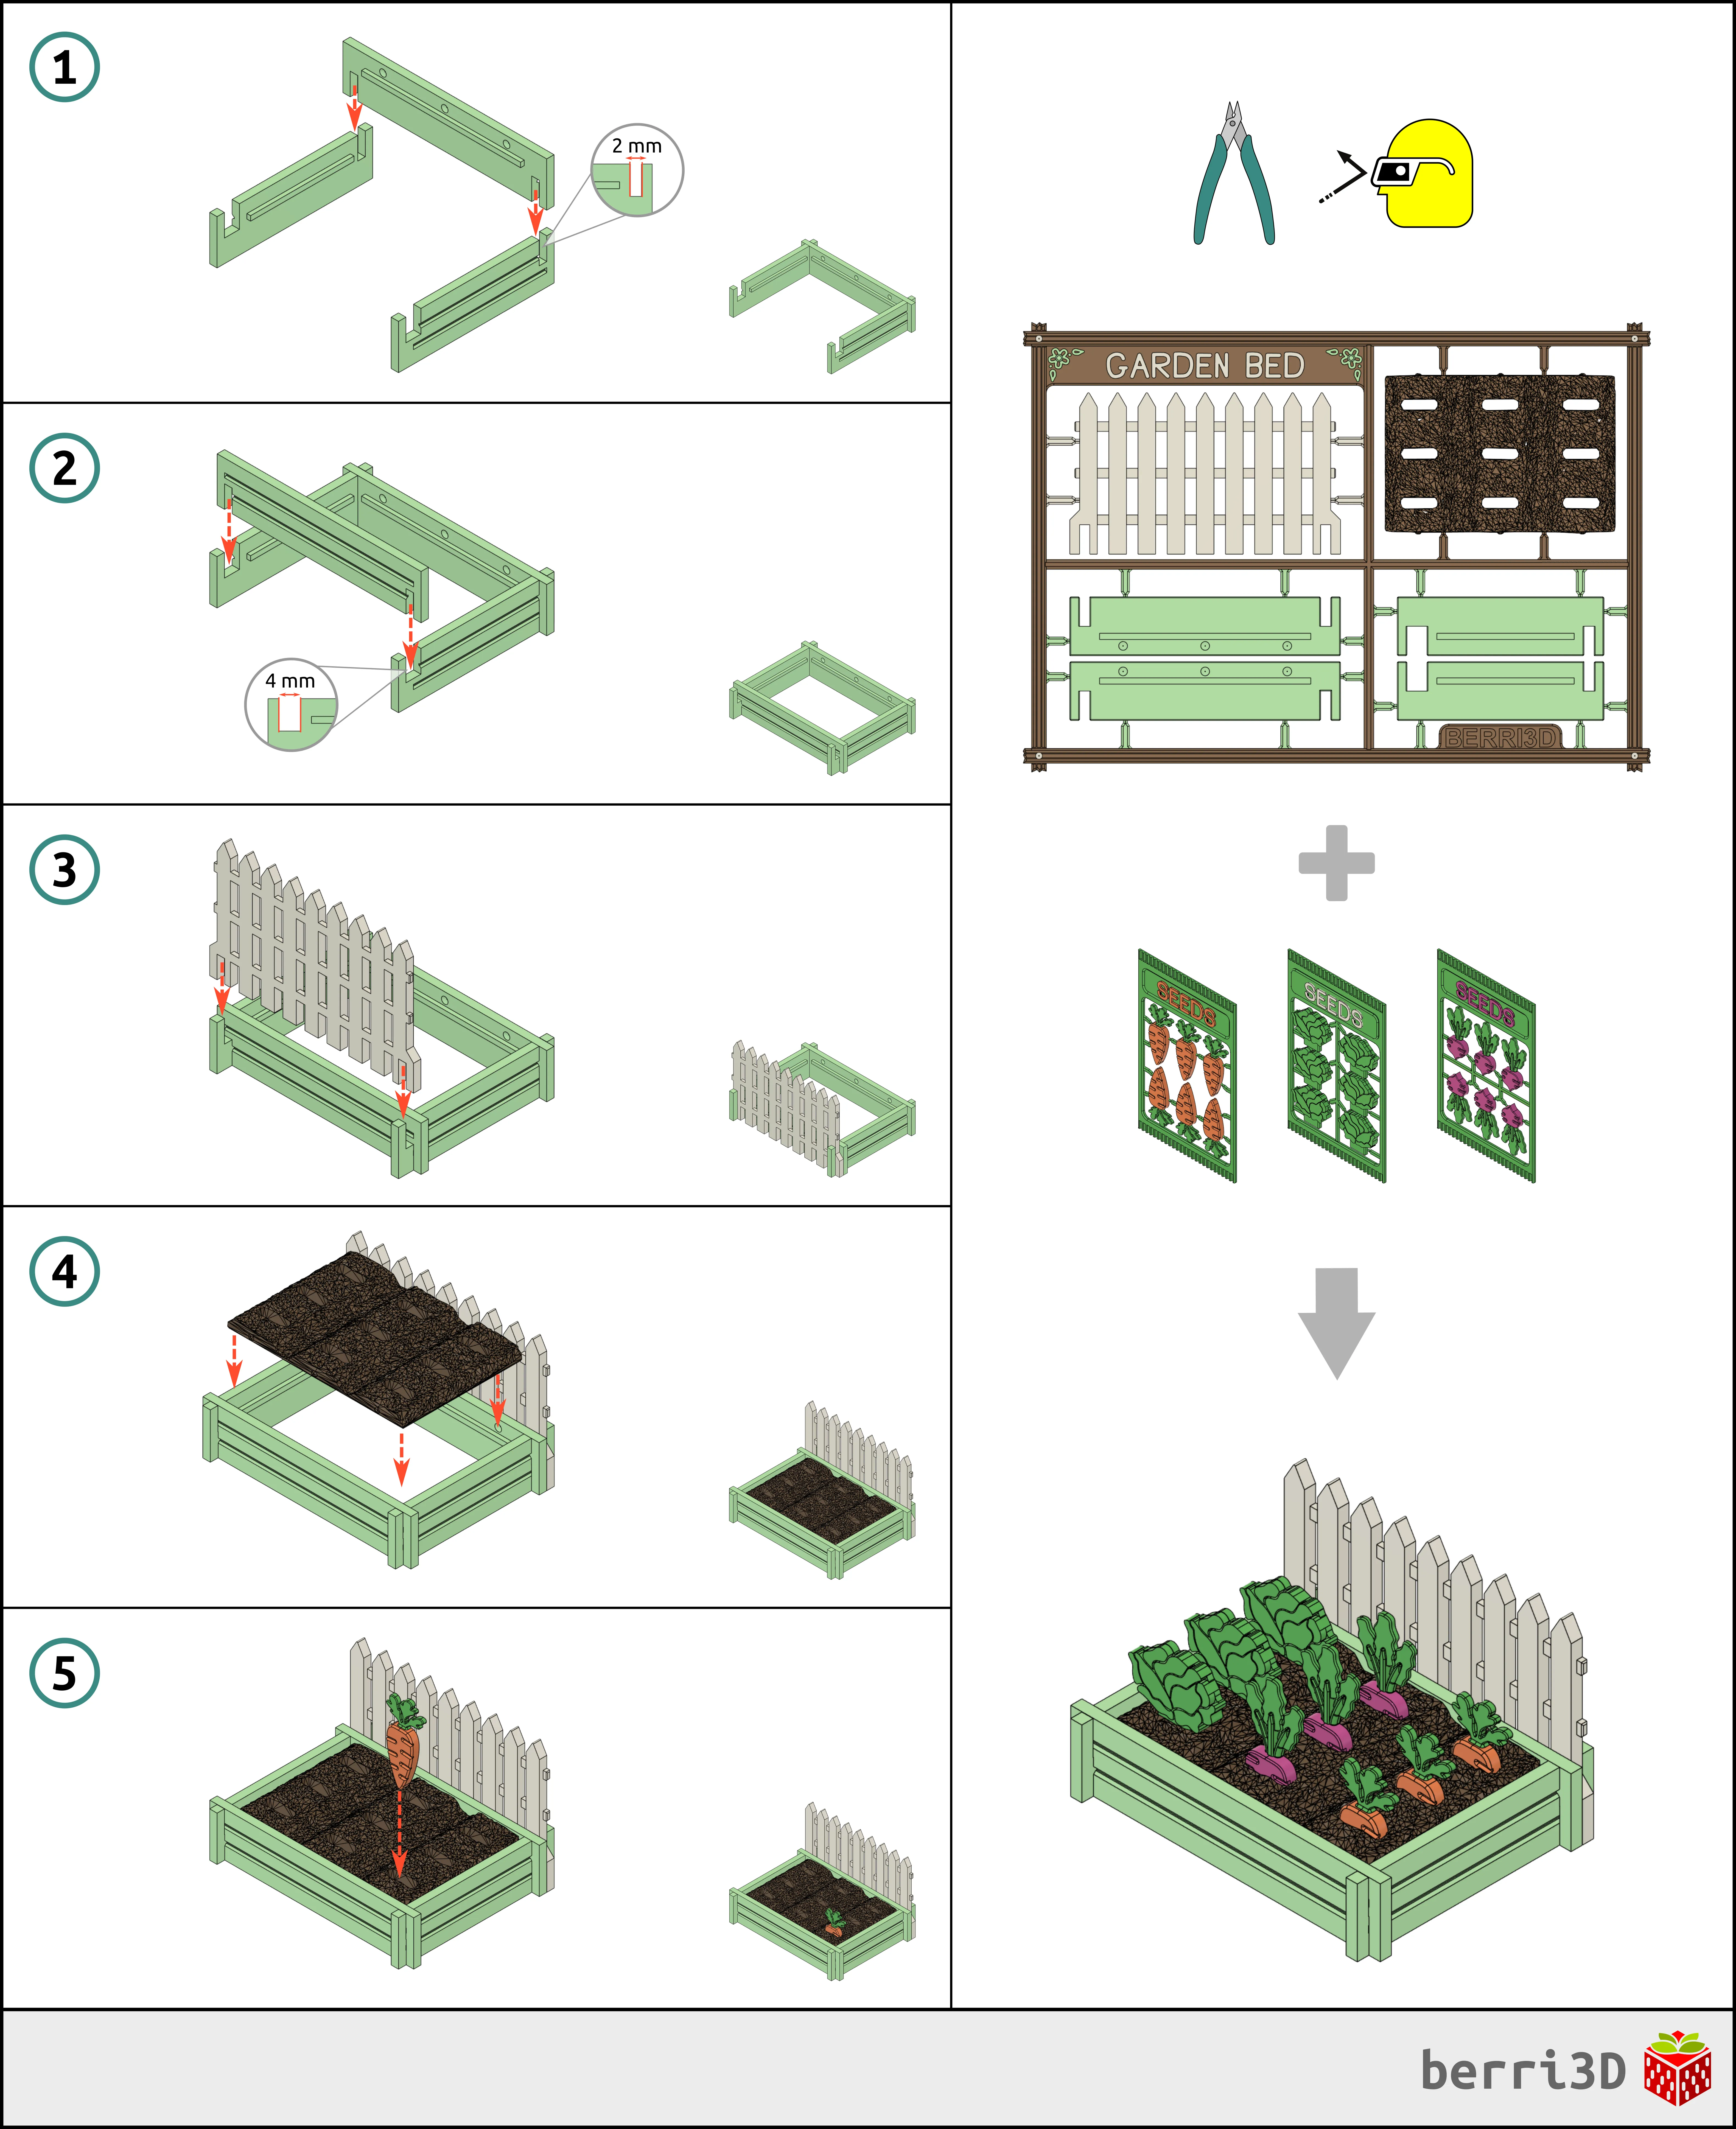
2. Assembly
General Tips
|
Assembly Guide is also available as a downloadable paper-printer ready PDF. See the Documentation section below.
3. Bonus Activity
Don't throw the leftover seed packs! Reuse them with the activity PDF (click the documentation link at the bottom of this page) and create either an imaginative play toy or a magnet for your fridge!
Some tips for the best results:
- Use cardstock: stiffer and more durable)
- Adult help may be required: the frame can be a bit fiddly to apply glue and line up.
- No paper printer: Trace the frame and make your own design!
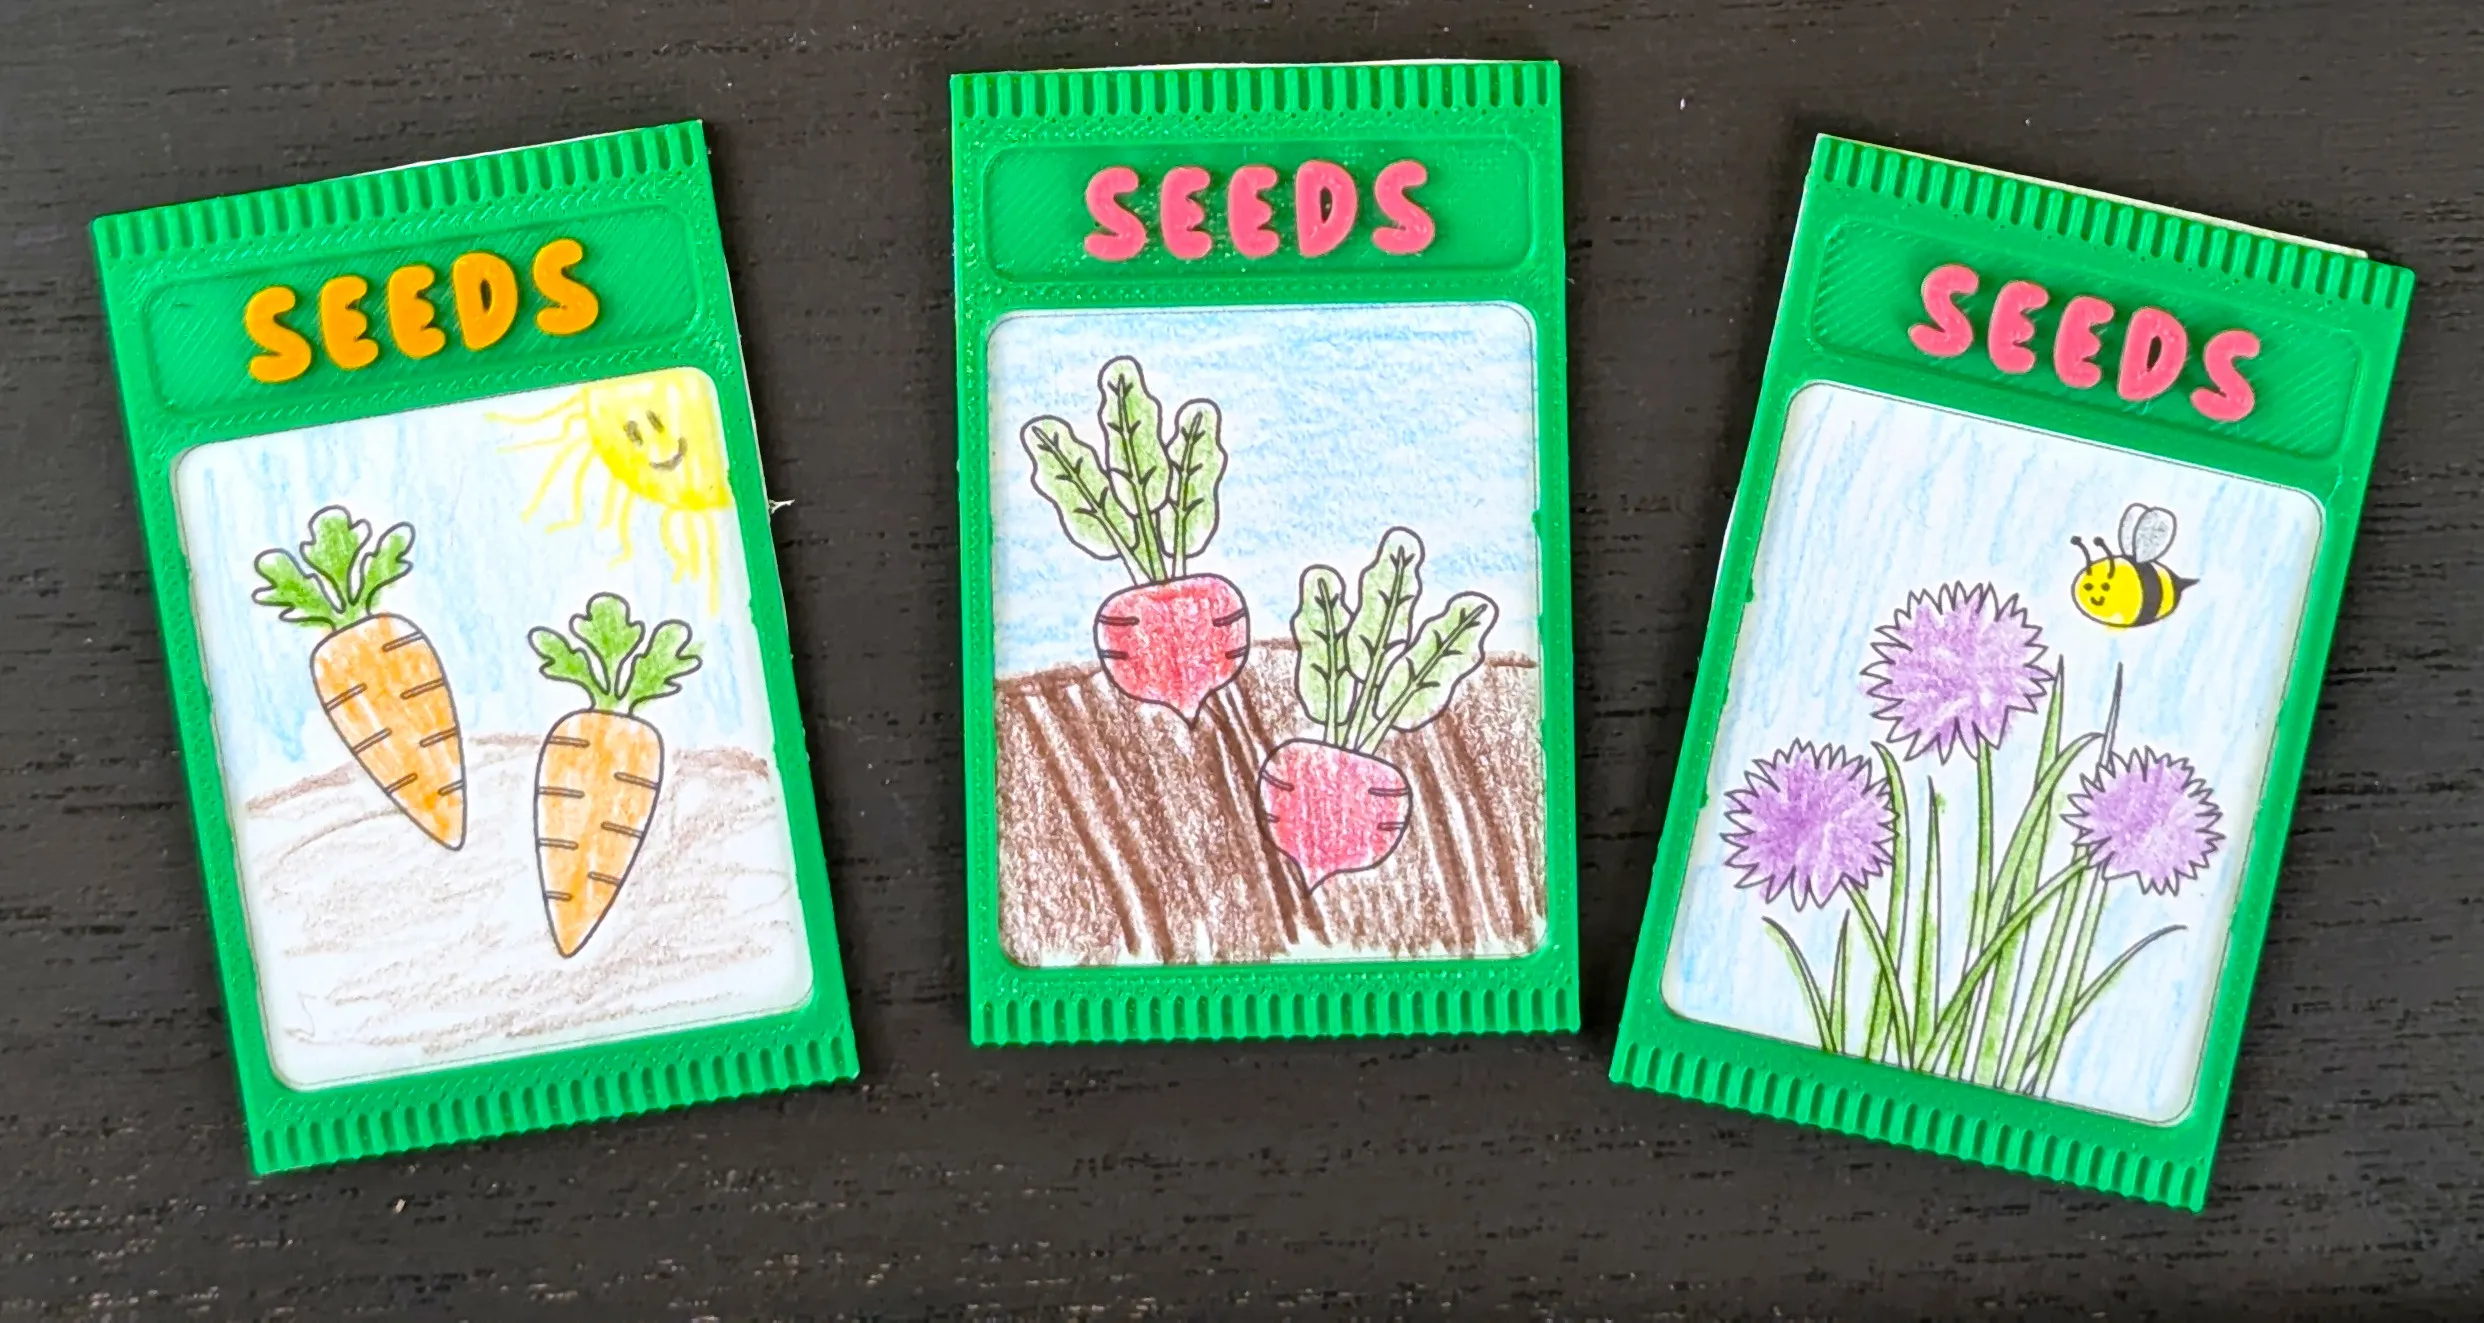
Coloured by yours truly who is just as good at colouring in the lines as she ever was ❤️
4. Print Information
💡 Best Practices
- A properly cleaned build plate is vital for printing small and detailed items.
- Do not batch print build kit cards without first printing a few smaller pieces to check fit: This will help save you filament by identifying fit issues before committing to a full multicolour plate. Seed packs do not need test prints as they are designed to be loose fitting.
- Be careful when removing kit cards from plate: sprue connectors can break prematurely.
- Use a textured plate. High tack plates often break delicate sprue tips.
- Let the plate cool completely. As parts cool, they contract and will often detach on their own.
- Still attached? Remove the plate and flex it gently by the edges. Go slowly and bend in all directions until they pop off. Don't touch the printing surface of the plate while doing this as skin oils transfer quickly.
🎨 Suggested Filaments
For best results, I recommend basic PLA (not silk or matte) for all parts except for the soil. Matte filaments produce “softer” parts which may deform or bend where they shouldn't. Silk filament can be brittle or have fit issues.
I’ve tested this model extensively using the following filaments. Test prints were made using calibrated and non-calibrated (default) profiles on a Bambu X1C and were found to have a good fit between parts. Your results may differ due to filament colour/type/brand, and printer.
| Brand | Type | Colour(s) |
| Bambu | Matte PLA |
|
| Bambu | PLA Basic |
|
🖨️ Print Process Settings
Models were prototyped on a Bambu X1C with a 0.4mm nozzle. These are the process settings I used and which are contained as part of the print profiles. Please note that changing layer height, using a smaller nozzle, or scaling models up may result in poor print quality such as mismatched colours or parts not fitting together.
| Setting | Value | Reason | Garden Bed | Seed Packs |
|---|---|---|---|---|
| Layer height | 0.2 | Part fit and colour swaps were designed with this value. Changing this value will throw off colour changes and part fit. | ✓ | ✓ |
| Wall generator | Classic | Prototyped with this generator. Changing to Arachne may make parts not fit. | ✓ | ✓ |
| Wall order (first layer modifier only) | outer/inner | Printing the outer wall first gives any tiny inner walls something to stick to. Only applied to the first layer as it's inadvisable to use for the entire model. | ✓ | ✓ |
| Only one wall on top surfaces | Not Applied | Results in a nicer top surface to the parts in build cards. | ✓ | ✓ |
| Elephant Foot Compensation | 0 (off) | Chamfers have already been applied to the parts. This setting shrinks the first layer too much on top of the chamfers so it should be off. | ✓ | |
| Object Flow Ratio (small decorative corner elements on sprue only) | 0.9 | Better for the extra tiny flourishes. If you scale up this model, you may want to change back to default. | ✓ | |
| Wall loops | 2 | Default. These do not need strength. Increasing this value may affect fit. | ✓ | ✓ |
| Sparse infill density/type | 10% / gyroid | As this isn't a weight-bearing model, less infill results in faster printing. | ✓ | |
| Sparse infill density/type | 100 / rectilinear | This prevents the slicer from putting in a 1 layer high sparse infill layer in the middle of the cards. | ✓ | |
| First layer speed | 20 mm/s | Slower speed allows complicated first layers enough time to cool and adhere. | ✓ | ✓ |
| Initial layer infill speed | 50 mm/s | Slower speed allows complicated first layers enough time to cool and adhere. | ✓ | ✓ |
| Outer wall speed | 100 mm/s | Slower outer wall speed is better for overhangs and overall surface quality. You can increase this speed but the quality may not be as nice. | ✓ | ✓ |
| Purge Tower | Disabled | Filament swaps generally do not need a purge tower, especially for such small prints. All my prototyping has been done with it disabled. If you notice print quality issues, you may want to enable it. | ✓ |
📏 Adjusting Fit of Build Cards
How well a build card fits together depends heavily on your machine, filament brand, and filament type/colour. I do my best to make models that assemble smoothly across a range of filaments, but as there are too many variables to account for, tuning by the end user (that's you) may be required.
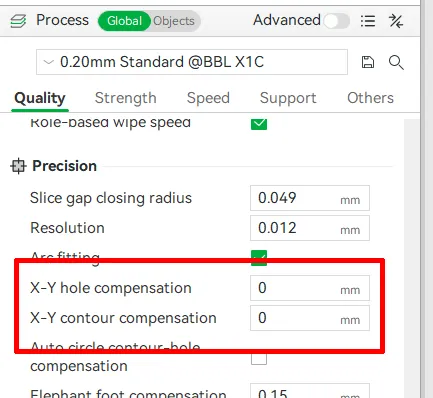
There are two ways to adjust fit of cards but it depends on the type of model that you're printing.
- Multicolour kit cards → Adjust flow rate up or down.
- Separate parts → change X-Y contour compensation by ± 0.03
Note: these values are guidelines only and may need further tweaking.
5. Filament Swap Printing (with and without an AMS)
The two-colour effect of the soil and seed packs are accomplished by swapping colours at a certain height. This technique works with and without an AMS and results in a part that looks the same regardless of how it was printed.
How a filament swap is accomplished is functionally different between the two setups. This is why there are two print profiles because they require two different slicer commands, both of which can be seen (and changed) on the Preview screen in Studio.
- No AMS → Printer will pause and wait for you to change the filament. If you've never done this before, this video is a quick primer on how to do it. Seed packs print very quickly with the filament pause occurring anywhere from 3 to 10 minutes after the printer first starts printing.
- AMS → The AMS will swap colours for you. Note, the colour change command can only be see on the Preview tab in Studio. Handy users with an AMS will see a solid colour in the thumbnails but it should ask you to map 2 colours. There is no need to paint these models.
I've set up my print profiles to trigger the swaps at the appropriate layer height. All you need to do is either load both colours in the AMS or be on hand to make the swap manually. The chart below shows the layer height where I've inserted the commands.
⚠️ Note: if you scale up the model, you will need to redo the commands yourself. This is because they're tied to layer height and not model dimensions. Commands can be edited on the Preview tab in Studio.
| Part | Start colour | Swap colour | Layer height when swap occurs |
| Soil | Light Brown | Dark Brown | 7 |
| Carrots | Green | Orange | 6 |
| Lettuce (2 colour Seed Pack) | Green | Text colour | 11 |
| Beets | Green | Hot Pink or Red | 7 |
| Chives | Green | Purple or Pink | 6 |
| Easter Eggs | Base colour | Decoration colour | 10 |
| Bunnies | Bunny colour | Eye colour | 11 |
6. Customizable Text
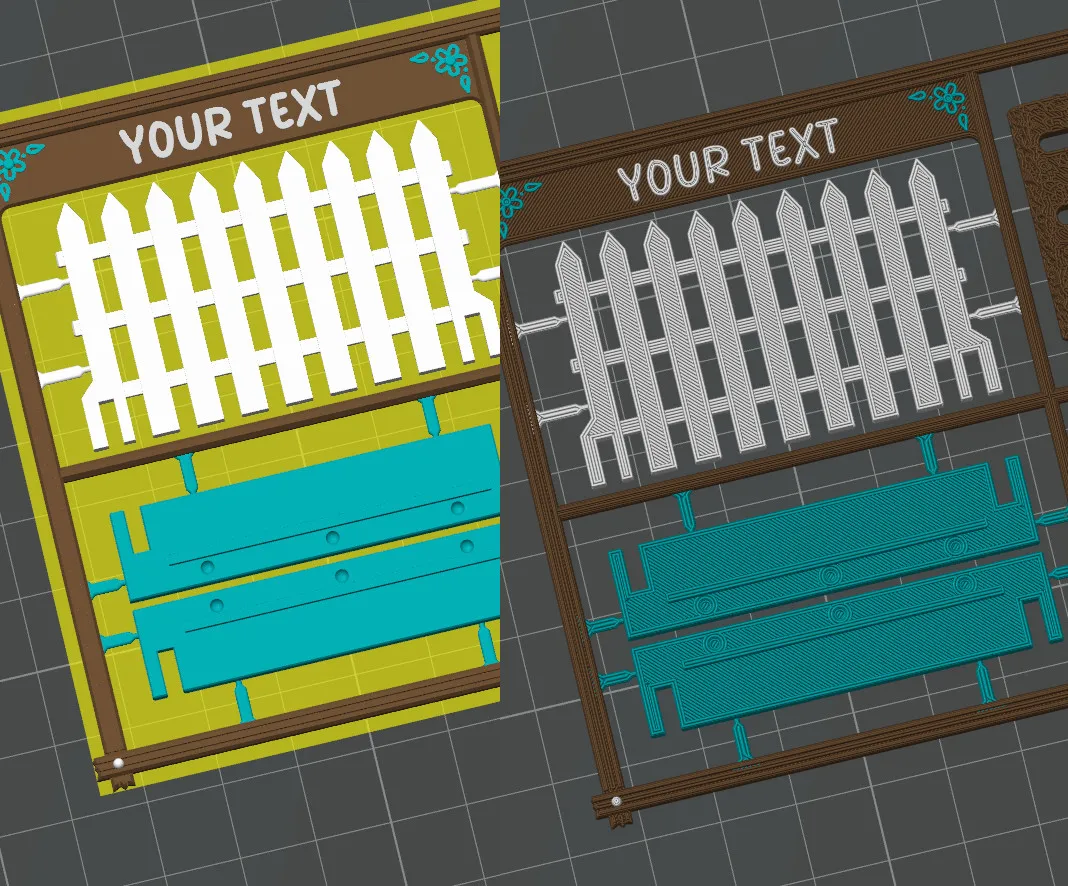
The text on all the kit cards in this set can be changed within Studio. Make your own greeting or even translate it into a different language! You will need to download it into Bambu Studio (not Handy) to change it there. If you've never done it before, this video is a good all-round primer on how to do it. Just remember to check the Preview tab to see how the sliced font looks. If it doesn't look good on-screen, it won't print any better 😥
7. About
I designed this collection for the Hop Into Creativity: Easter 2026 Design Contest around the theme of Spring Renewal while leaning heavily into “fun, color, and unexpected delights.”
Spring Renewal
For me, spring renewal is synonymous with the vegetable garden! Tilling the soil, adding in rich compost, and best of all, planting the first seeds is something I look forward to all the long winter. Easter is usually around the same time as the last frost. When my child was younger, I used to help the Easter Bunny by delivering plastic eggs full of chocolates and miniature toys in and around the yard. For some reason, most of them wound up in the veggie patch!
Fun, Color, and Unexpected Delights
Thinking of those cherished early Spring mornings, I wanted to create something that evoked the same feeling. I couldn't decide between a vegetable garden or mini easter eggs, so I picked both! I'm secretly a kid at heart and I loved imagining things that could go in a miniature garden. I asked myself what I'd want to be able to do with it and the answer was easy: I wanted to plant and replant! And I wanted baby bunnies! And a mama bunny! And lots of easter eggs! In all the colours! I wanted to pretend to open a seed pack and sprinkle seeds on the soil. I wanted a sign! And a watering can! And details, lots and lots of details! And and and…I didn't have nearly enough time 😅
That said, I still packed a lot in and I accomplished the most important things on my list. It's packed full of colour (just check out the build of materials!). The garden can be seeded and harvested over and over again, the leftover packs can be reused in imaginative play, there are so. many. bunnies., and best of all, I was able to cram as many of the tiny details I love into every aspect. You might be surprised at just what a 0.42mm nozzle can accomplish! I know I continually am!
🥰 How to Support me
If you appreciate the work I did to bring this model to you, please consider supporting me on Ko-fi. Even a small tip will help offset the cost of prototyping filaments. Alternatively, a like or a boost is another easy way to say “hey, you don't entirely suck.”

⭐ Licensing
If you wish to sell my models, you may purchase licensing rights through my official Ko-fi page.
This model is shared using my own Personal-Use License which supplements (but does not replace) MakerWorld’s Standard Digital License. My license is fundamentally the same (no public remixes, no file sharing, no selling) but includes specific exceptions and allowances not covered by the Standard Digital License.
Licenses offered through third-party websites (e.g. Cubee3D) are not authorized and are not valid.
Boost Me (for free)
🚀= 💪🐹 👍 = 🦵🐹 My models are created on a smoking hot Compy386 powered by Hunrod the Unusually Swole Hamster™. Every boost and like makes Hunrod stronger.
Documentation (2)
License

You shall not share, sub-license, sell, rent, host, transfer, or distribute in any way the digital or 3D printed versions of this object, nor any other derivative work of this object in its digital or physical format (including - but not limited to - remixes of this object, and hosting on other digital platforms). The objects may not be used without permission in any way whatsoever in which you charge money, or collect fees.


Comment & Rating (57)