Search models, users, collections, and posts

berri3D
@berri3D
1.8 k
19 k
23 k
14 k
Social Media Links
Bio
☕ Commercial licenses, models and more on Ko-fi: ko-fi.com/berri3d 🍁 Canadian Maker 🍁
Achievements

MakerWorld Guardian
Active more than 20 days out of last 30 days UTC time

Contest Winner
Won 6 model contest awards.

Featured Creator
7 models are featured by MakerWorld.

Popular Creator
More than 1,000 followers.
Recent Article
Prototyping for Pieksekisten
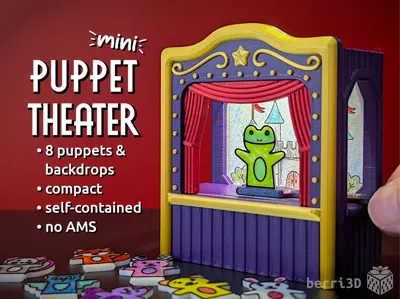
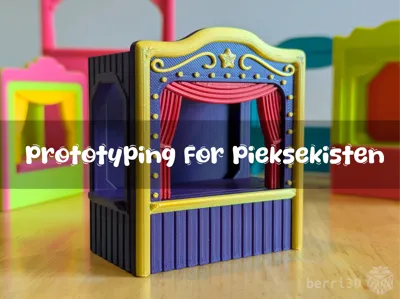
Prototyping for PieksekistenCreating a 3d printable toy for children may seem straightforward enough but when those children are seriously ill and undergoing painful procedures, suddenly every design decision matters. As I worked through prototyping just such a model for the Pieksekisten project, I had to consider and design around a number of requirements and challenges I don't normally come across. I went through at least 20 iterations:  the first 6 were complete failures, and the last five were optimistically (and incorrectly) labelled “final.” The finished model. Actually, I tell a lie. This is two versions ago. Prototype 16? 18?  I've lost count, actually While it's too easy to look at a polished design and think the creator just banged it out, there's more to it than that, often involving failures, mistakes, tunnel vision, questionable life choices, coffee, crippling self-doubt, and starting from scratch halfway through. Wait, that's just me. The IdeaI knew fairly quickly what I wanted to design for the project. A kit card. Not just any kit card, but a puppet theatre. A puppet theatre that was itself the card – the sprue – that held everything together. The puppets and legs would print with snap-off lines and the whole thing delivered to the child who would happily assemble it with their parent. The sketch. It was a PERFECT idea. Narrator: it was not, in fact, a perfect idea. Astute readers will note that the finished model is not a kit card.  This is called foreshadowing. The First BatchAt first, the idea was perfect. And then as each iteration tried to solve the problem of the previous one, it got farther and farther from what I wanted. Half-drunk cup of cold coffee for scale. This represents a week of tinkering.I gradually came to the conclusion my idea wasn't suitable for the project. In particular:Snapping off left sharp edgesNeeded an instruction sheetHinges tried to solve the sharp edge but they were big, clunky, broke easily, and/or hard to printTrying to print multicolour would be limiting the colour choicesNo place to store all the partsWobbly and prone to falling overI tried to make it work. I really did. It might still be useful for something else. Such as a cautionary tale or projectile. Or both.Back to the Drawing BoardIt's hard to admit your idea isn't working. Especially when you were so sure of it. After I sulked a bit, I decided I needed to draw up a list of  “must haves” and “nice to haves.” Hard requirements:Immediately ready to play withSelf-contained (everything had to store on board)No sharp edgesMinimal small partsEasy and quick to print with minimal AMS wasteNo difficult assembly steps or special hardwareSoft requirements:Swappable scenery backgrounds made with business cardsImmediately recognizable as a puppet theatreMulticolourInteractive in more than one wayThe Model Takes ShapeArmed with a shopping list, I booted up Fusion. While I'd like to say that I knew what I was going to do that's not what happened. I morosely faffed about and came up with this awkward thing.   Faffing about. Not enough room for puppets. But the sliding stage was okay…ish? I made it, but didn't like it. So I returned to my tried and true approach: procrastination cleverly disguised as research. I looked at a lot of photos of puppet theatres. New theatres, old theatres, theatre illustrations, full-sized theatres, tabletop theatres. Did you know there's a bajillion theatres out there? And I looked at all of them? It was only when I mashed two entirely different theatres together that I finally broke through the creative block. The first, an antique Victorian toy theatre with its elaborate designs and equally elaborate puppets. The second, a 1960s era Punch and Judy theatre toy with its compact house-like design, simple playfulness, and instant association with puppetry. I wondered if I could combine what I liked about the first (puppets attached to pasteboard strips which propelled them onto the stage) with the simple practicality of the second. With this in mind, I went back to Fusion, enabled productive faffing, reused the sliding stage idea, banged away for a few hours and created something I can only describe as…thick. The picture doesn't truly convey how chunky this thing was. There were problems – it took forever to print due to the excessively thick walls and the underside of the roof was a hot mess  –  but it felt like I was heading in the right direction.  I had learned from the first batch not to blindly tackle problems like whack-a-mole, but to instead slow down, look at the big picture and really think things through. What worked? What didn't? My next attempts were more slowly and thoughtfully created. I'd stop after each one to ask the questions, tossing what wasn't working, keeping what did. And always comparing against the hard requirements. Left side Good: stage is stationary now and only the floor slides, overhangs eliminated by removing ceiling entirely, the extension at the bottom of the stage gave it a bit of visual depth, having the stage front print flat meant it could have colour added to it with minimal AMS waste Bad: way too many parts, still too chunky, brackets felt weak, stage front only attached at the bottom (weak) Right side Good: lid less clunky, brackets replaced with tall bracing columns (more surface area for the dovetail), backdrop slot added Bad: still too big, curtain still required an AMS, the front columns not thick enough and might break, dovetail poorly sized, window shape is meh, lid too tight The Model CoalescesThe right-side model was the one that showed the most promise and so I decided to just go for it. I started a new fusion file, and started building “for real” this time. I fixed what I didn't like including figuring out how to make the curtain print separately. Sadly, I ditched the backdrop slot because it was causing problems in terms of ease of use, overall model size and so forth. I also added a two-colour effect to the front by making a raised border and stage extension that could be easily printed with a filament swap. You could say this was the point where having met the hard requirements, I could start on the soft ones as well. I sent it to print and crossed my fingers. When I pulled this off the printer, I had a thrill. This was IT. Finally. I had found the shape, the dimensions, the everything.At the time I thought I was a few cosmetic changes away from being done. Narrator: She was not, in fact, remotely close. After this first fully-realized, ready-to-polish (ha) model, I went through at least a dozen more iterations, going through the requirements each time to be sure I was on the right track. I even figured out a way to put the business cards back in business (😎👉👉) which pleased me to no end. I could go through each of the remaining prototypes, but it's late, I'm tired, and this is long already. Instead, I'll sum up all the important bits with my favourite and yours: the instructional diagram. And if you think this is a lot, I haven't even mentioned the lid, the ungodly amount of time I spent researching global business card sizes, or having to go back in and redo both PDFs from scratch because of a big mistake 🤪But finally it was done. The finished model.  Actually…I tell I lie. This was one version ago.What could I have possibly changed at this late hour? (The lid. Always the lid.) Puppets for PieksekistenIn the end, the theatre had to go through many versions to get to what I thought was impossible: all the requirements – hard and soft – achieved. While I was initially deflated about giving up what I wanted to do, the final result is better for it. While no one can guarantee how a toy will fare in the hands of a child or even in the environs of a hospital ward, I can at least guarantee that this is the most over-engineered puppet theatre I've ever made.* I hope you…enjoyed?…this particularly deep dive into prototyping. If you have any prototyping stories of your own, I'd love to hear them!     (Is joke! I only made one puppet theatre and it's this one!) https://makerworld.com/en/models/2753762
Celebrating Easter with Freshly Printed Veggies
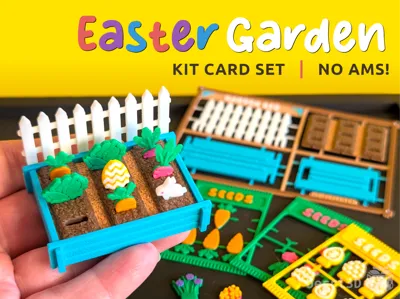
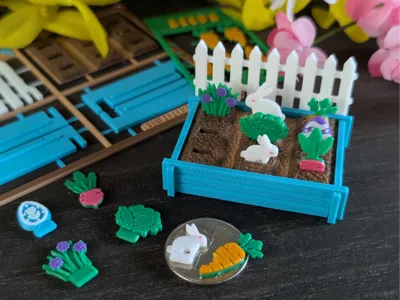
Celebrating Easter with Freshly Printed VeggiesI've been working overtime on this kit card set. It was so much fun to create that my biggest trouble was having too many ideas and not enough time! Now that it's finally posted (get it here: https://makerworld.com/en/models/2592154), I thought it'd be fun to go behind the scenes of my design process.InspirationI began the project with an idea of recreating a typical early Easter Sunday morning when I'd be out helping the Easter Bunny hide eggs in the garden. For some reason, he really liked the vegetable patch. It perhaps was because I liked being out there with a cup of coffee, wondering what I should plant that year, then having to remind myself that I had a job to do.  With this in mind, I wanted to create a mini take-along garden that could be planted and replanted. And of course I wanted to make sure that the Easter Bunny and his large extended family could come visit, have a nibble, and perhaps leave behind some treats!ConceptAll my designs start with a pencil sketch. It helps me get the idea on paper so I scribble and scratch my way around the concept, forming the rough “edges” in my head. I'm certainly not an artist, ha! But it helps me work through an idea and come up with solutions to the “how” of design. Refining the IdeaAfter I have the rough direction I want to go in, I start playing around in Inkscape which is an open source vector-editing software. This is usually where I get a ballpark of scale. Since I usually create miniatures with fine details, I use a stroke width of 0.42mm on shapes to gauge the printability. Why 0.42? Because that's the default line width in Studio of a 0.4mm nozzle. This was one of the first bunny sketches I made. I saw I could make it even smaller thanks to the stroke width.  3D Modelling BeginsI use Fusion 360 to create my models. Like me, this program also begins with sketches. Sometimes I draw directly in Fusion. Sometimes I import vectors from Inkscape. And sometimes I do a bit of both like this sketch for the baby bunny. Green lines are what I imported from Inkscape, blue is redrawn using fit point splines. Notice the file names? At the time I created this sketch, I was still in what I call “sandbox” mode where I just play around and don't worry about fully defining it. After I have a sketch ready to become three dimensional, I extrude the profile and add filleting to create a more organic shape.  Fillets hide a lot of design crime. I also have to be careful not to go too heavy on them because they can create meshes that are too small for Studio to properly display (and thus print). Normally not a big concern, but this little baby bunny is barely 11mm tall!Prototyping aka the Goldilocks PhaseAt this point you may be wondering when I get around to actually printing something. This is where that happens. It's where I take what I've created in Fusion and see if it matches what I want the model to look and feel like “in the hand.” Scale is a hard thing for me to master as of yet and I hardly ever nail it on my first try. Too small….  Too big!  Just right!  I often go back and forth between elements. While a prototype is printing, I'm modelling the decorations. Once the prototype is off the printer, I can see what needs to be changed. It's a big soup of a process and there's no clear path through it especially because I change my mind a lot! Fortunately, Fusion allows me to change dimensions easily if I've set them up as parameters.  It's especially useful for when testing tolerances. While my kit cards may look simple, there's a lot that goes into ensuring all the pieces fit together well and print consistently. Parameters really help me dial in the fit.Sprue DesignI've come a long way since my first kit card created with Tinkercad back in 2023. Sprue design has always been a headache but once I realized that I could make them look fun, it became less of a chore.  I use a combination of parameters and some “tricks” to create strong tips that are also easy to remove and don't break while taking them off the build plate.   If you're curious about Stunt Dirt, he's the stand-in model for Real Dirt. Real Dirt is a diva with hundreds of thousands of mesh triangles that bog everything down. After it crashed Fusion for the 16th time, I made Stunt Dirt do the (pardon the pun) dirty work until the final export. Bambu Studio At this point you're thinking surely it's done by now, right?? Not yet. I often go between Fusion and Studio and check to see how the model looks when it's sliced. If it doesn't look how I think it should, I can make changes before I even hit print. I also choose settings and take advantage of slicer behaviour so that I can make sure that colours print where they should.  For example, by ordering the sprue at the top of the assembly in the Objects tab, my own special “beam interlocker” sprue tips will print properly. Finishing StepsAt this point, there's still more work that I do. From testing with other filaments, to writing model descriptions, to creating assembly documents, to photography, I do it all and I do it by myself. I may not be a fast creator, but I am a thorough one! What my photography “studio” looks like. A chaotic mess. Yes, that's a whole lot of plastic. It was organized before I started, I swear! Also, all those parts will be given as Easter basket gifts to friends and family. Maybe their homes will also experience a bunny infestation uh…colony. Then there's the instructions. I create them in Inkscape using images captured within Fusion360. I used to be an instructional designer back in the day so I have a bit of a leg up in creating diagrams. They still take time to create. One day I'll learn the animation tab in Fusion but today is not that day.  The ResultThis was a solid 3 weeks of work for me. But it was worth it. It's so gosh darned cute. I love planting and replanting all the seeds. The bunnies keep finding ways to escape and wind up in weird places like the one that went through the laundry along with a wayward carrot.  The seed packs were born from me pretending to shake out a sprue over an early prototype as if I was actually seeding the garden. Also, yes, some of these “seeds” aren't really seeds. But I'm using my imagination here 😅  I also created a tiny watering can and Easter basket to go along with, but they weren't ready for publication yet. Here's a sneak peak because they're adorable, too! I was sad I couldn't release them at the same time but it'll be worth it, I promise!  Closing ThoughtsI hope you enjoyed a look at my process and found it informative! If you have any questions or thoughts, I'd love to hear them. In the meantime, I wish you and your family the best, hoppiest, and most veggie-full Easter yet! Naomi aka berri3D 🥰 Edit: I wrote this after only a few hours of sleep and realized I missed a step and made some typos. Fixed now 😅