
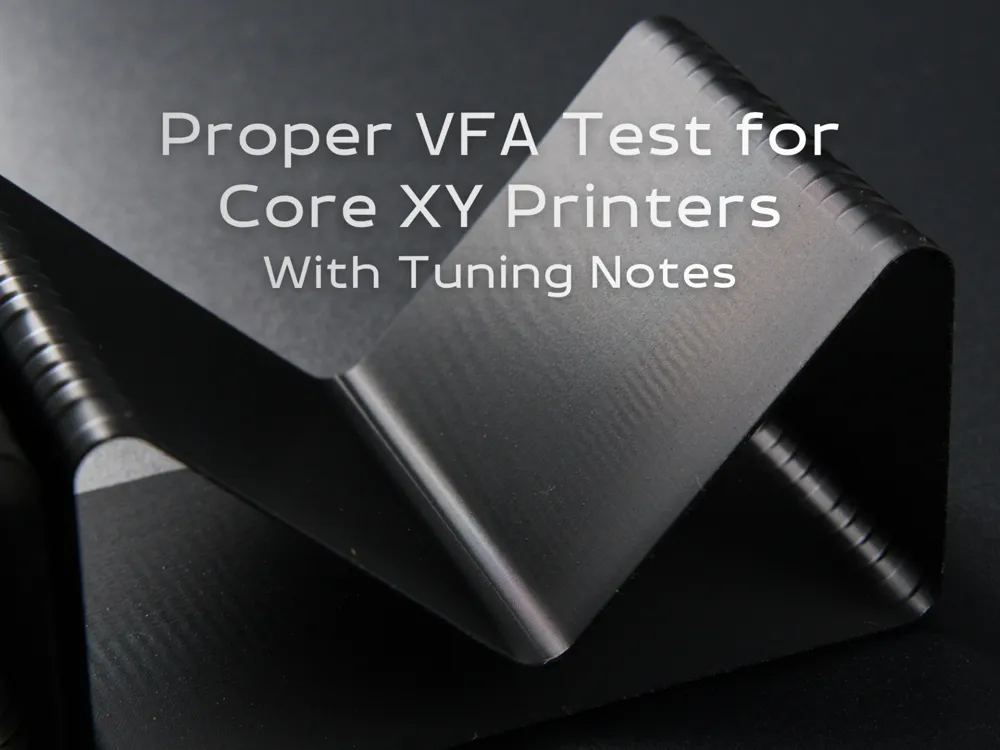
VFA Test for Core XY Printers
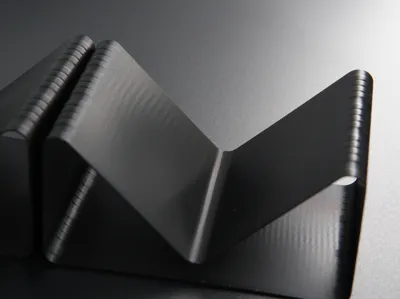
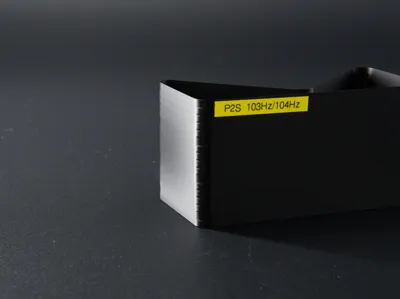
Print Profile(2)

Description
Introduction
If you have not heard of VFAs, it's not too late for you, stop reading this, close this and go live your life!
For those who can't unsee it, read on…
VFAs are “Vertical Fine Artefacts” and refer to any patterns of vertical or vertical-ish lines that appear on the print surface. They have a variety of causes, and as printing technology develops, some causes are being addressed but new causes are showing up (from faster printing, larger printers and newer motion systems for example).
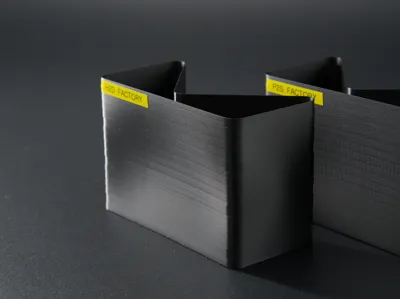
This page attempts to define a comprehensive list of different types of VFAs, how to test for them with new types of tests designed specifically in core XY machines, and potential methods to address them.
Types of VFAs
I will use the naming convention as started by Taylor from YGK3D in this excellent video about VFAs in modern printers and I've added type 0 and 4 to 7 to the list. Note that I do not agree fully with the video about some points and my description will differ slightly.
Type 0 - Ringing
This is caused by mechanical vibration of the nozzle tip from sudden direction changes. This can be overcome by reducing toolhead accelerations and firmware compensation (i.e. input shaping). In printer design, a lightweight toolhead and gantry with a stiff motion system with little play is critical.
Type 1 - Torque ripple from A and B motors
The A and B motors (motors that move the toolhead in the XY plane) are usually stepper motors and do not apply torque to the belt evenly throughout its rotation. These effects can be reduced by using motors with finer steps (0.9° step motors vs 1.8° step motors) or more advanced motor control to compensate for peaks and dips in motor torque.
Type 2 - Drive pulley polygonal effects
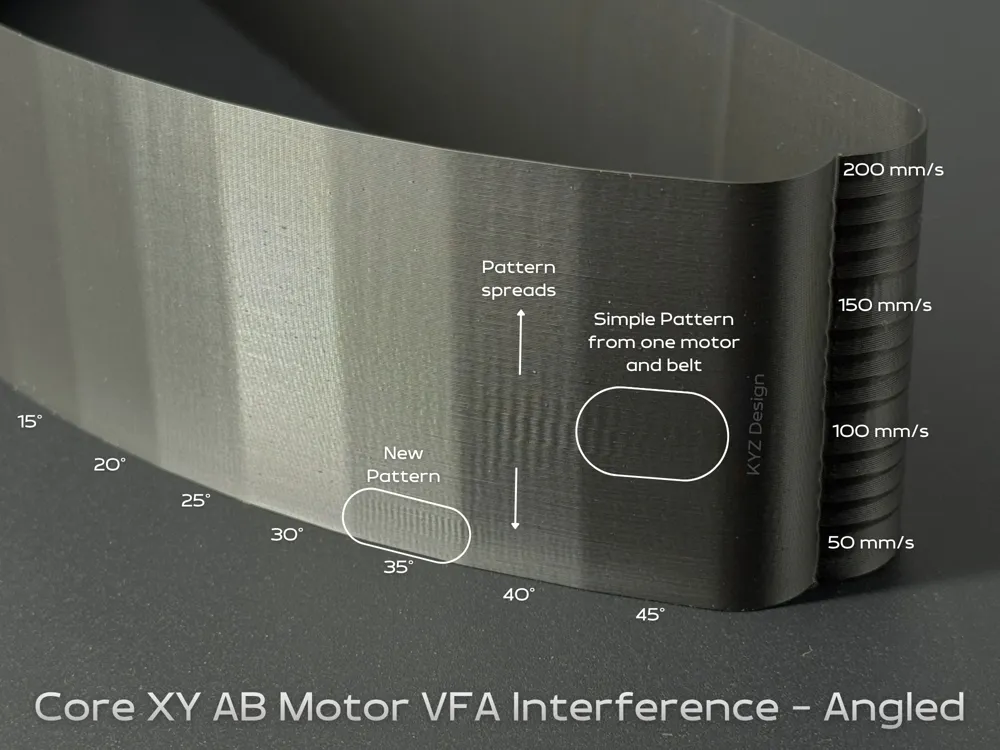
Due to the belt teeth, the belt will not wrap smoothly around a drive pulley in an arc - it will be somewhat polygonal. Therefore, even a smooth rotation of the drive pulley will not translate to smooth movement of the belt. The pitch of the VFAs match the belt teeth on 45° angle surfaces on core XY machines and are 71% of the pitch on X and Y oriented surfaces and are completely vertical on vertical surfaces. Note that Type 3 VFAs may also look like this.
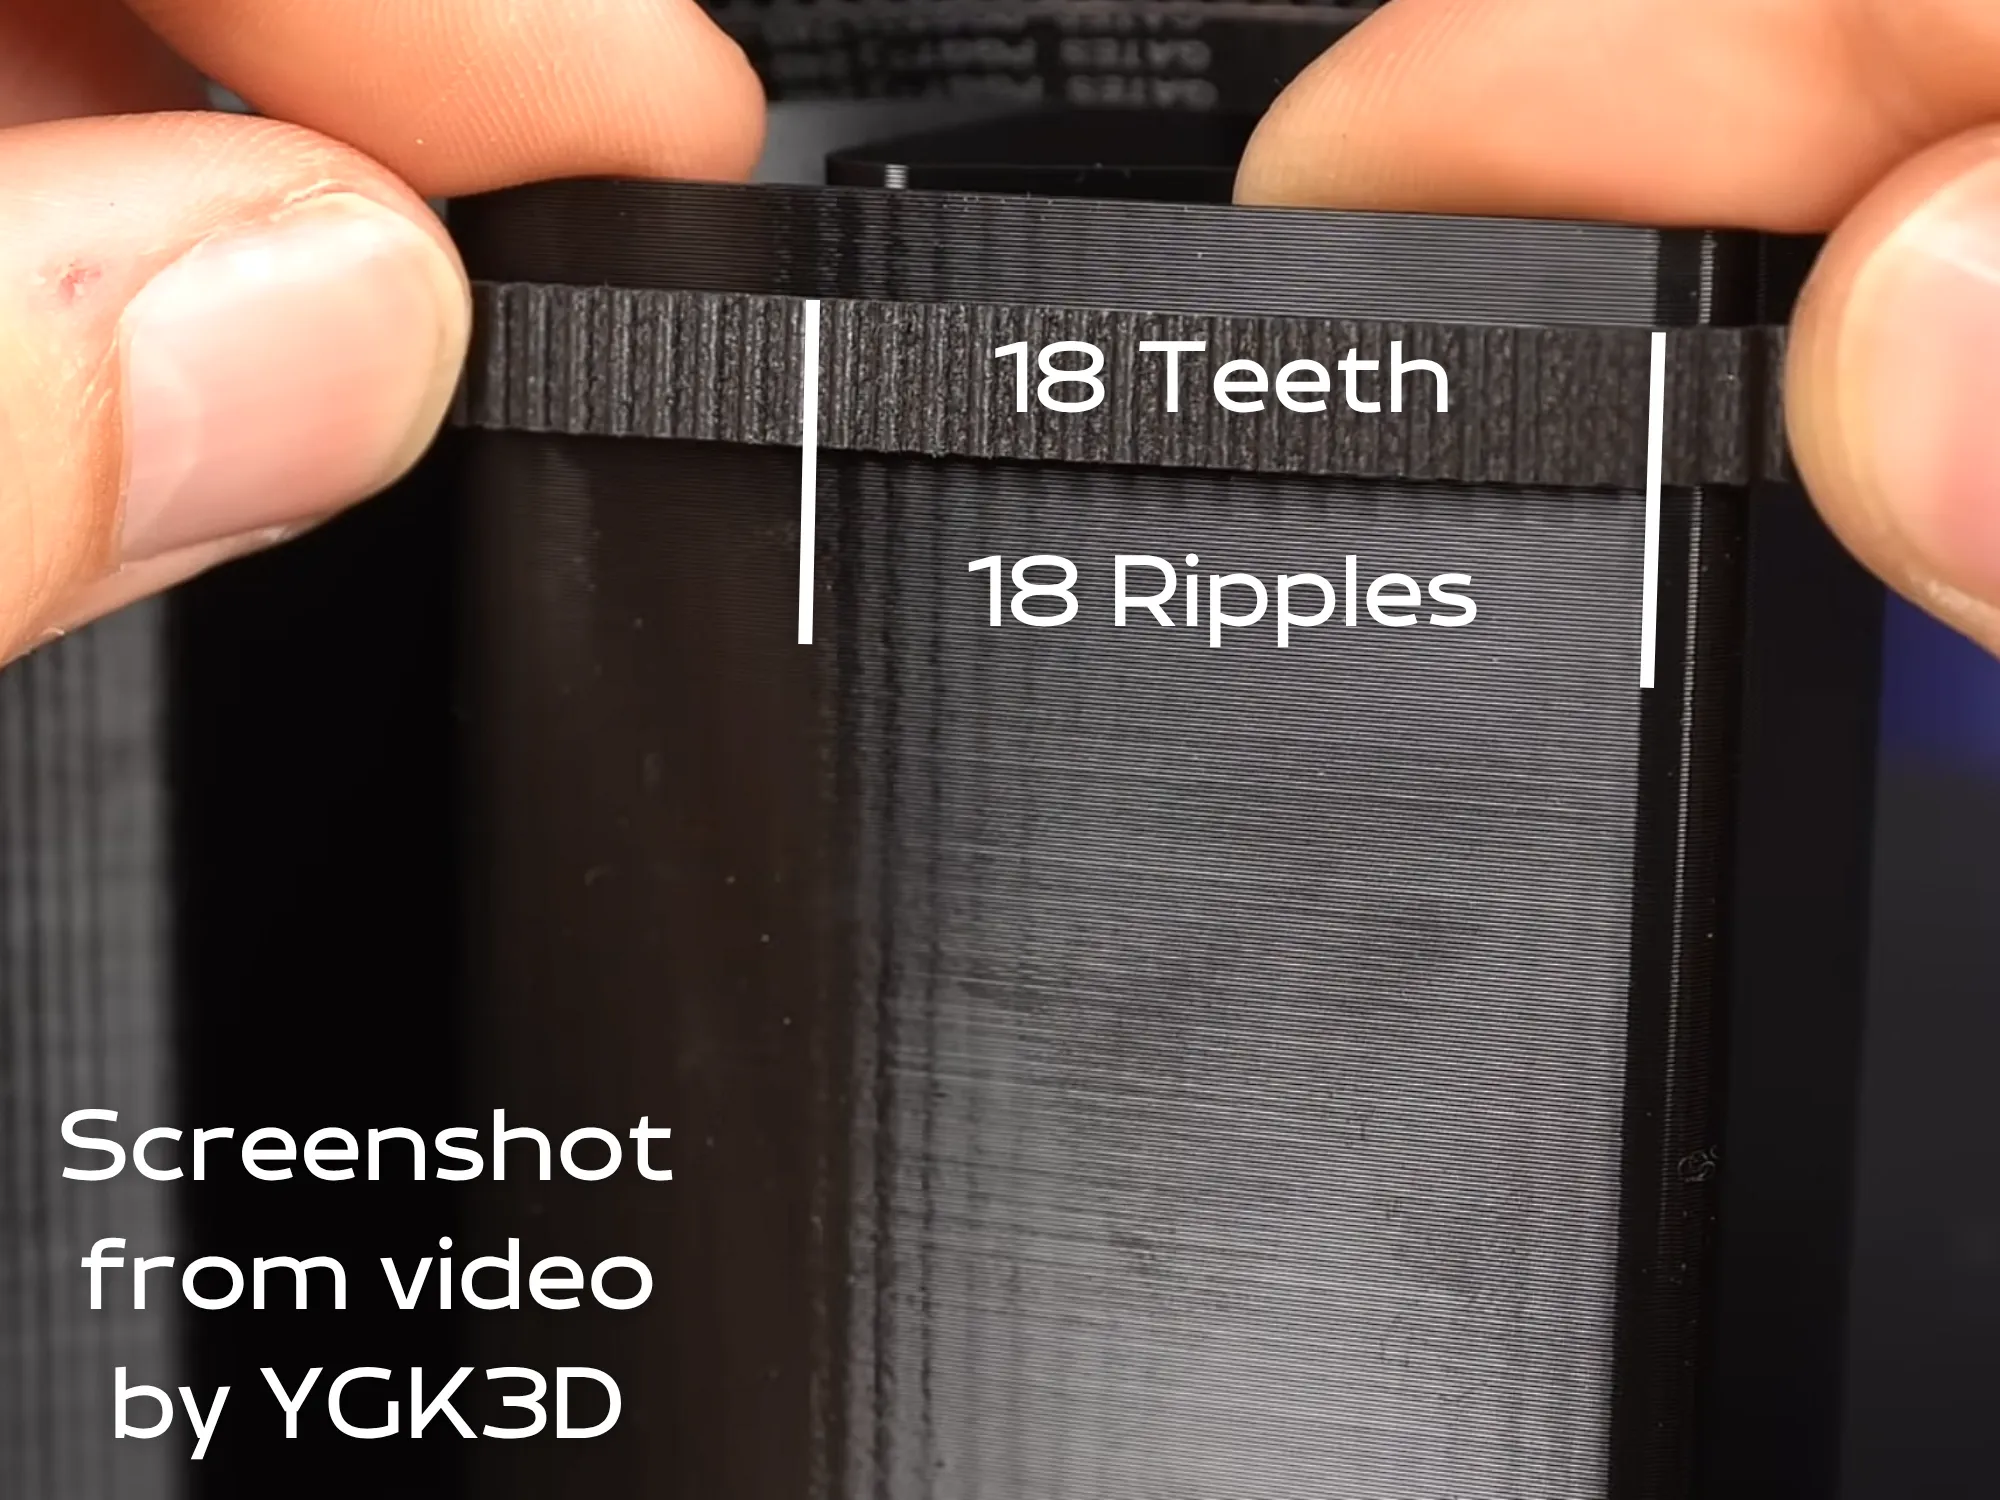
This effect can be reduced by using a belt with finer teeth (1.5mm pitch instead of 2.0mm pitch teeth for example as used on the Bambu H-series and other modern machines).
Using larger diameter drive pulleys will reduce this effect but will make type 1 VFAs more apparent (as seen in the Creality K1).
Lowering the belt tension can reduce Type 2 VFAs as the belts will be rounder around the pulley but will likely increase Type 3 VFAs.
Type 3 - Idler pulley (smooth or toothed) polygonal effects
Similar to Type 2 VFAs but at idler pulleys. Belt teeth riding on smooth pulleys will create a more significant effect as the polygonal effect will be greater. Some people have replaced their smooth idler pulleys with toothed ones and have had success in reducing this type of VFAs.
Type 4 - Belt vibration effects
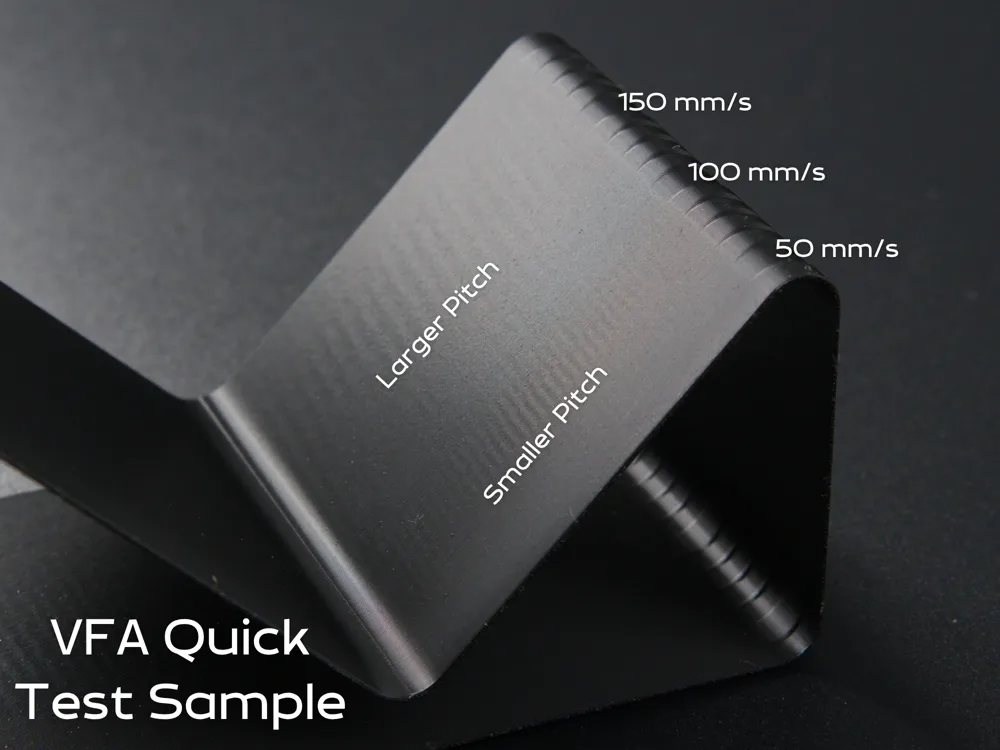
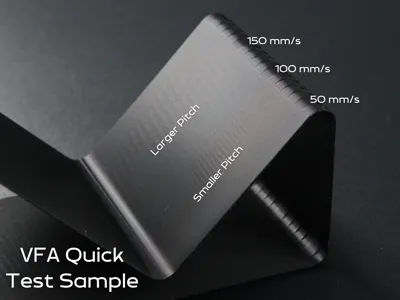
From my VFA test print experiments, it appears that the torque ripple and/or pulley polygonal effects from Type 1, 2 and/or 3 VFAs can produce a second order effect where the belt vibrates and subtly affects the position of the toolhead and create different VFAs, which I will call Type 4 VFAs. The pitch is proportional to the print speed and not necessarily equal to the belt pitch. Type 4 VFAs may combine with Type 1, 2 and/or 3 VFAs through constructive interference and be worse at certain printing speeds. Below is an example from my P2S:
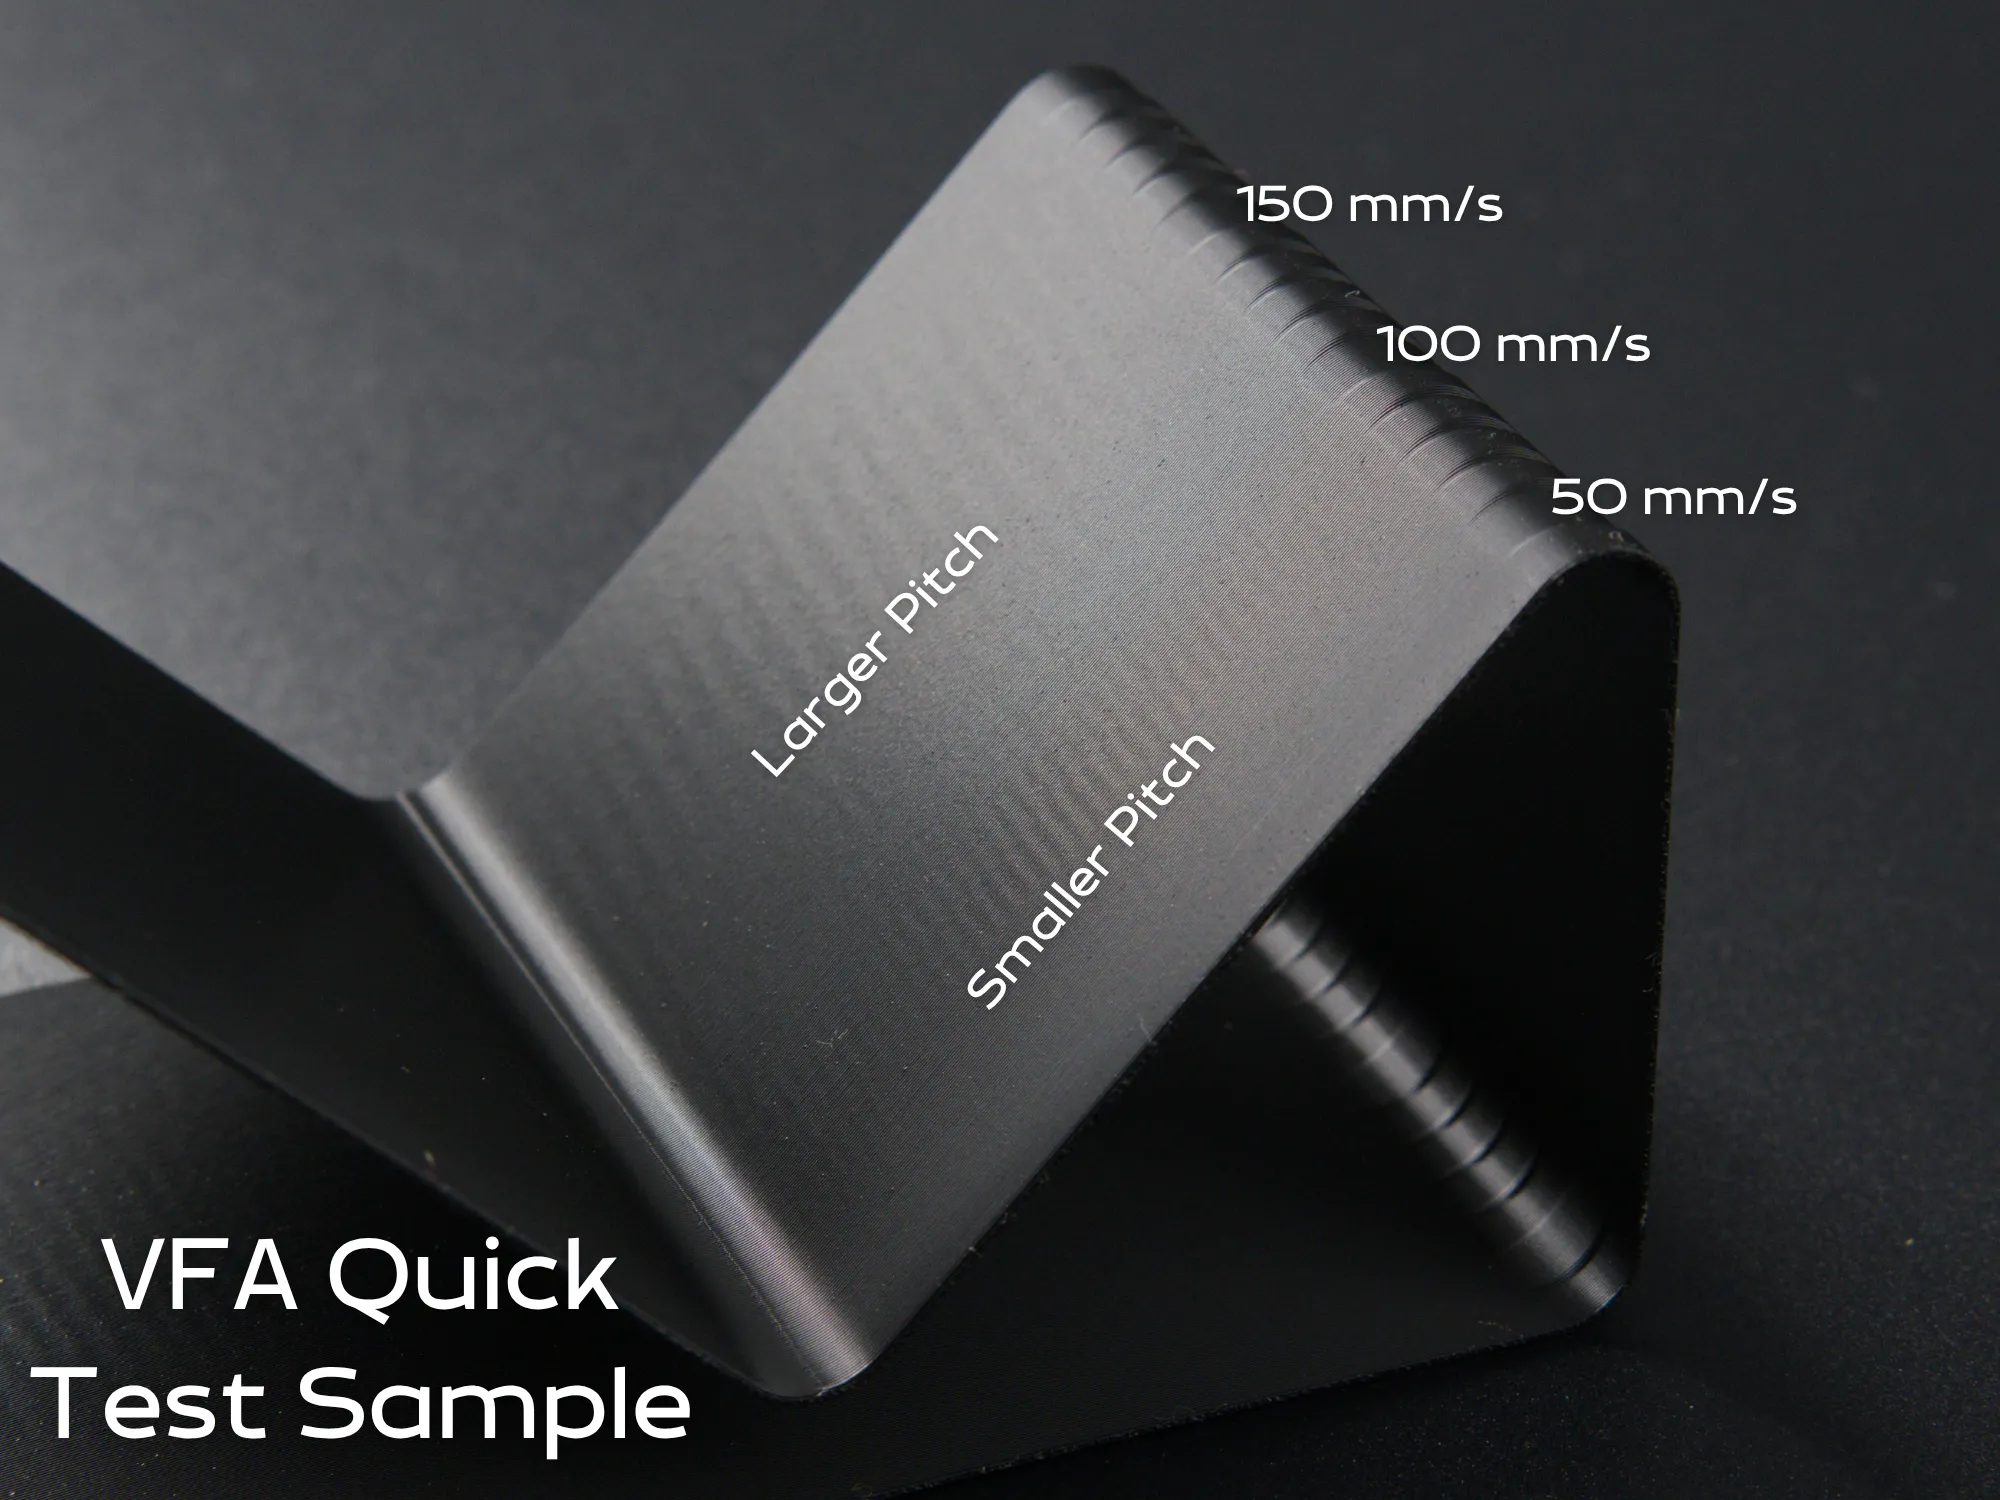
You can see that the VFA pitch increases as the print speed increases and the smaller pitch VFAs and the larger pitch VFAs are faintly connected. The pattern is consistent in amplitude and therefore not ringing (this test sample is designed specifically to not show ringing).
I believe these effects are dominated by the largest unsupported lengths of the belt as their vibrations will have the largest amplitude and their lowest harmonic more likely to coincide with the tooth engagement rate on a pulley on common print speeds. Therefore, on a core XY printer, when printing in the middle of the print bed, the belts far left, far right and rear lengths. The problem print speeds are somewhat predictable if the belt resonance frequency is known, and is directly correlated to belt tension. More on this below.
Type 4 VFAs can be reduced by, of course, addressing the causes of type 1, 2 and 3 VFAs. This can also be addressed by selecting appropriate print speeds, but this can be difficult when printing round objects or objects with many face angles (vs. simple rectangles) due to how the 2 belt systems interact (third order effects!), more on this below.
Type 5 - Torque ripple from the extruder motor
Similar cause as Type 1, the extruder does not apply even torque to the extruder gears, and the filament is extruded unevenly. This can be overcome by changing the gear ratio significantly (by using planetary gears for example, as done by Prusa and their Nextruder) or more advanced motors and motor control.
Type 6 - stepping from the extruder gears
Spur gears with involute gear profiles are designed to transfer motion smoothly but low-quality gears can transfer motion in a stepped manner and cause the extrusion to be uneven. This can be overcome by using higher precision and helical gears.
Type 7 - extruder gear skipping
Printing too cold and/or fast can cause the extruder to skip as the extruder motor cannot provide the force needed to push the filament through the nozzle at that rate.
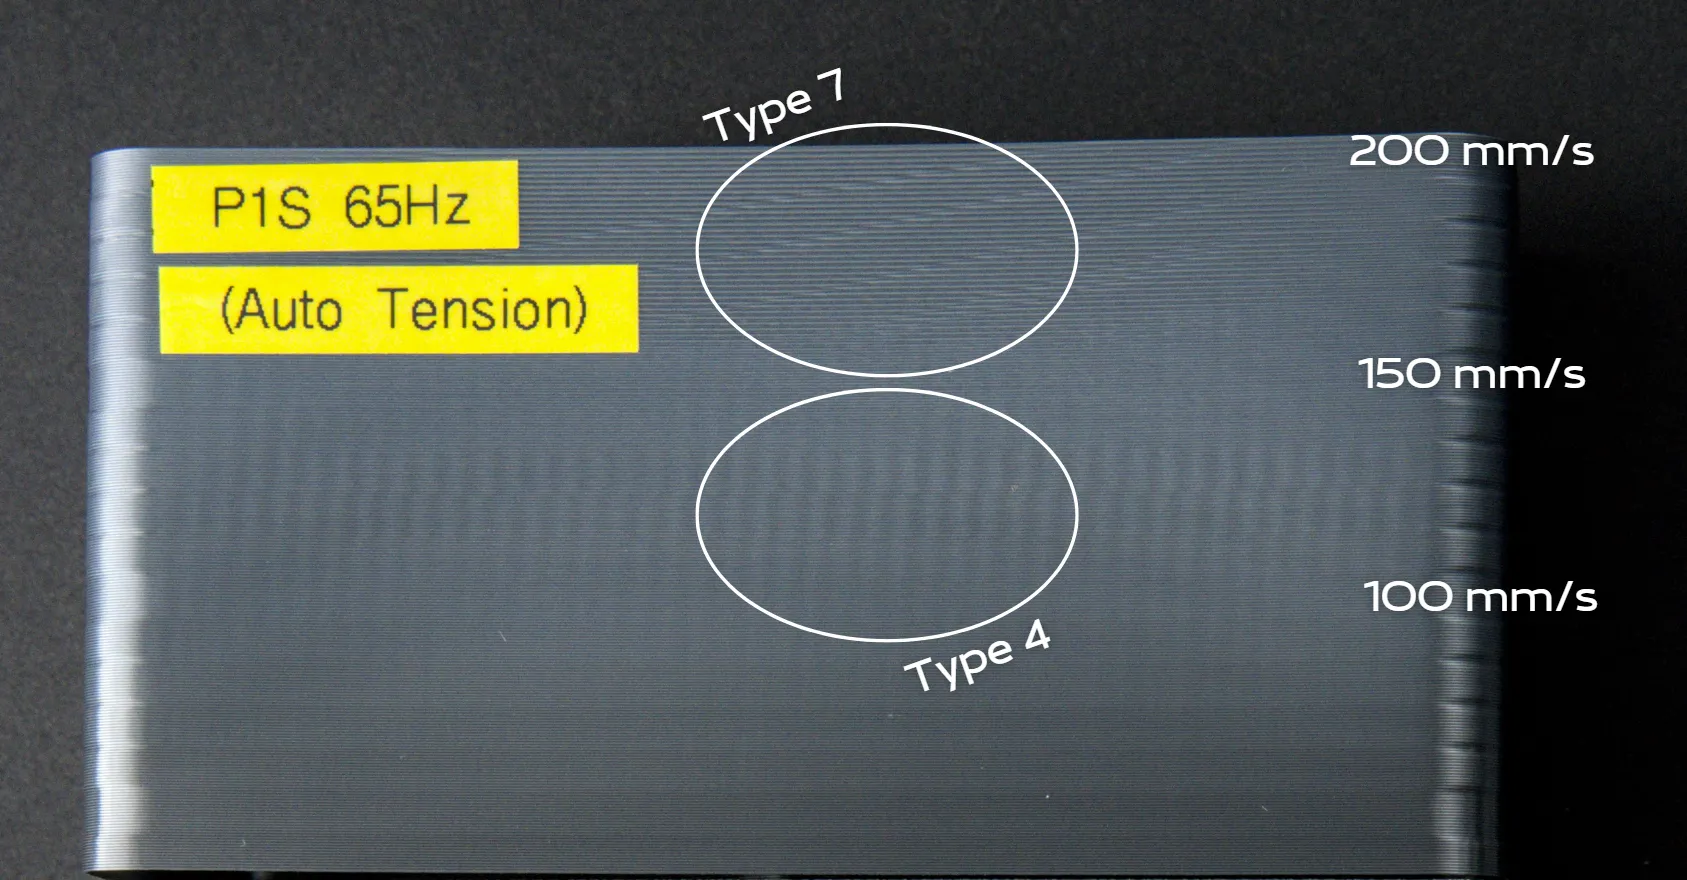
These effects can be reduced by printing hotter, slower, with a “High Flow” nozzle and ensuring that the nozzle heater has enough power and power delivery in printer design.
Issues with the Traditional VFA Test
The standard VFA test built into the calibration option of many slicers is good but I have developed new test samples to address the following issues:
- Sharp turns introduce ringing which may be confused for other types of VFAs. Ringing should be tested for and corrected separately.
- Does not test the A and B motors (and their belts) in a core XY system independently as the 45° face is in only one direction.
- Does not adequately test the interaction and interference between the A and B motors at a wide range of angles and build plate positions (more on this below, sorry I keep saying that…).
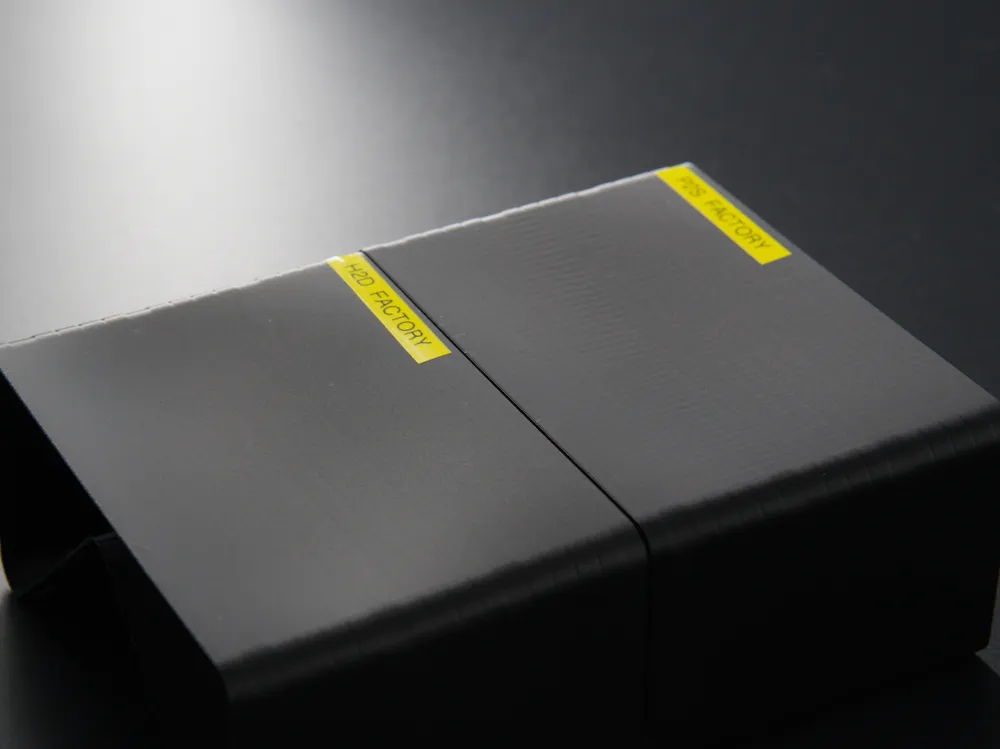
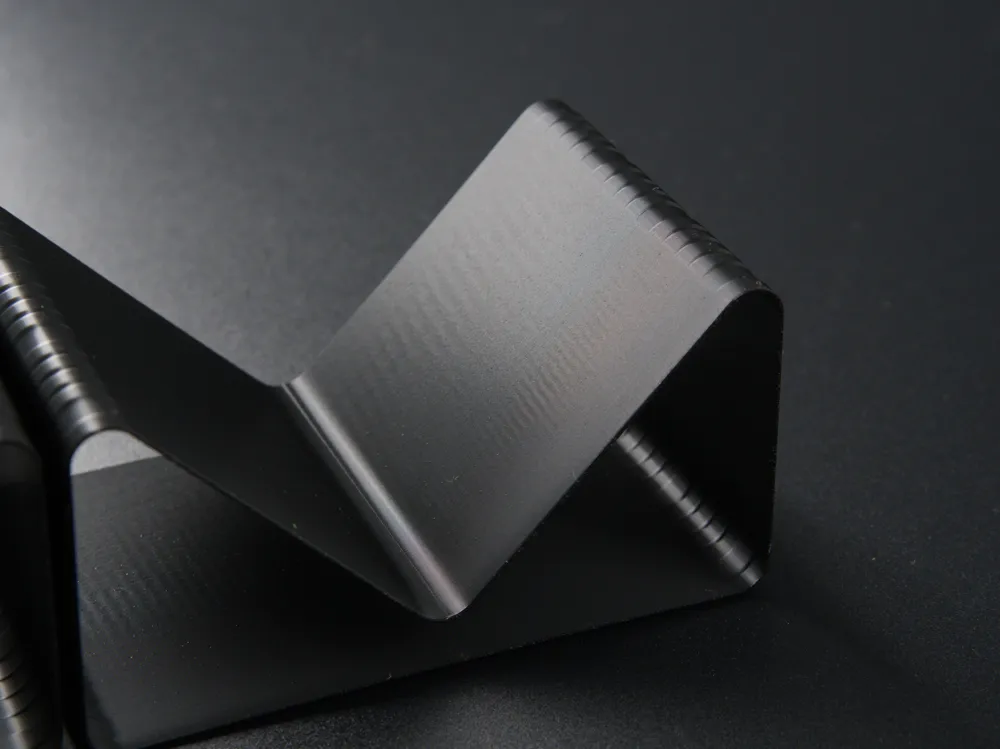
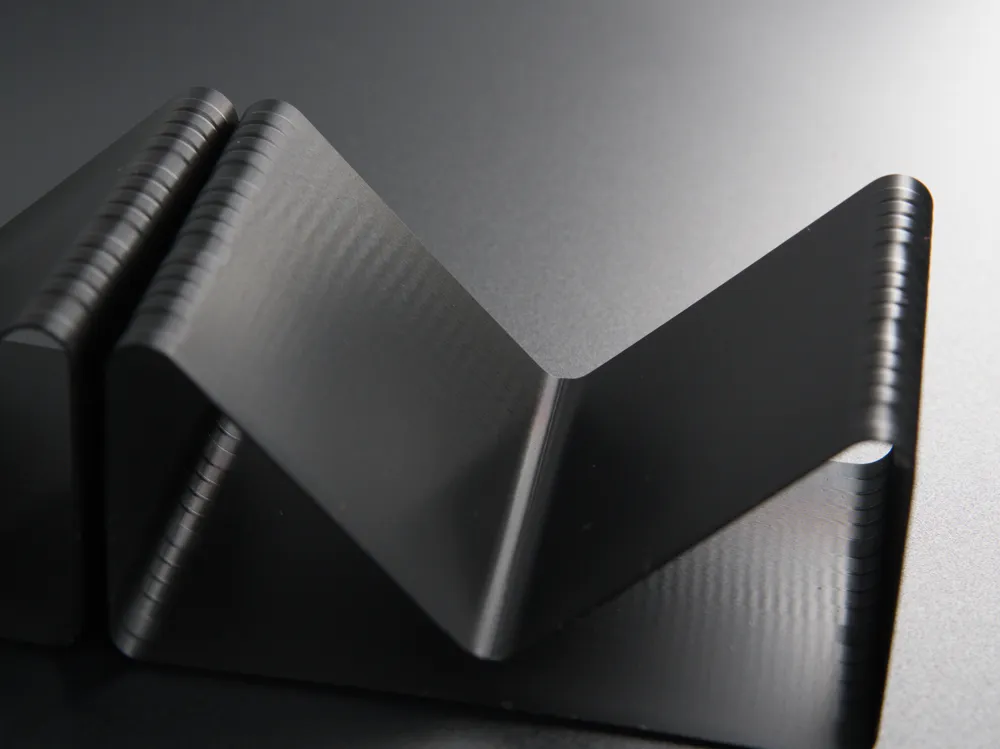
Test 1 - VFA Quick Test
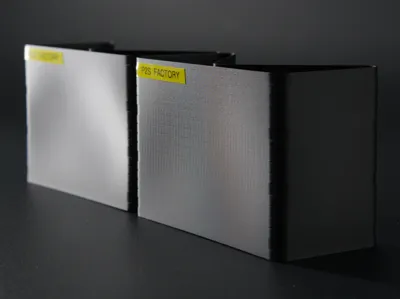
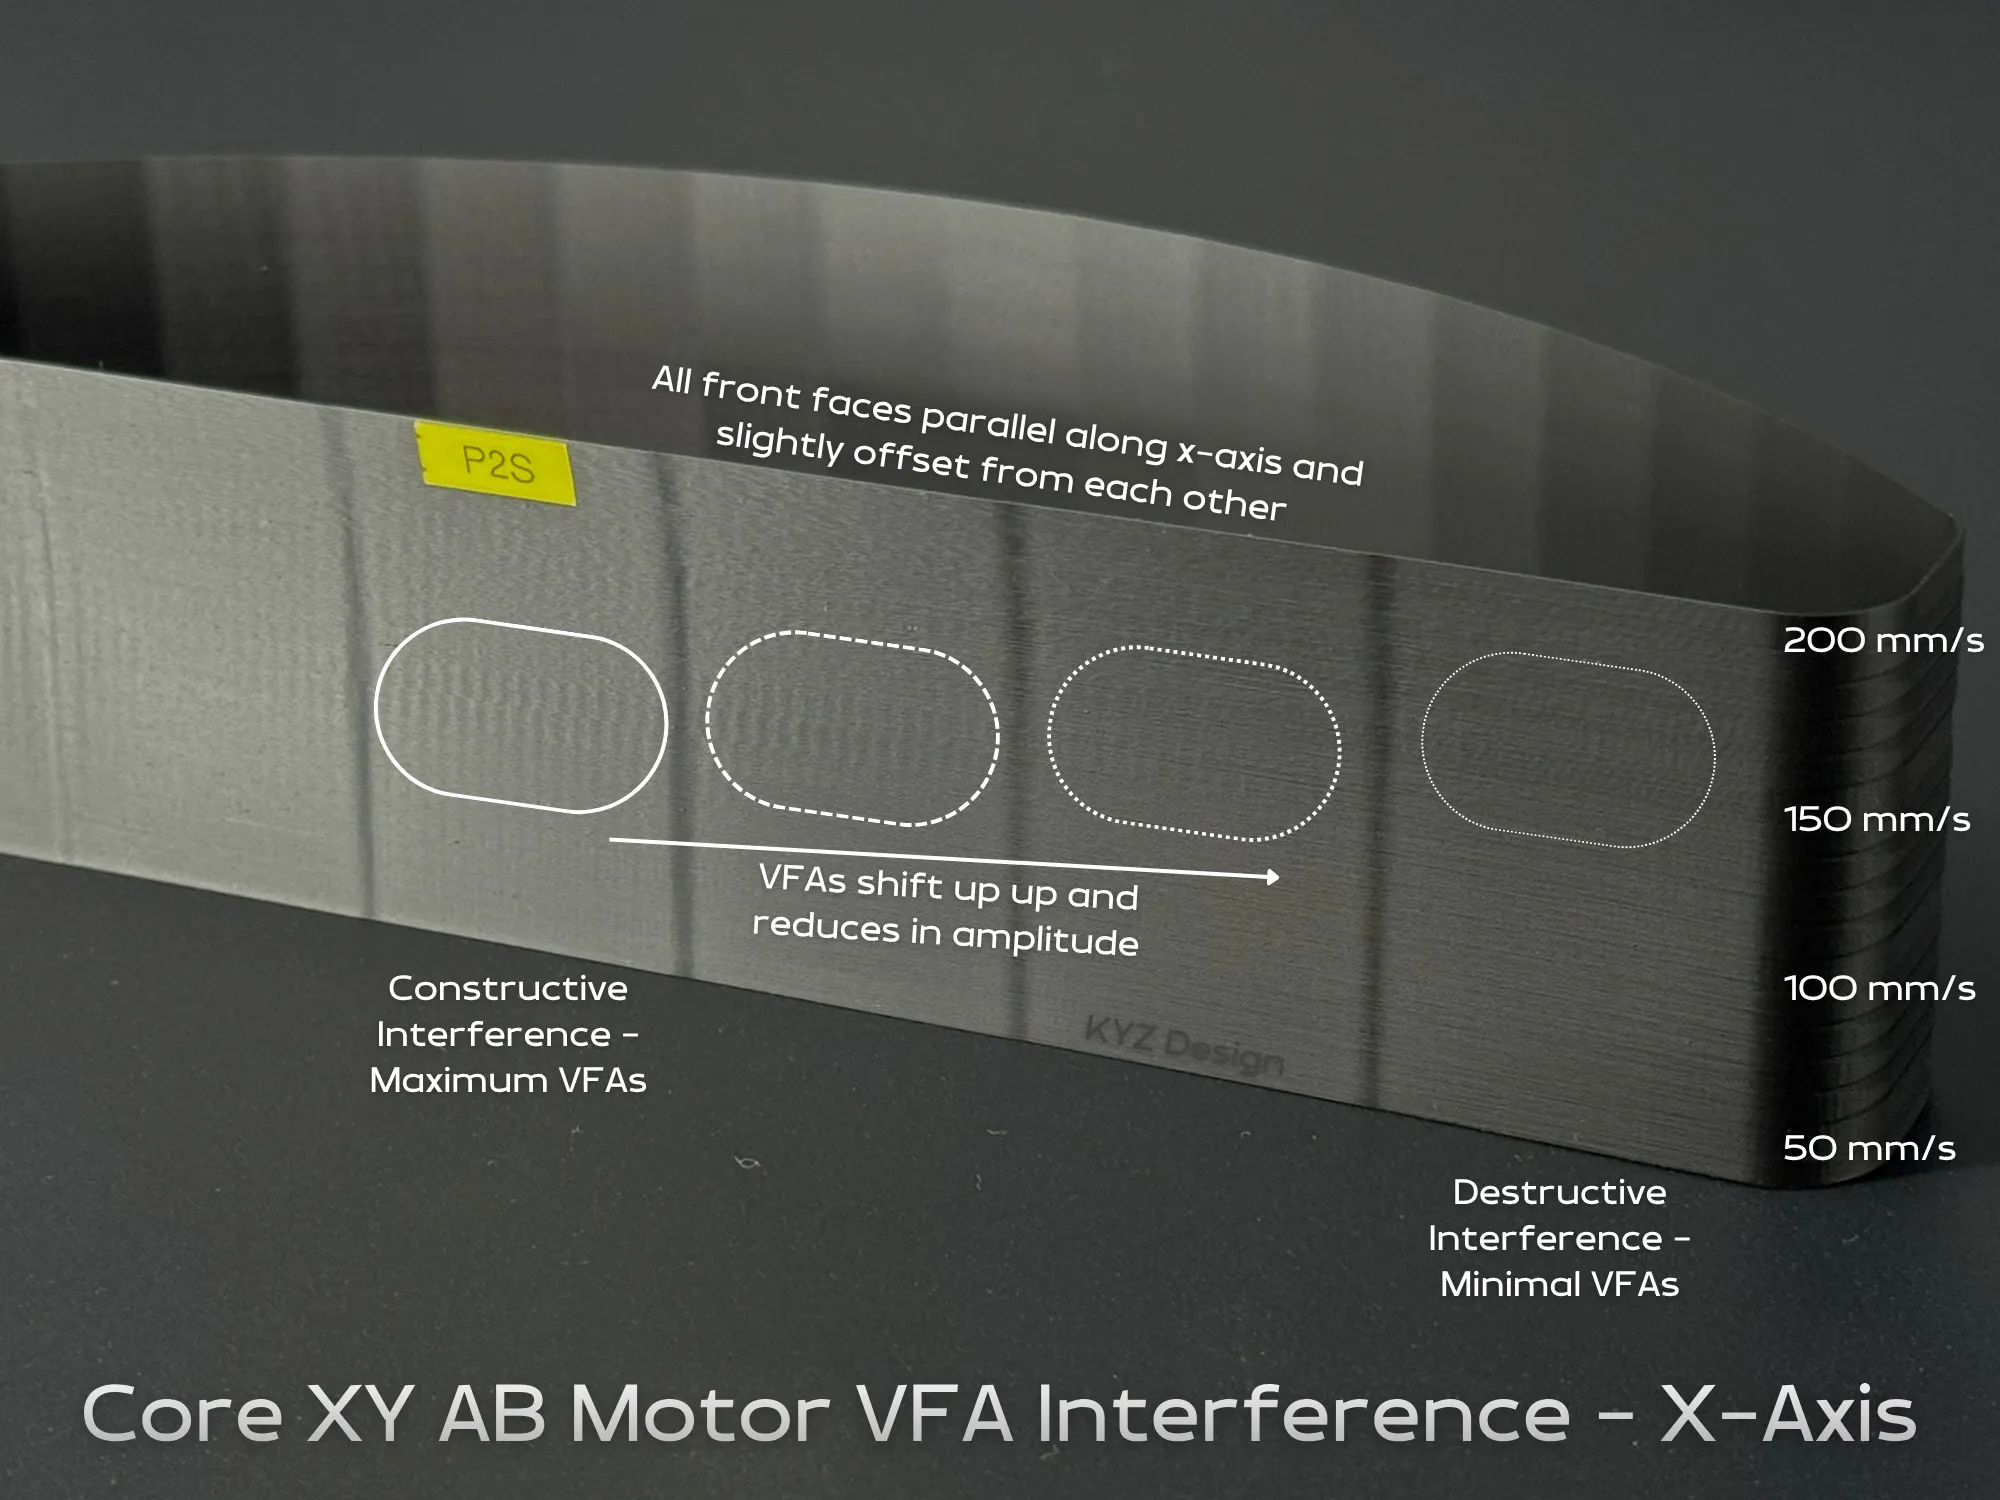
This is a fast printing test, mainly to see how the A and B motors and their belts behave in a core XY motion system. The front face and side faces (X and Y directions) shows some interference patterns from the two systems.
- The standard VFA tuning test uses about 23 grams of material and takes around 54 minutes to complete (for PLA). This test reduces the material usage to 8 grams and takes around 23 minutes.
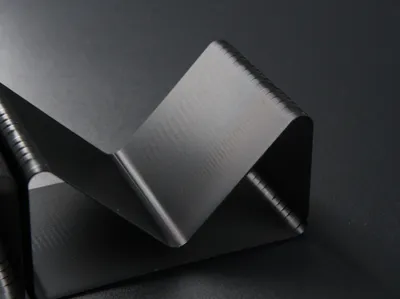
- This also covers the two different 45° angles to test each motor independently in a core XY motion system.
- There are no sharp turns and ringing is minimised.
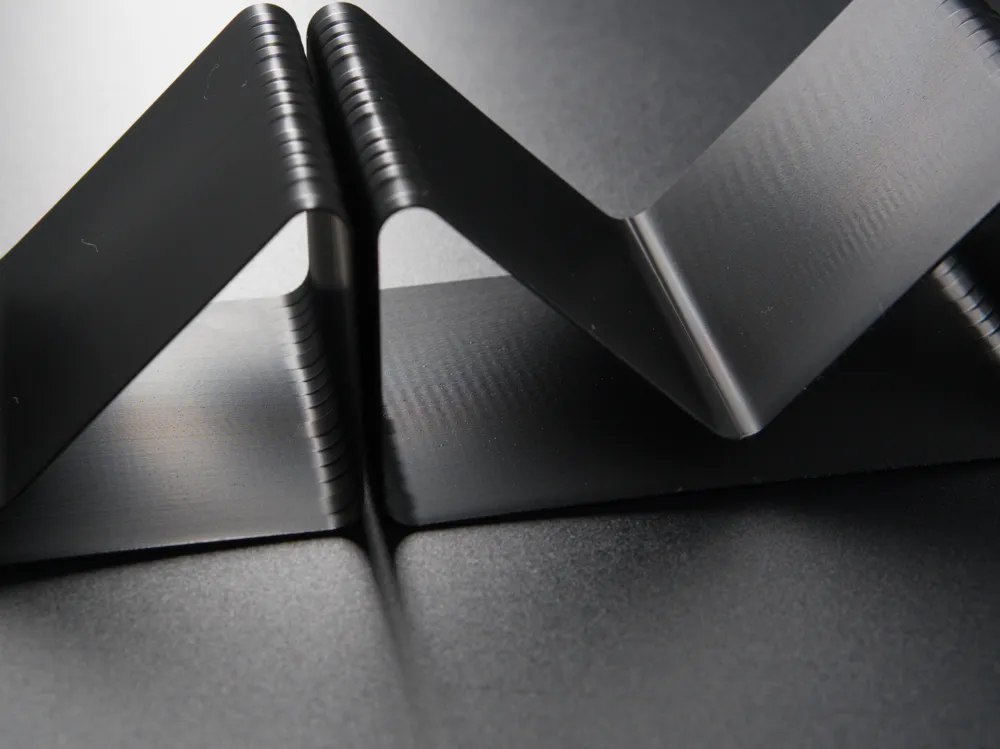
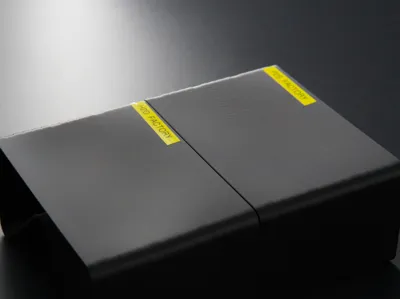
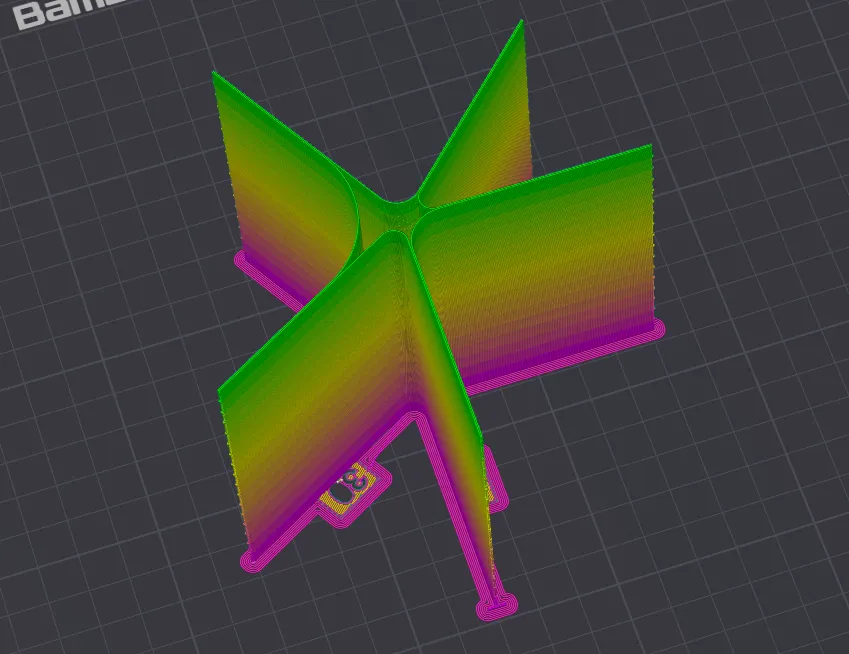
Test 2 - VFA AB Interaction Test
This is a more comprehensive test to see the interference patterns from the A and B motors and their belts.
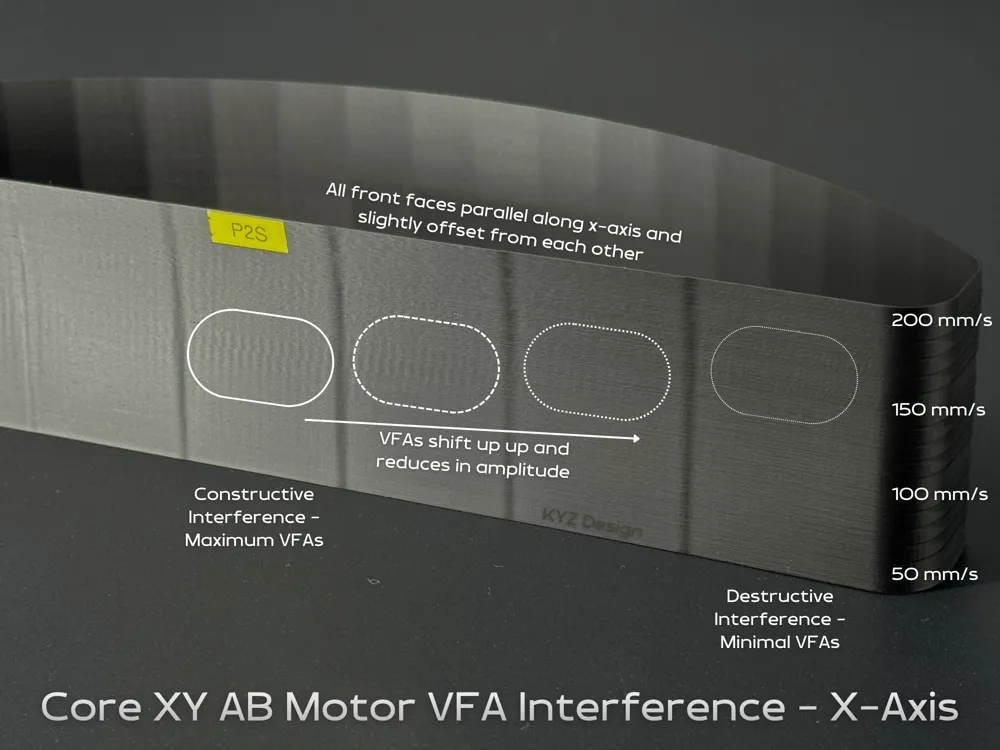
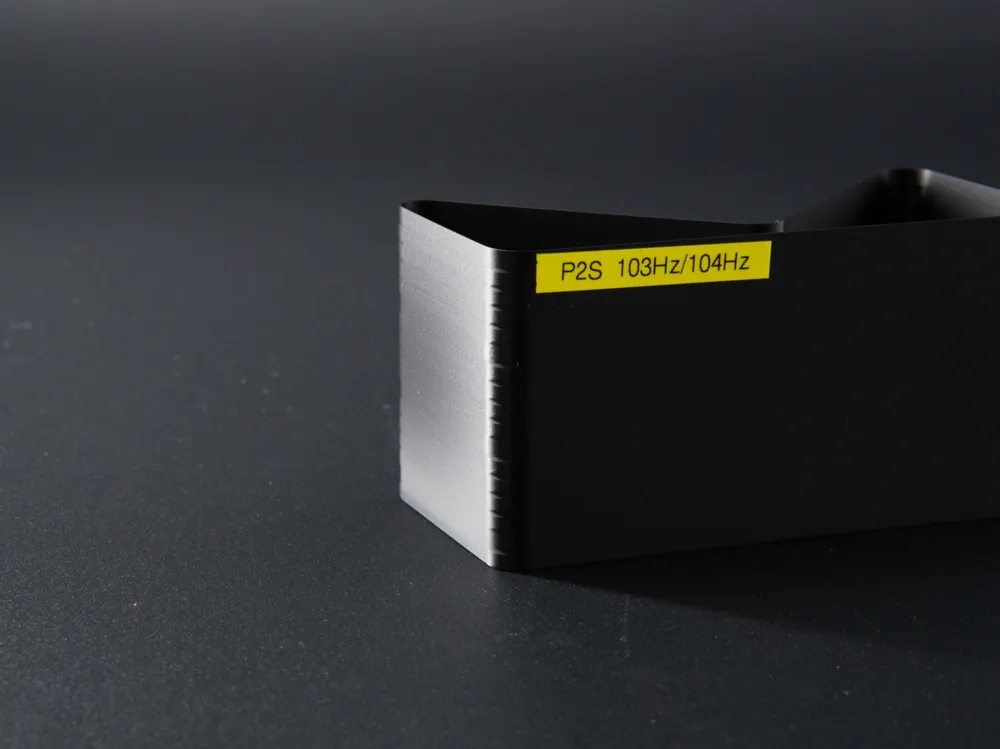
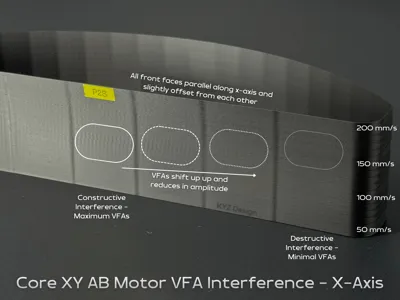
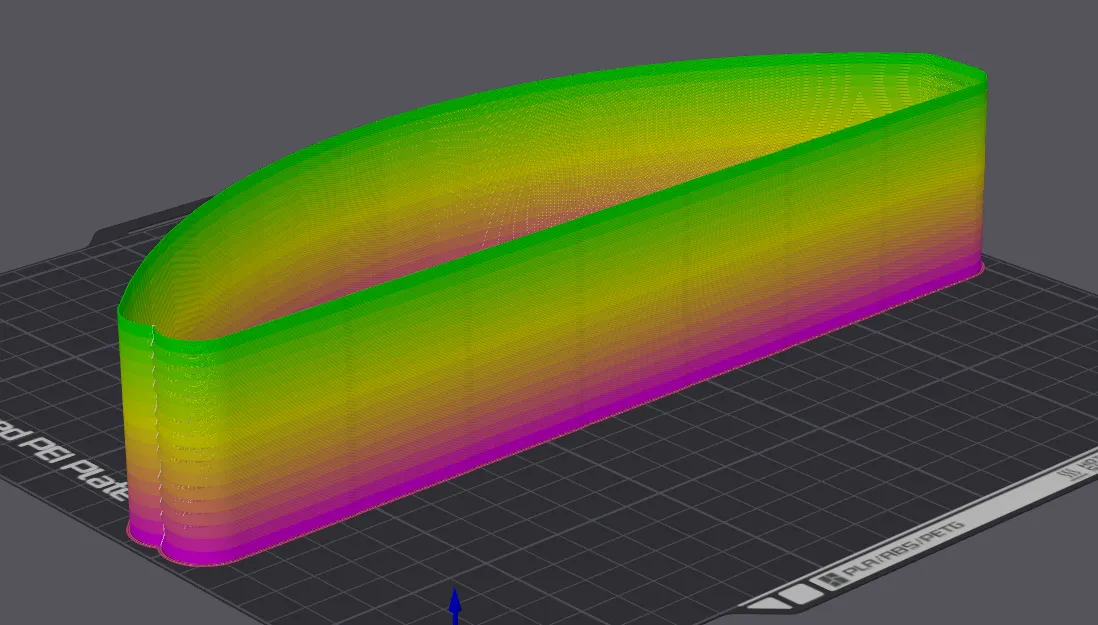
- The front side has 7 faces, all aligned with the x-axis, slightly offset from each other to test for constructive and destructive interference patterns produced by each belt when they both have the same “tooth rate” and thus the same excitation frequency. You may have heard comments like “the VFAs are worse on the back side than the front”. I believe the VFAs depend on exactly where it is on the build plate and can change even if it's shifted 0.5 mm. The offsets are designed to test 2mm tooth pitch belt systems but will work for finer tooth belt systems.
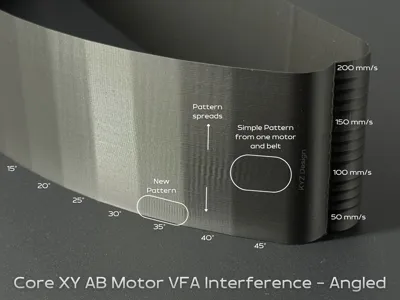
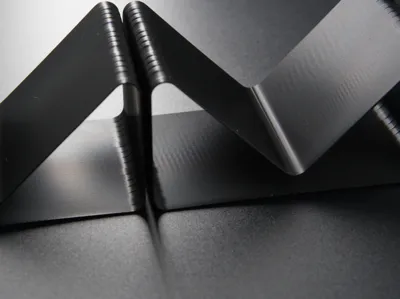
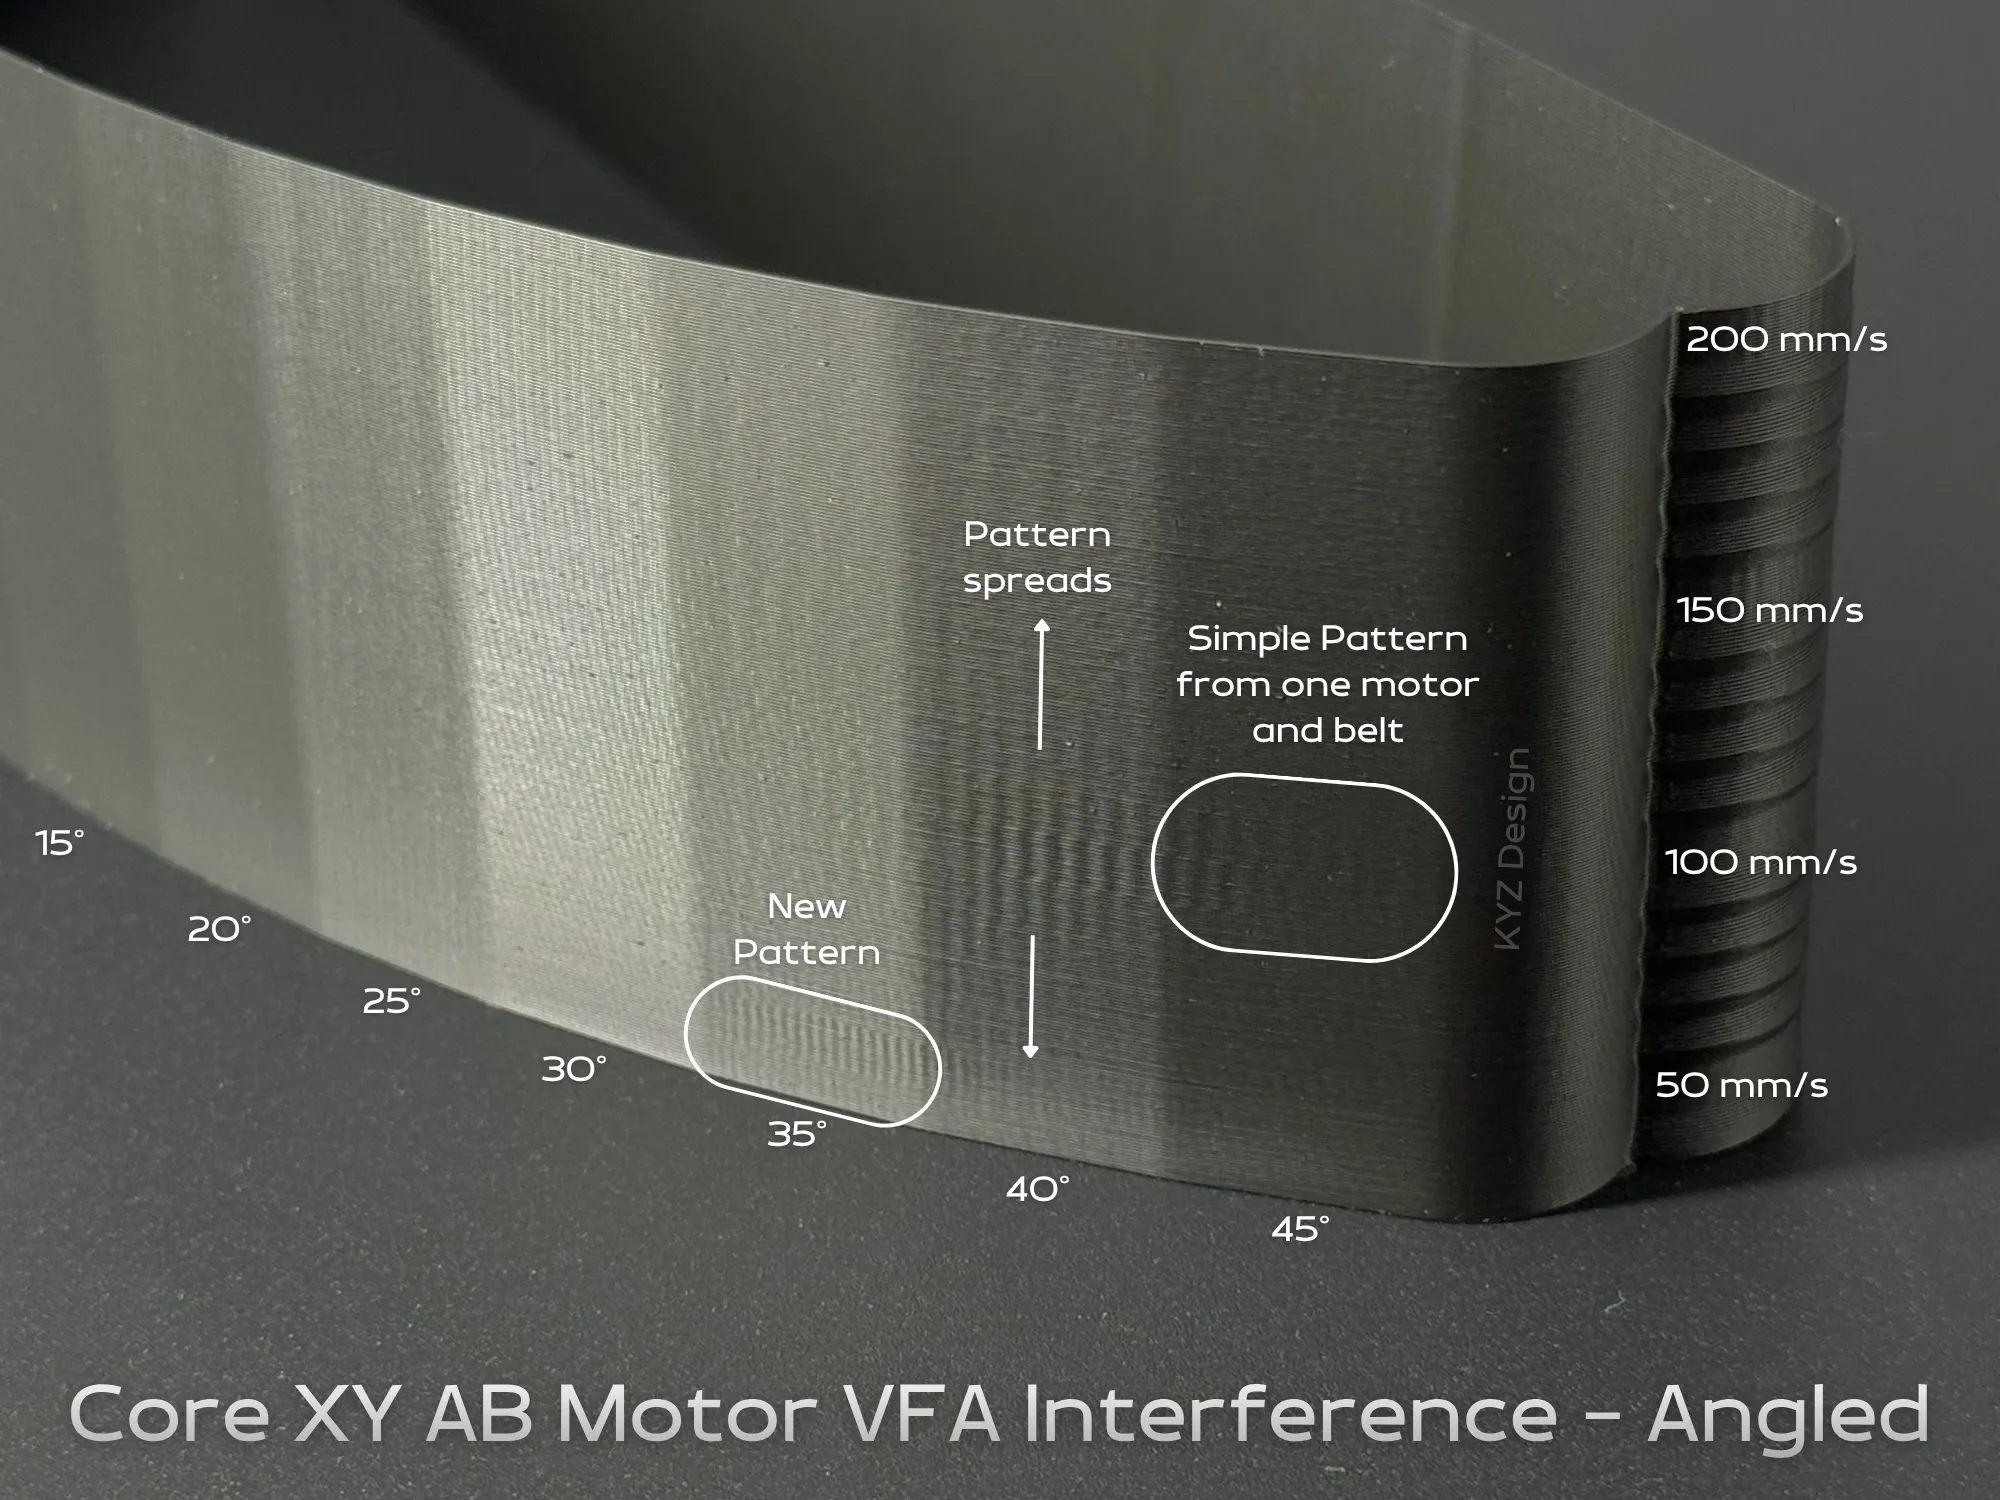
- The rear side has 19 faces, all at different angles between 45° and 135° at 5° steps from the x-axis to determine whether the print speeds you are interested in has problematic angles. If the top and bottom belts have different belt tensions, the results should be particularly interesting.
- The left side has a trap for the seams (Bambu studio, as of Nov 2025, will not let me print this in vase mode).
- The Y-axis is tested with the model rotated 90 degrees. A combination model is not used as it is difficult to see the results with a model that's folded over.
- There are no sharp turns and ringing is minimised.
As a bonus, the melodic sounds made by the motors when printing this is quite nice to listen to!
Speed Range
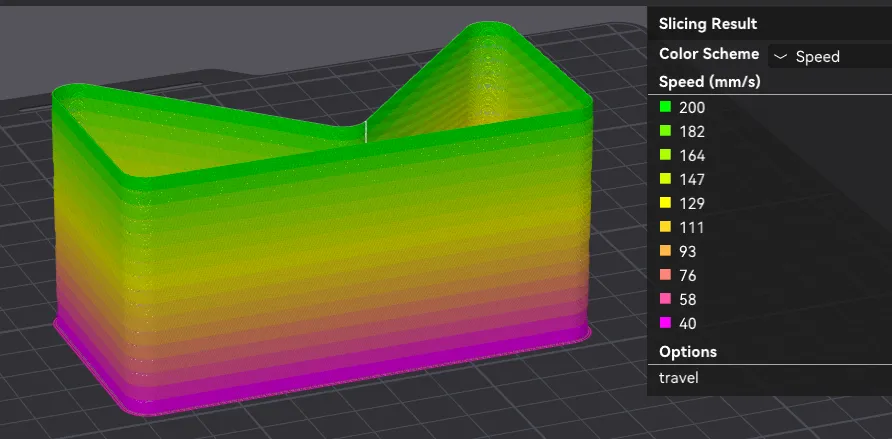
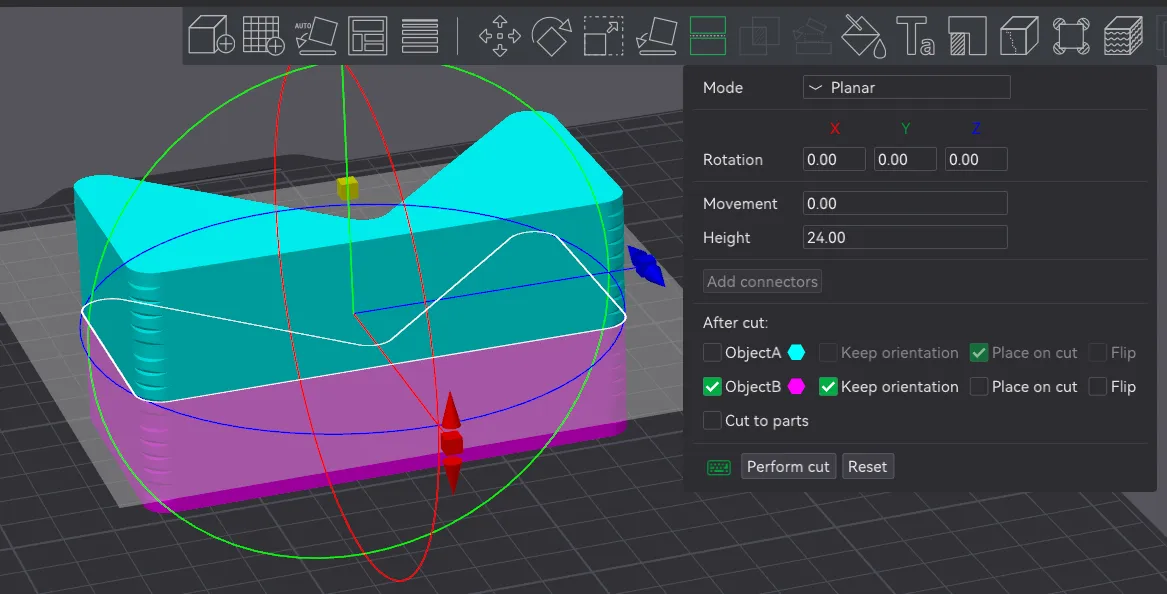
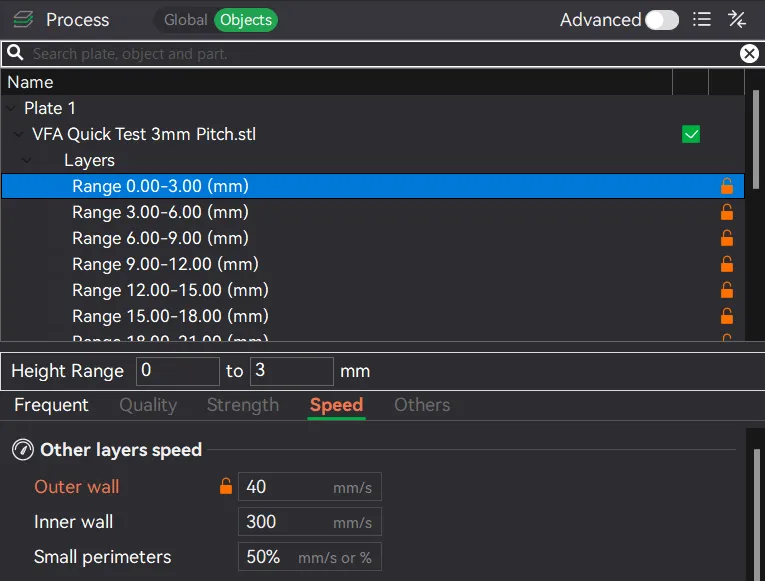
The default profile is tuned for 40 mm/s to 200 mm/s in 10 mm/s increments. Each step is 3mm tall. If you are interested in a narrower range and/or different speeds, you can crop the model (top and/or bottom) and change the speeds as shown below. Note the notches on the corners of the model: there is a marker every 5 steps.
Print Tips
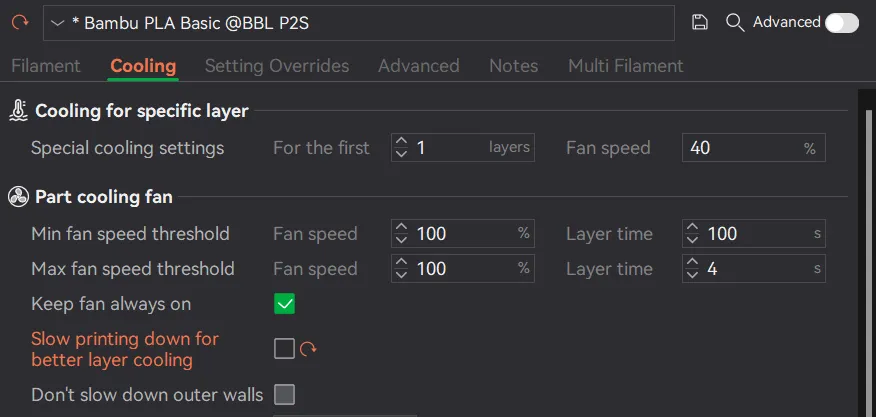
Important: If you change the filament profile, make sure the speed is not layer time limited by unchecking “Slow printing down for better layer cooling”
Also check that all the speed ranges are printing at the correct speeds by looking at the speed preview:
Observations
Observation 1: H2D Prints Better Than P2S
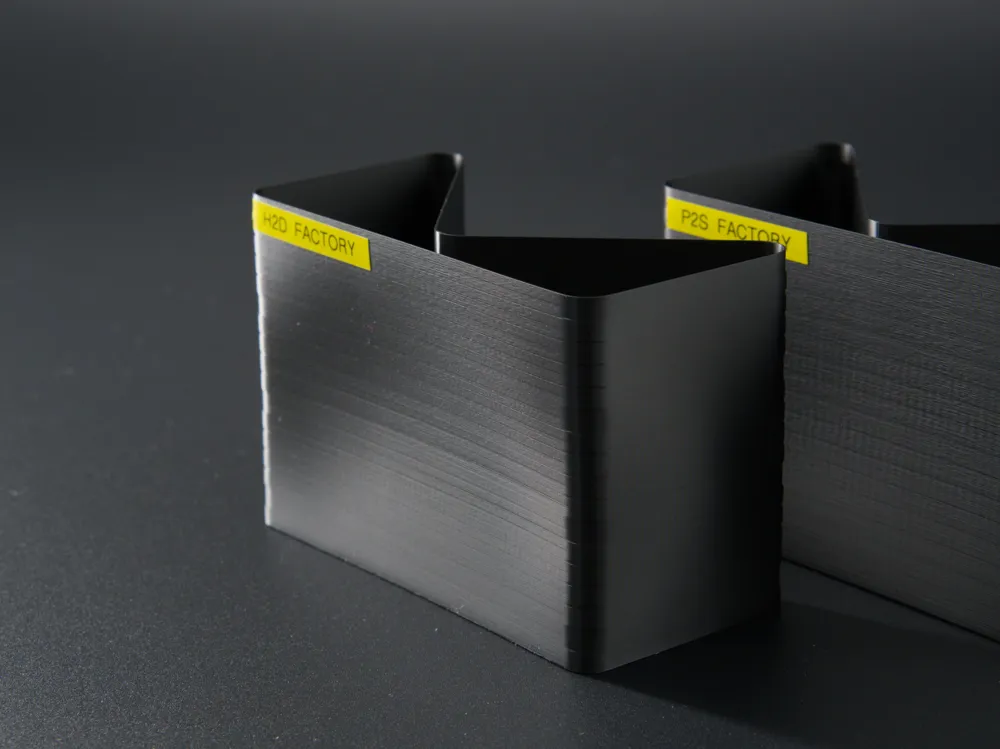
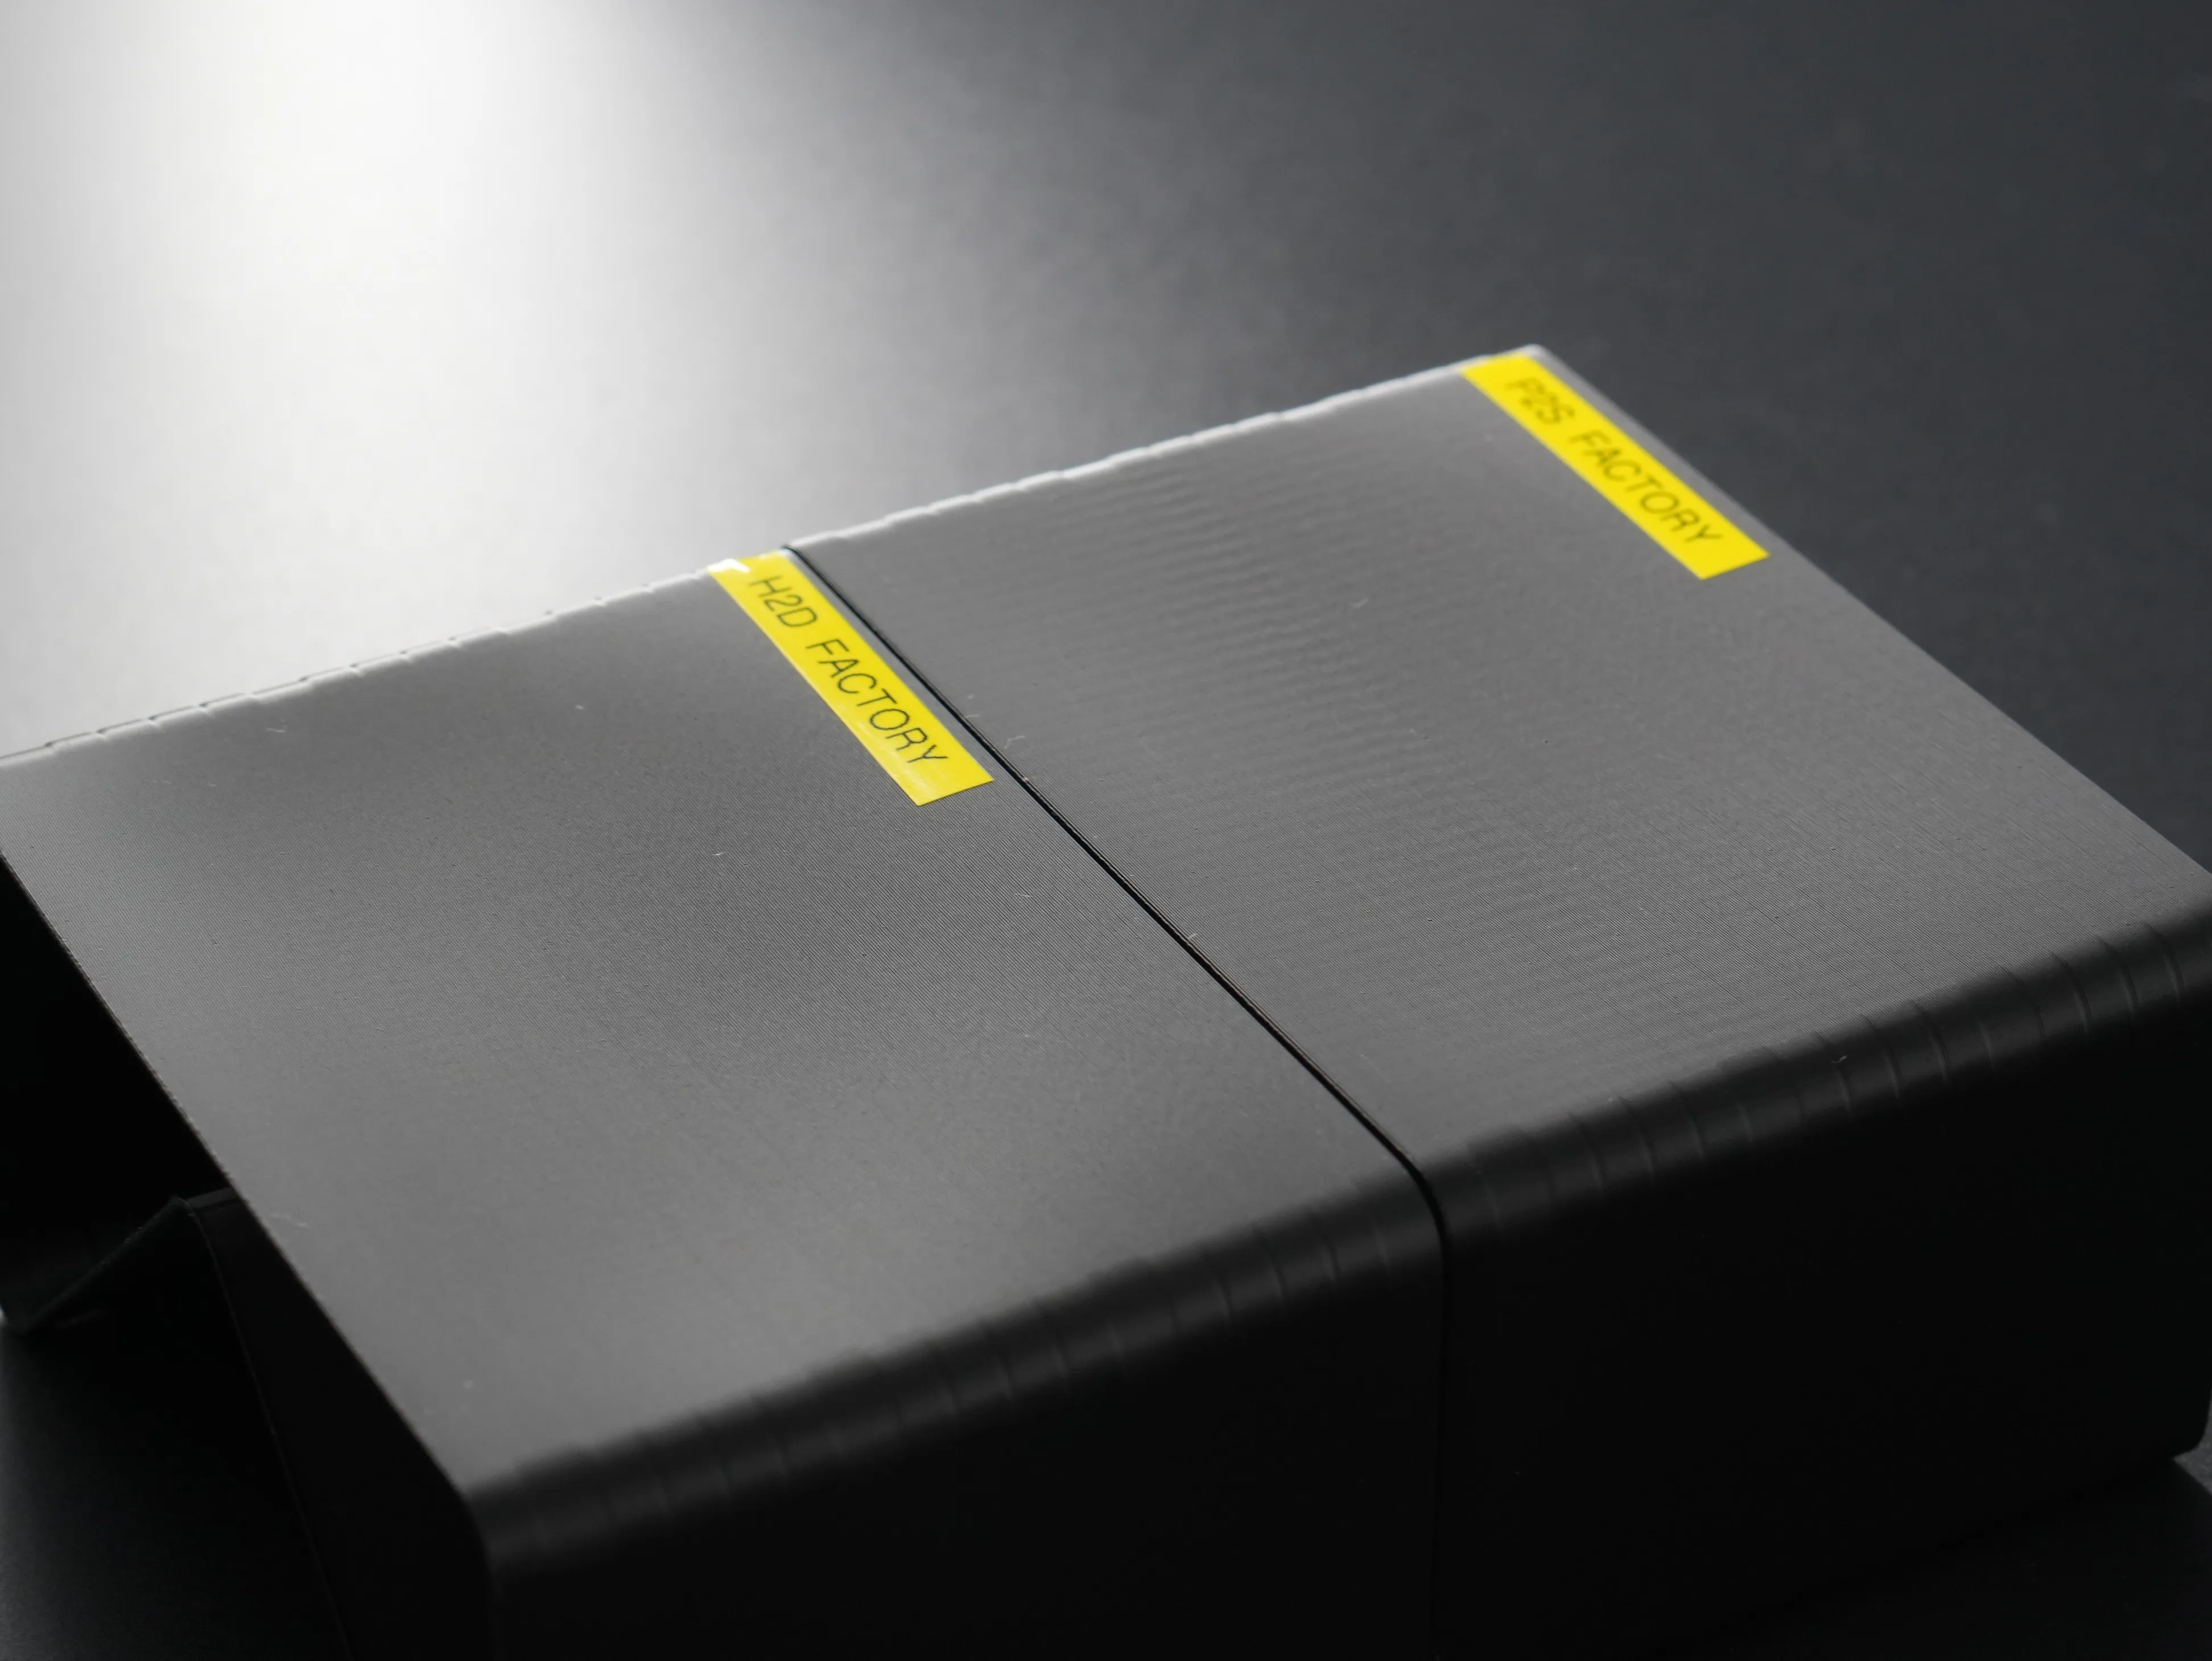
As you can see below, VFAs are almost unnoticeable on the H2D print in most places. This is likely due to the finer tooth pitch belts as well as a heavier toolhead. It would be interesting to see how the H2S, with the lighter toolhead, performs vs. the H2D.
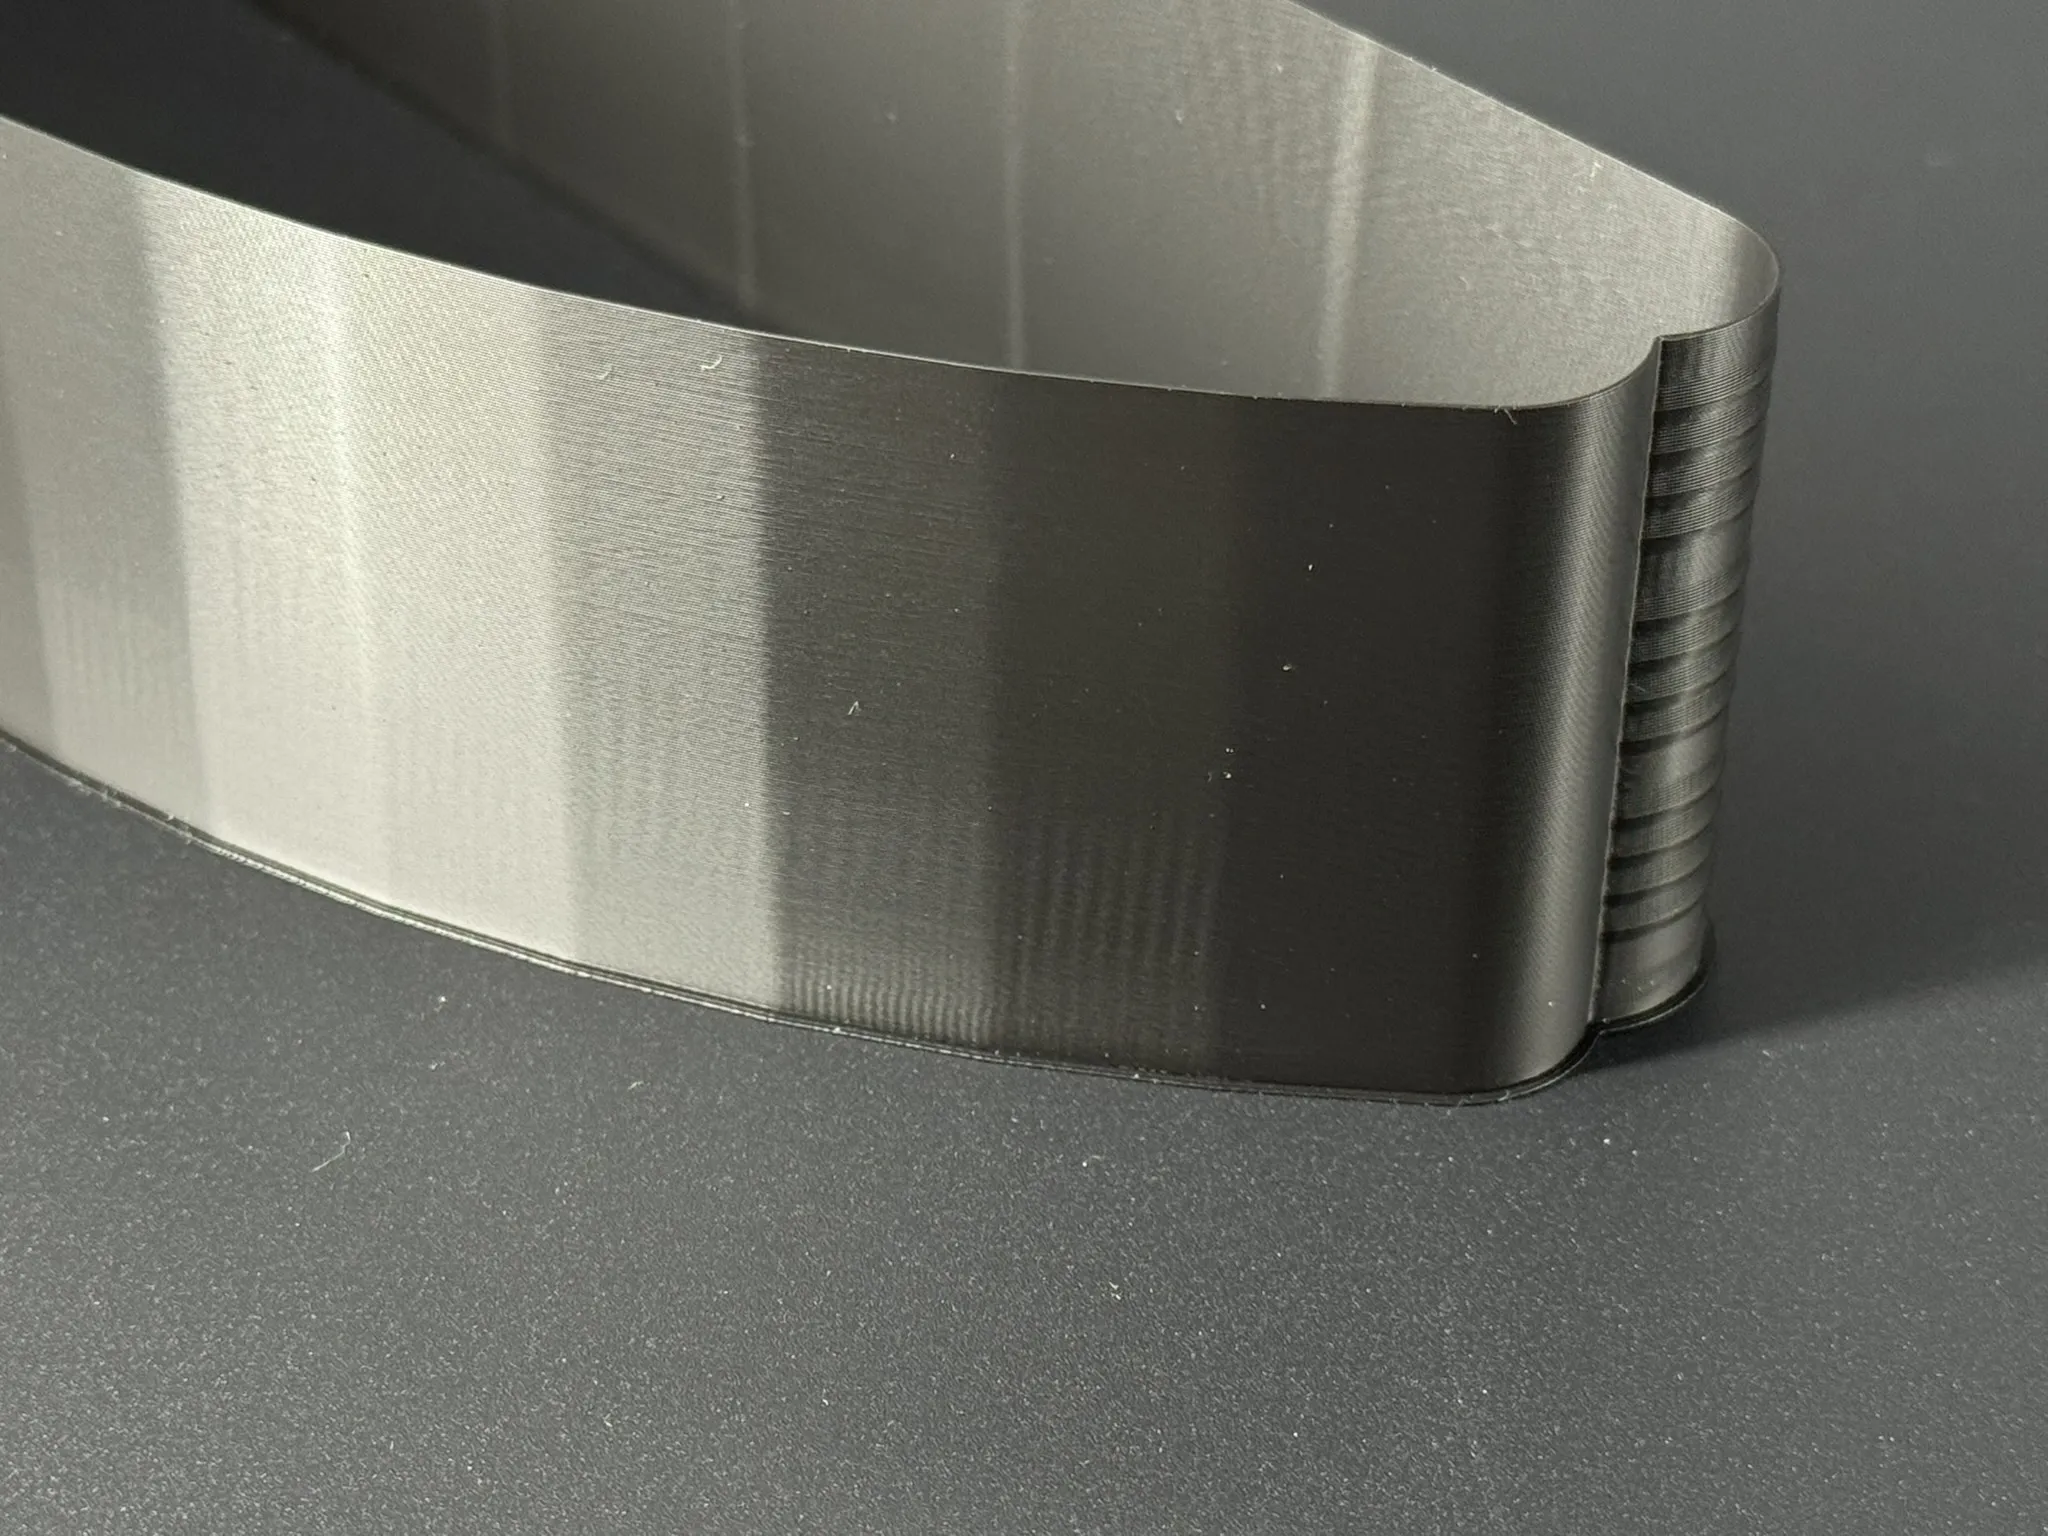
However, even the 1.5mm tooth pitch belts aren't enough to stop interference patterns from appearing at some angles, similar to the P1S:
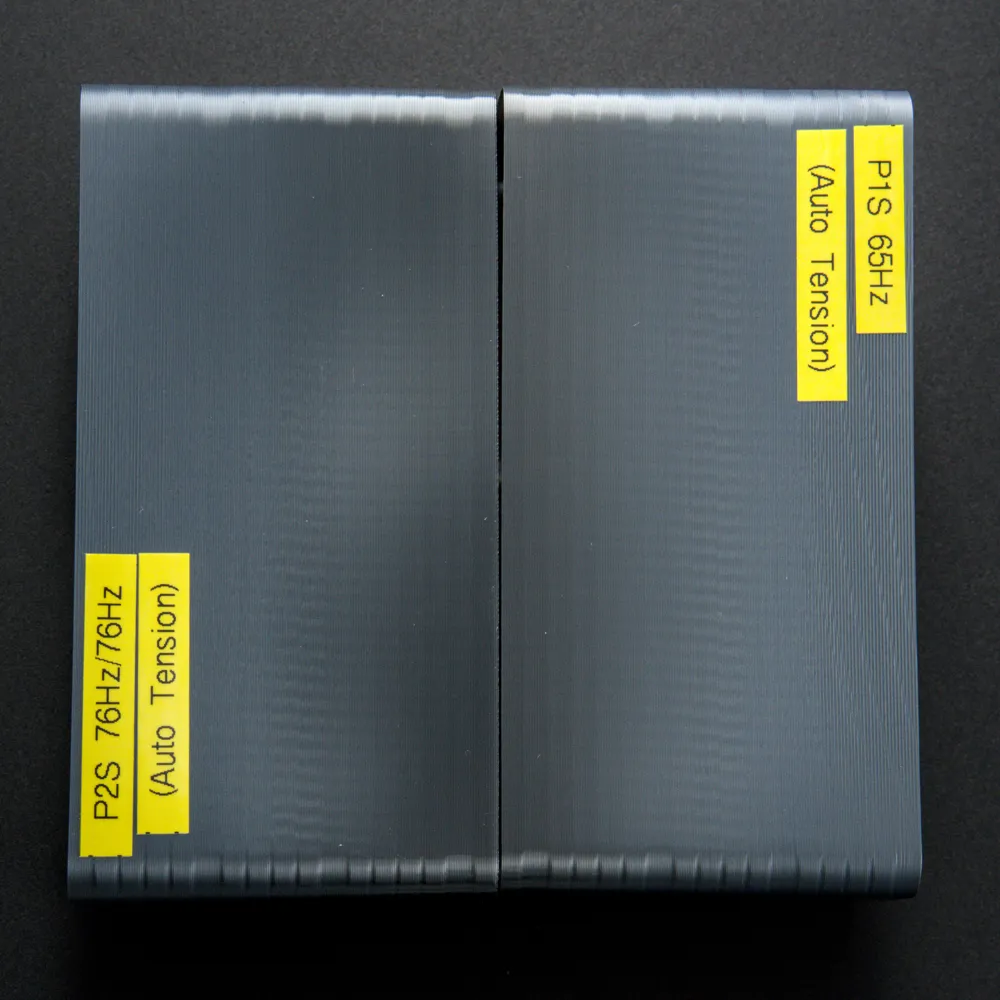
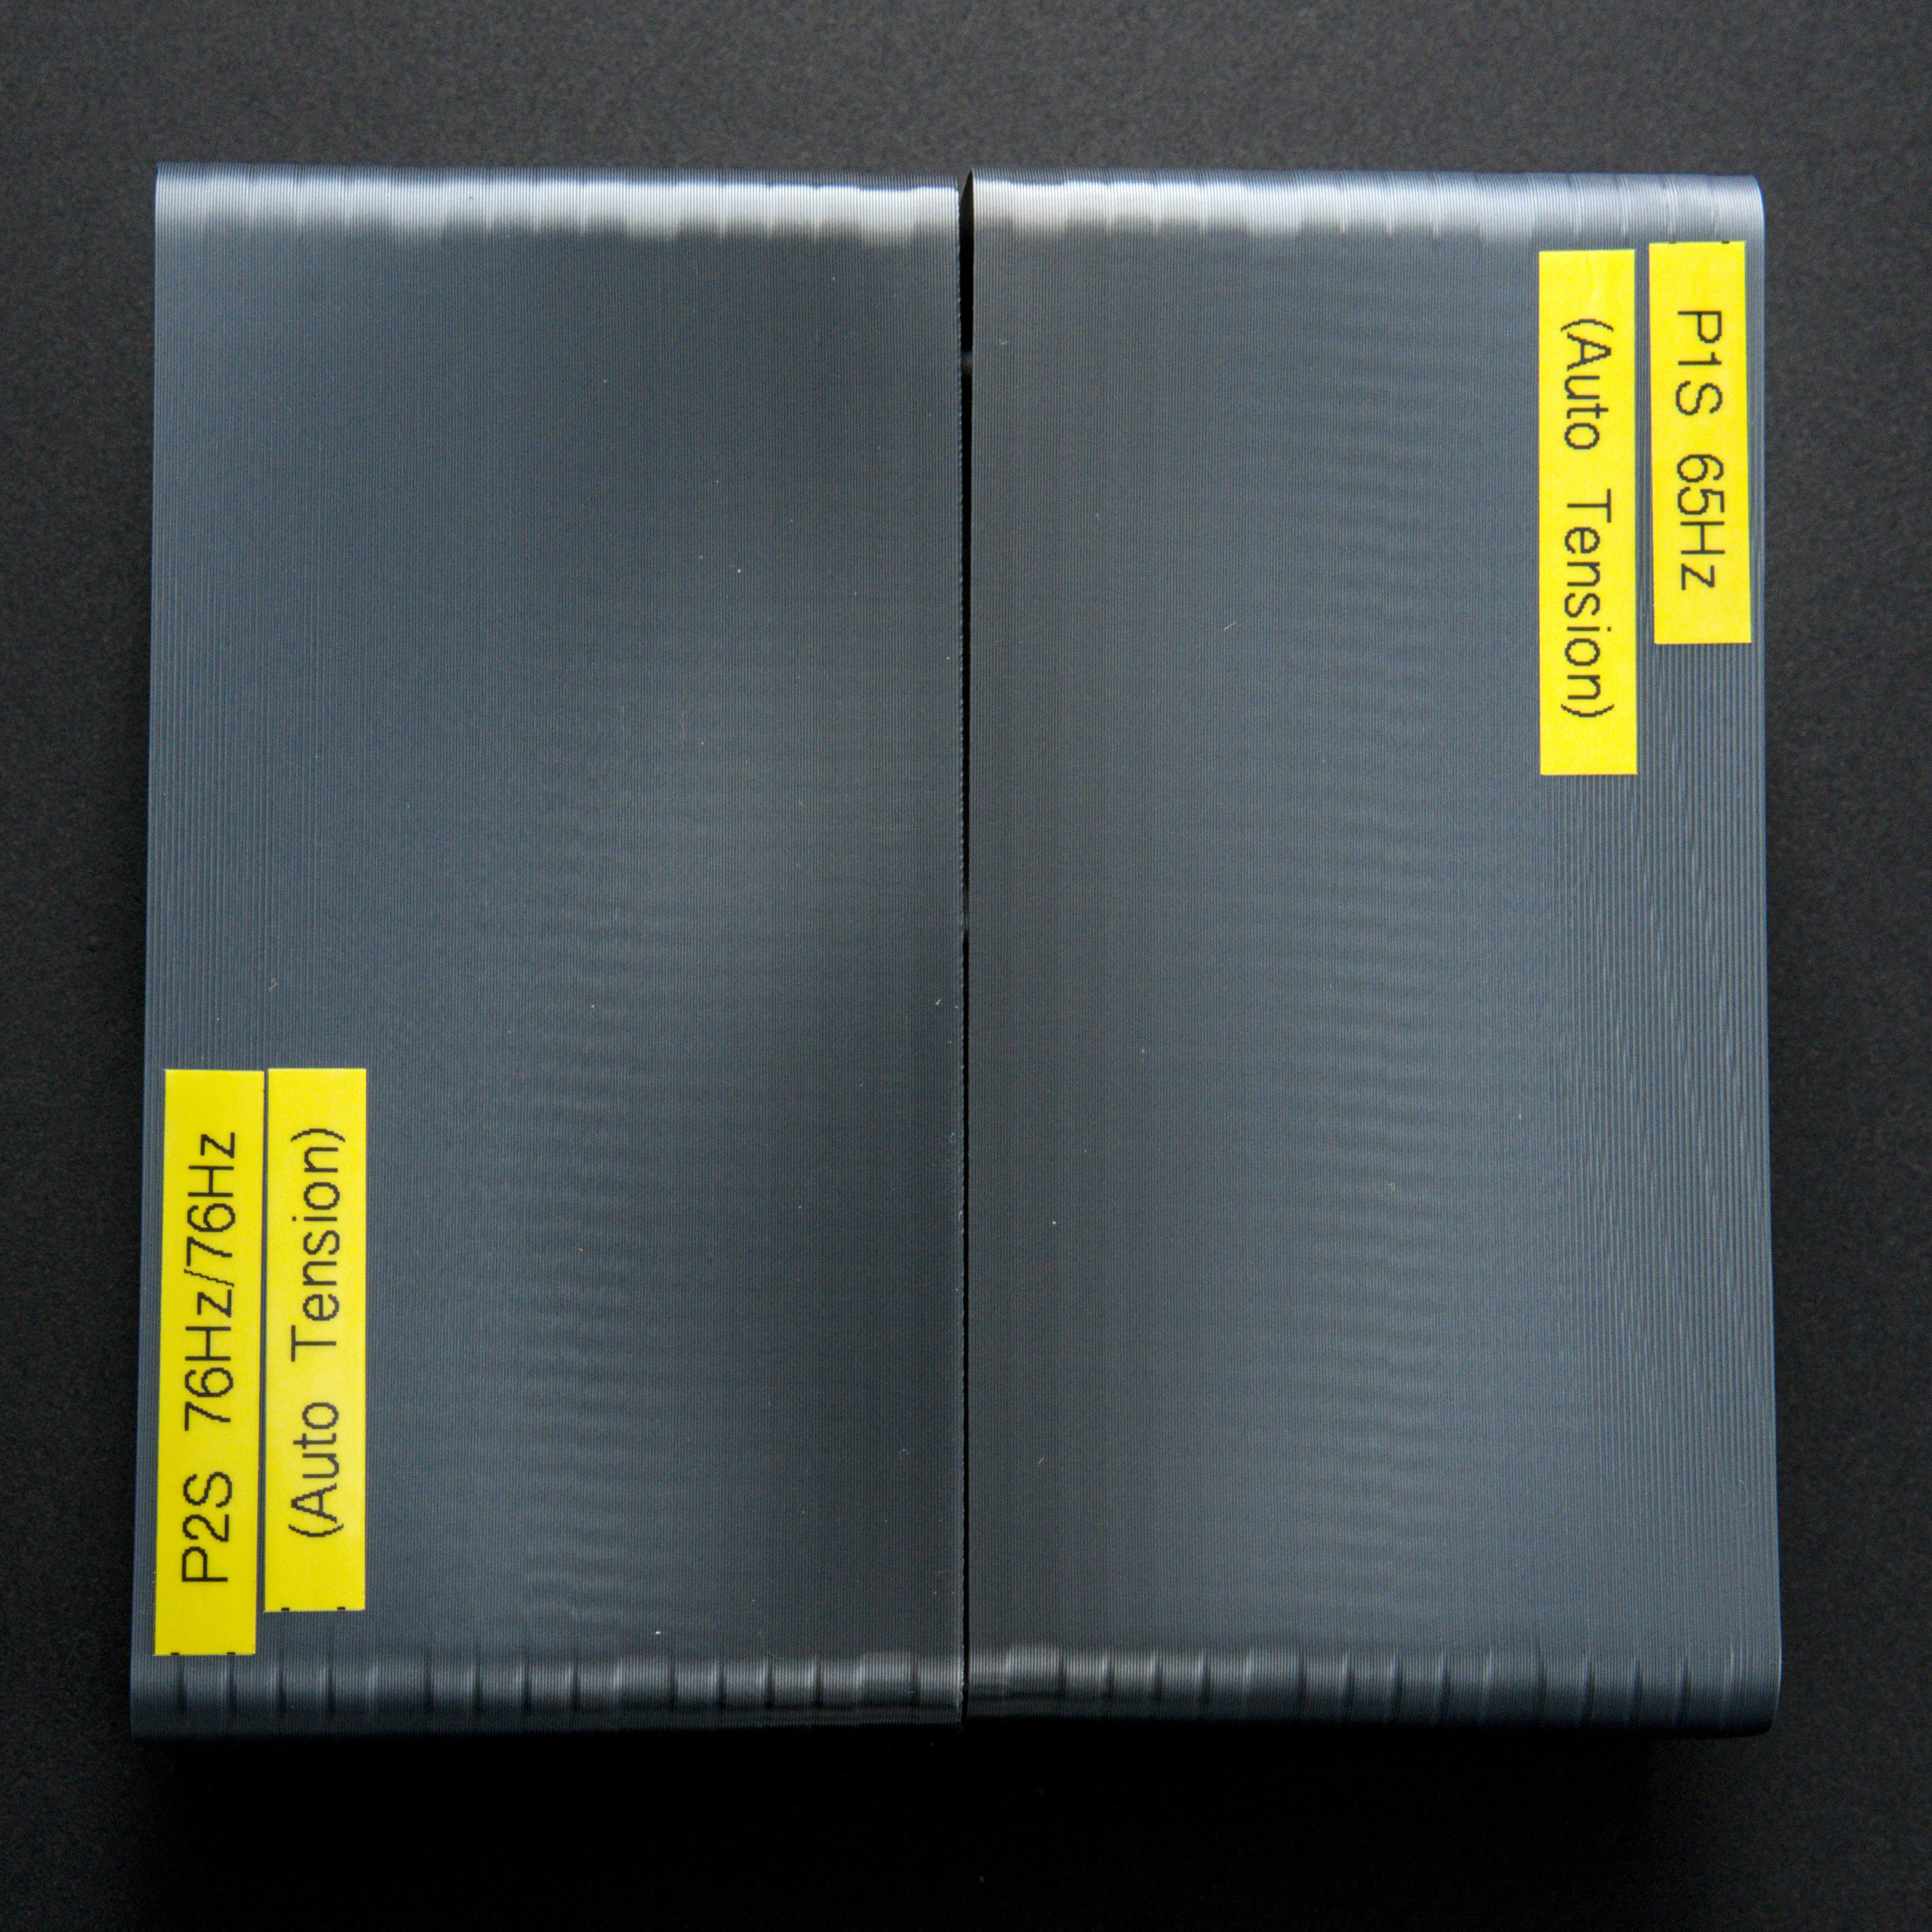
Observation 2: My P2S Prints Similarly to my P1S
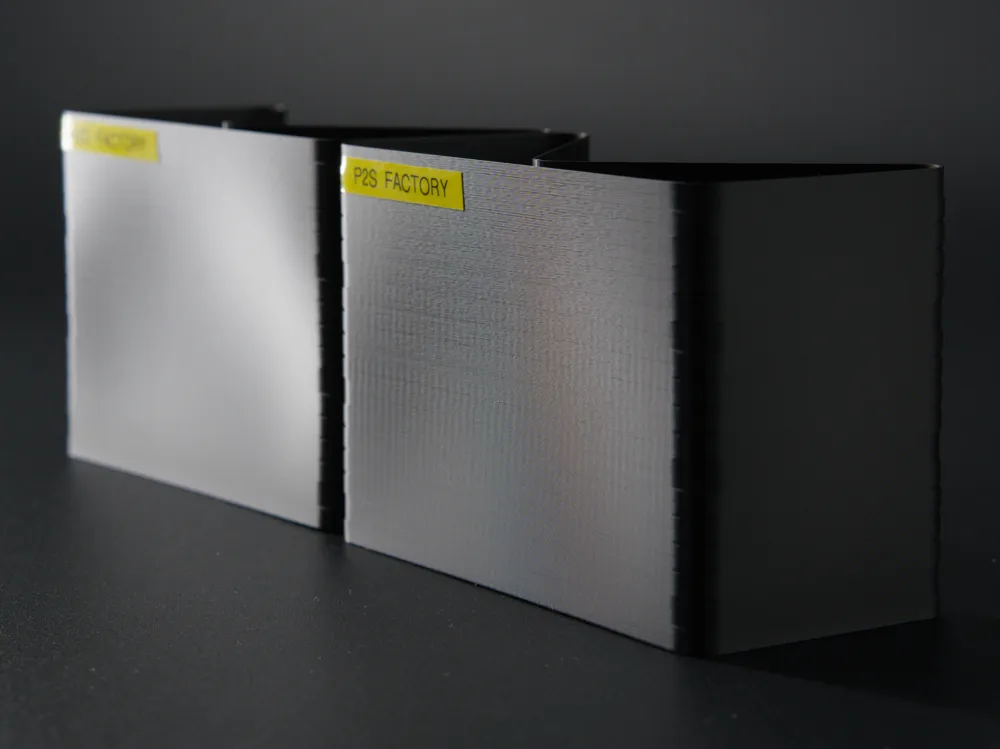
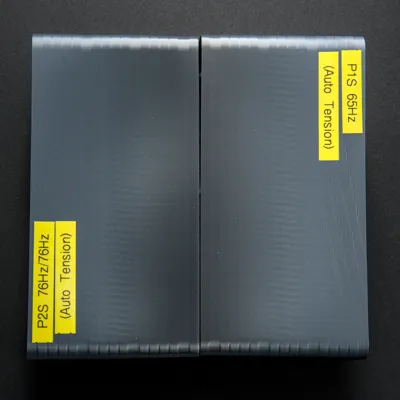
The VFA ranges on my P1S are similar to that on my P2S when tuned with the auto tensioning system. As a side note, the hotend/extruder performance of the P2S is significantly better with higher speeds remaining glossy with less under-extrusion at very high speeds. Samples below were printed from the exact same spool of Bambu Lab PLA Silk+ Titan Gray.
Observation 3: P2S Belt Tensions and Resonant Frequencies
My P2S belts were tuned out-of-factory:
- Top belt (right motor), 74 Hz
- Bottom belt (left motor), 78 Hz
I measured the frequency with a phone tuning app by plucking mid-span the right-most span for the top belt and left-most span for the bottom belt. I measured these belts as the longest spans of belt are likely to dominate the VFA effects and these are easy to reach.
On the two 45 degree angle surfaces on the test prints, the primary resonance patterns occur around 80 mm/s and the secondary at around 160 mm/s. First, note that the spacings of the pattern are different - this leads me to think that these patterns are not caused by belt teeth riding on smooth idlers.
For a 2 mm tooth pitch belt, the belt moving at 160 mm/s, a tooth would pass the motor pulley at a rate of 80 Hz. This almost happens to be the belt tuning frequency and explains why there are VFA patterns centred around 160 mm/s.
I currently do not have an exact causal explanation for the pattern at 80 mm/s other than it must be related. (Perhaps the first order harmonic is actually around 40 Hz?)
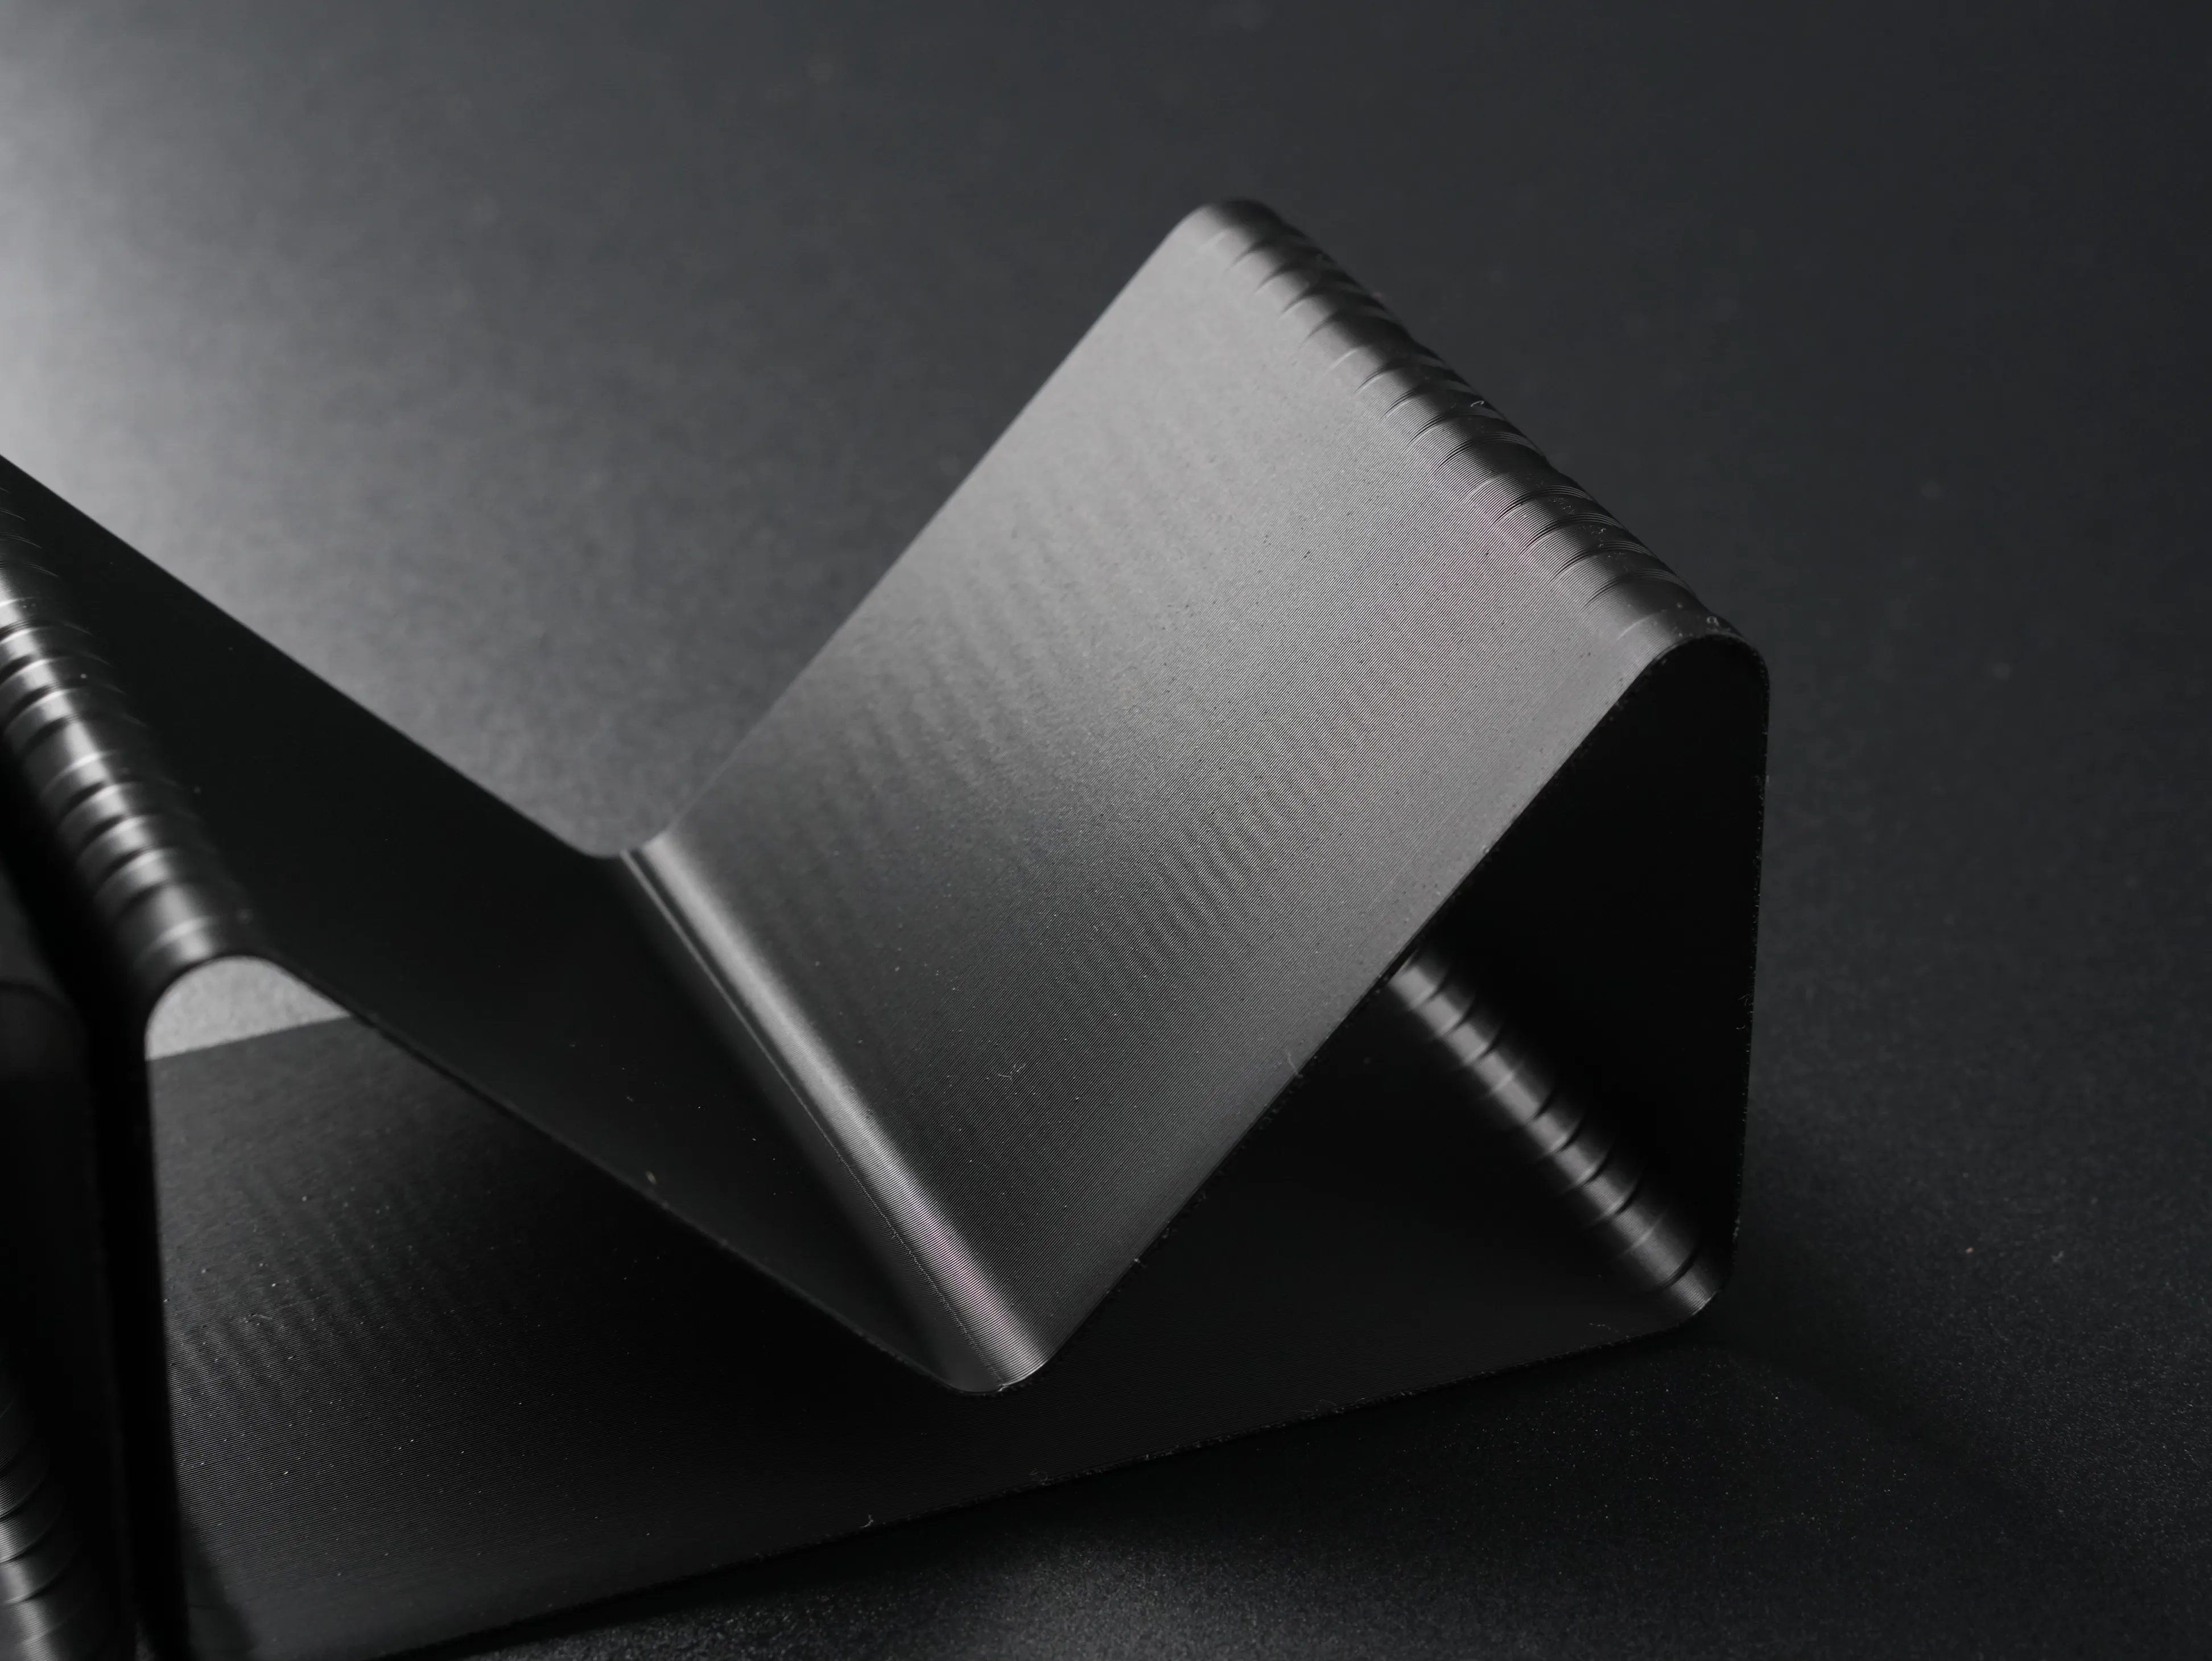
Now let us look at the X face (the face oriented left-right when printing). In a core XY motion system, if the toolhead is moving in the X or Y direction at a certain speed, the belts are passing the motor pulleys at 70.7% of that speed (this is the square root of 0.5, trust me: I'm an engineer). On the X face, the most prominent VFA patterns are centred around 100 - 110 mm/s. This translates to a belt speed of 71 - 78 mm/s, one of the problematic speed ranges seen on the 45 degree faces.
On the above photo, you can see that the VFAs are actually worse on the X face than the 45 degree faces. This is potentially due to the resonances of the two belts interfering constructively, considering that my two belts are tuned to a similar frequency. This may explain why Prusa has decided to have their Core One belts tensioned differently (96 Hz and 92 Hz) but I am speculating.
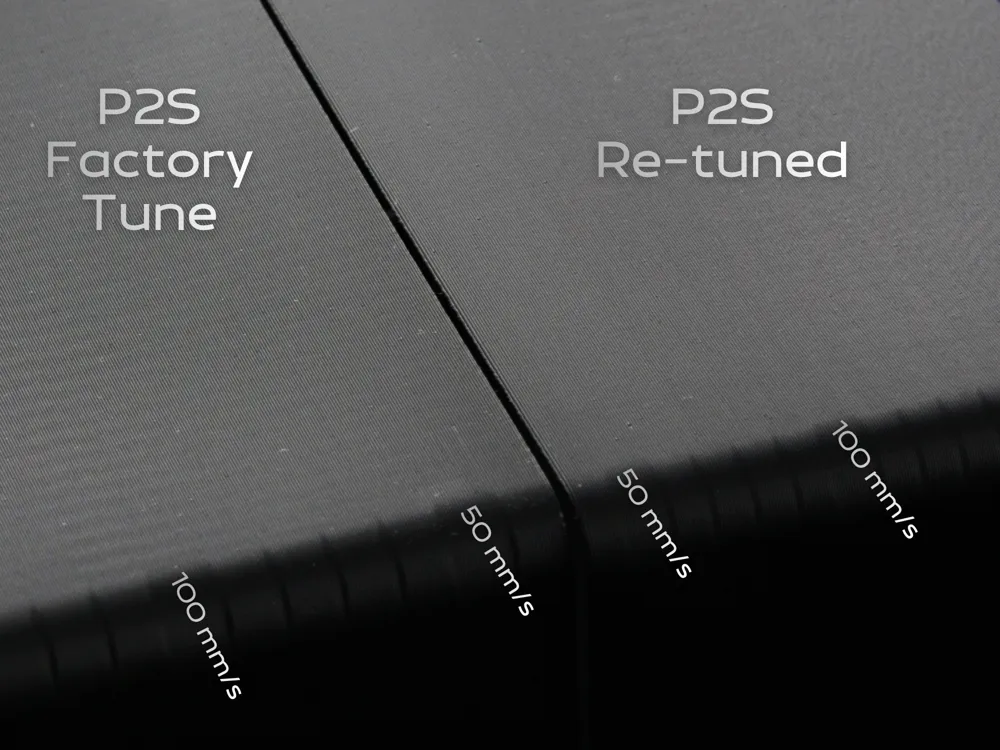
If you have problems with VFAs on your printer, manually changing the tension on your belts may improve your print quality. You could increase or reduce the belt tension to shift the VFA patterns to higher speeds or lower speeds. I think the printer should be able to print clean at lower speed ranges (30-80 Hz) as those speeds are useful if you're trying to achieve consistent surface gloss levels and clean sharp corners on complex parts and to get strong layer adhesion on load-bearing parts. Do this at your own risk as changing the belt tension may cause unforeseen damage or skew issues.
P2S VFA Tuning Procedure
- Print the VFA Quick Test (or the standard VFA test) to get a baseline.
- Re-tension the belts using this Bambu Wiki Article. Wipe down and re-lube the X and Y rods if you've been printing high residue filaments.
- Run the Vibration Compensation calibration.
- Print the VFA Quick Test to see if the issue is fixed for the speed ranges you would like to print in.
- If that didn't work, this is where we deviate from the standard procedures and possibly leave the comfortable land of warranty. If you are risk adverse and have some patience, contact support instead or always print outside of the problem speed ranges. For those that want to make the machine really yours to keep, let's keep going. (Note that this modification is very easy to un-do and no-one will know!)
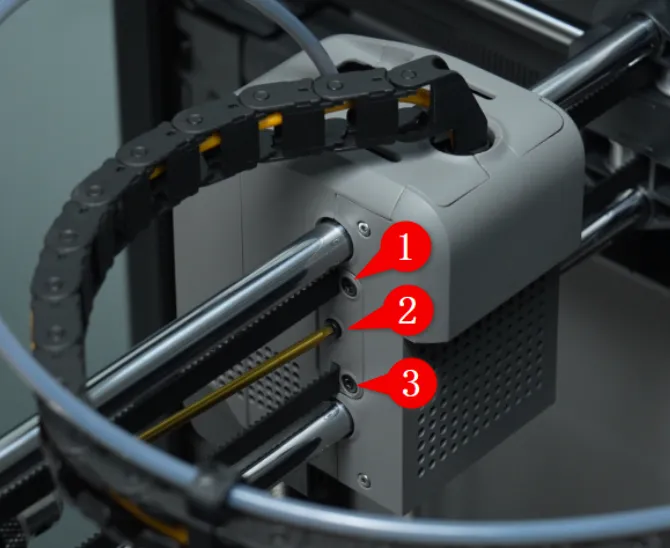
- Loosen the four belt tension locking screws on the back of the printer.
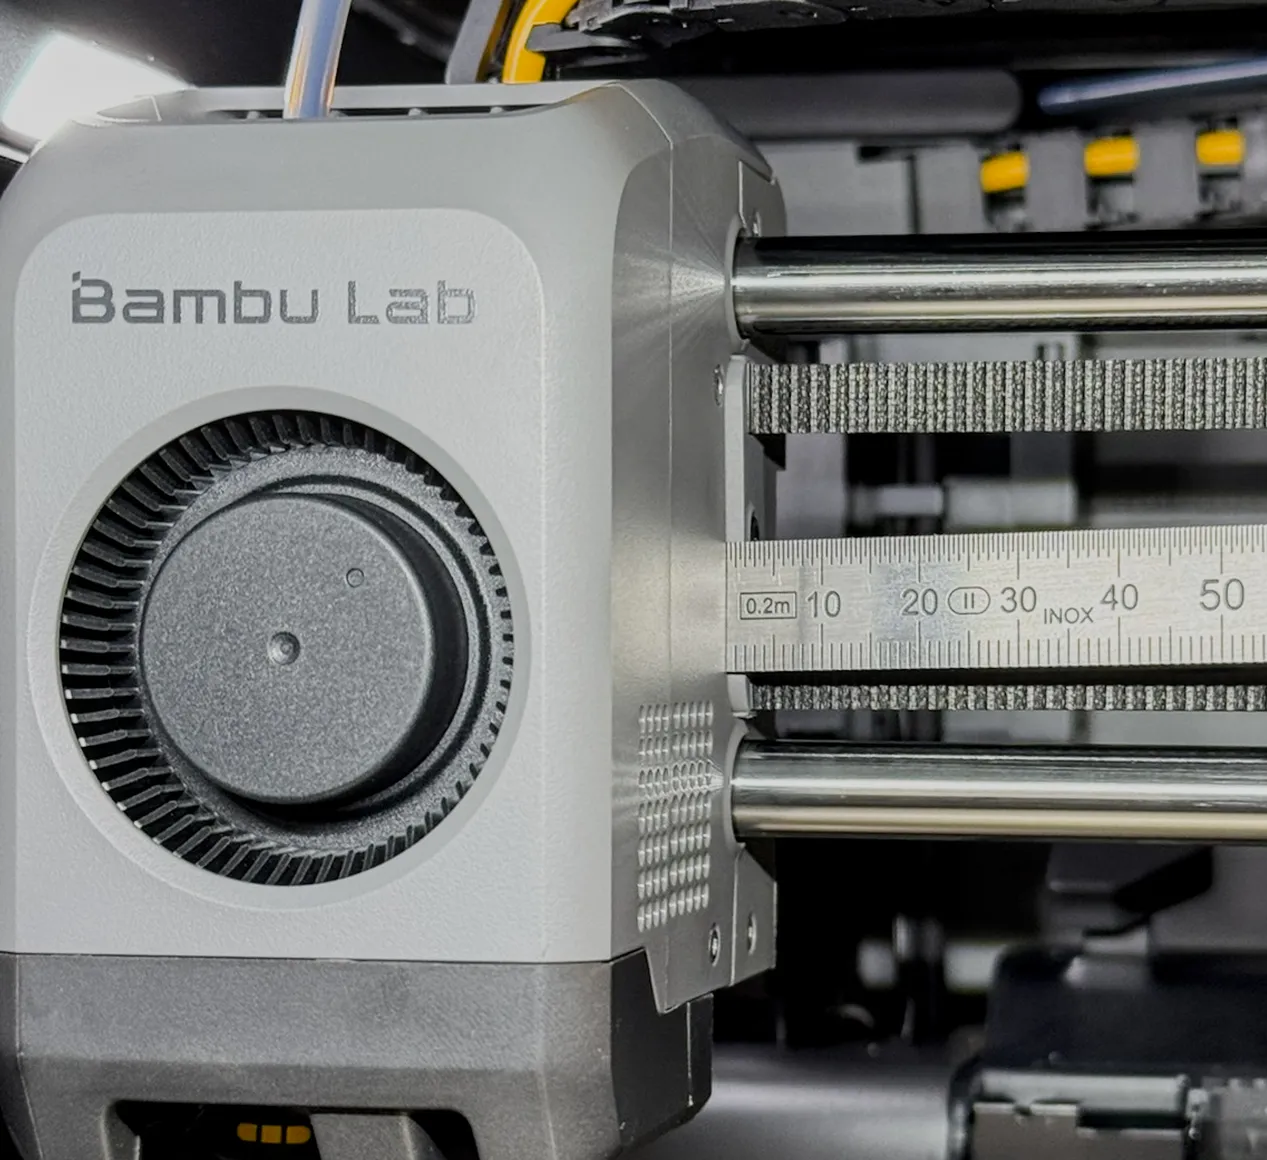
Loosen the three screws that attach the XY Belt Fixing Block on one side of the toolhead so that it comes out 1mm. Make sure that the top and bottom of the block are out by the same amount (the photo shows I've made it come out by 2mm but start with 1mm).
- Tighten the four belt tension locking screws on the back of the printer.
- Tighten the three screws that attach the XY Belt Fixing Block. This will stretch the belt 1mm from the default tuning.
- Run the Vibration Compensation calibration.
- Print the VFA Quick Test to see if the issue is fixed for the speed ranges you would like to print in.
- If you would like to move the VFAs further up the speed ranges, do the adjustment again but with 1mm on both XY Belt Fixing Blocks each side of the toolhead for a total of 2mm belt stretch.
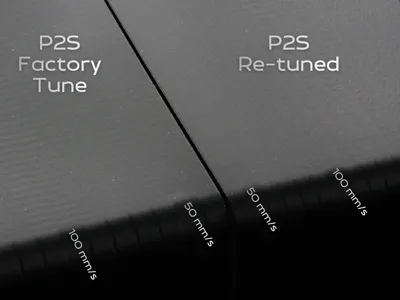
Results with 2mm of belt stretch, PLA Basic printed at 220°C:
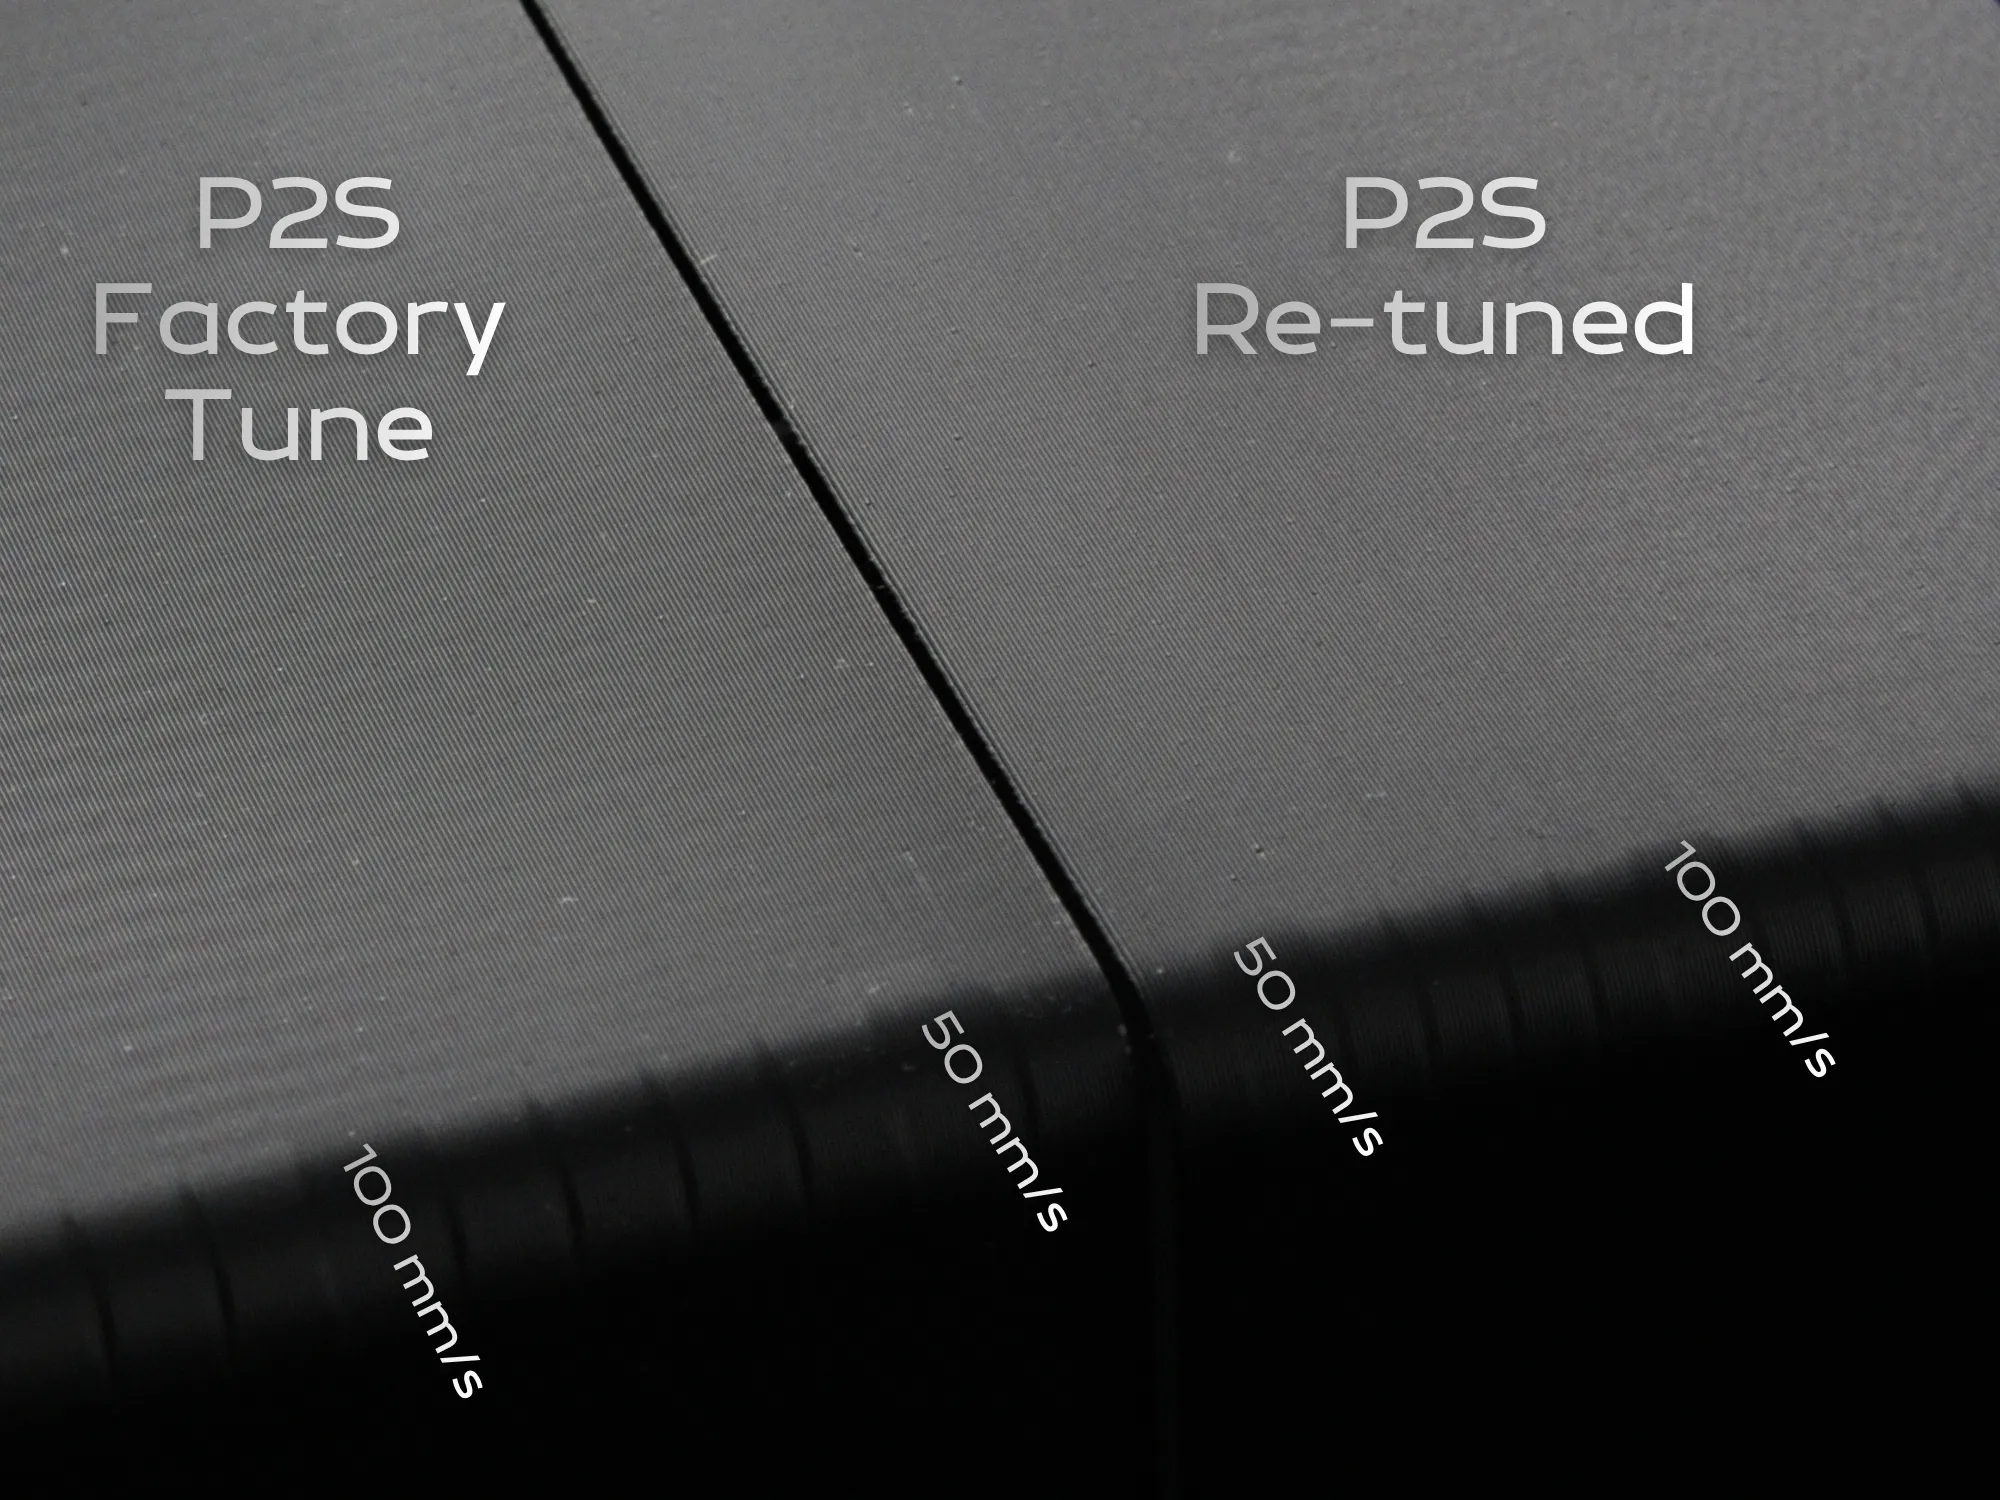
Note 1: I have not yet done an AB interaction test on the re-tuned machine.
Note 2: the belts are 1444mm long and stretching them by 2mm make them and the printed parts 0.14% larger. This is a small amount but if you have already tuned for material shrinkage, you may like to re-tune the shrinkage factor.
What About My P1/X1 Series Machine?
I have not tried this (yet) but I found this adjustment tool and these tension jigs that looks promising and would stretch the belts. Supposedly, this was suggested by Bambu Lab support (for this user and this machine anyway). Note: if you move the tensioner 1mm, the belt will stretch around 2mm. If I try it, I'll report back here.
X2D Update
The X2D and P2S use the same chassis and have the same belt lengths. The X2D has a heavier toolhead and uses a 1.5mm tooth pitch belt, an upgrade from P2S's 2mm. The VFA patterns are, of course, different. Most notable is that VFAs occur at lower speeds on the X2D - I suspect that the smaller teeth increase the “tooth rate” for any given travel speed and belt resonance is therefore reached at lower speeds. Going from 2mm to 1.5mm, you'd expect that the resonance speed is 25% lower and this just about checks out:
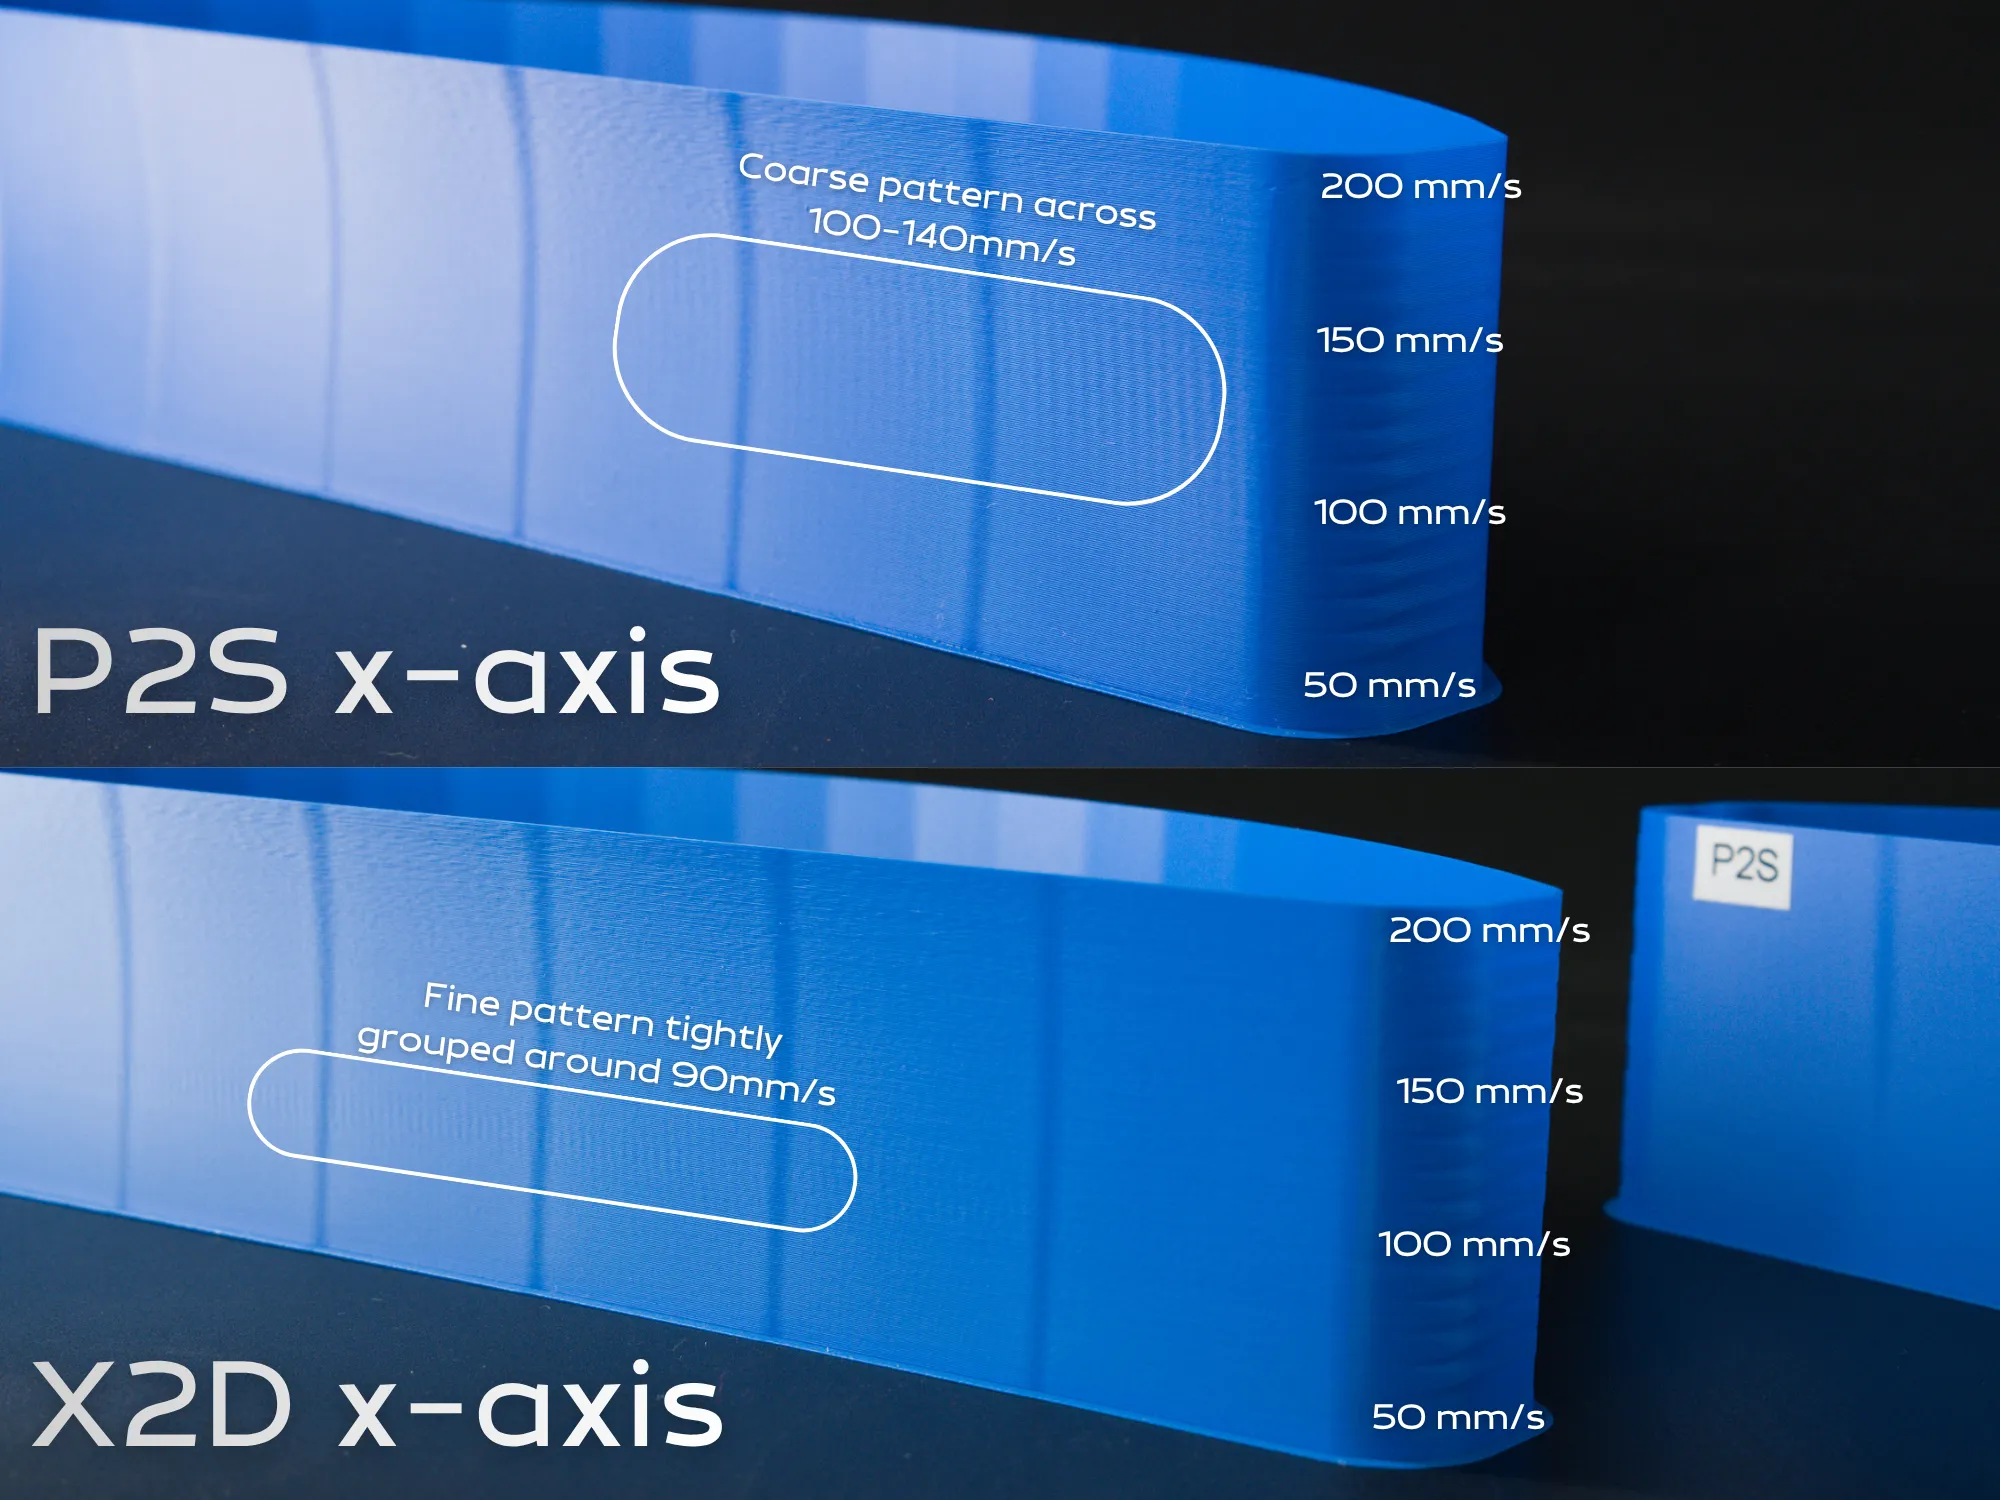
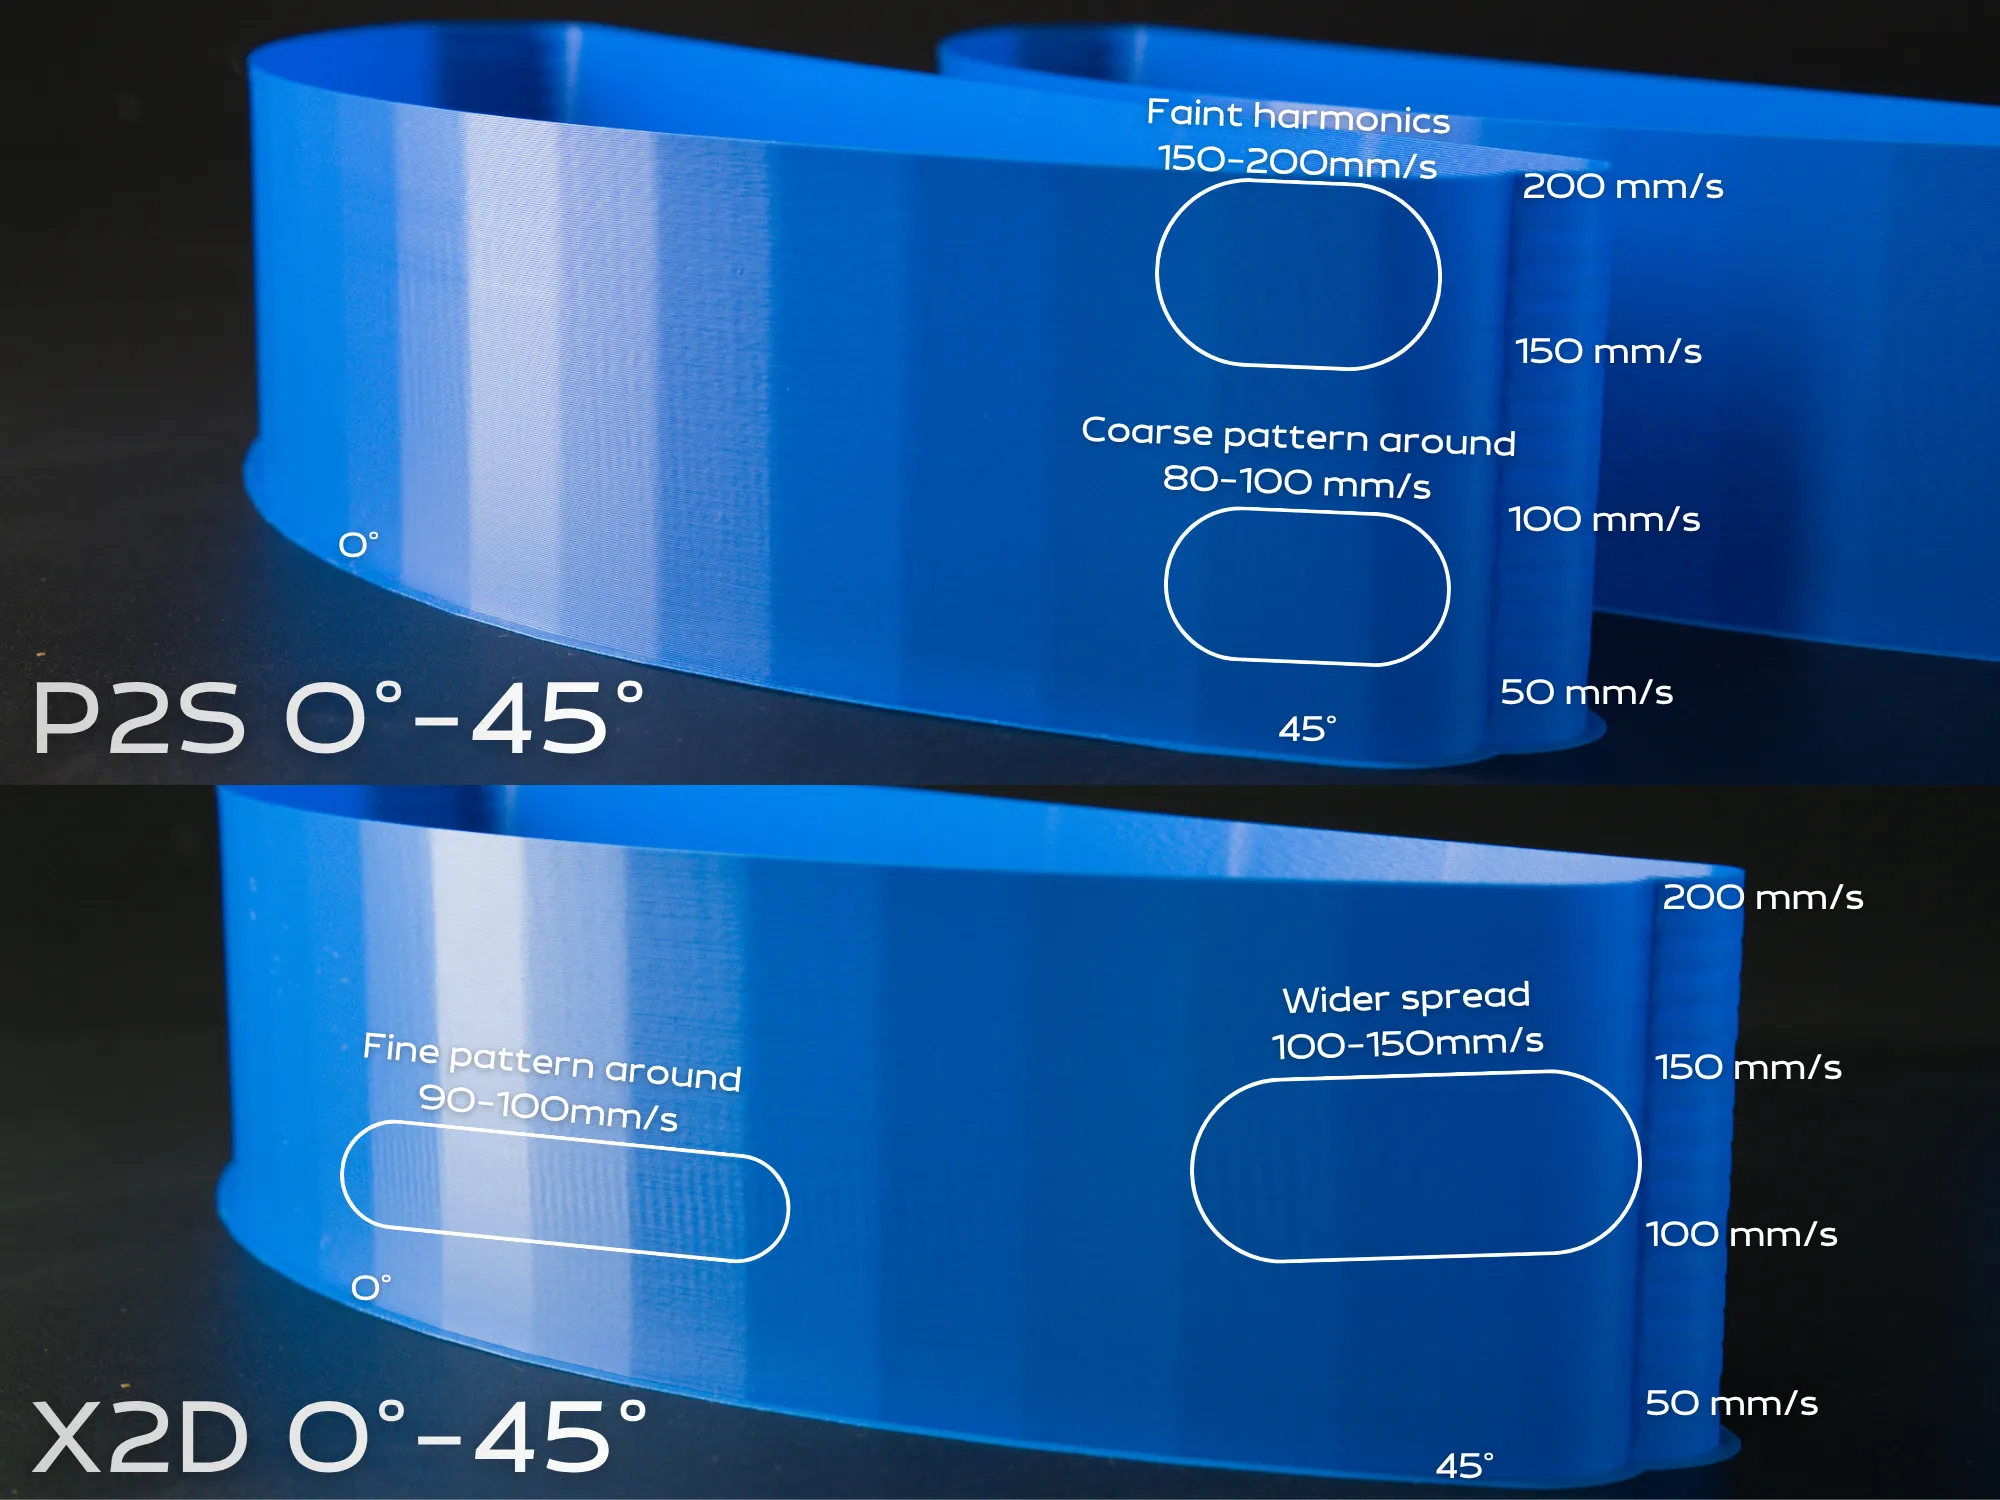
Overall, the P2S seems to have less VFAs at lower speeds.
What's Next?
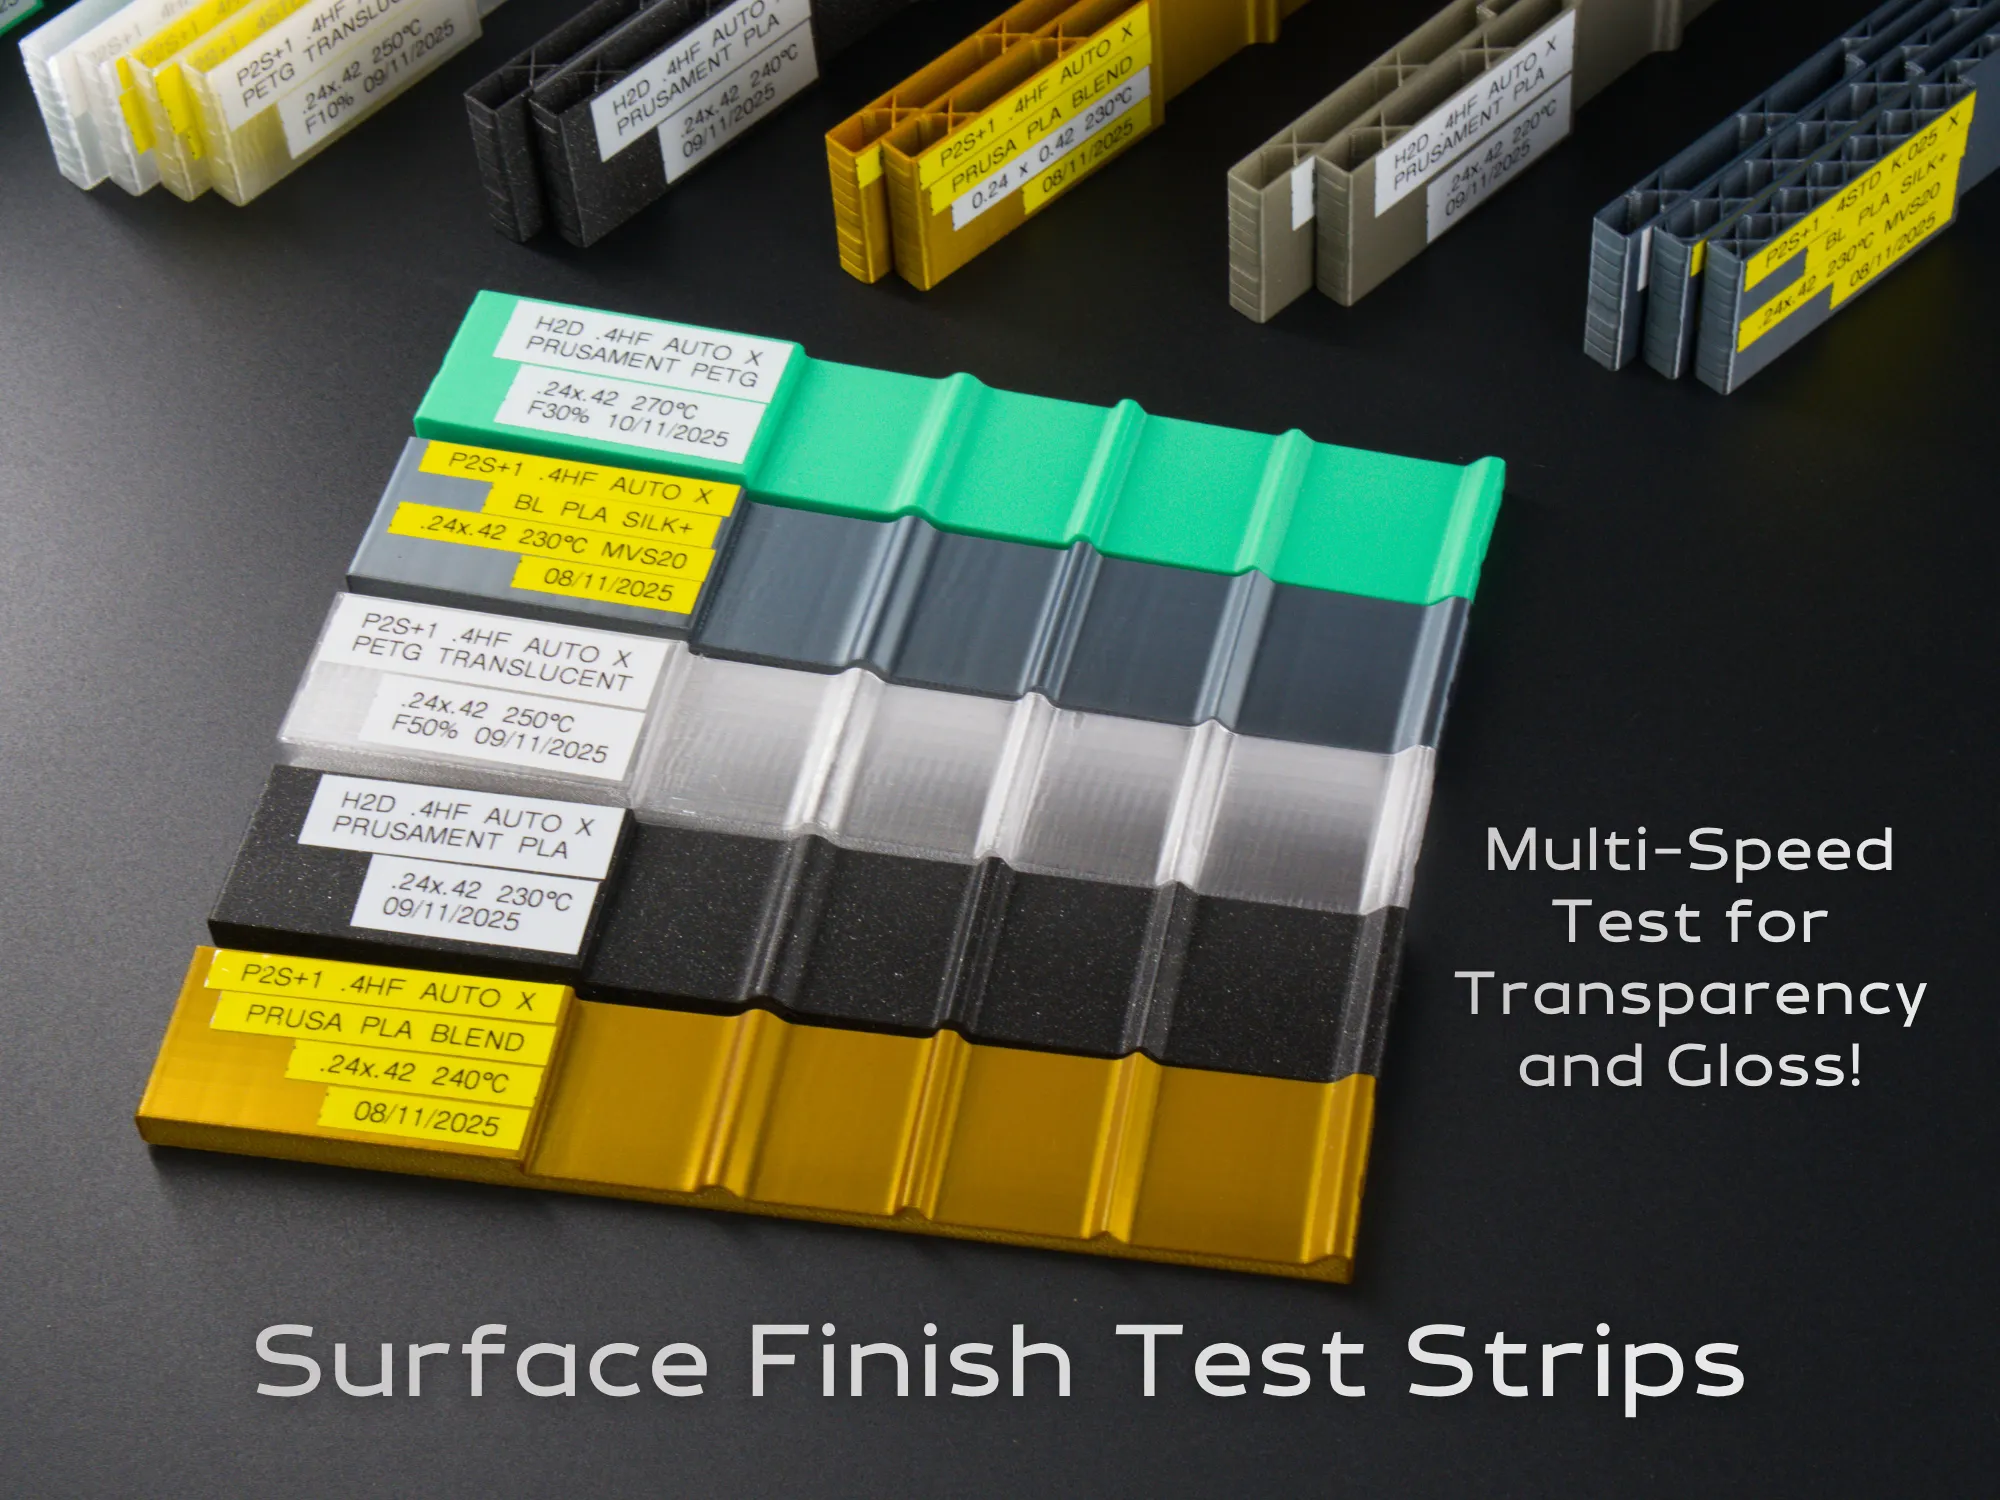
After you've printed a kilo of tests, pulled all of your hair out and decided to just ignore the artefacts (they're Fine anyway), it's time to tune your filament properly!
License

You shall not share, sub-license, sell, rent, host, transfer, or distribute in any way the digital or 3D printed versions of this object, nor any other derivative work of this object in its digital or physical format (including - but not limited to - remixes of this object, and hosting on other digital platforms). The objects may not be used without permission in any way whatsoever in which you charge money, or collect fees.


Comment & Rating (84)