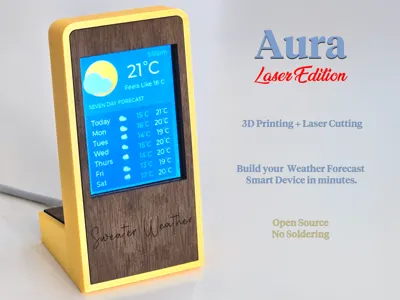
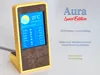
Aura Laser Edition, Smart Weather Forecast Display


Print Profile(1)

Bill of Materials


Description
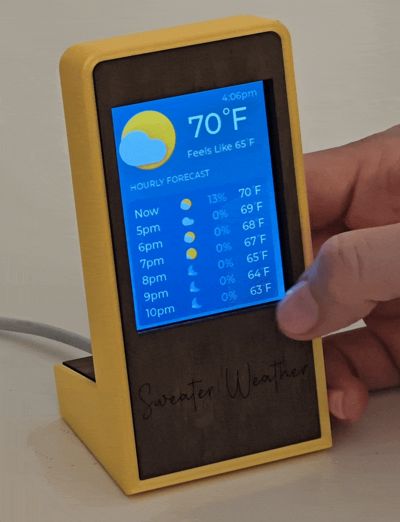
Aura Laser Edition is a mixed-media (laser-cut & 3D-printed) premium glanceable smart device that displays the latest weather forecast. Never walk out the door wearing the wrong gear again.
This listing contains only the laser-cut components. The matching 3D-printed project is here. You need both.
Features:
- Assemble in seconds
- Costs less than $25
- No wiring or soldering!
- Free and open source
Aura Laser Edition requires a laser cutter to build (such as the Bambu H2D). If don't have a laser cutter, you can still build the standard version of Aura. The original 3D-printed-only version is here.
Aura Laser Edition is an ideal first project for learning to combine laser cutting, 3D printing, and microcontrollers. It uses off-the-shelf parts that are inexpensive and widely available on Amazon, and it's simple to set up. No previous experience required.
Boost Me (for free)
Hope you have good weather, but feel free to rain down your boosts :)
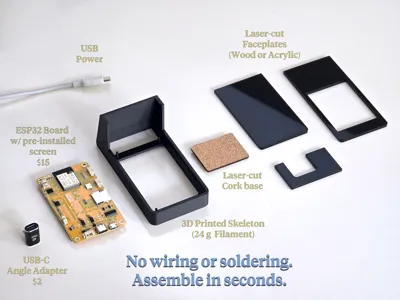
Required Parts
- Case skeleton (3d-printed - see here)
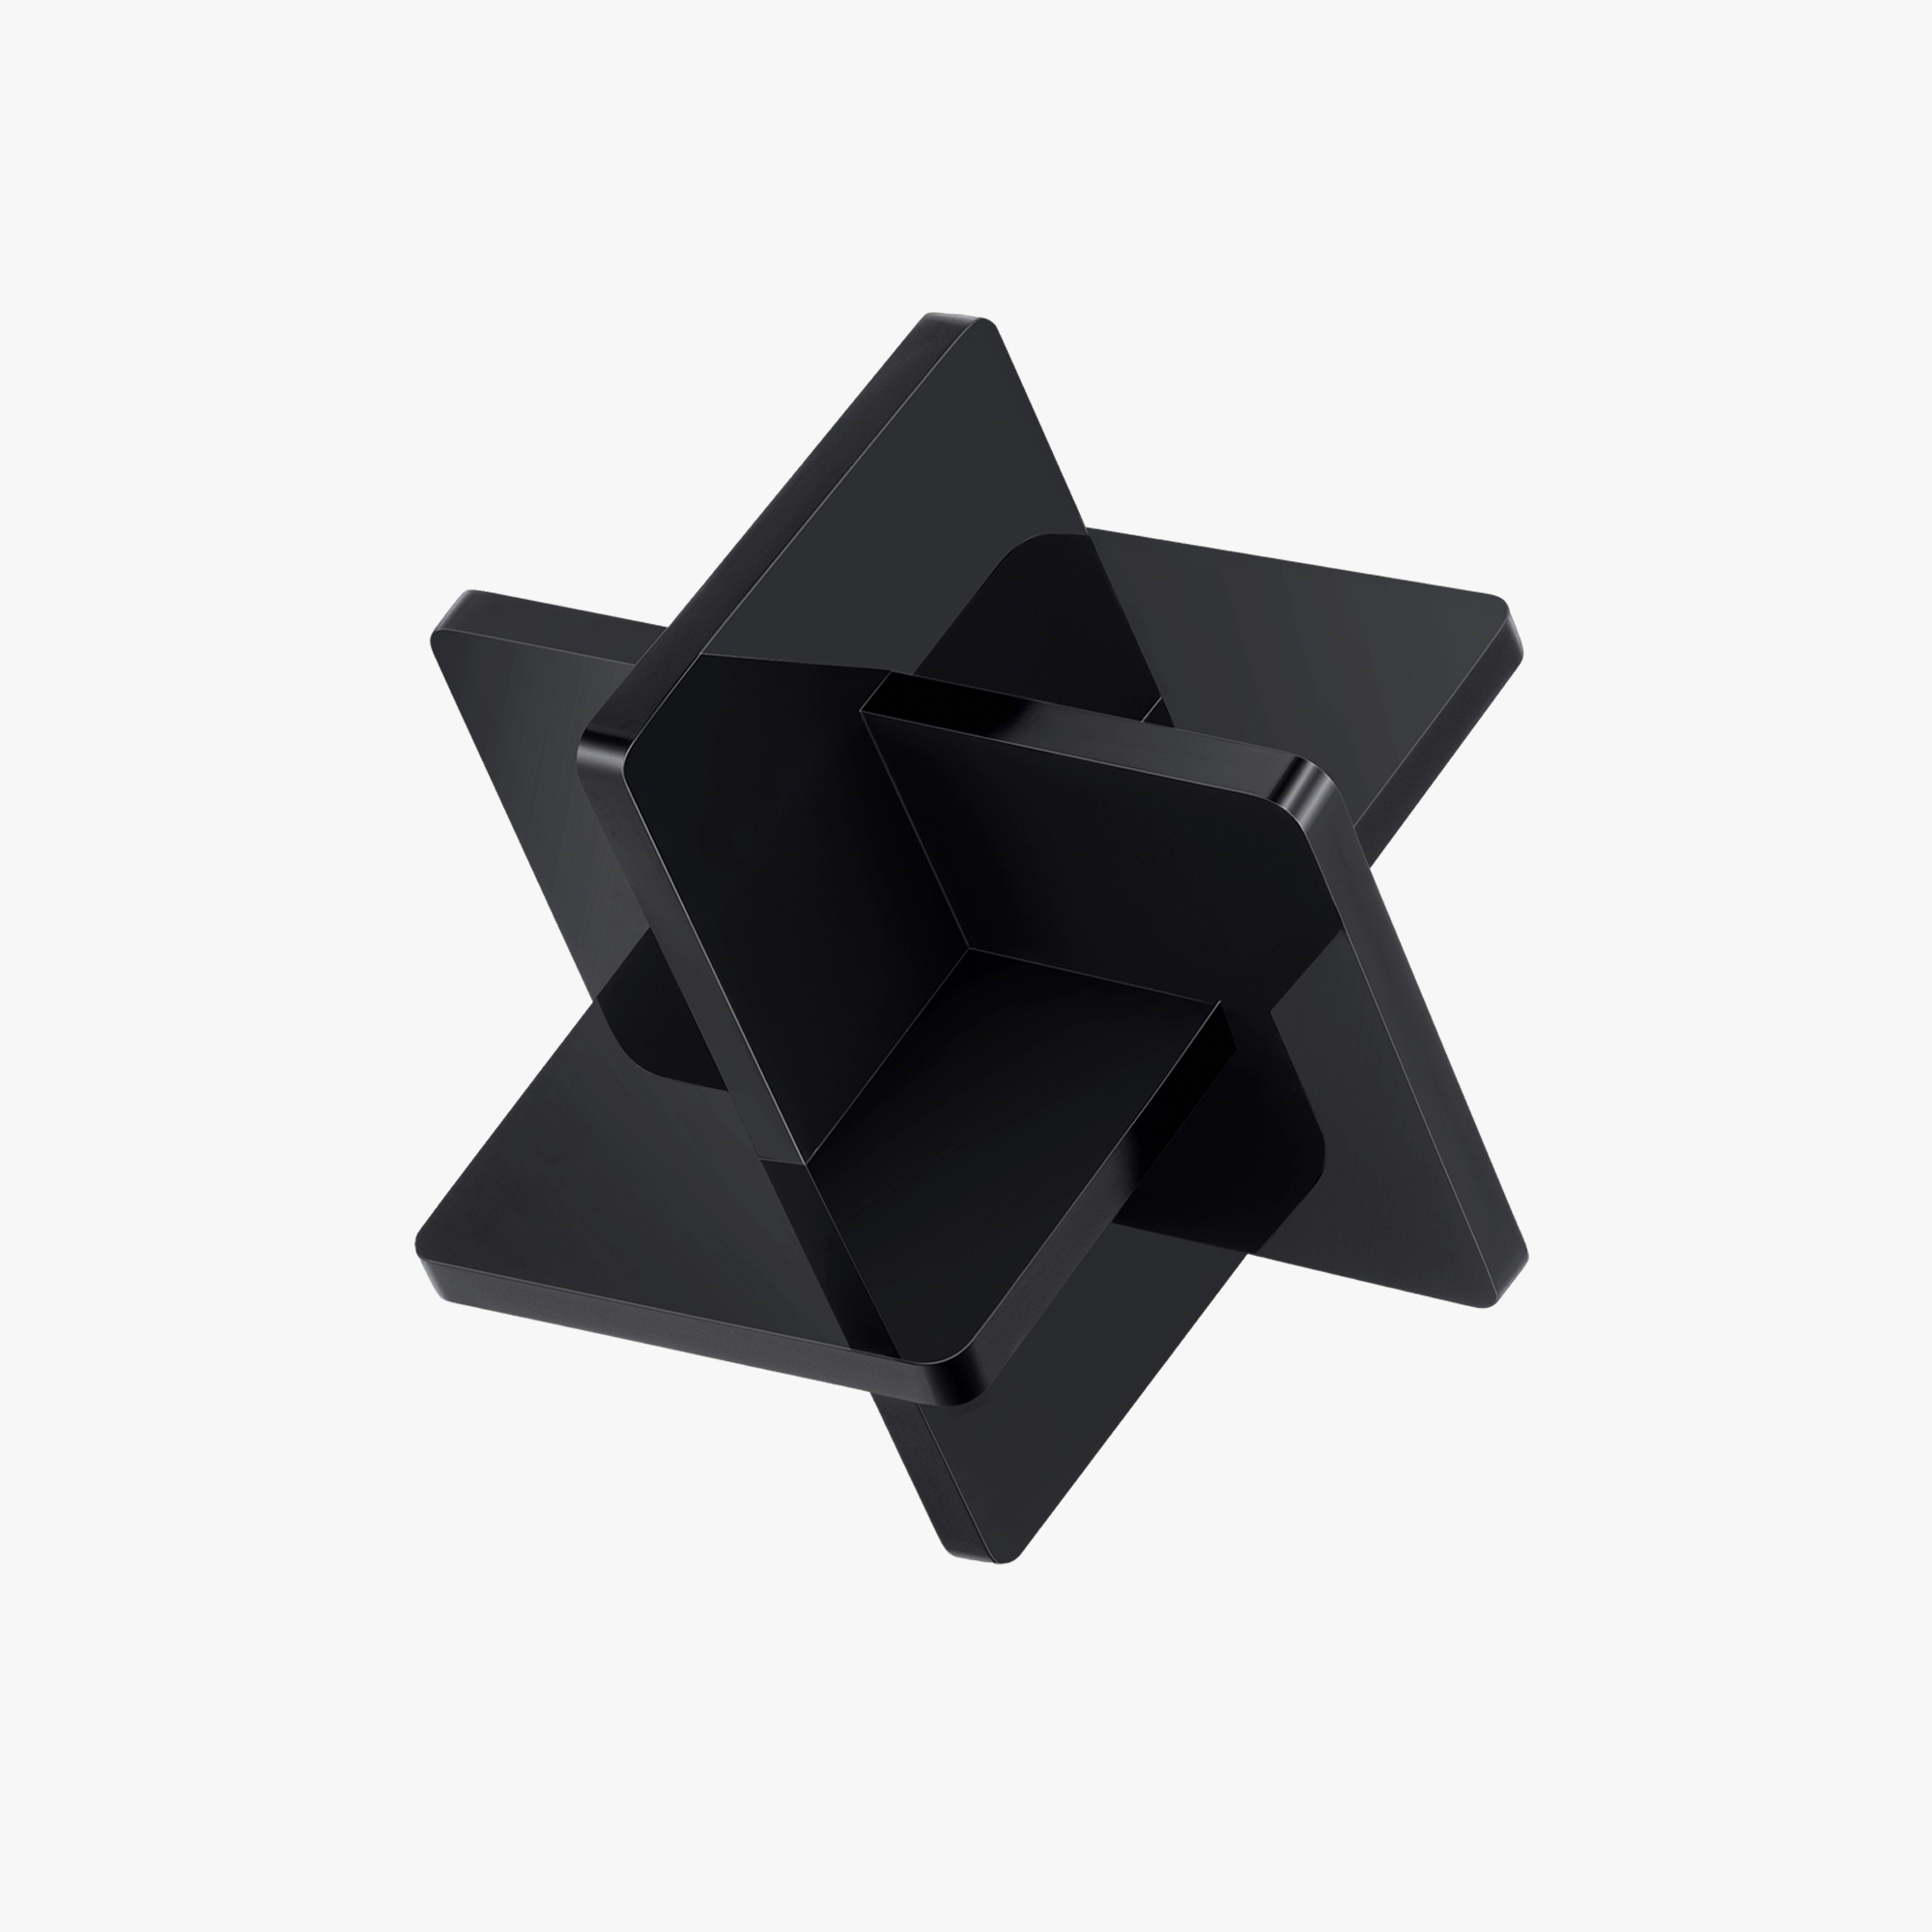
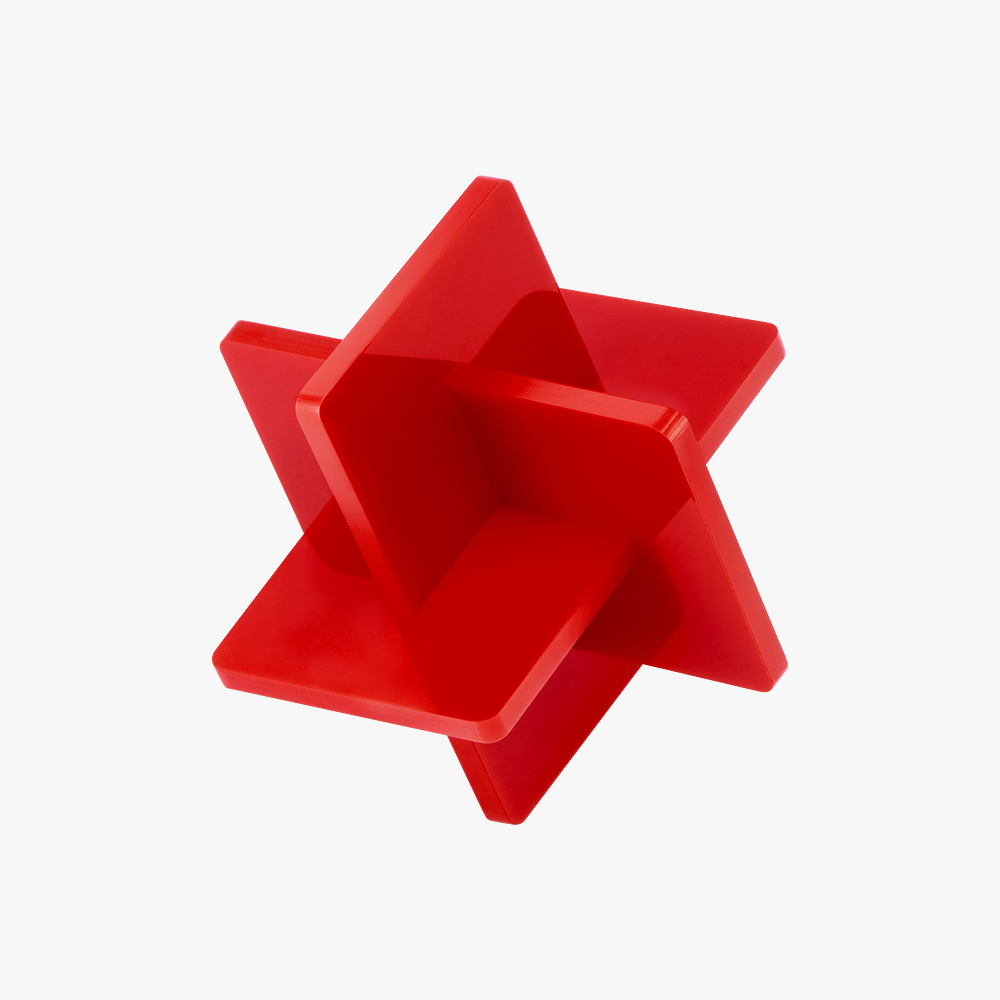
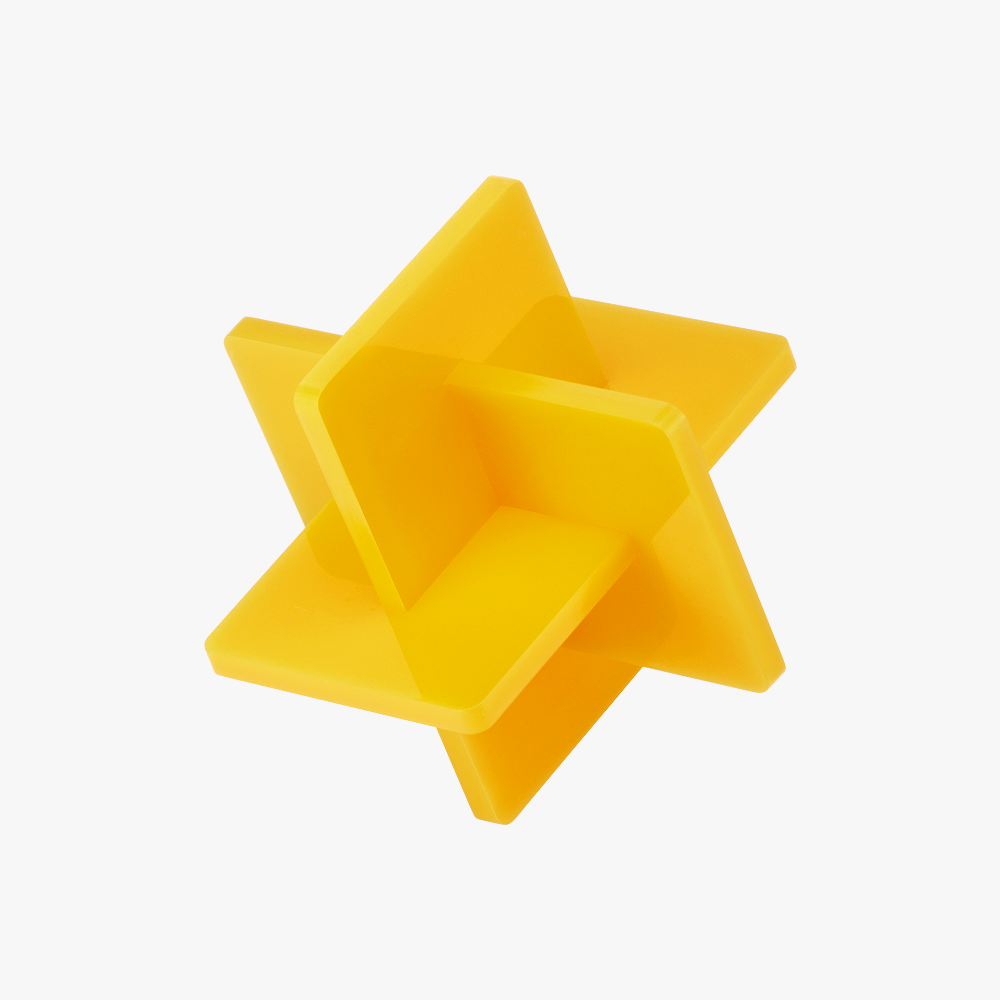
- Case faceplates (laser cut - this listing)
- ESP32-2432S028R ILI9341 dev board with 2.8" display (Also known as a CYD): Around $15
- Any USB-C (or USB Micro) 90 degree angled connector
Note: If the exact 'DIYmalls' brand 2.8" ESP32-2432S028R ILI9341 board is not cheap or easily available in your country, you can buy any brand's “ESP32-2432S028R ILI9341 2.8in 240x320 TFT LCD Module”. Many Chinese distributors sell this product. Just make sure it's a 2.8-inch display and that the ESP32-2432S028R ILI9341 numbers match.
Frequently Asked Questions
Q: How is this different than the original 3D-printed version of Aura?
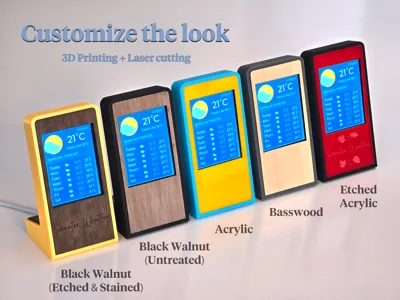
A: This new version features wood or acrylic laser-cut panels, giving you more options on styling and finish. Functionally, it is exactly the same. Build whichever version you like more!
Q: Aura connects to the internet. Does it collect any information or track me?
A: No, it only connects to the Open-Meteo API to fetch the weather forecast. You can see the source code here and compile the software yourself, if you like. It's open source.
Q: Do I need an account or anything to use this? Does it cost money to use?
A: No, it's totally free, and no accounts are required.
Q: Aura displays everything in English. Does it support other languages?
A: Yes, currently English, French, German, and Spanish are supported.
This listing contains the laser-cutting parts you need to cut. You also need to 3D print the required plastic “skeleton” that everything attaches to.

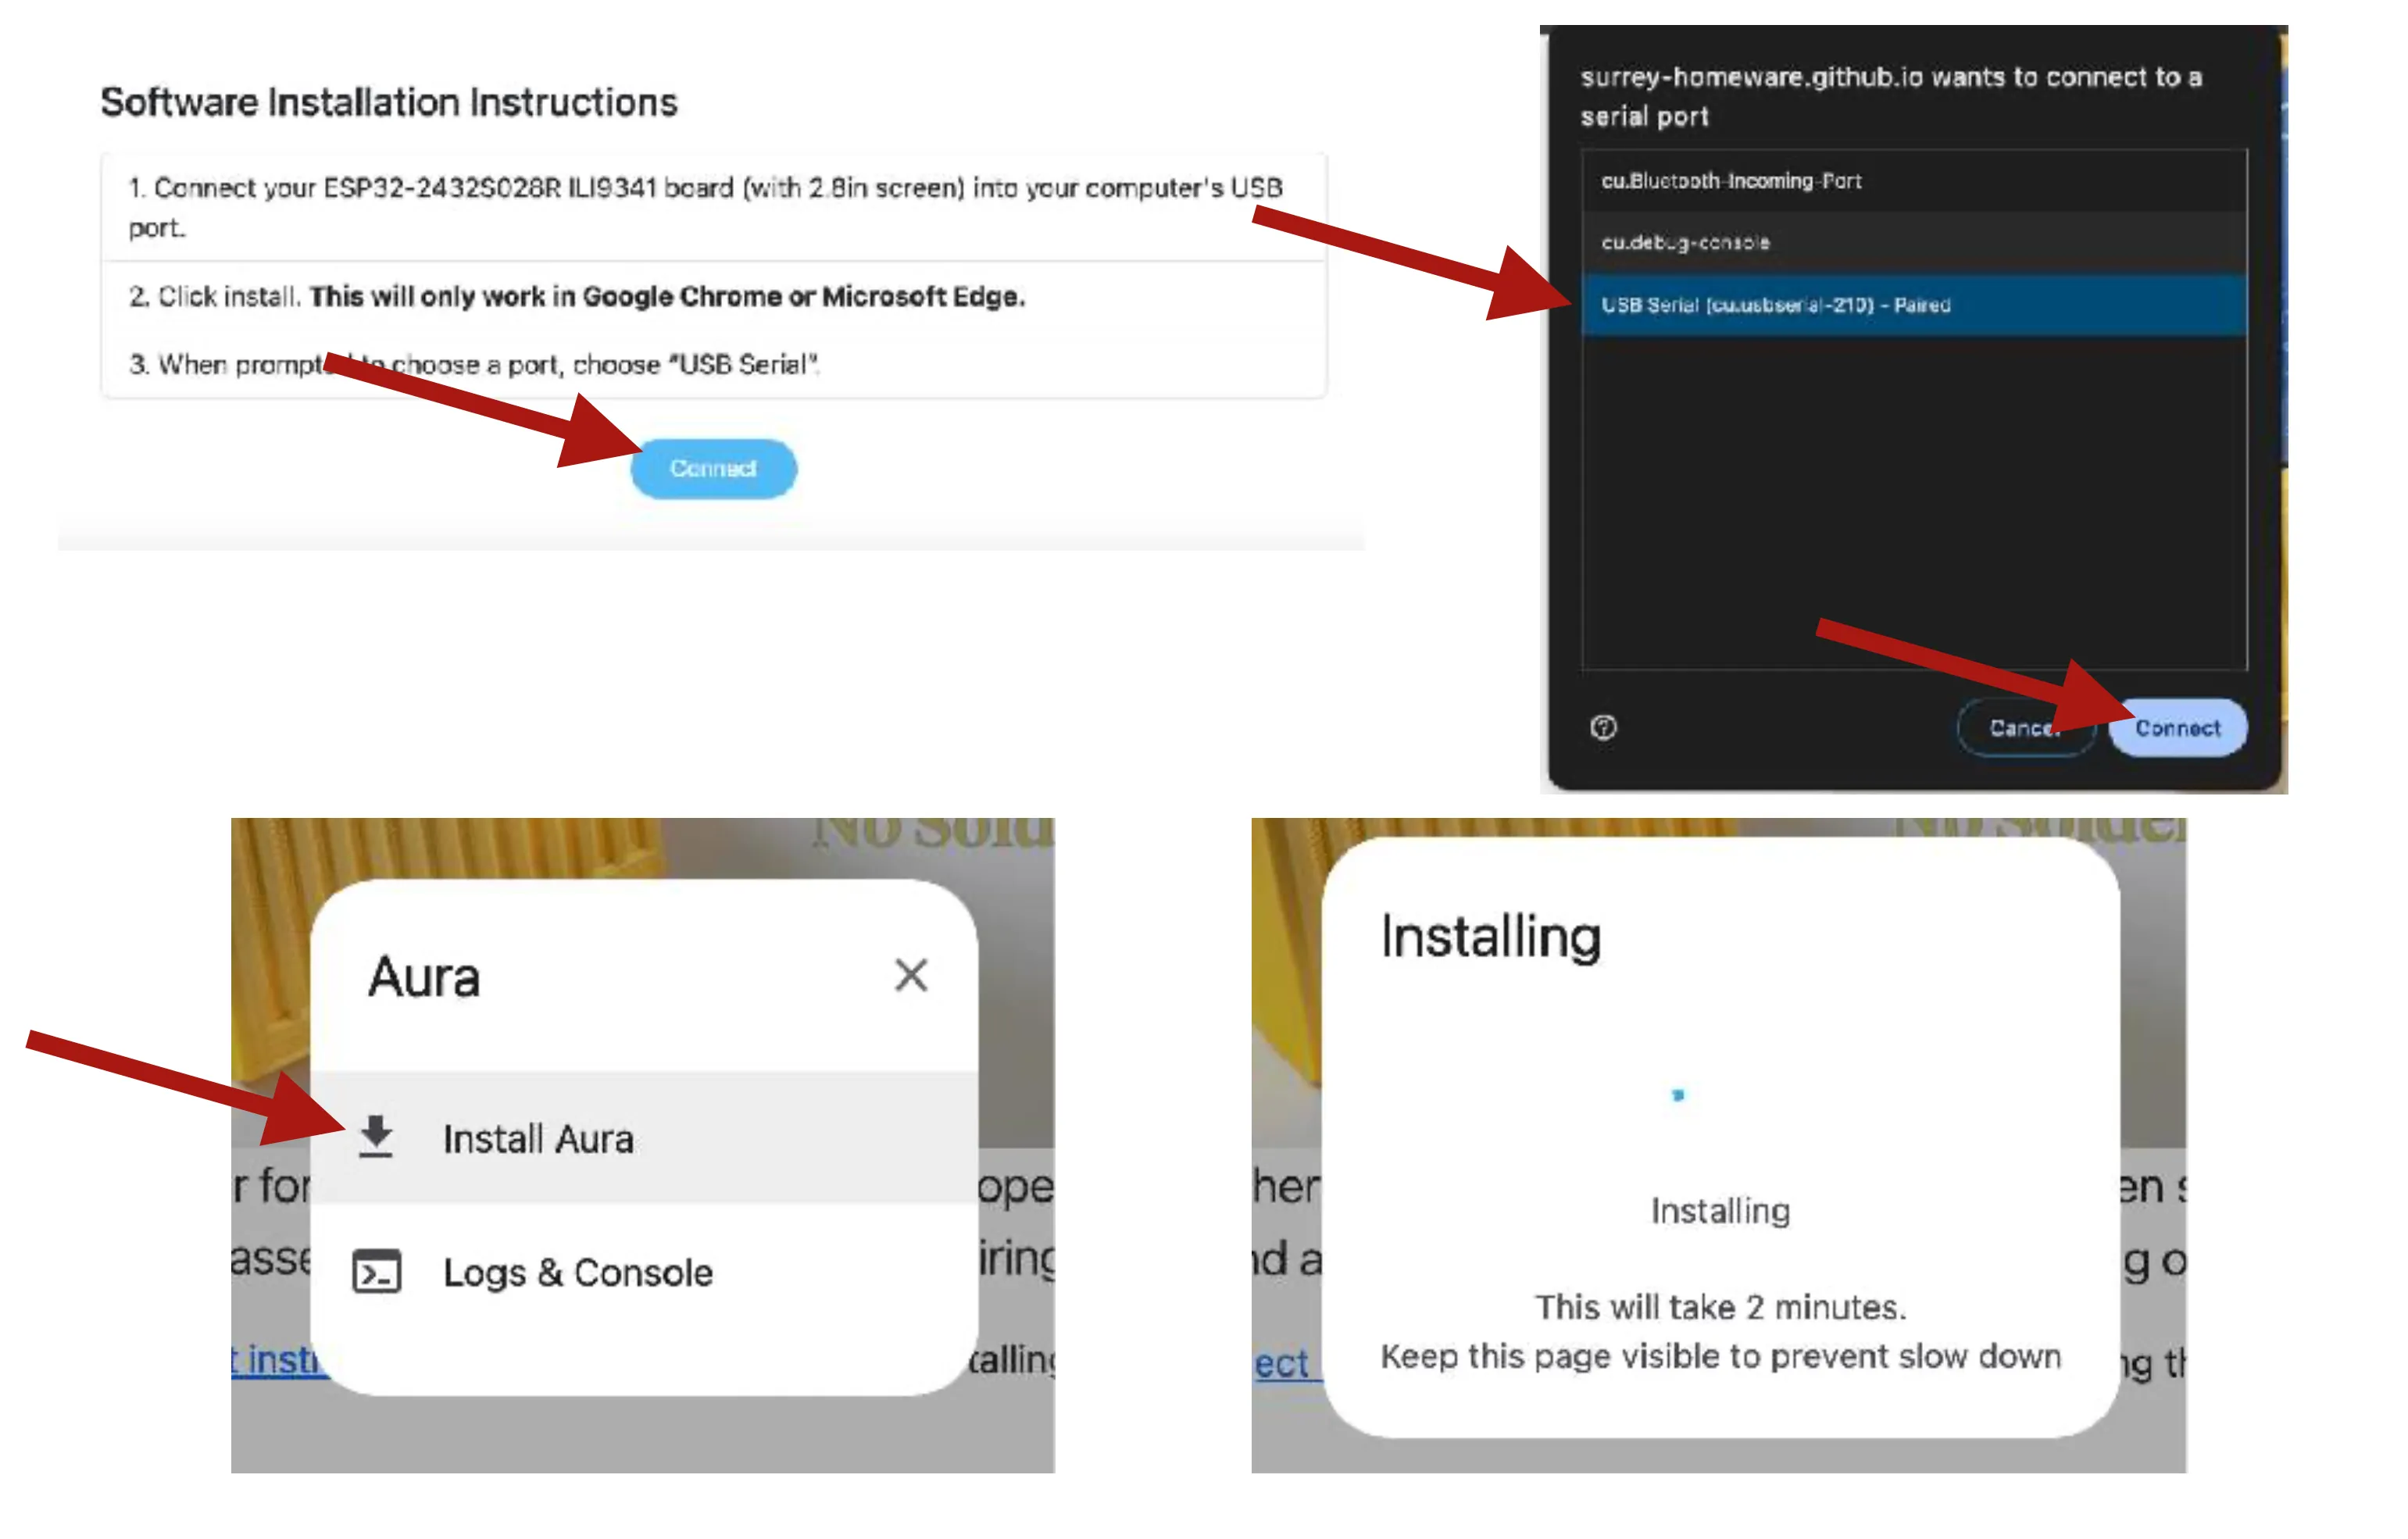
The ESP32 dev board will come with demo software installed. You need to install the Aura software onto it. Don’t worry, it’s easy!
- Plug the board into your computer's USB port. This should make it power on.
- Visit this website to load the Aura software onto the board:
https://surrey-homeware.github.io/aura-installer/
Follow the prompts on the website to install the software.
For developers only: If you are an experienced ESP32 developer and are familiar with the Arduino
IDE, you can access the source code and compile it yourself here: https://github.com/Surrey-
Homeware/Aura
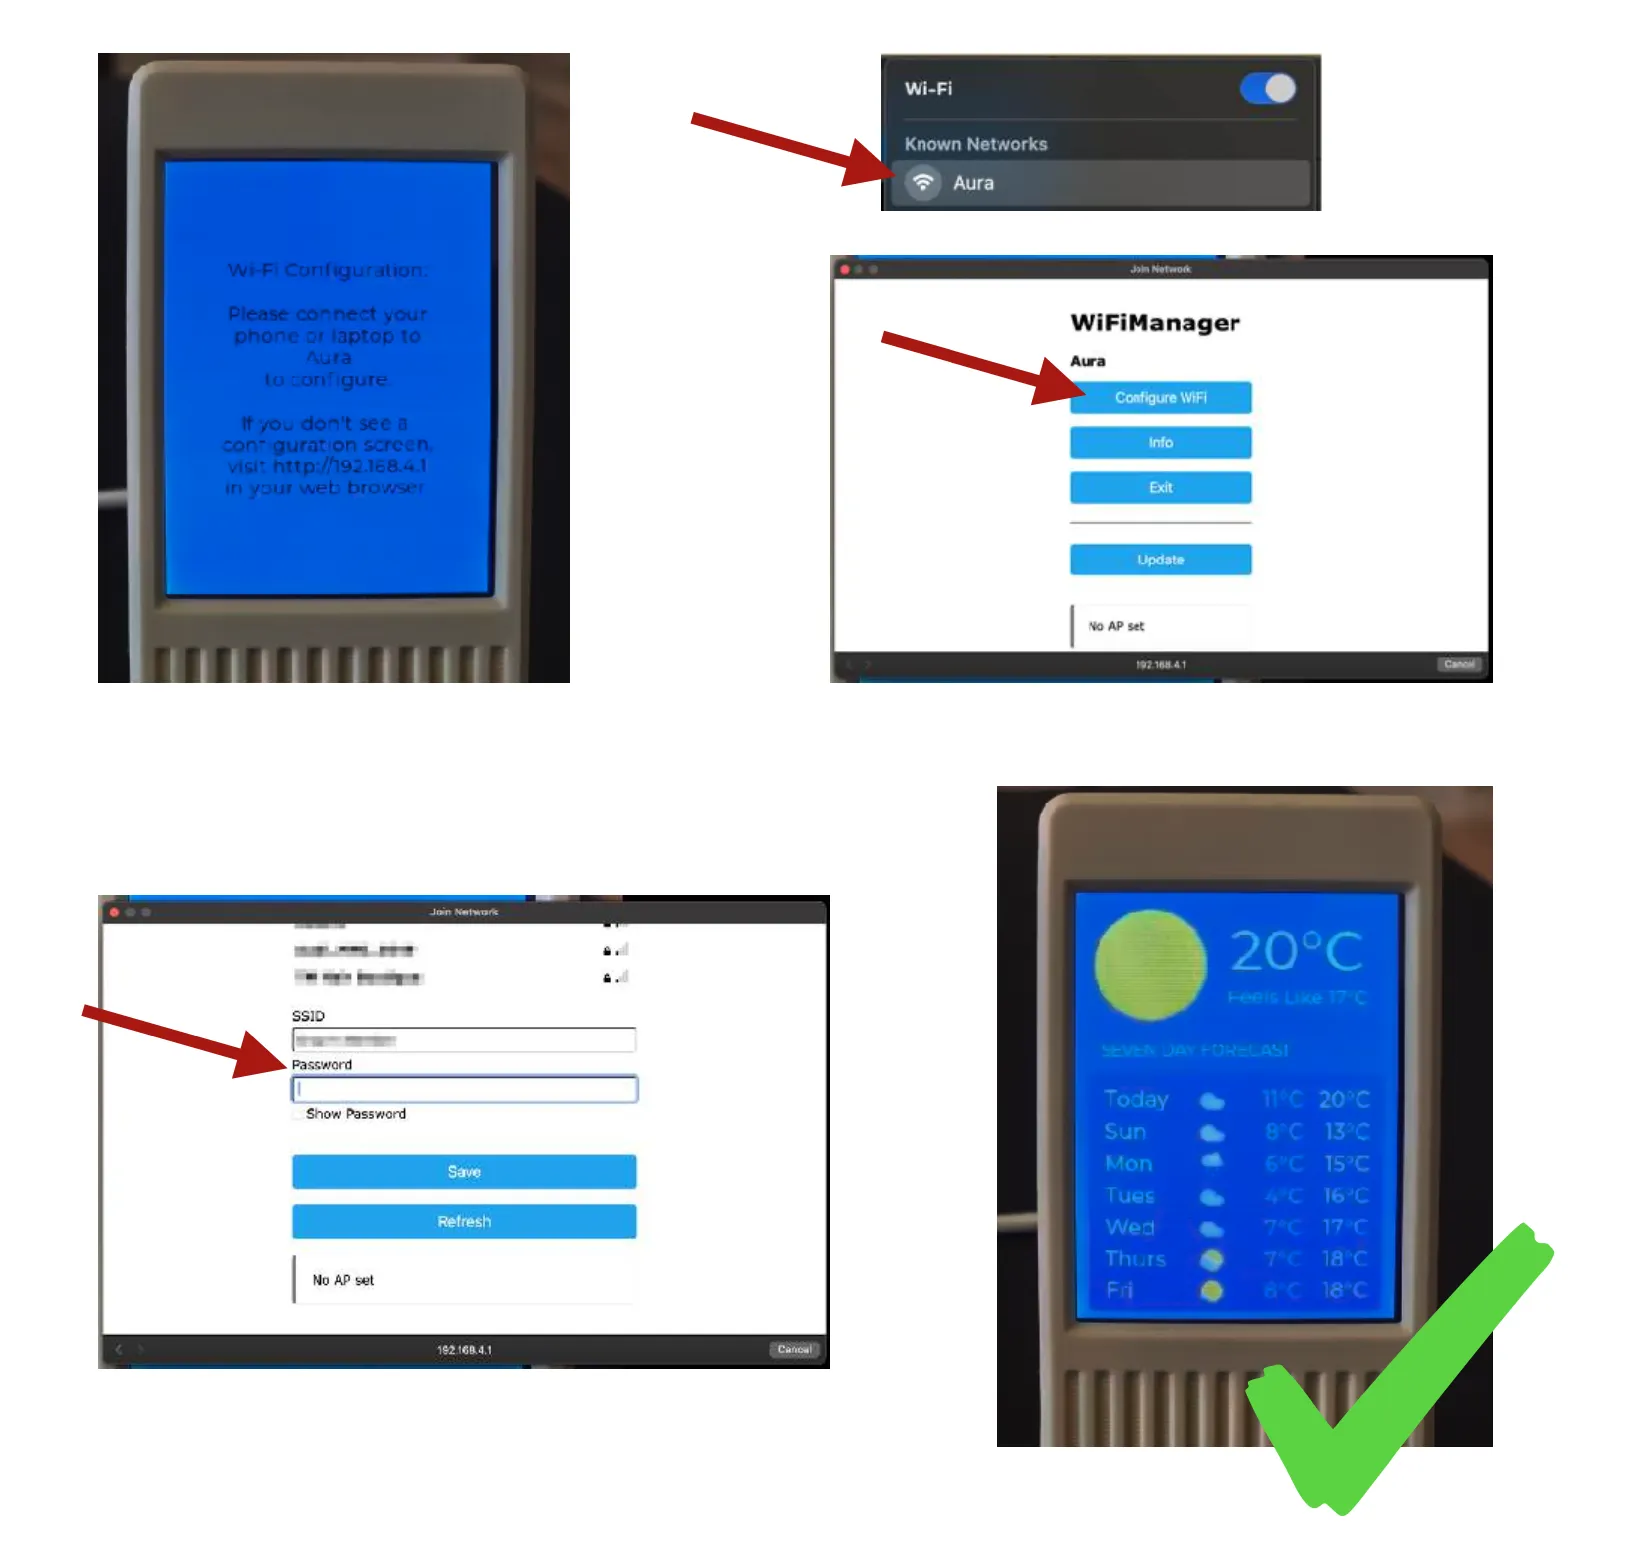
Once the software is installed on the board, follow the instructions on the screen to configure Aura's access to your Wifi. It needs internet access to load the weather forecast.
If your computer or phone doesn’t automatically show the wifi connection screen when you connect to the Aura wifi access point, you can access it manually by opening http://192.168.4.1 in your web browser while connected to ‘Aura’.
Attach the USB angled adapter to the board's USB port, facing away from the screen.
If your board only has a USB Micro port and no USB-C port, that’s no problem. You can use either.

Carefully press the board into the front of the case skeleton with the screen facing outwards until it “snaps in”. Be gentle.
Optionally, you can glue the board in place by putting glue on the plastic crossbars in the case. This will result in a firmer mounting, but of course you will not be able to remove it later.

Glue the front faceplate to the skeleton by applying glue to the edges of the faceplate and the case. Use the glue appropriate for your faceplate material.
Pro tip #1: Test fit everything before gluing. The faceplate fitment will be different for different combinations of faceplate and filament materials. Wood faceplates will generally fit snugly without any glue. Acrylic will often be loose and fall out. If you want a tighter fit before gluing, you can laser cut the acrylic with a 0.05mm offset from the original design in Bambu Suite to make it slightly larger.
Pro tip #2: Wood is easier to glue than acrylic. If using acrylic, use a glue specifically made for acrylic for the best results.

Then, glue the back faceplate to the skeleton.

Then, glue the back rear cover to the skeleton. Make sure the cord cutout lines up with your specific board’s USB port. Usually the cutout should be oriented as pictured here.

Finally, glue on the cork non-slip base (if you want one).

Plug in a USB cable for power! Either USB-C or USB Micro is fine.
Using Aura
Click anywhere on the top of the screen to access Aura Settings.
- From there, you can enter your city to make sure you get the correct forecast.
- You can change the brightness or switch between C/F temperatures.
- You can also change the language to any of the supported languages.

Click on the 10-day weather forecast area to switch between an hourly or daily forecast view:

License
You shall not share, sub-license, sell, rent, host, transfer, or distribute in any way the digital or 3D printed versions of this object, nor any other derivative work of this object in its digital or physical format (including - but not limited to - remixes of this object, and hosting on other digital platforms). The objects may not be used without permission in any way whatsoever in which you charge money, or collect fees.
Comment & Rating (2)