
SUNBU LAB AMS LITE 1.0

Print Profile(6)


Description
// Update 250611. User @evutech found a successful way to prevent RFID spillover (all other countermeasures failed). A piece of kitchen aluminium foil placed between the leg parts did the trick! The excess was easily removed after leg assembly. Thank you for this solution!
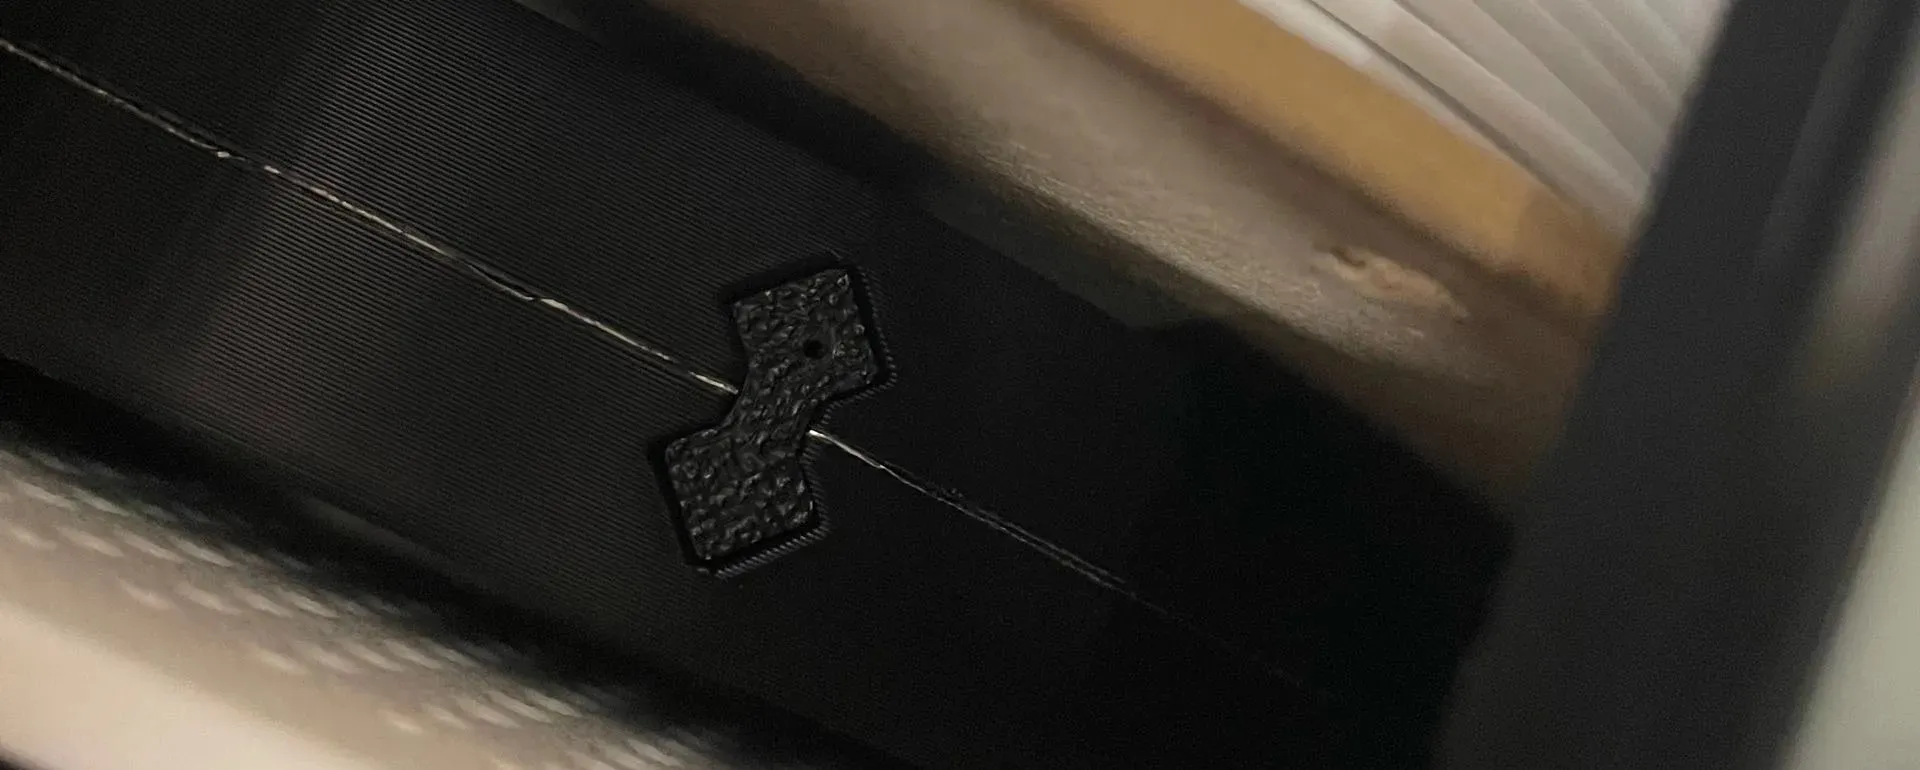
// Update 241212. Added print profile for “Aftermarket RFID Spillover fix”. Idea by @Argent73. Read profile description for more info.
// Update 241014. Contributions. I will try to have this space updated with links to contributions to this project.
Version Double Tube Sunbu Lab Up&Down Full printab Remixed by benjibenji45 - MakerWorld
Hooks for sunbu ams mod by knobby - MakerWorld
My Feet and support for SUNLU S4 AMS LITE by Mrx by benjibenji45 - MakerWorld
Sunbu Ams Lite Loader Stand by jdfletch - MakerWorld
Sunbu AMS Lite RFID Spillage Fix Remixed by spooter - MakerWorld
Sunbu Loader Stand holder by Argent73 - MakerWorld
Sunbu Lab UP&DOWN SYSTEM v. 1.0 by djferre garage by djferre - MakerWorld
SUNBU LABS "MOTORIZED" UP&DOWN SYSTEM by seongin.park - MakerWorld
SUNBU LAB LITE - AMS Lite on Sunlu S4 (Remix) by Roket_3D - MakerWorld
Extra Silica Desiccant Box for SUMBU LAB AMS LITE - Free 3D Print Model - MakerWorld
Video on full assembly of the project (in Italian) by @djferre
If I left someone out please let me know! :)
// Update 241011
In able to submit this model to the “Exclusive Model Program” I had to change the Licence terms to “Digital File License”. I'm not a fan of this license type though, and rest assure I will never pursue anyone for adding contributions to this project in any form! Since the remix option will probably be removed, if you have an idea that you want to published that is based on this model files, please shoot me a DM and I'll link to it myself when published.
"This user content is licensed under a Standard Digital File License.
You shall not share, sub-license, sell, rent, host, transfer, or distribute in any way the digital or 3D printed versions of this object, nor any other derivative work of this object in its digital or physical format (including - but not limited to - remixes of this object, and hosting on other digital platforms). The objects may not be used without permission in any way whatsoever in which you charge money, or collect fees."
Consider this “post” as “permission” to remix and release on Makerworld (But only Makerworld), and also to receive points and boosts for your work!
// Update 240823. Important note!
A user had issues with the RFID identification spilling over to the other spool. After some tests it came clear that this might happen if any of below is true:
- The sensor wires are to close to each other in the gap between the leg and the base (Thanks @jdfletch for investigating)
- One of the coils (sensor windings), had been installed backwards. (Which was the case)
I will update the assembly instructions accordingly.
// Update 240806. Important note for anyone who made the A1Mini version!
The split of the legs had a design flaw resulting in a strength issue. The “feet” will come off the “legs” at some point during drying conditions and heavy load leaving the spools hanging from the sensor wires. I strongly recommend anyone who built this version to glue the “feet” to the leg. For new users I have already designed and released and updated version that I have tested to be sufficient. I'm very sorry for this inconvenience.
// Update 240722. Important note!
I got feedback from a user (@digigibbs), that with Bambu PETG Basic on textured PEI plate, the Clips/Locks/Plugs plate just stuck to much to the plate generating a lot of work removing the brim from the plate. Suggestion is to turn off brim when printing with PETG since it might be superfluous. Or chose a different plate material that doesn't stick so much.
// Update 240630
- Redesign to fit on A1 Mini build plate. (Parts to big was split to “puzzles”)
- Print profile for A1 Mini added.
=================
The idea to design and build this has been with me for a while, and I finally got the time to do it….
What is it?
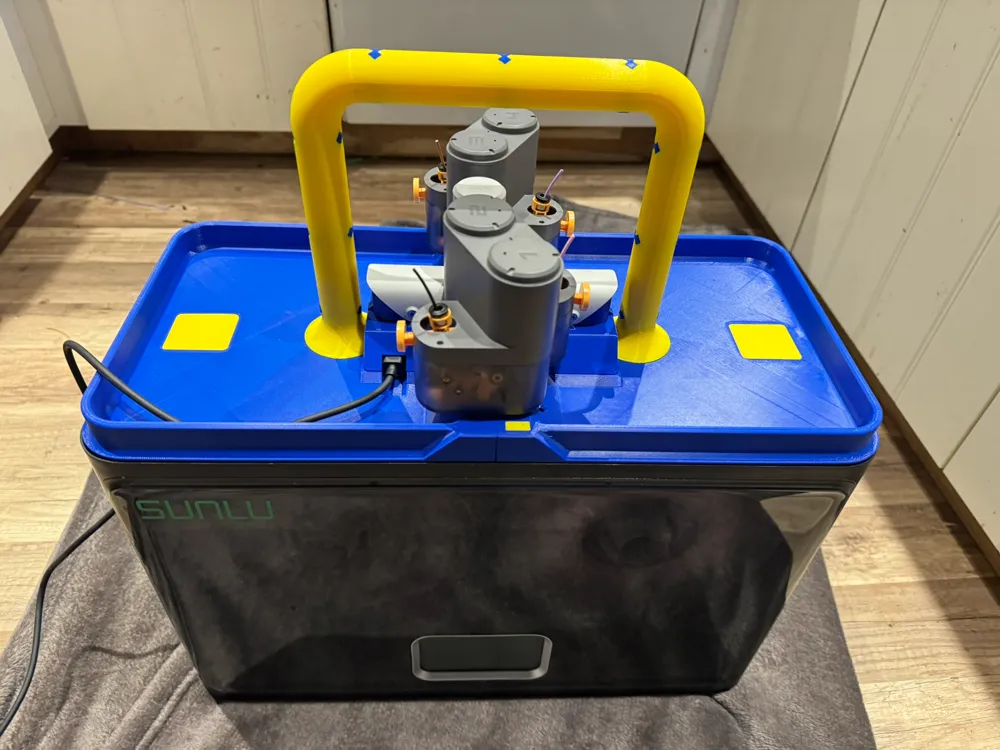
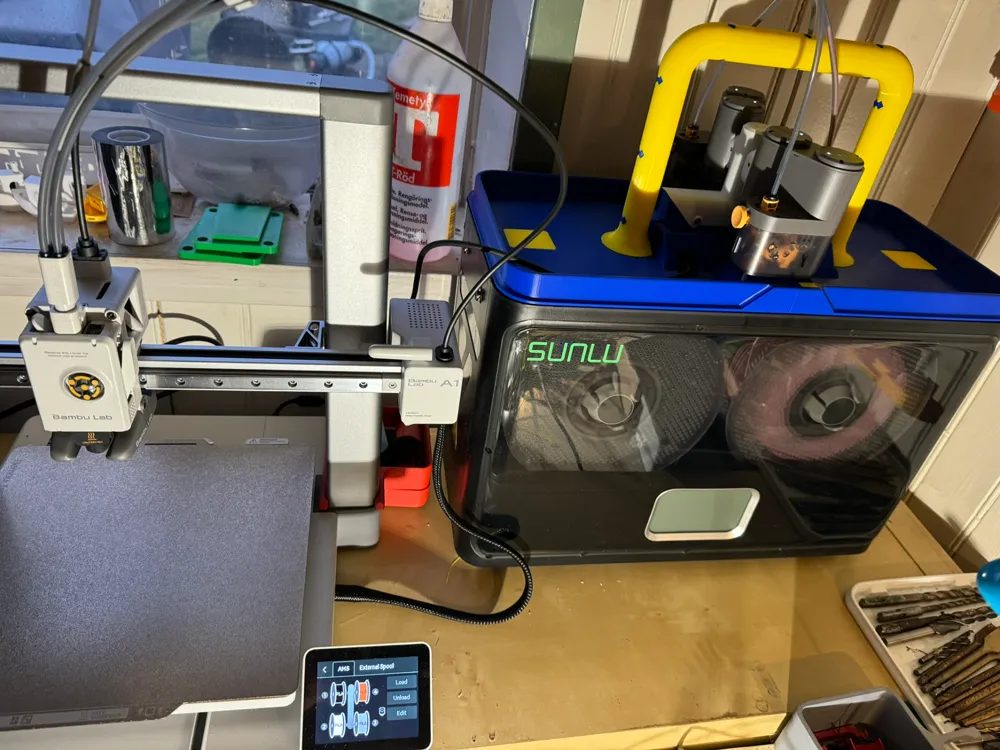
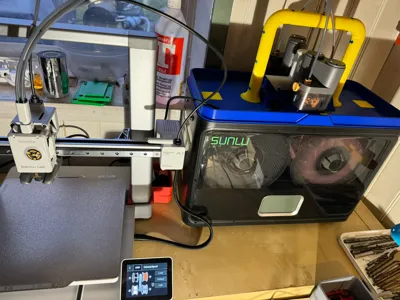
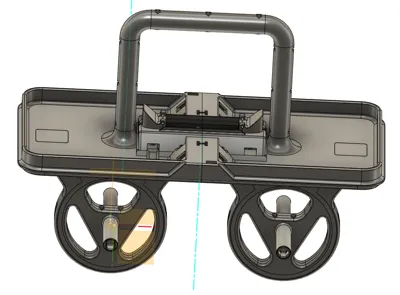
This is a fusion of the Bambu Lab AMS Lite and the Filadryer S4 by Sunlu. First and foremost it will allow you to keep your filament dry and also print directly from the Filadryer but with AMS Lite capabilities. Second, you will clear up space on your desk (if you previously had the AMS Lite standing on it). You will also get a tray on top to store some stuff.
Lets get to it!
My list of prerequisites were:
- All functionality of the AMS lite should persist.
- All functionality of the Sunlu S4 filament dryer should persist.
- No modification or damage to the original parts of both the AMS Lite or Sunlu S4 allowed. (reassembly must be possible)
- No or at least minimal supports required when printing.
- Only printed parts allowed, no additional parts (like screws, bearings, etc) should be required.
- As much as possible of the design to be "mirrored".
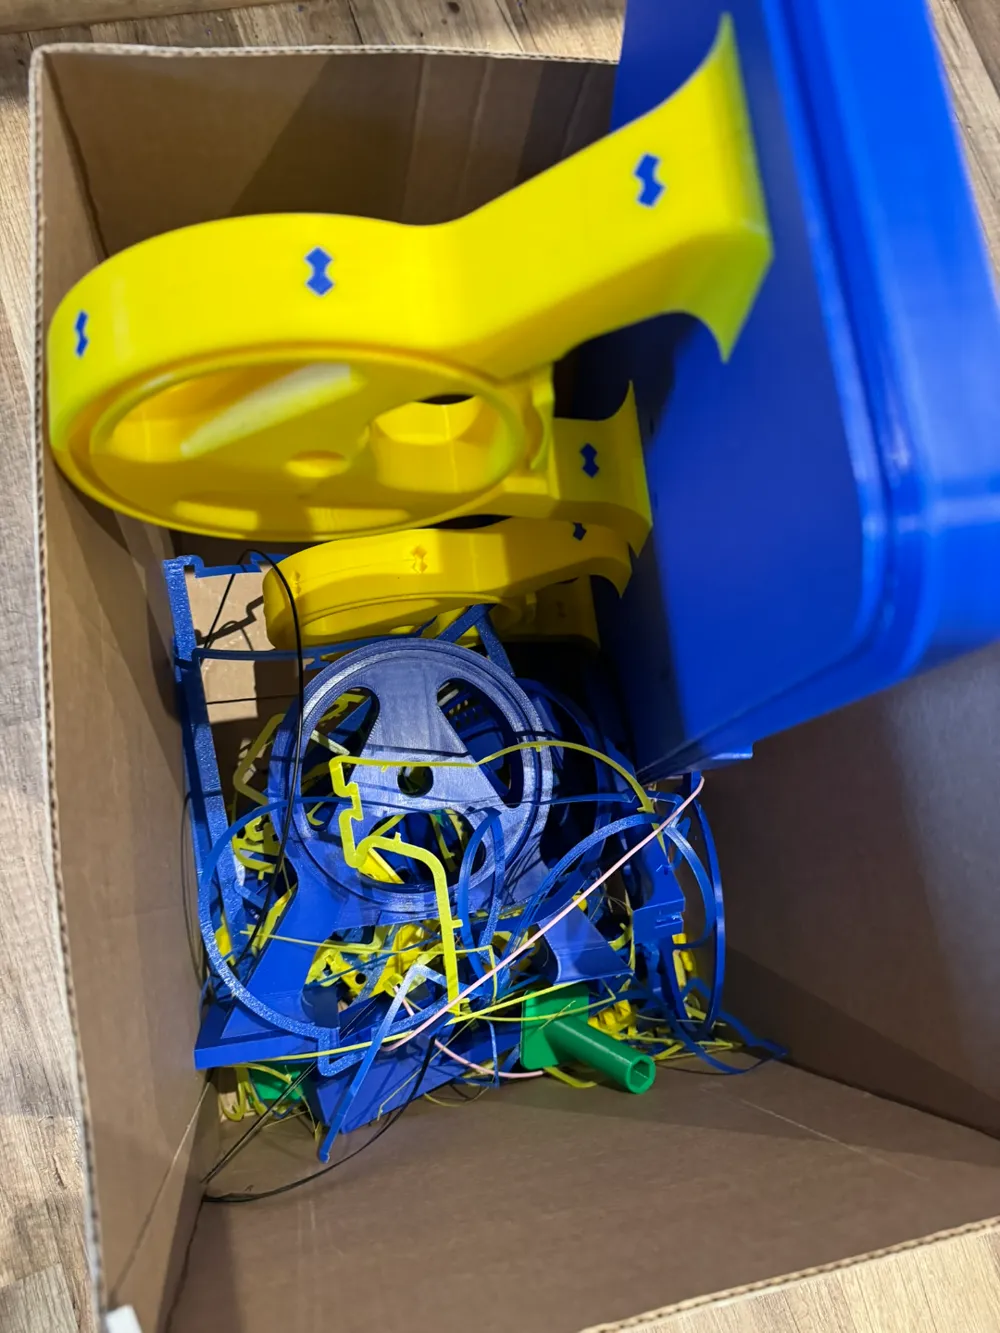
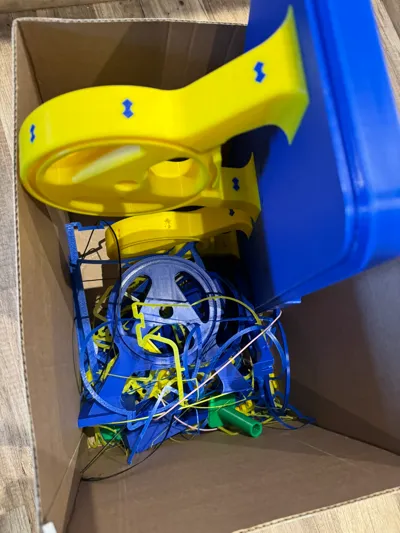
All plates and parts needed are stored in the 3mf-file. I used a X1C to print the parts. I opted for ABS since it usually gives great durability and finish. It will most likely work with PETG or even PLA, but I have not tried that, and PLA might be insufficient in drying temperatures.
For a smooth journey I would start like this and print:
- BASE A
- BASE B (Exactly the same as BASE A)
- CLIPS & LOCKS & PLUGS
While printing, disassemble the AMS Lite. There are guides for this in the wiki:
AMS Maintenance and How To guides | Bambu Lab Wiki
To remove the feeder units, unscrew the four screws that are attached to the main body and unplug the to ribbon cables from the mainboard. The feeder units does not require any further disassembly.
When you have removed the motherboard (Details in the wiki), carefully remove the NFC sensor windings from the main body. Easiest way to do this was to use a screwdriver and bend carefully at each place where there is silicone, It is four places in total for each sensor.
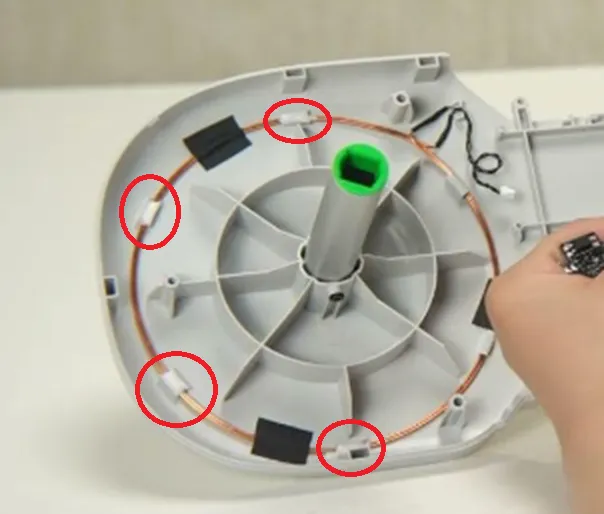
That's all AMS parts you need to disassemble. You should now have this in front of you
- First stage feeder kit
- 1x Motherboard
- 4x NFC Sensor windings
- 4x rolls
Now turn to the Sunlu S4. The top covers needs to be removed. I was puzzled of how to to this but found out that if one cover is opened and then carefully bent, it would snap out from the chassis.
When you have finished printing the first three plates print the following plates:
- LEG A
- LEG B
- YELLOW SPOOL HOLDER (x2 on the plate)
- GREEN SPOOL HOLDER (x2 on the plate)
- LEG C
- LEG D
(All LEG parts are exactly the same)
Assembly of the SUNBU AMS LITE main body
BODY A and BODY B will jack in to each other. Just pair the edge at an angle and twist them together:
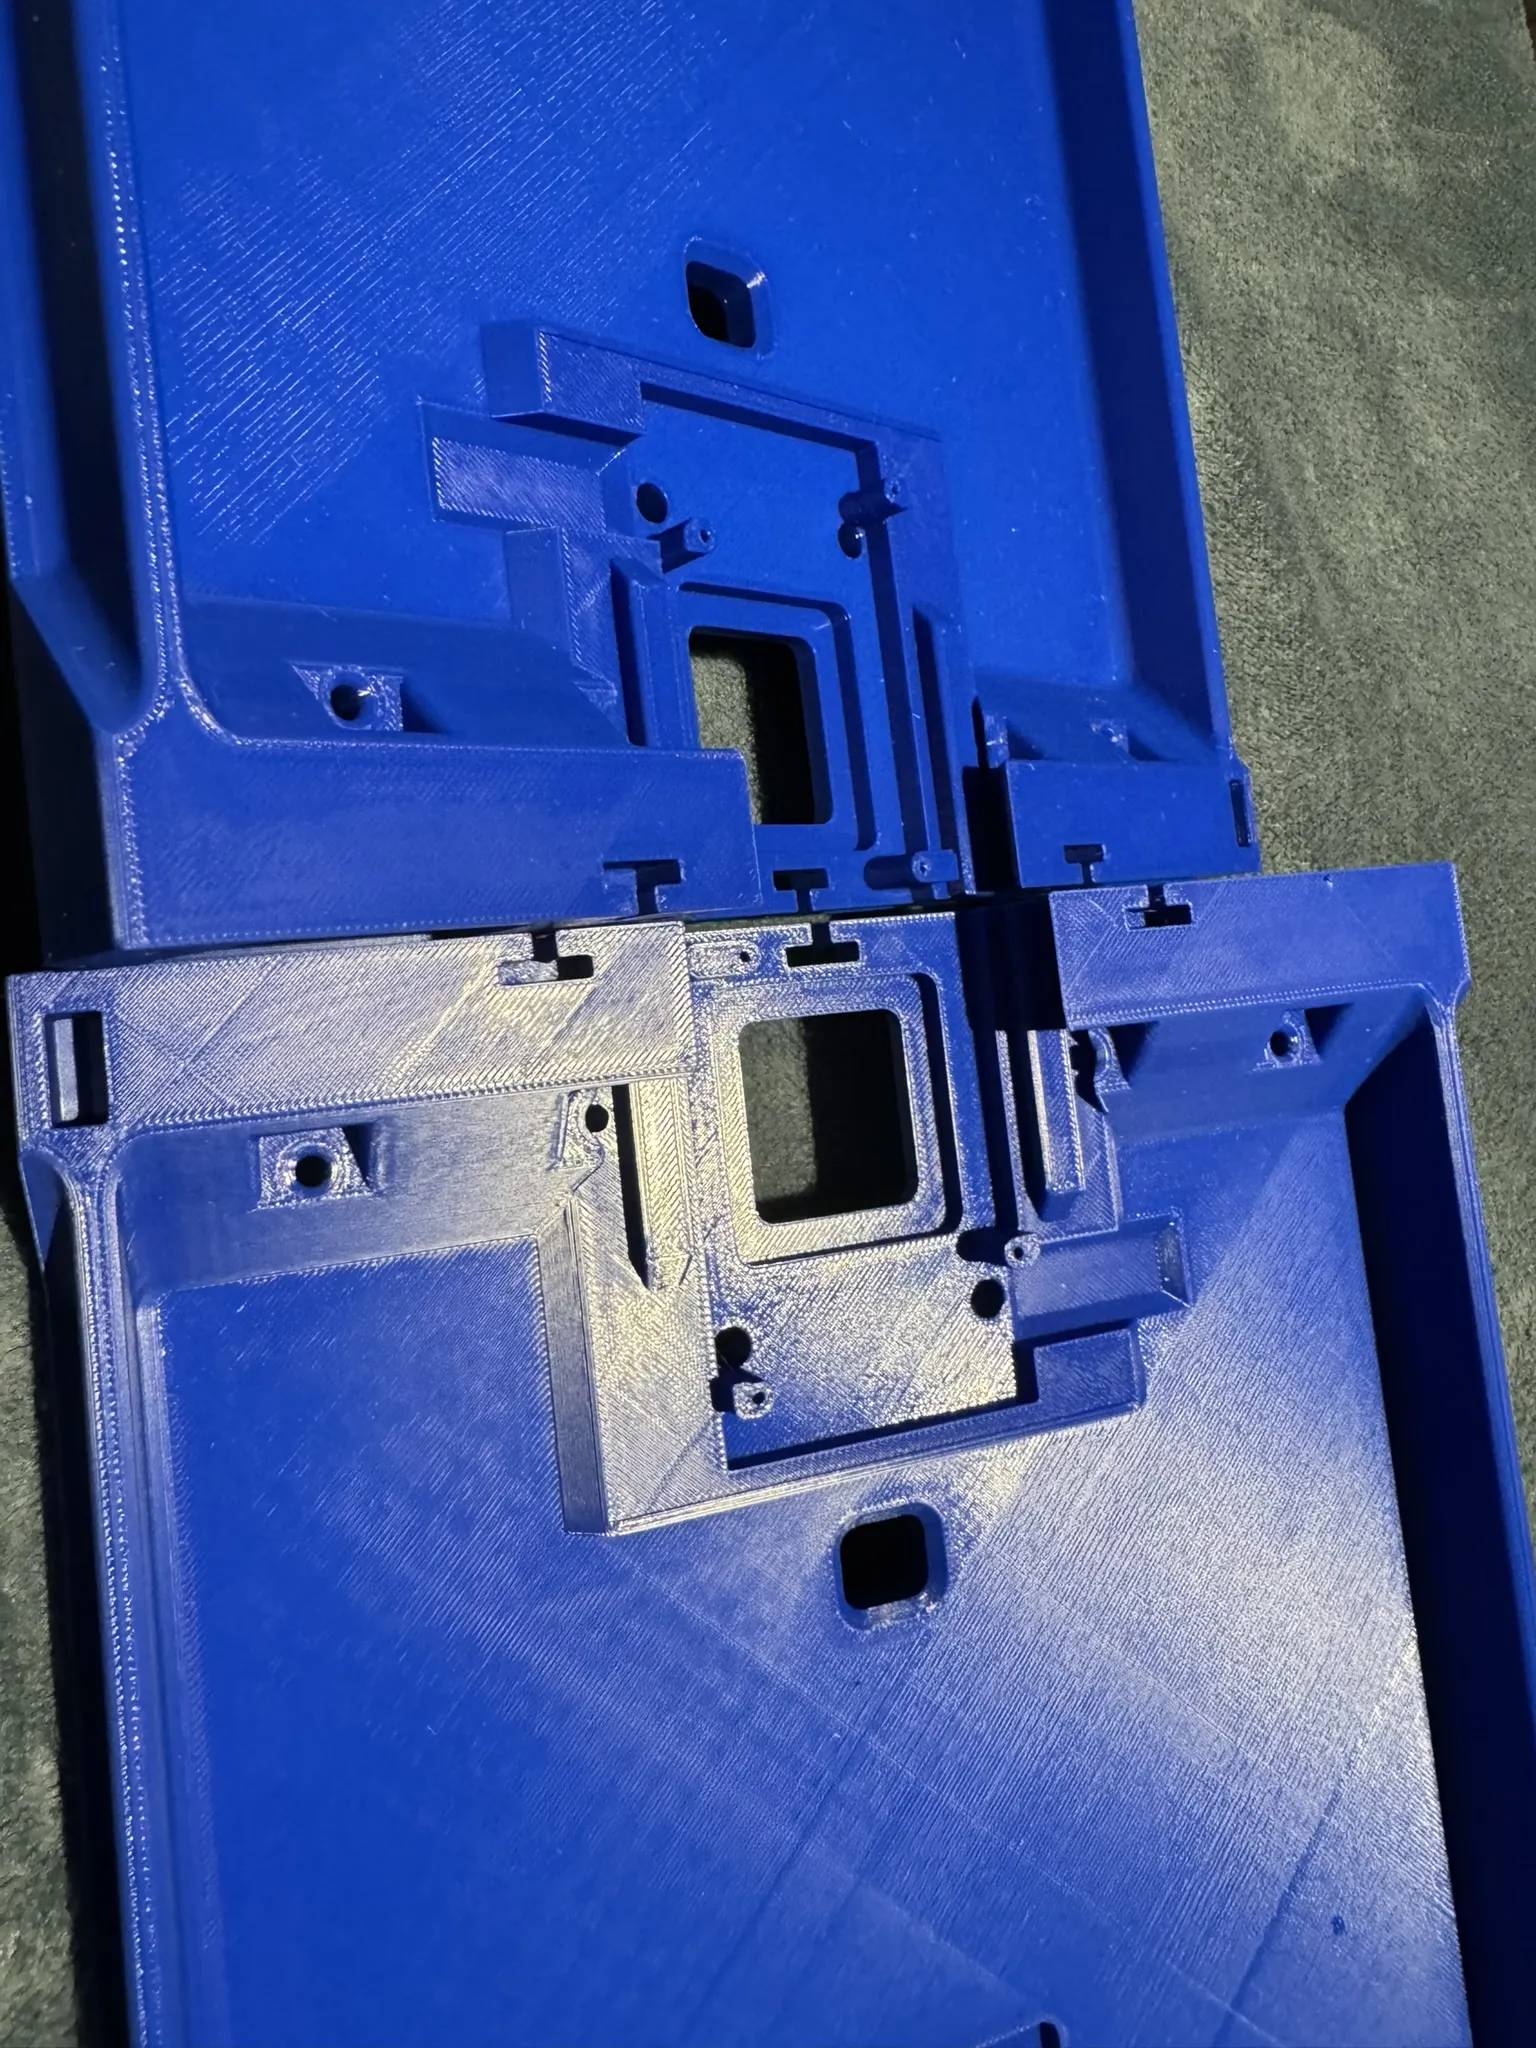
--→
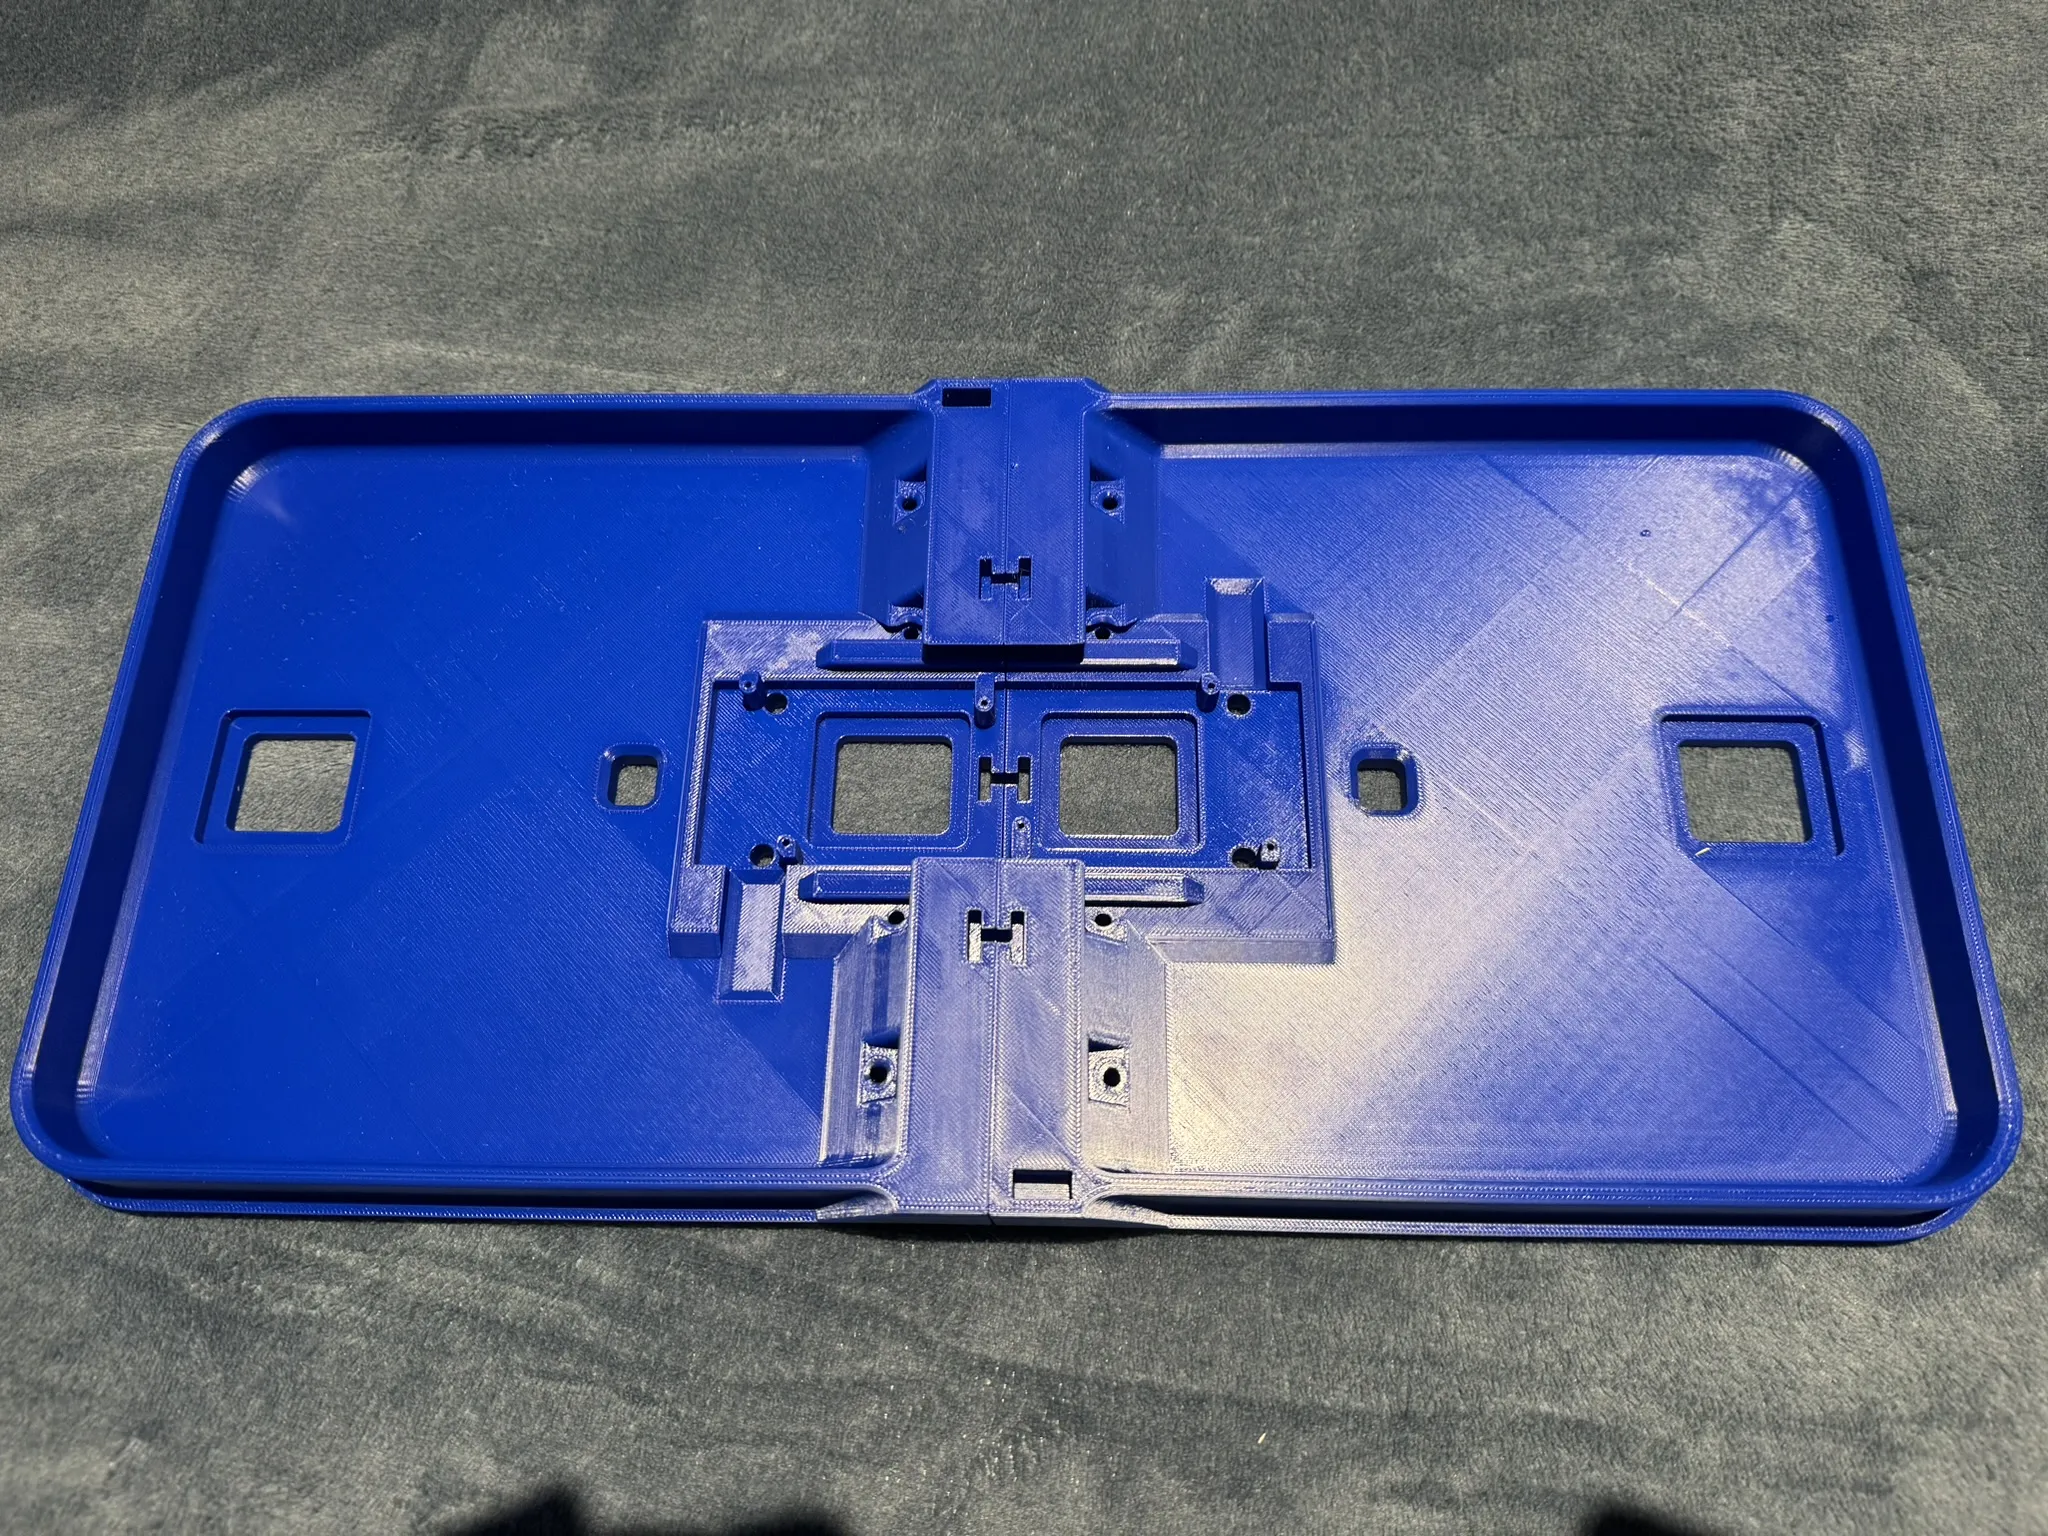
Now find the following parts from the CLIPS & LOCKS & PLUGS plate:
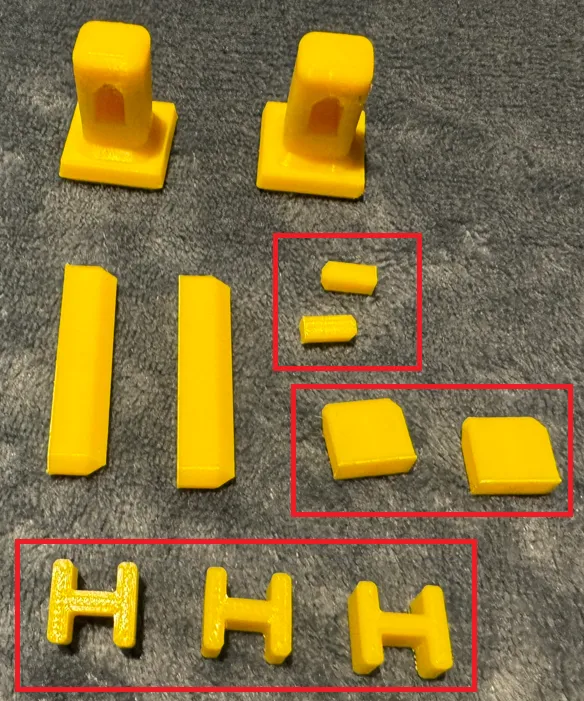
Push the three H-shaped slips into the main body. You can use the rear side of a screwdriver for this. Or any other tool you like. Or just toyr thumb. Note that the clips have a chamfer on one side. That side is the one that goes into the model.
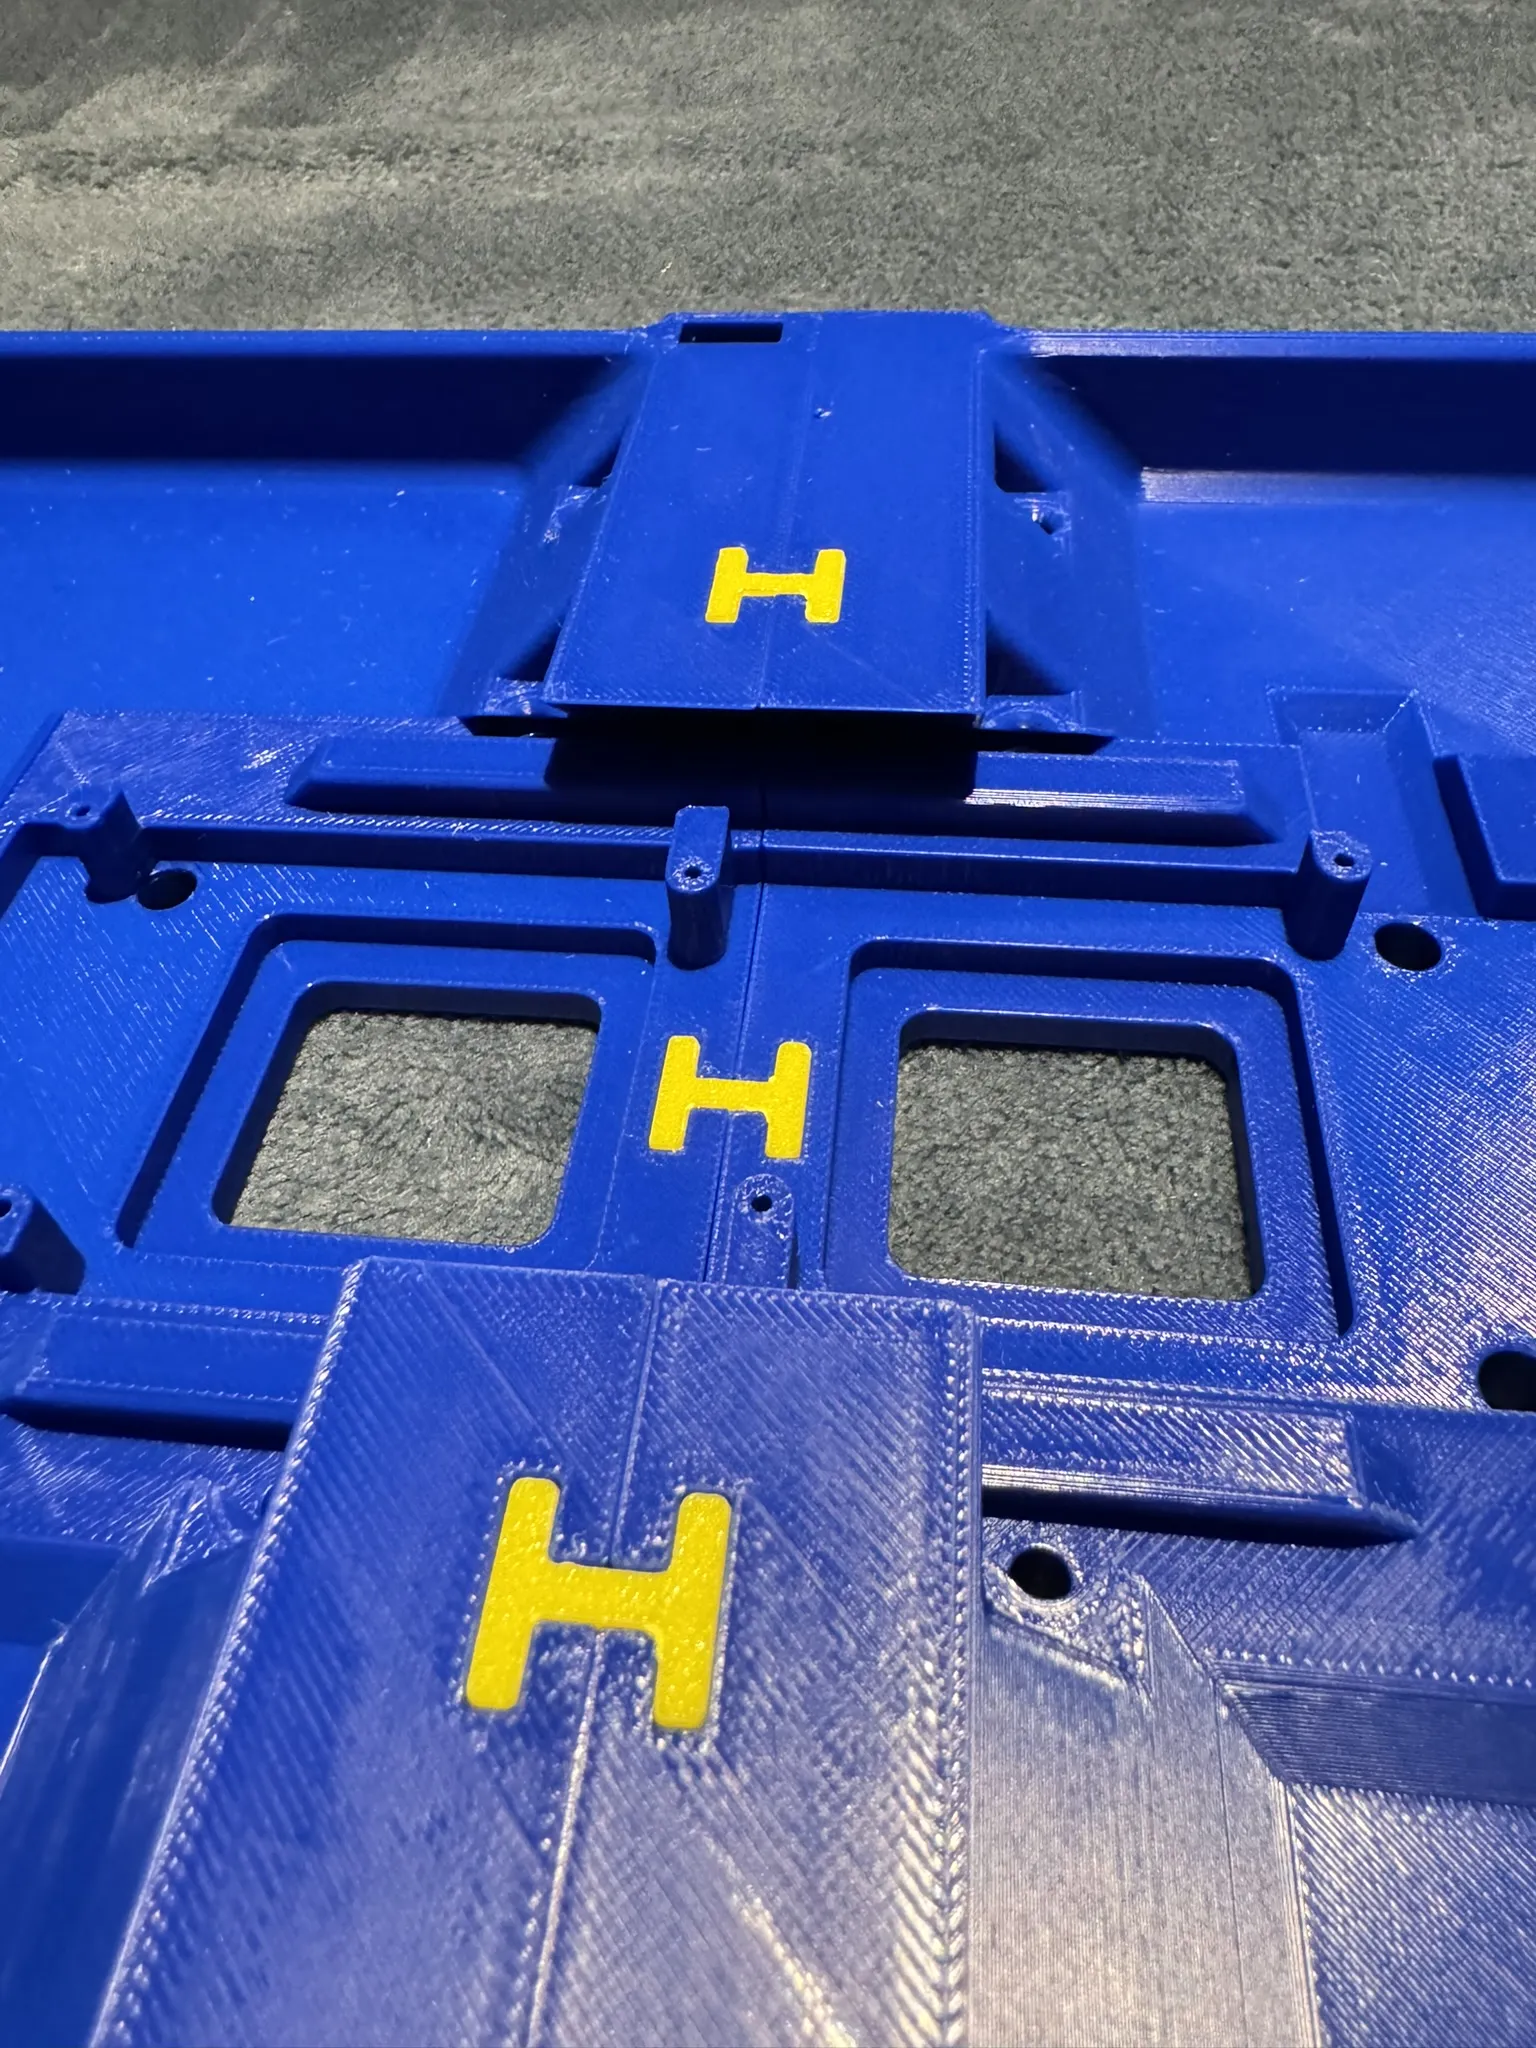
Now turn to the two small 6x10mm poles. Drop one sideways into each of the slots on the top side of the main body. Use a screwdriver and push the pole into the next part of the main body. Press it all the way in.
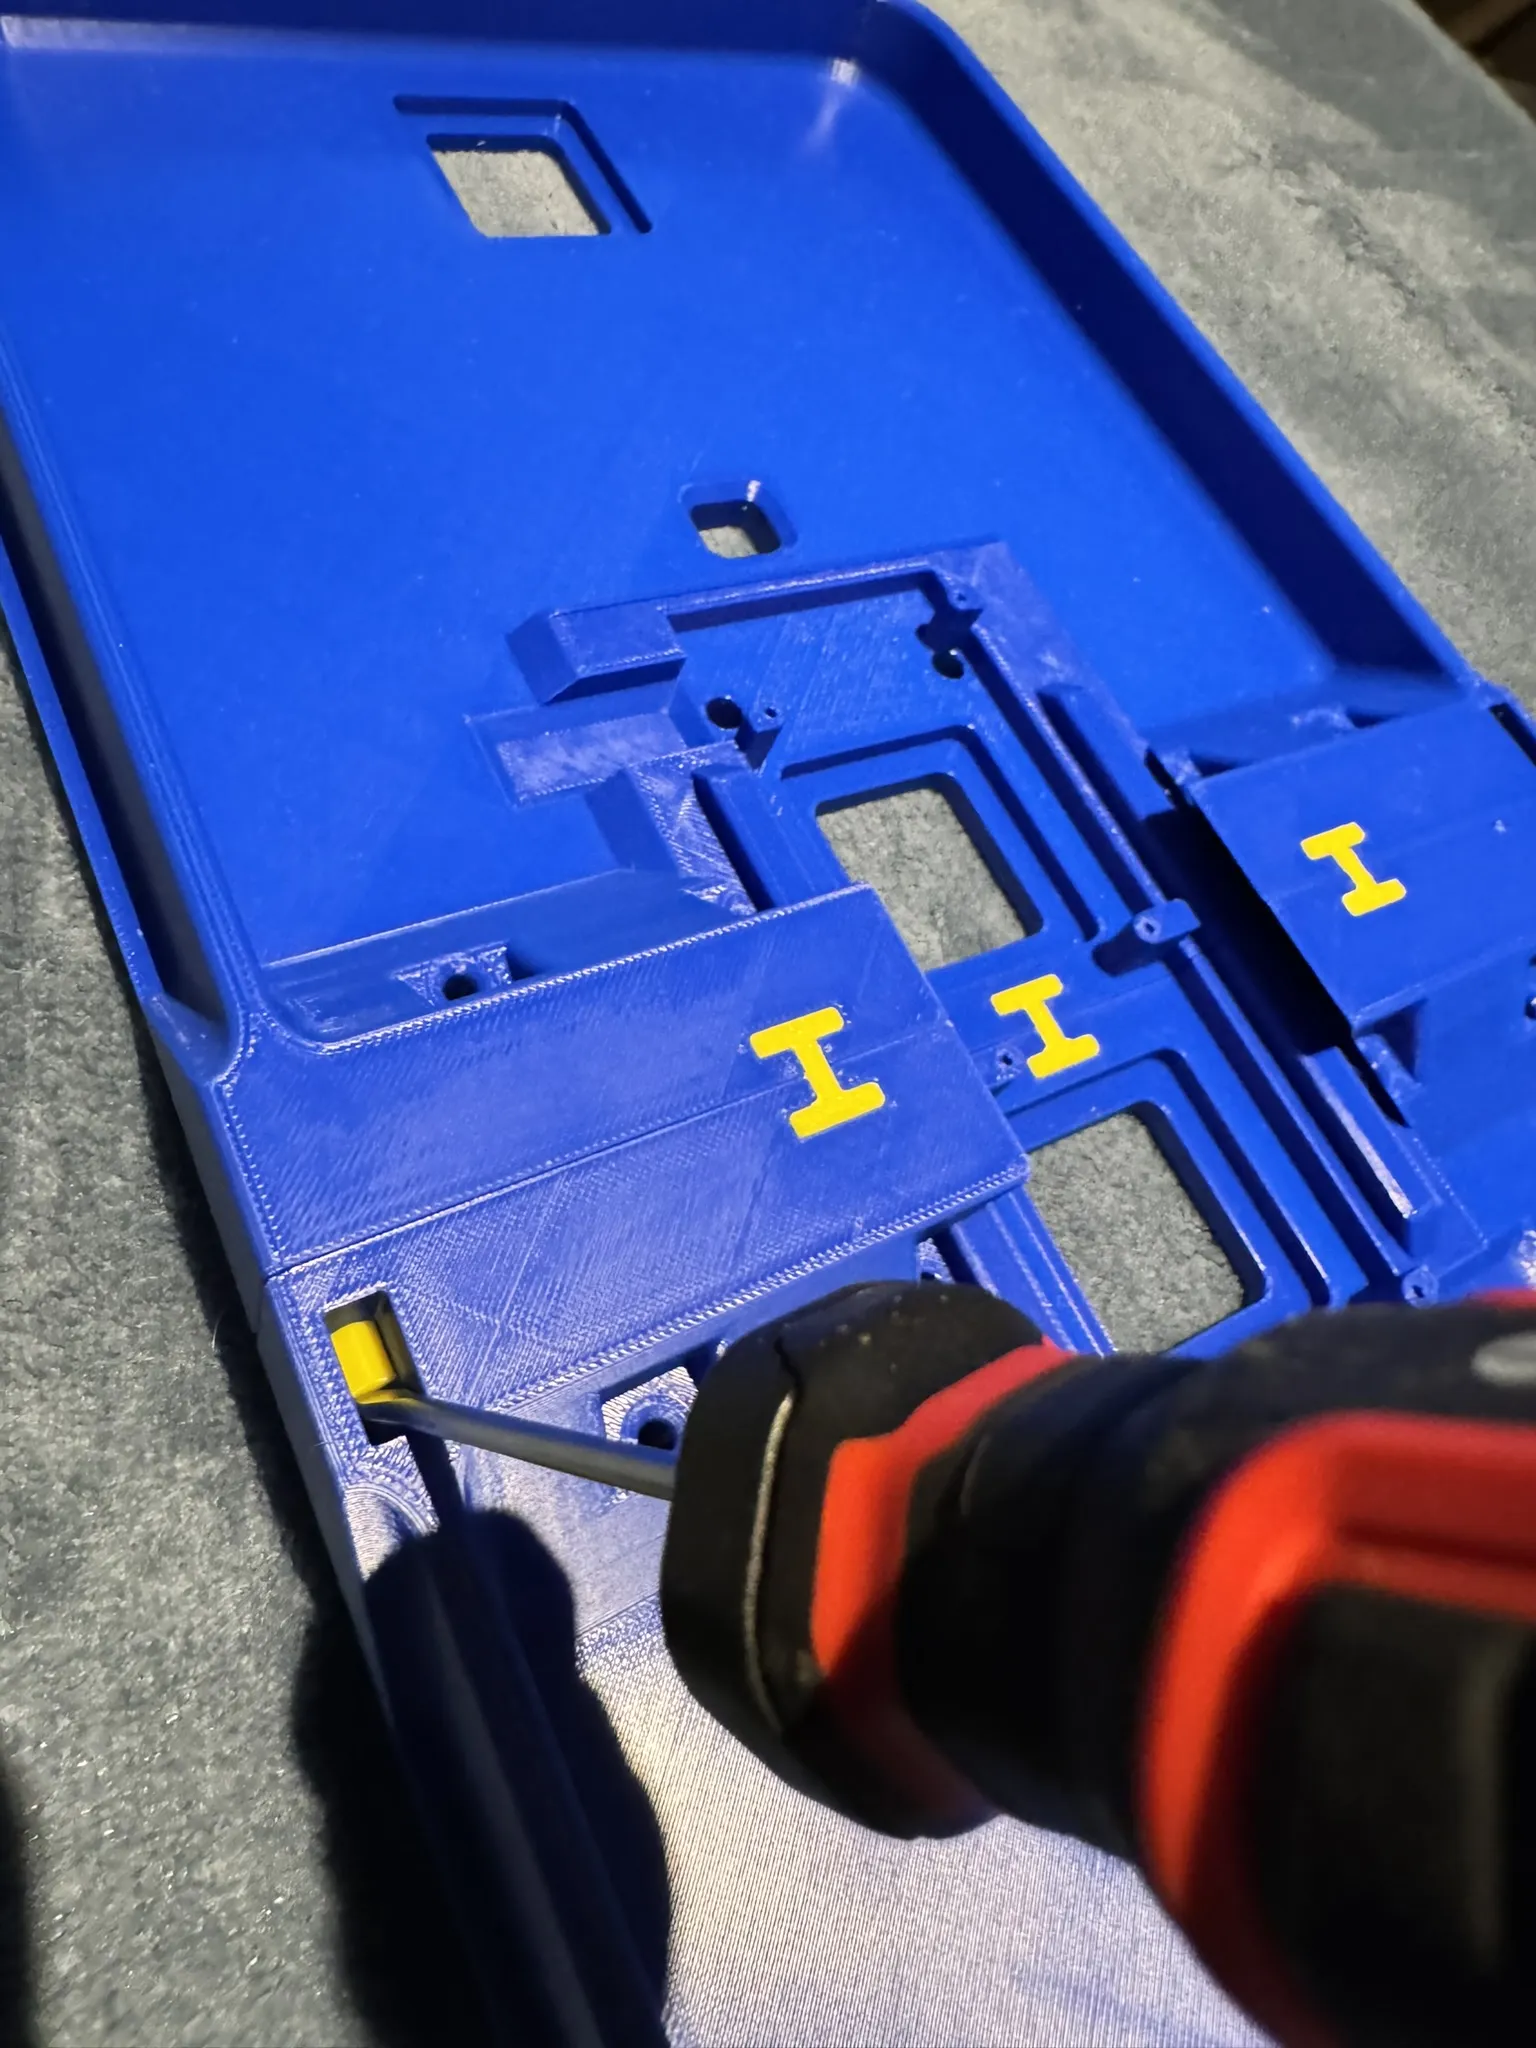
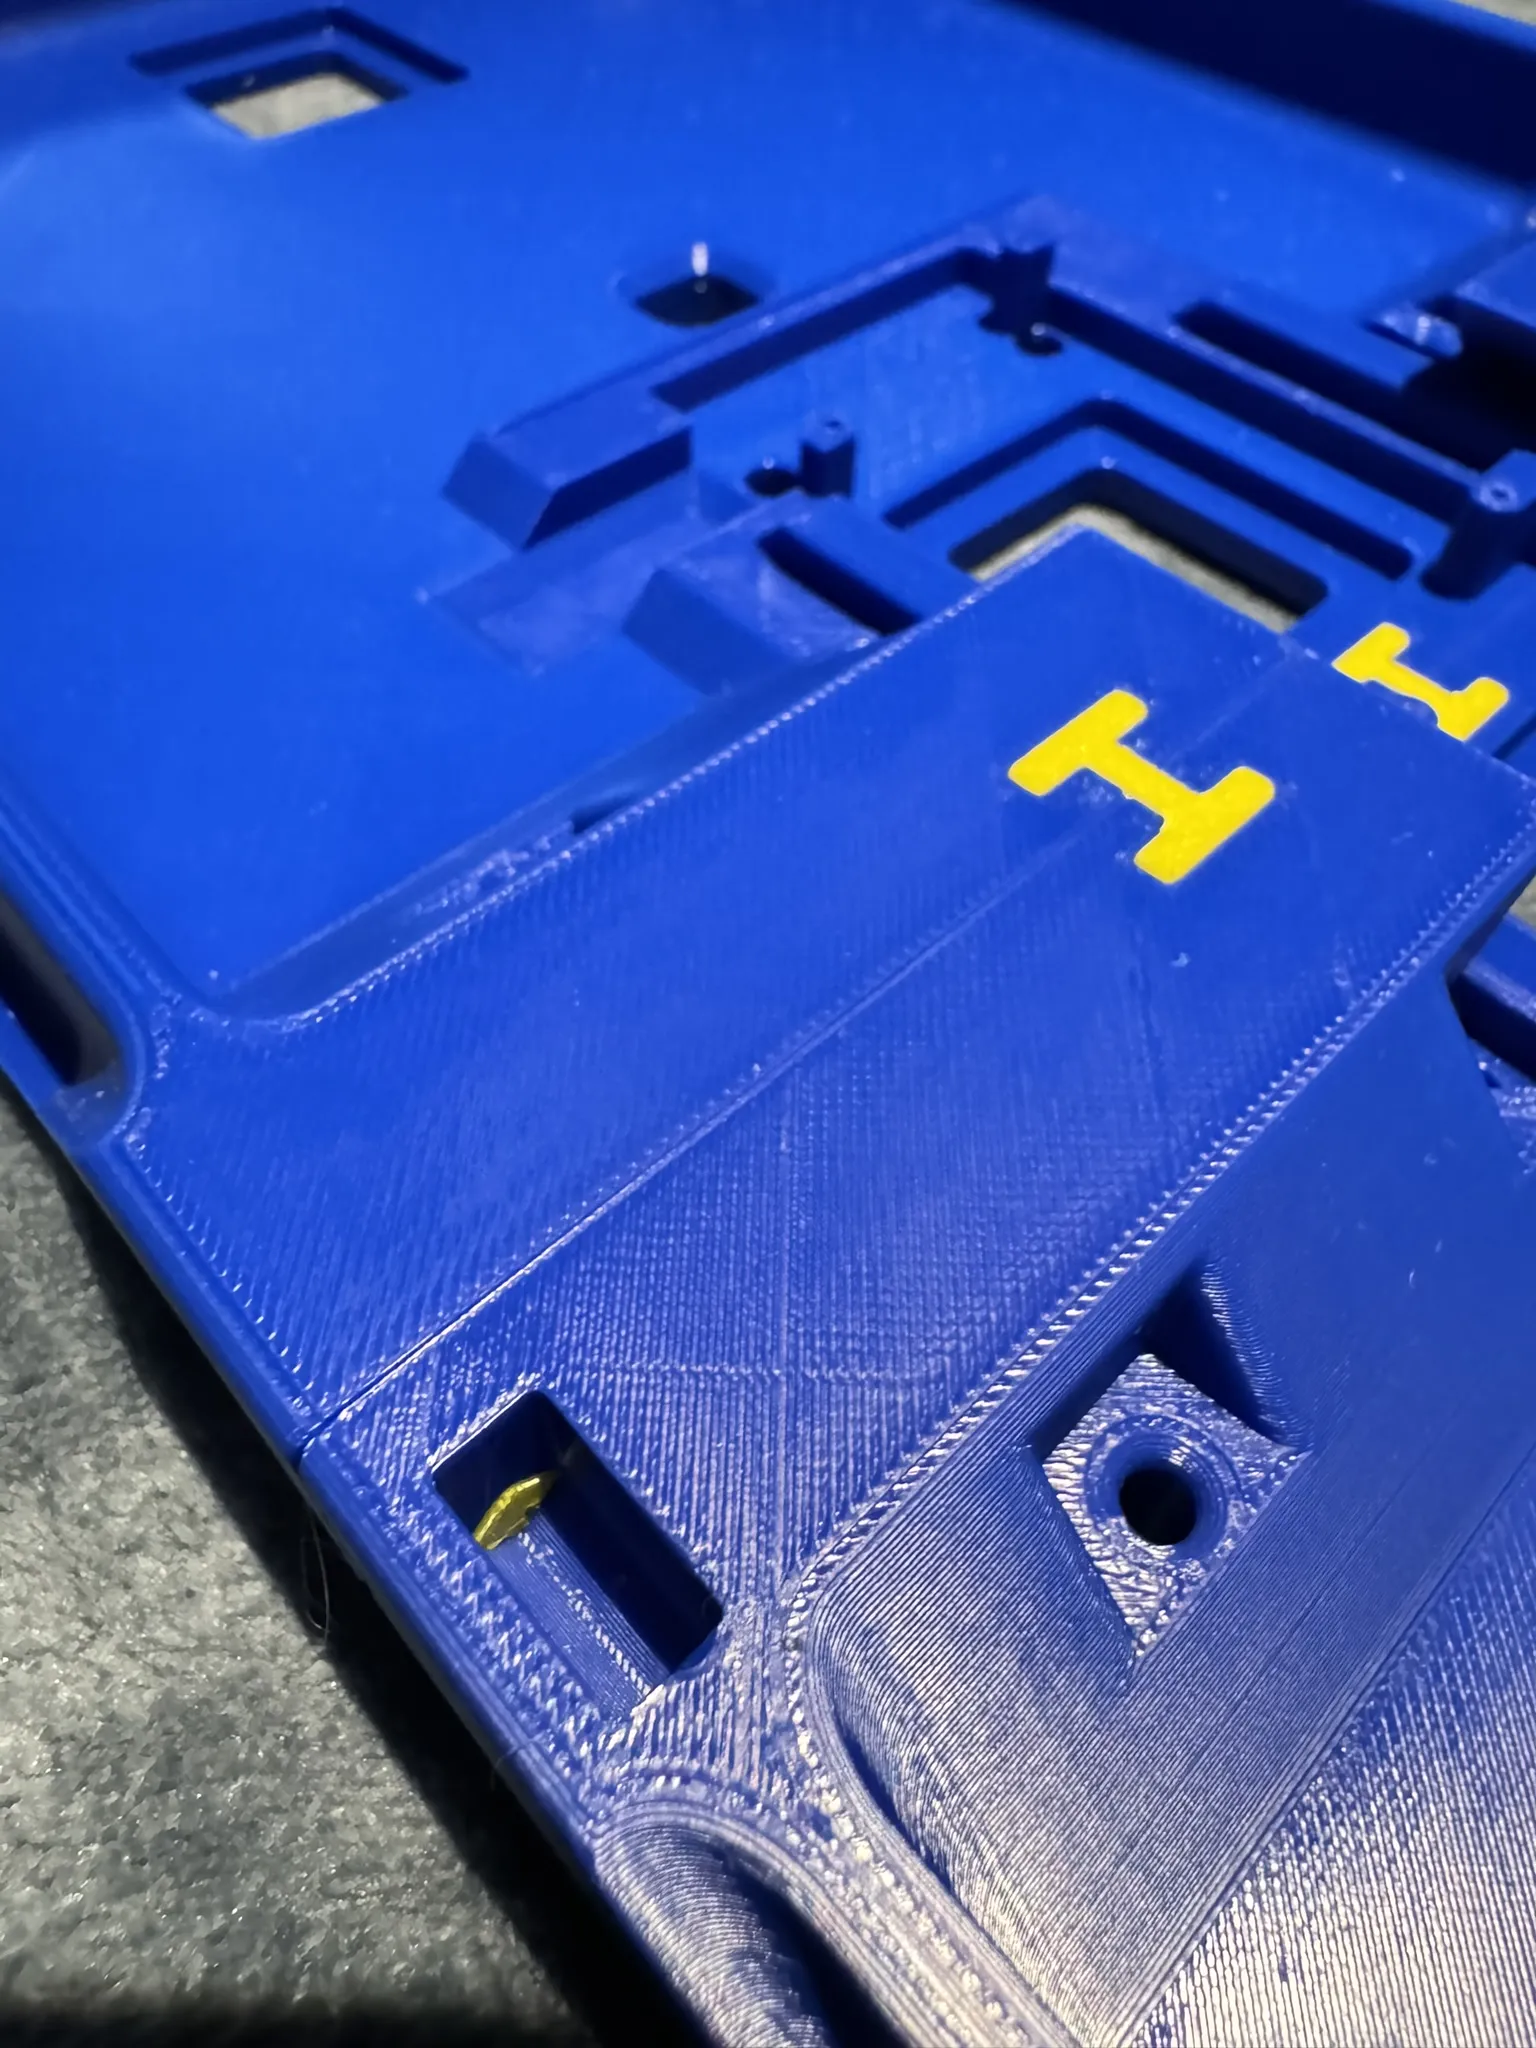
Now take the two "lid-blocks" and push down one in each hole
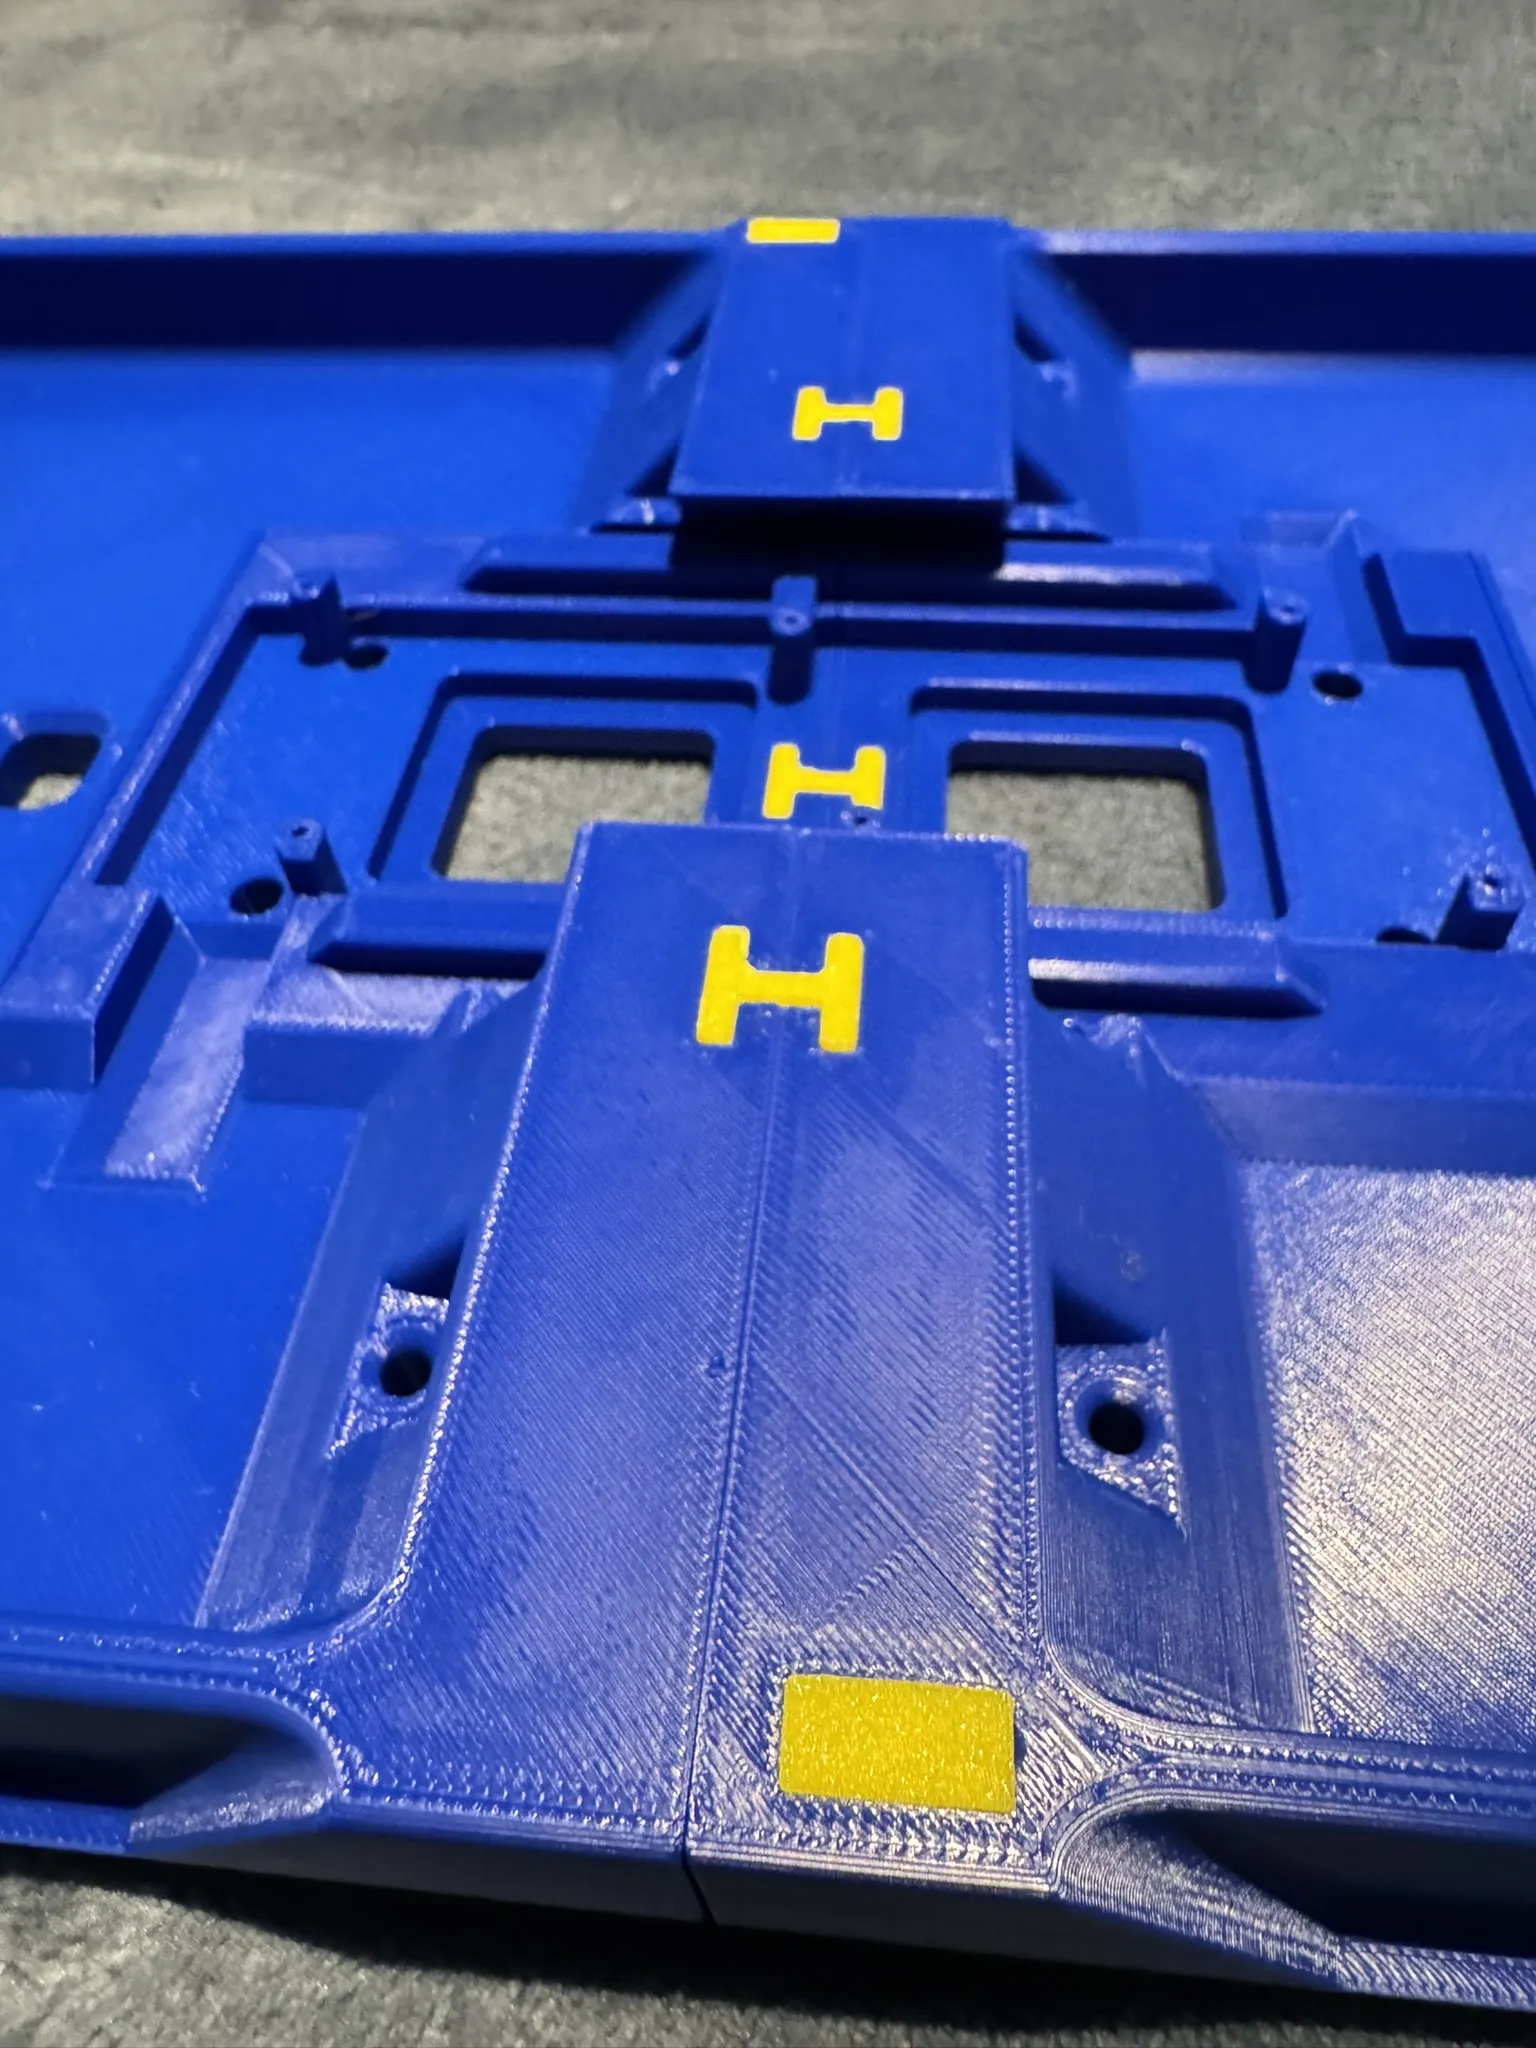
If you have finished printing the next 4-6 plates you can start assembly of the legs.
While doing so print the following plates:
- FIRST FEEDER STAGE MOUNT & MB HOUSING
- SENSOR COVER A
- SENSOR COVER B (Same as SENSOR COVER A)
- HANDLE A
- HANDLE B (Same as HANDLE A)
this should conclude the printing of parts.
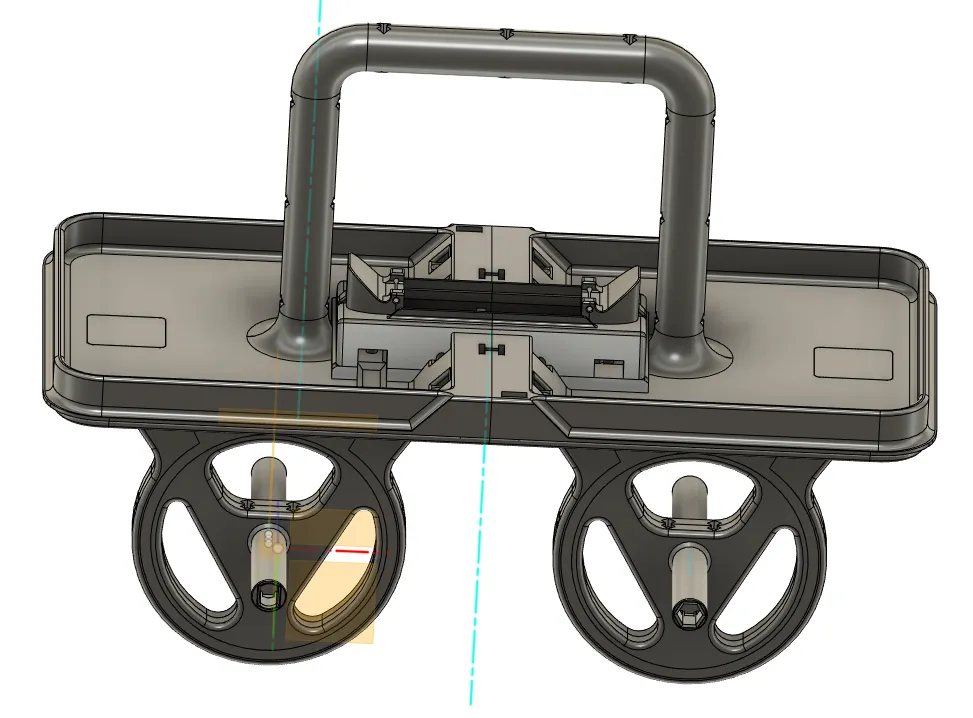
Assembly of the legs
From the CLIPS & LOCKS & PLUGS plate find the 4 squared lock-plates
Take one LEG-part and slide it into the lock plates that you will have to put in from below. The easiest way to fit the legs is to start with one lock plate and just get it to attach enough to hold it in place. After that do the same with the second lock plate and finally slide the legs as much as it allows for. (Never mind the yellow cross below the leg, I did assembly in a different order that was not optimal)
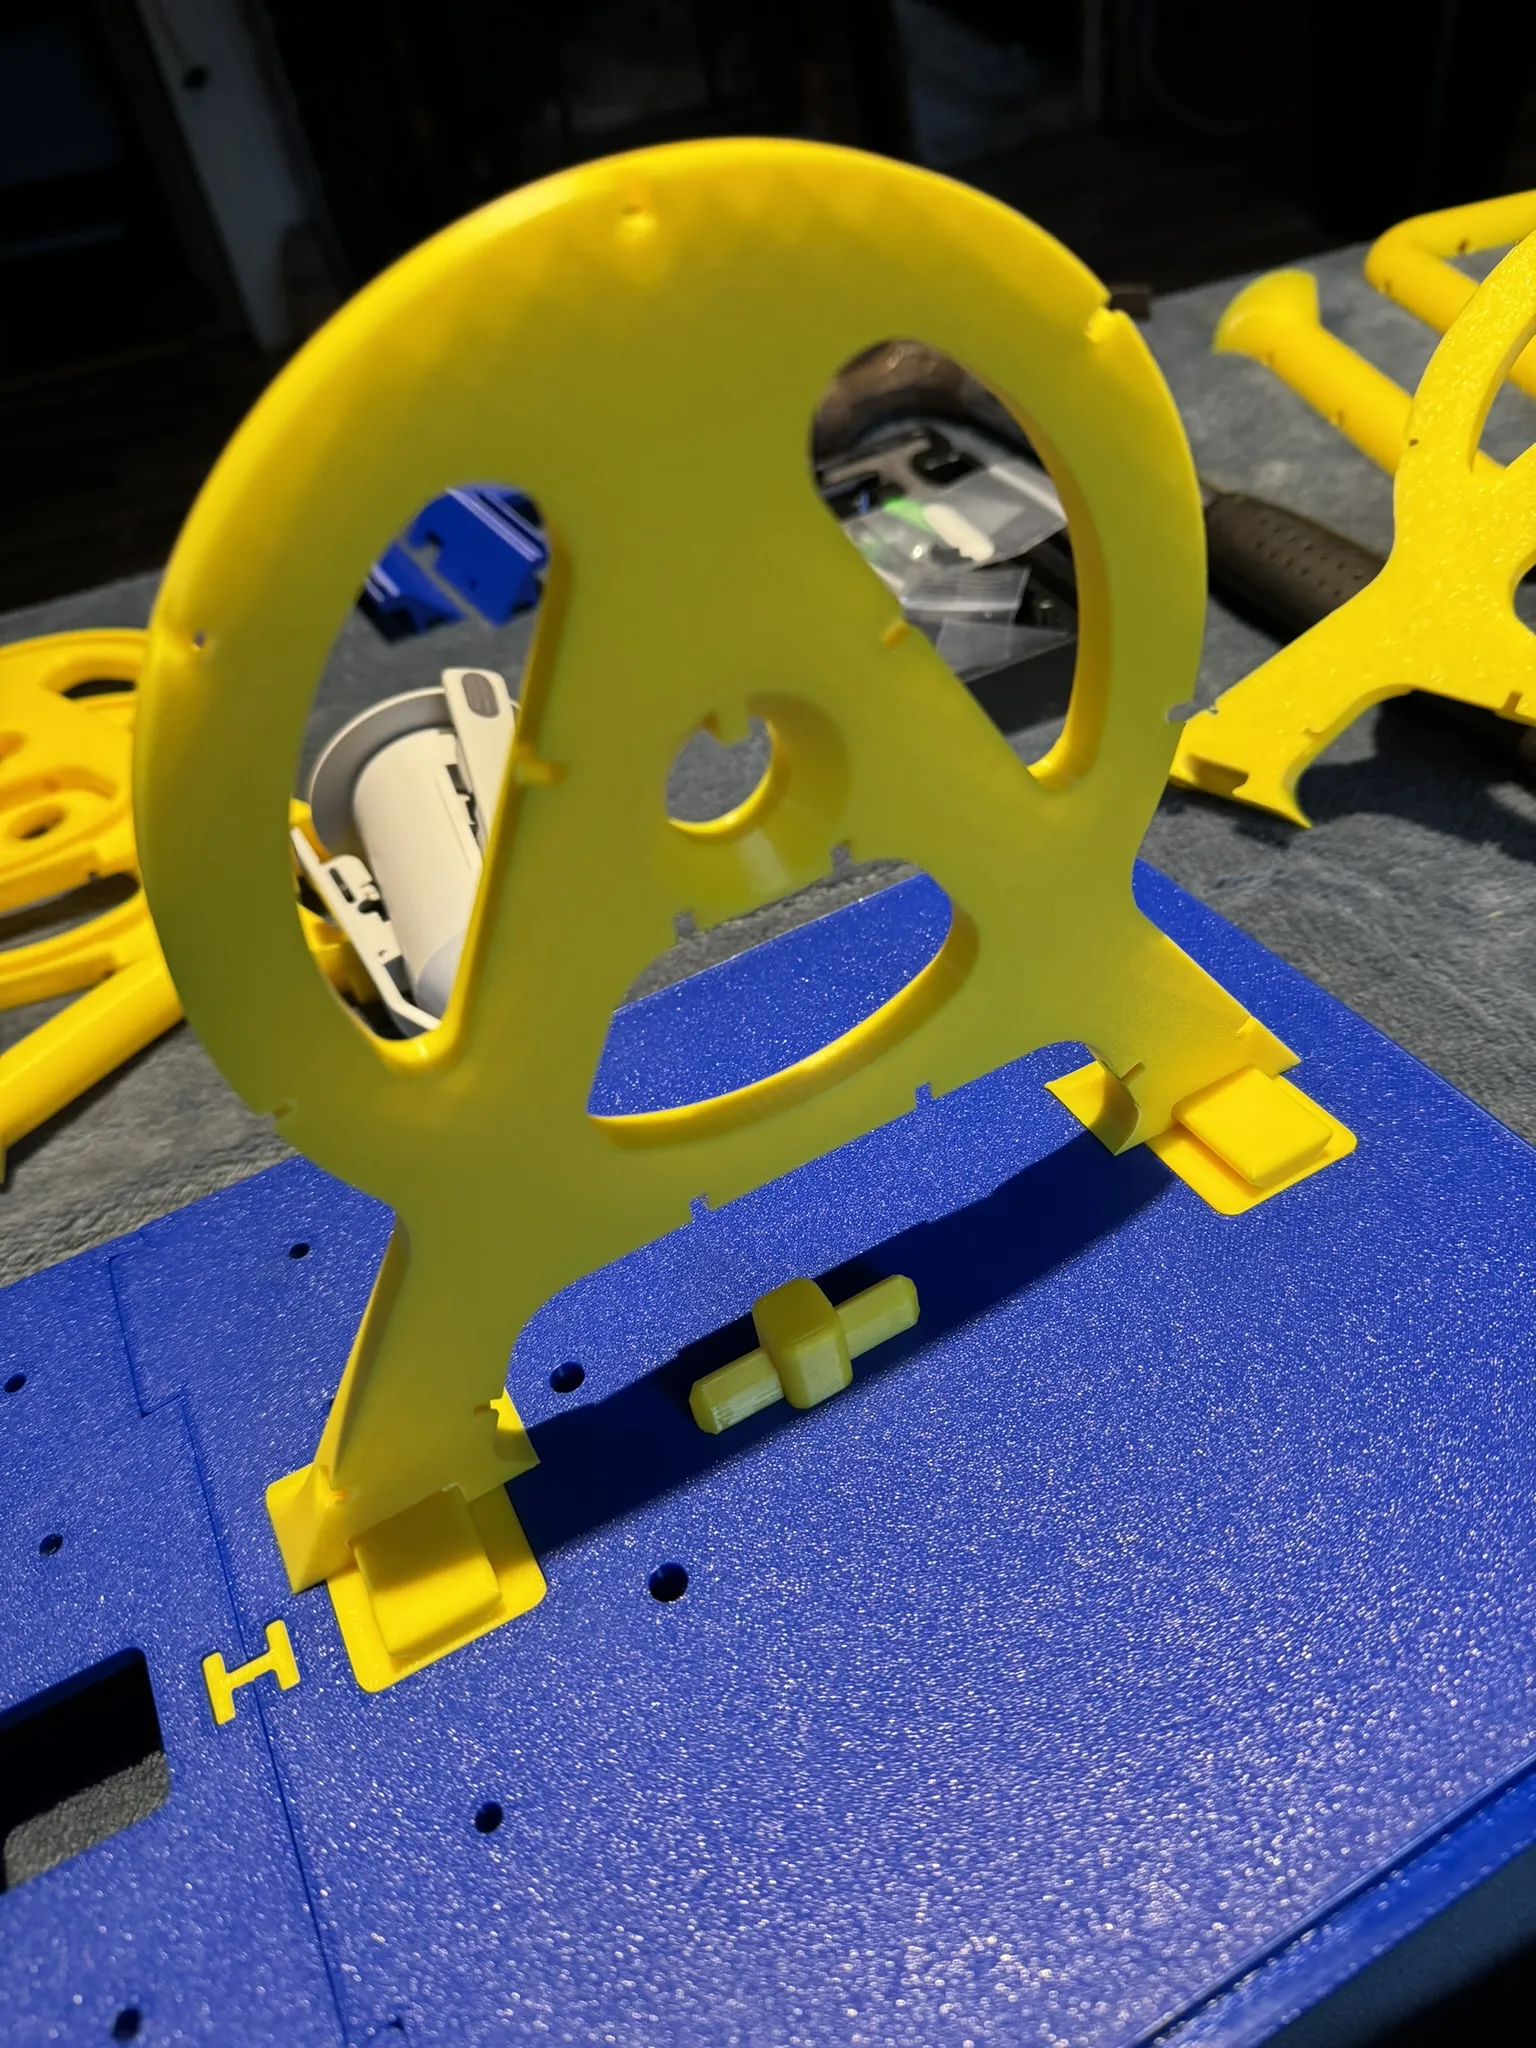
Grab the YELLOW SPOOL HOLDER and push it through the first leg half
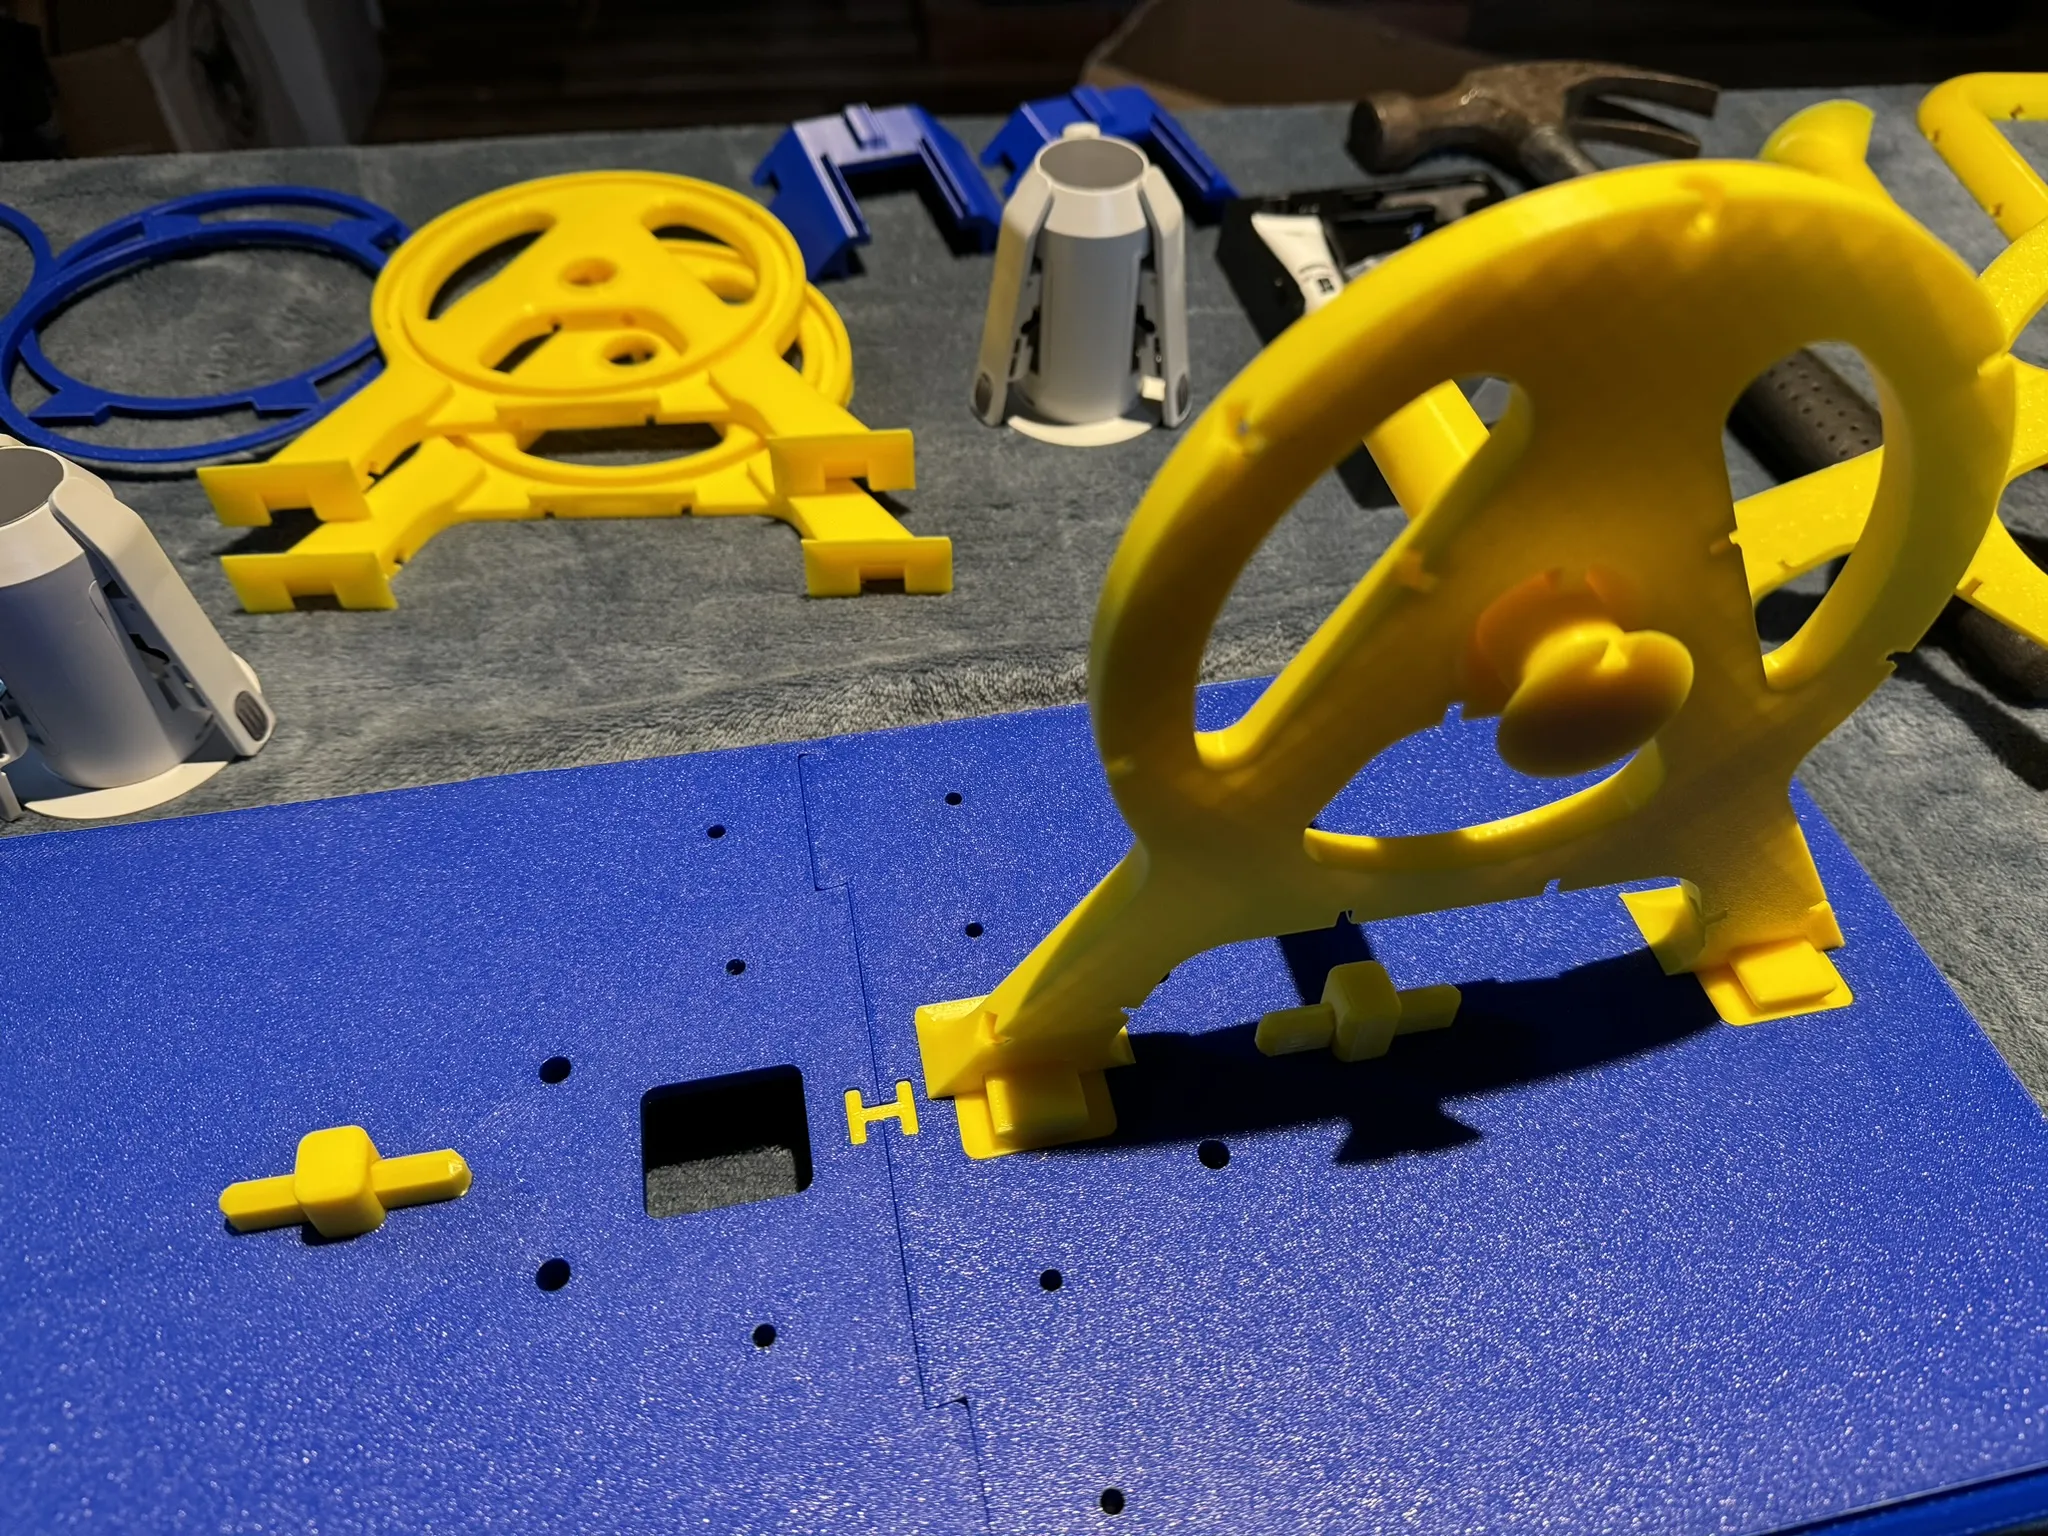
IMPORTANT!
The spool holders must be inserted to the correct leg half, otherwise to rollers will not be oriented correctly. If installation is done as in the pictures you will be fine!
Now, push the GREEN SPOOL HOLDER through the second leg part
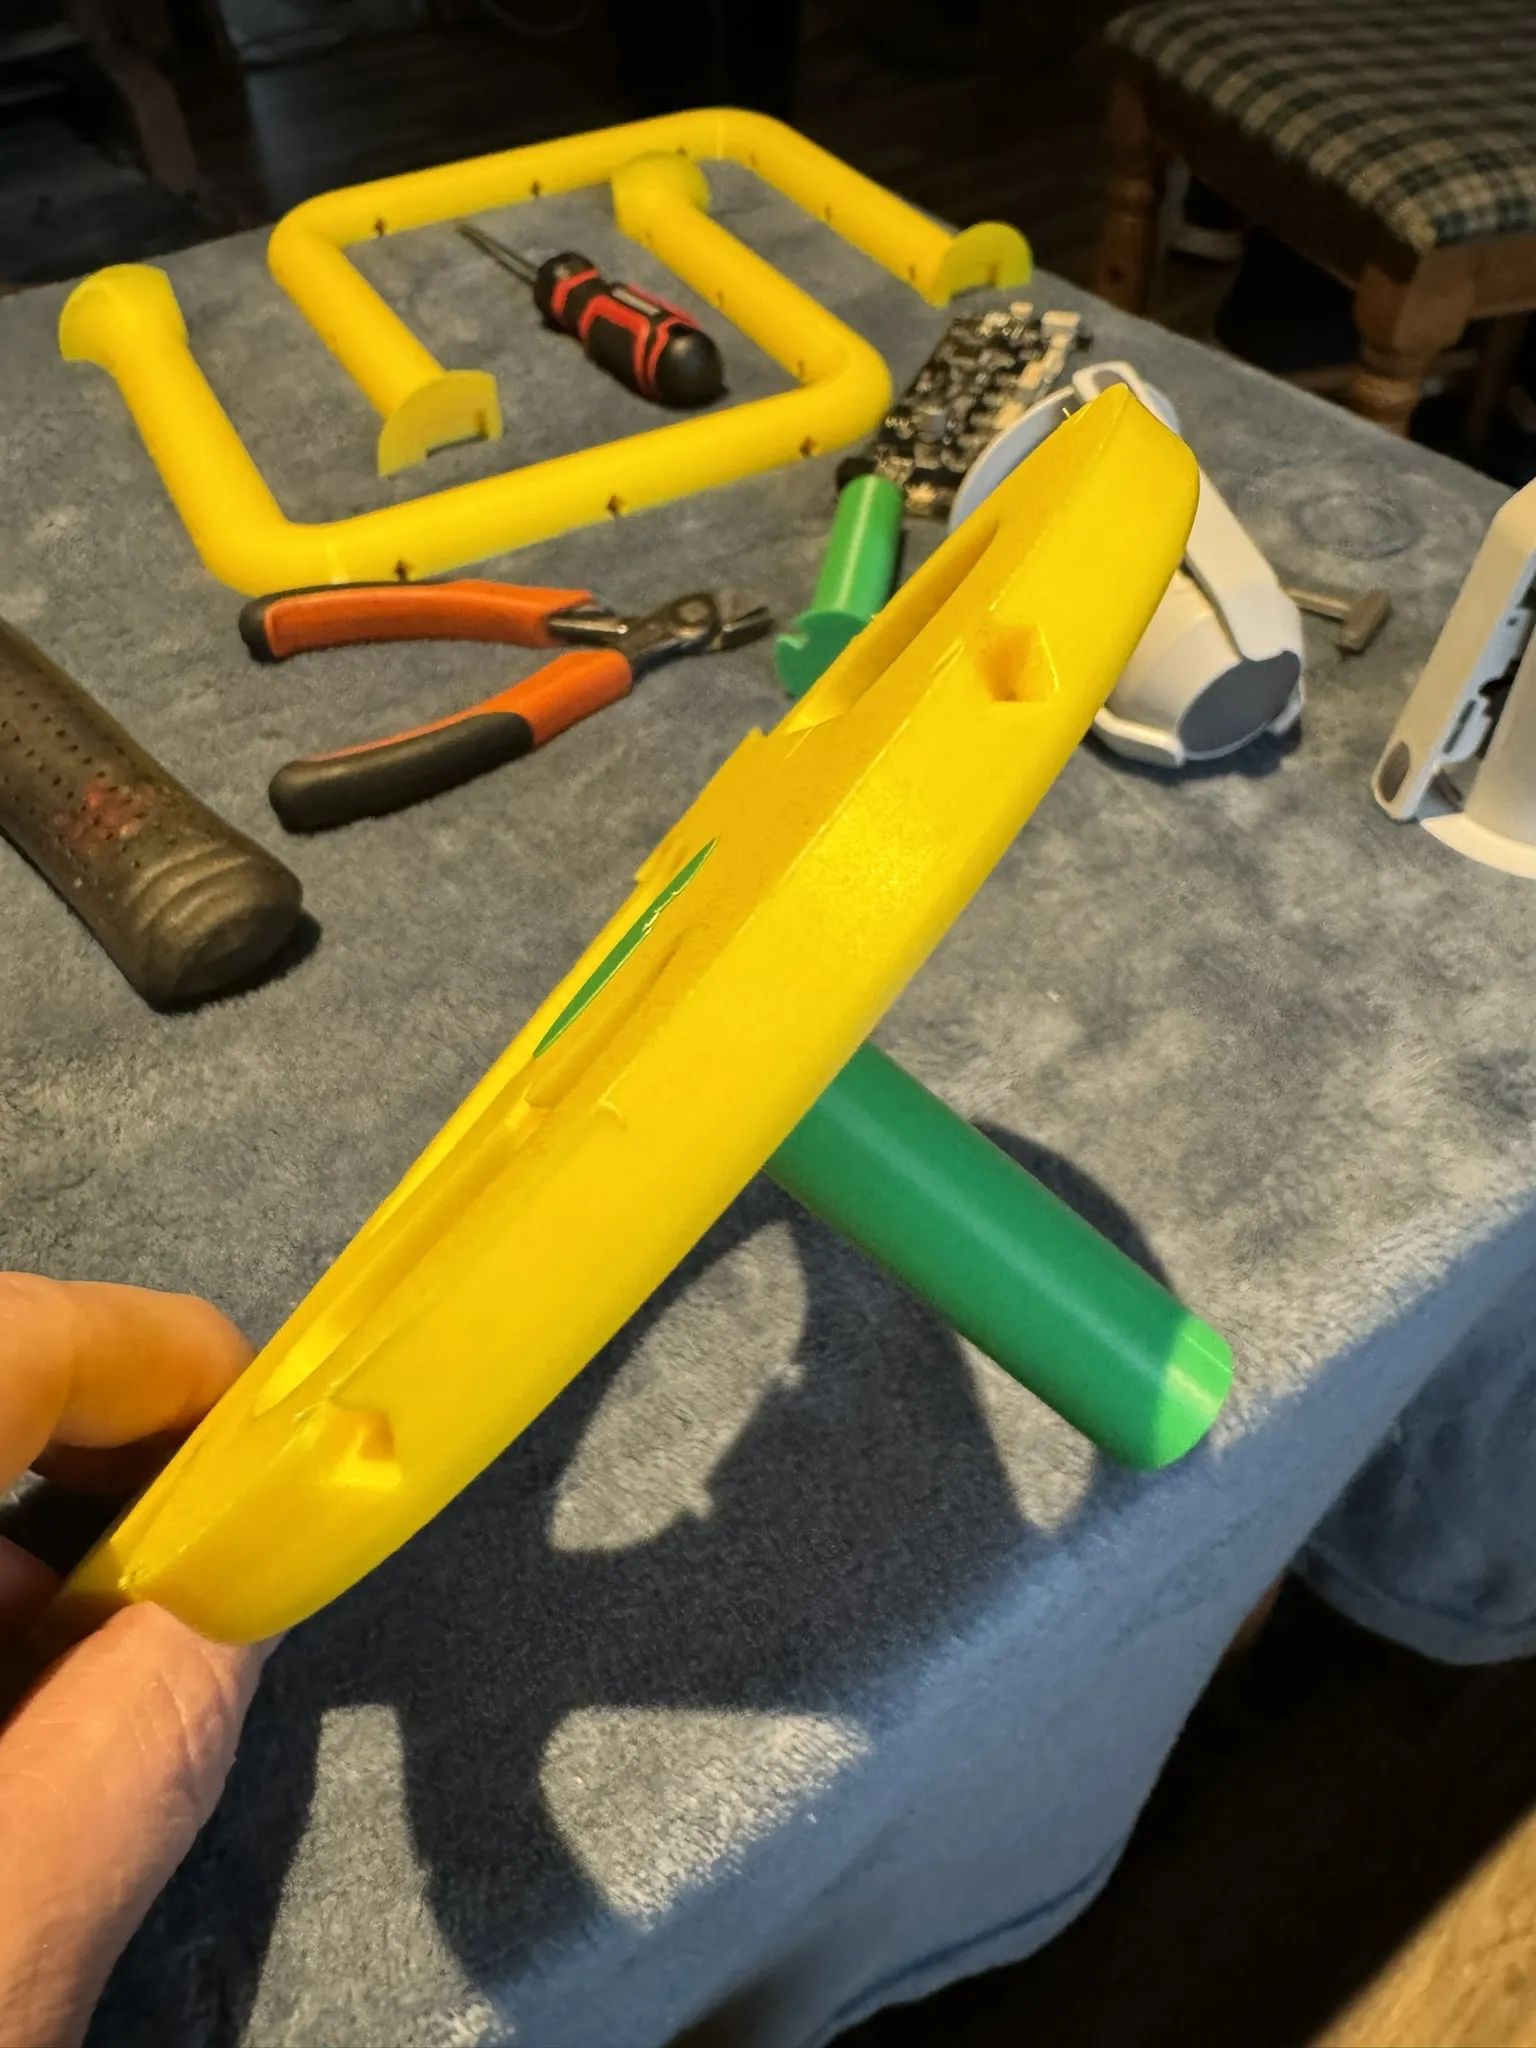
Take the second leg half and push it to align with the first leg half.
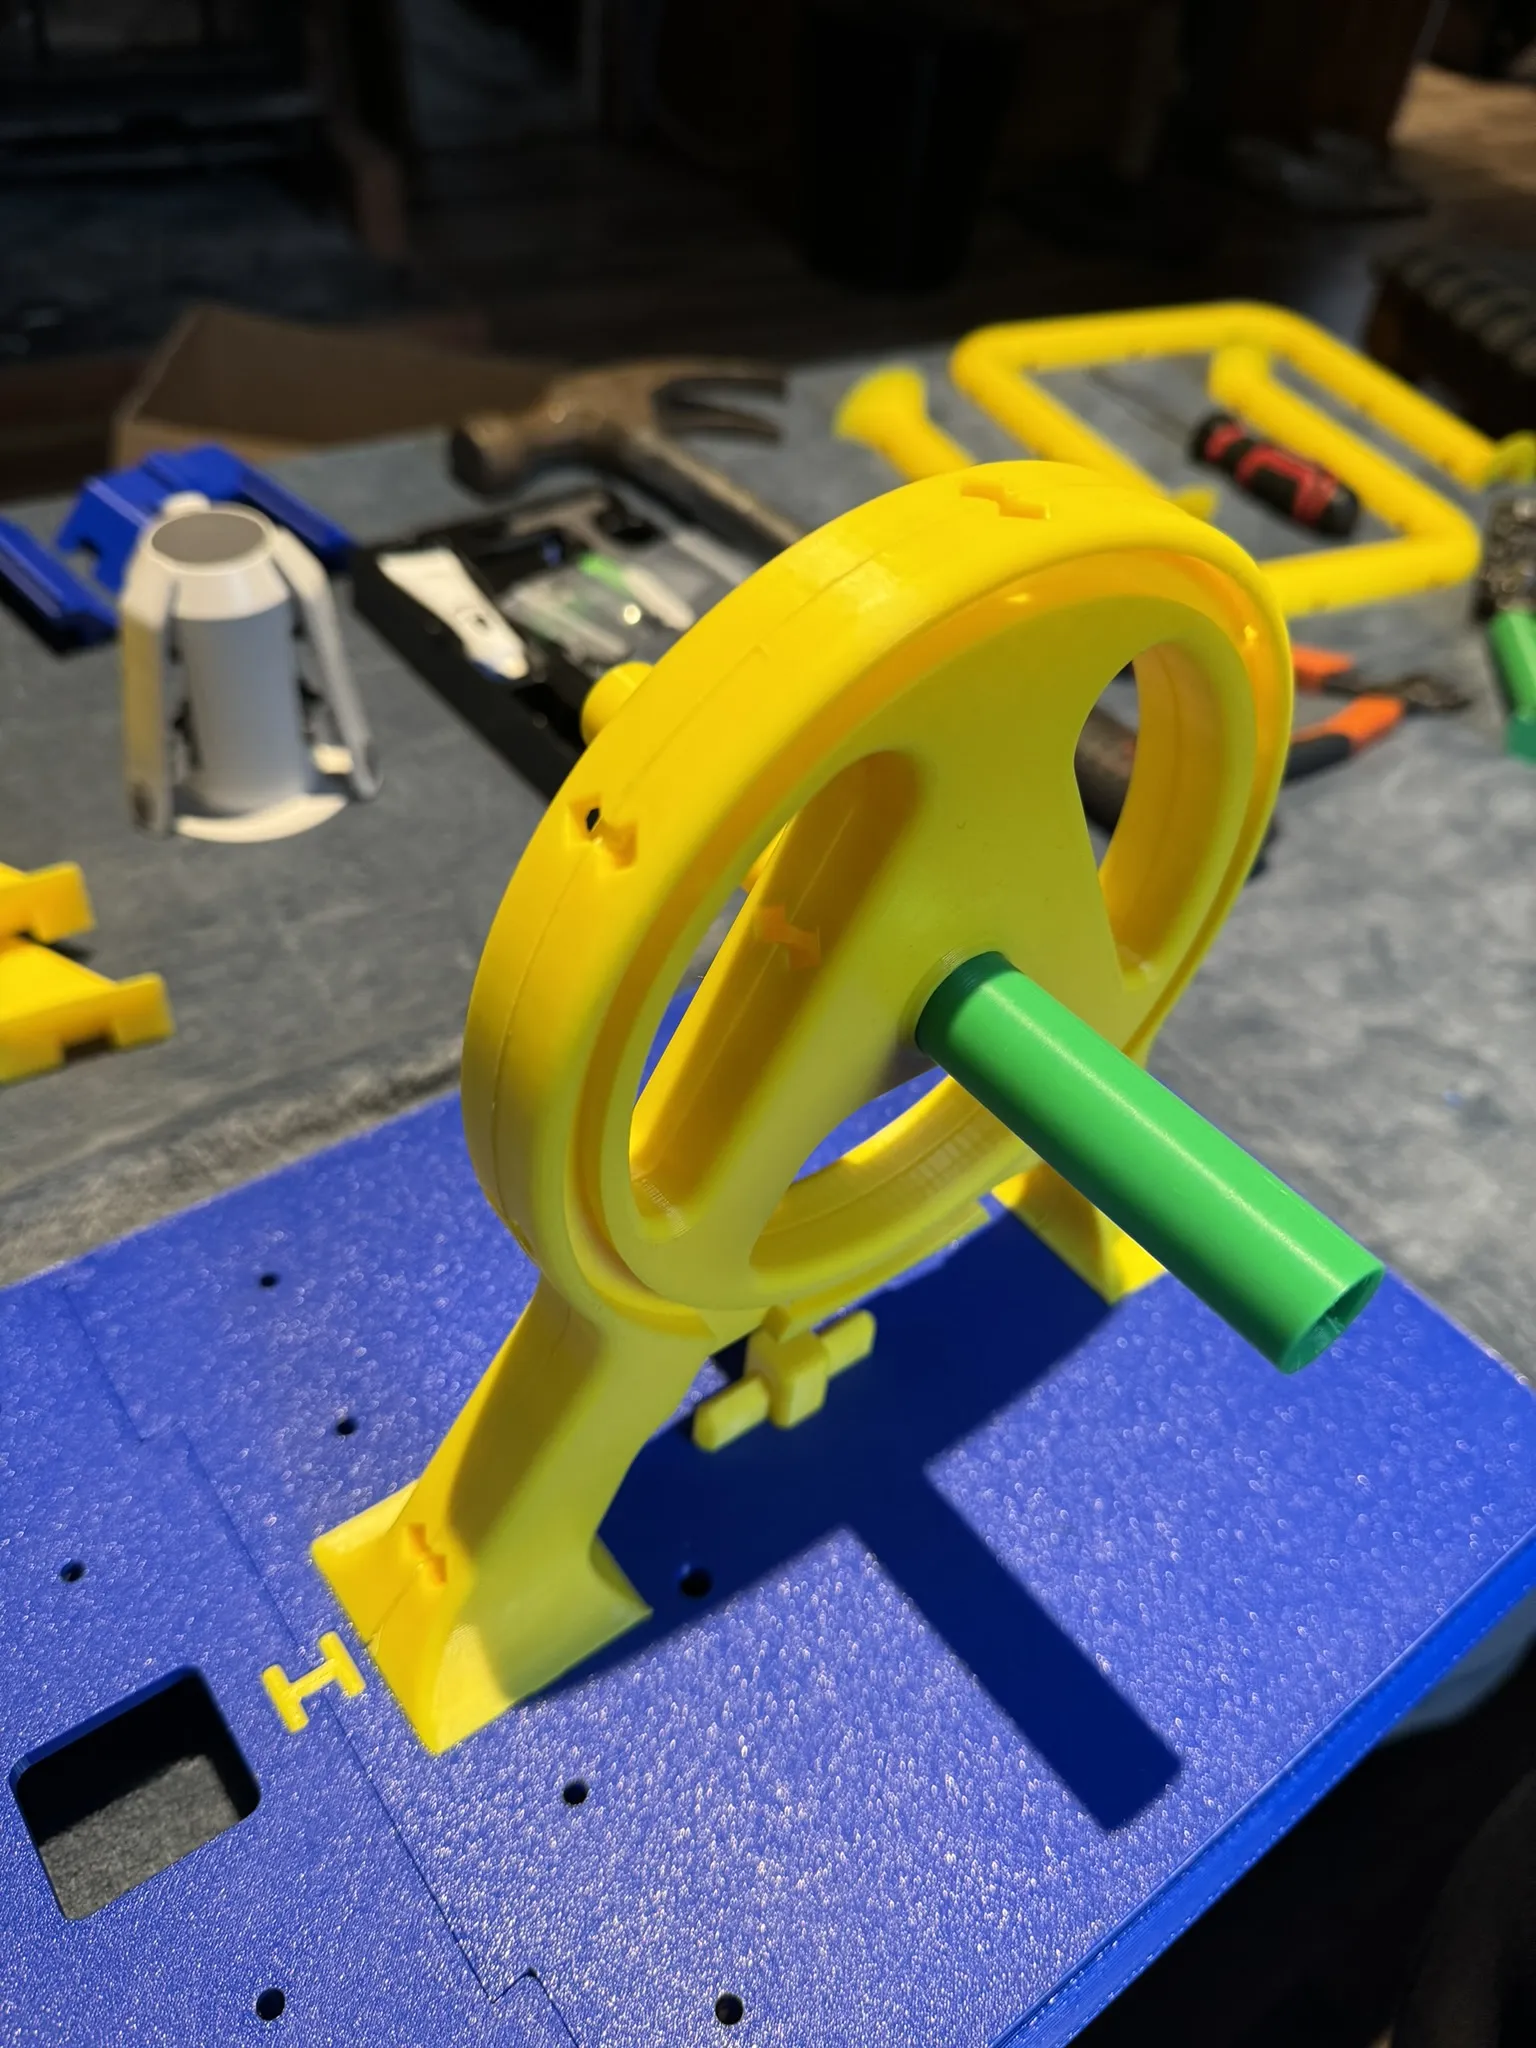
From the CLIPS & LOCKS & PLUGS plate find the 28 clips (4mm thick)
From this point there is no turning back, you will not be able to disassemble the legs after this without drilling all clips so:
MAKE SURE YOU HAVE THE ORIENTATION OF THE YELLOW AND GREEN SPOOL HOLDERS CORRECT!
If you have the main body laying upside down in front of you, there should always be a YELLOW SPOOL HOLDER on the top right corner.
Put clips into the leg by pushing it into the holes. The clips have a chamfer on one side that goes into the leg.
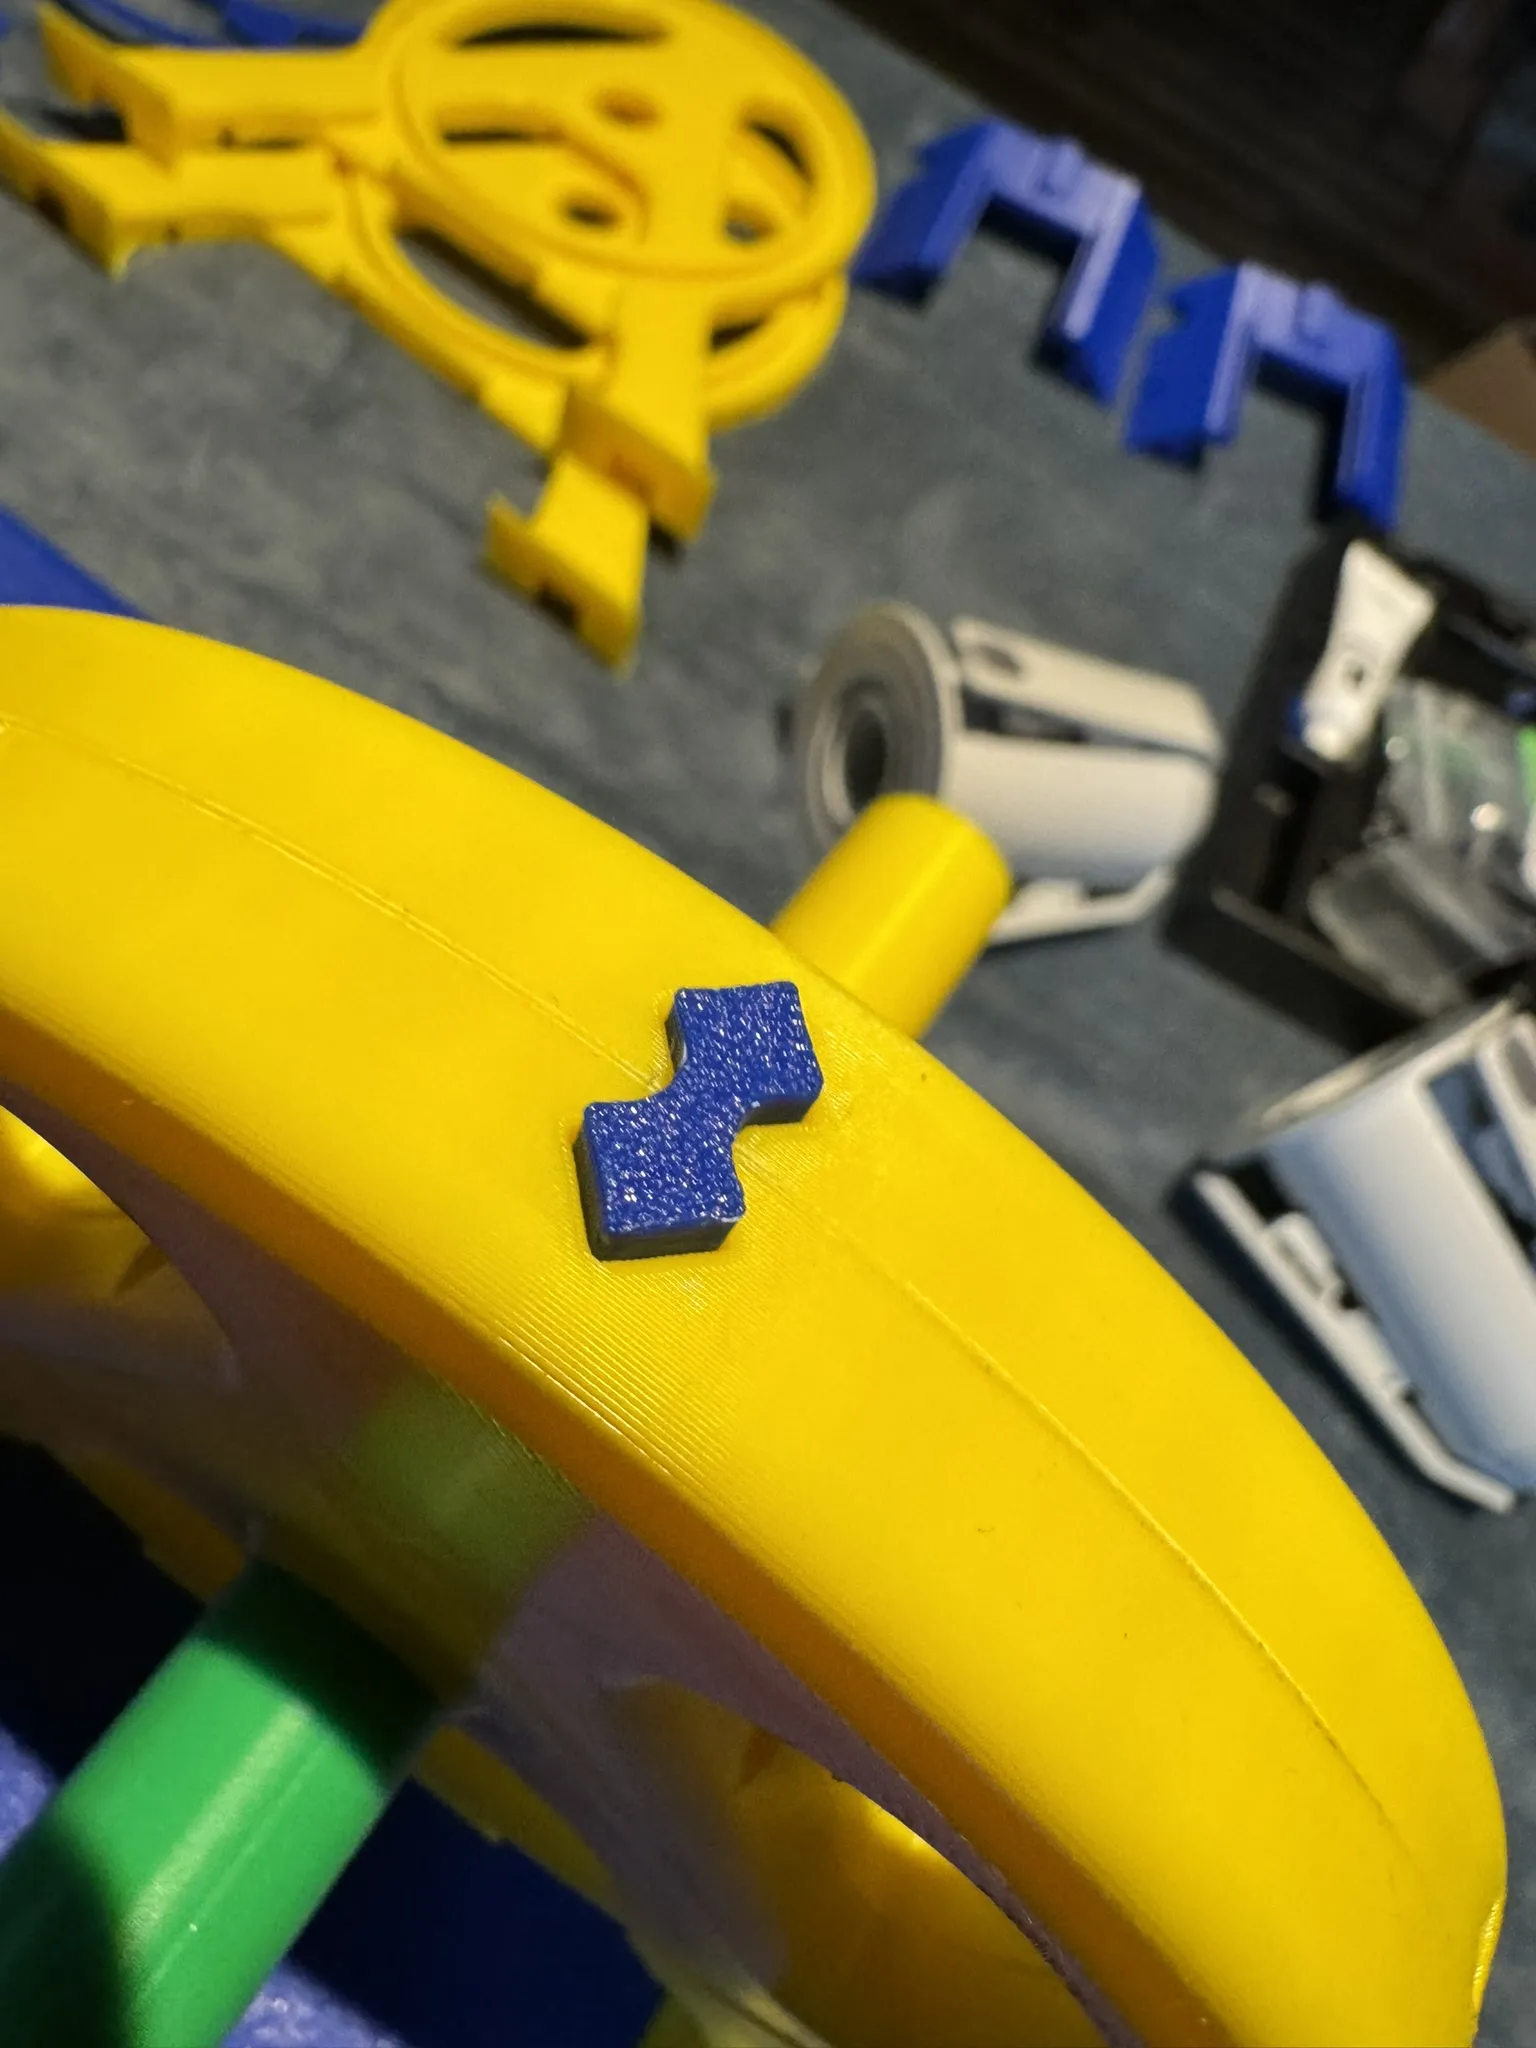
When you have assembled one leg do the same procedure with the other leg.
Note the orientation for GREEN and YELLOW SPOOL HOLDER!!!!!! (See complete assembly 3 pics below)
Install the NFS sensor windings for each roll and pull the wire through the hole in the base plate.
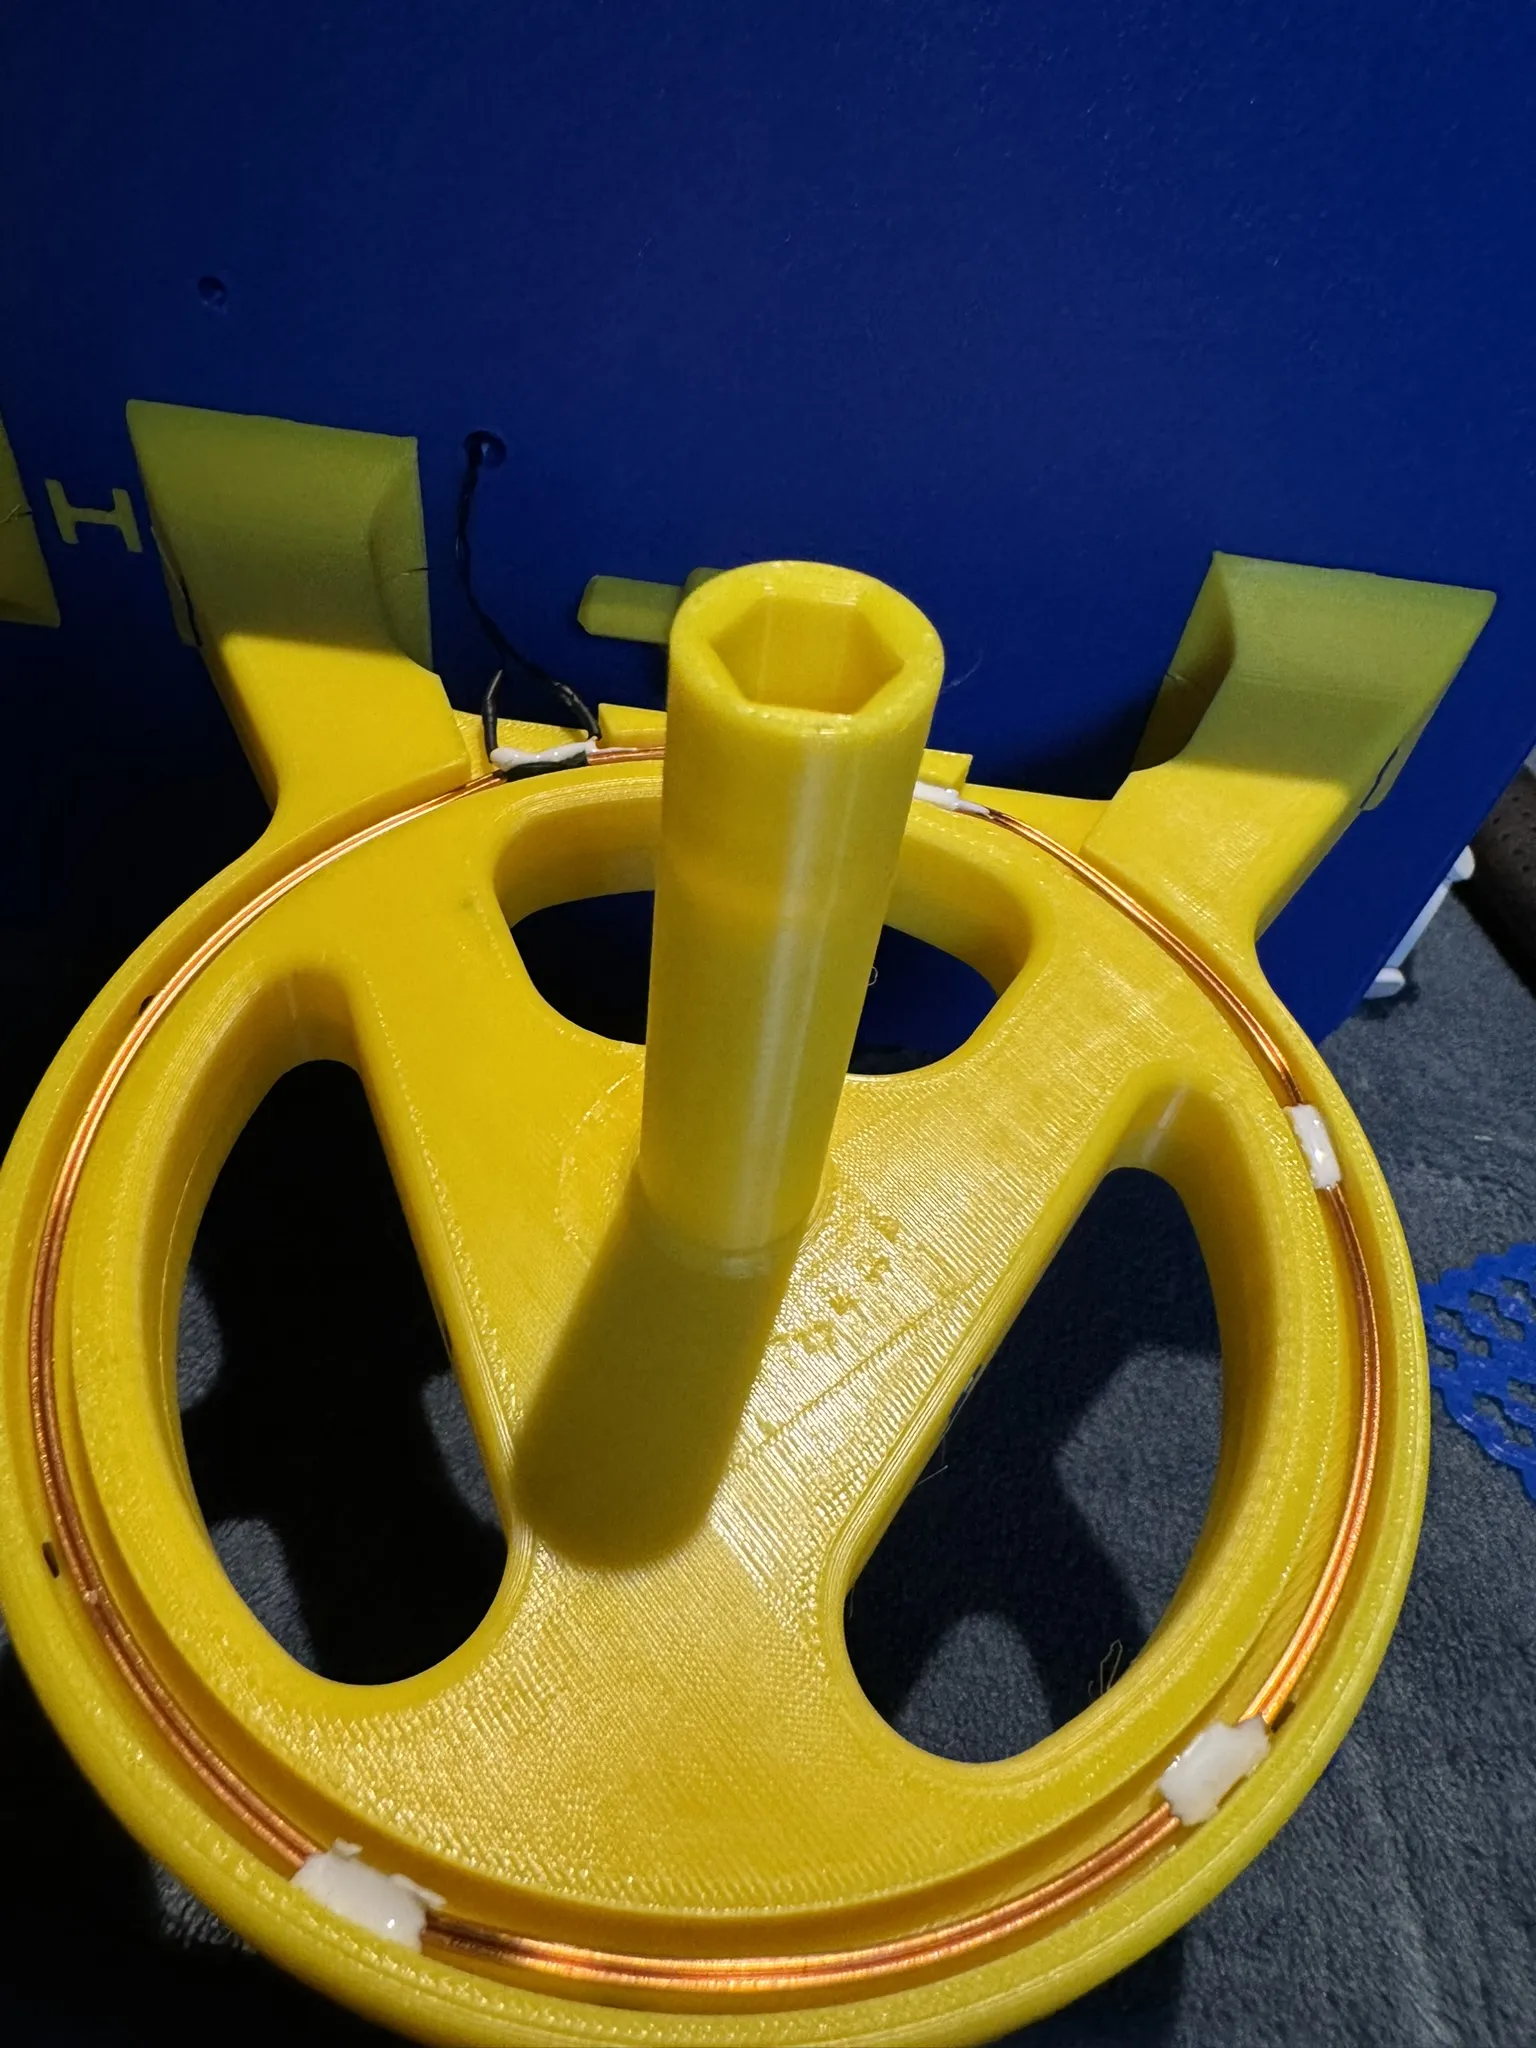
Install the sensor covers by pushing them down into the shaft. Make sure to install them like they were installed in the original AMS, keeping the correct orientation, meaning the side with “untouched” silicone residues should be closest to the spool. You should also make sure that the connected wires have as much distance between them as possible. If installed incorrectly or if the wires from two coils are to close, there might be issues with RFID identification spilling over to the spool next to it.
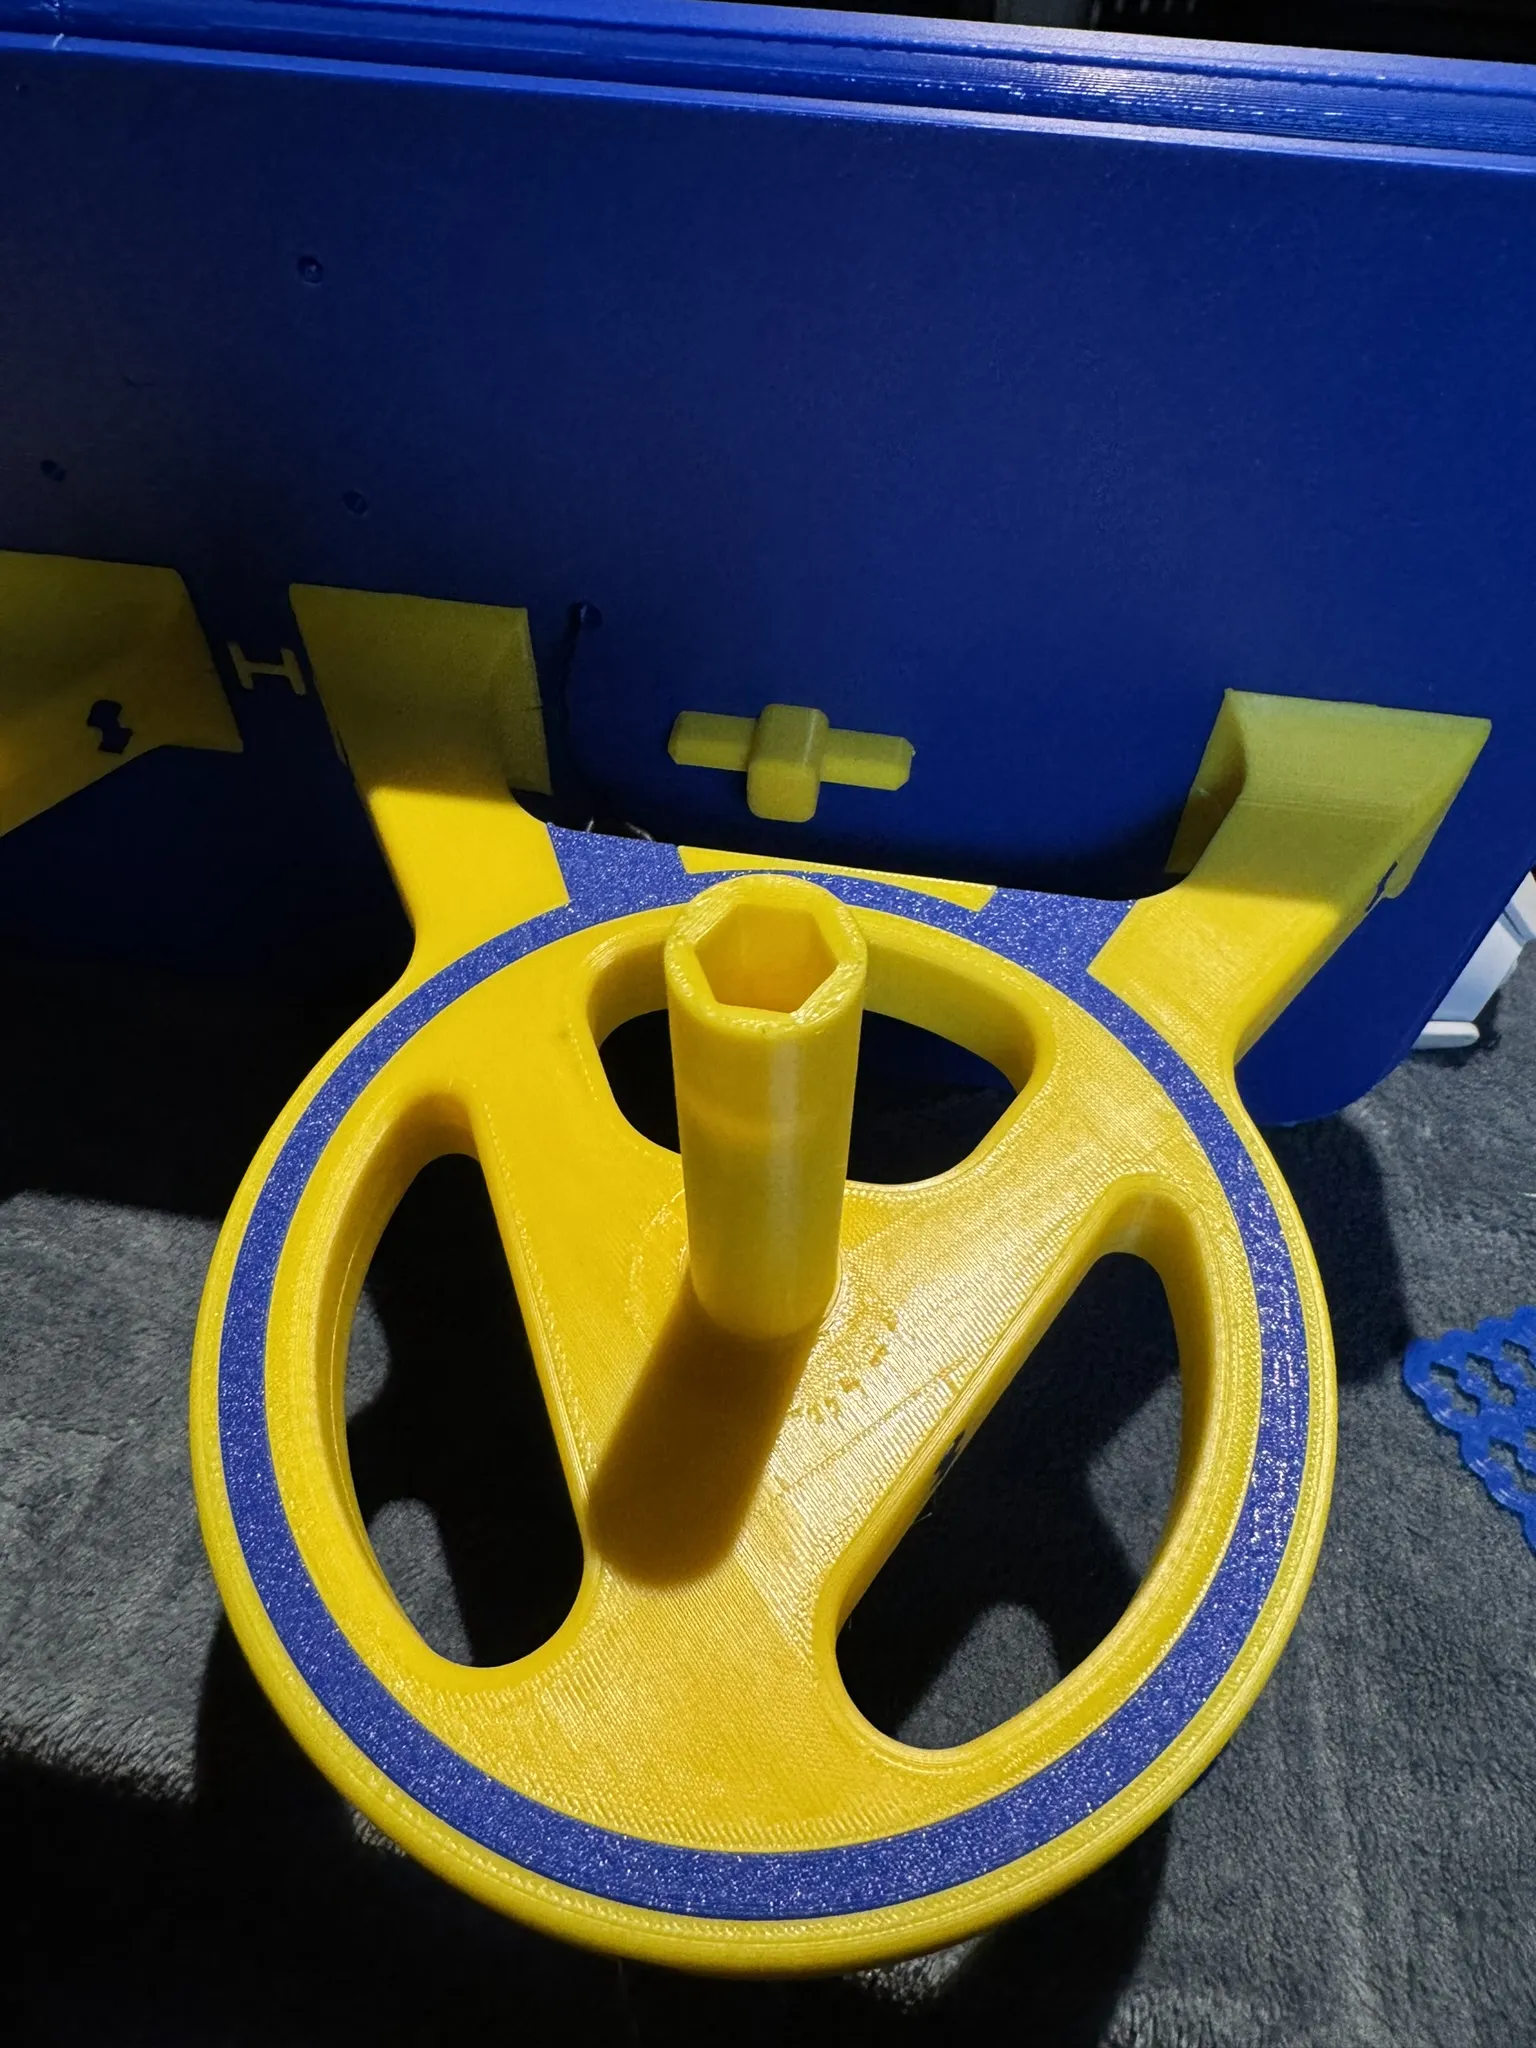
The result should look something like this:
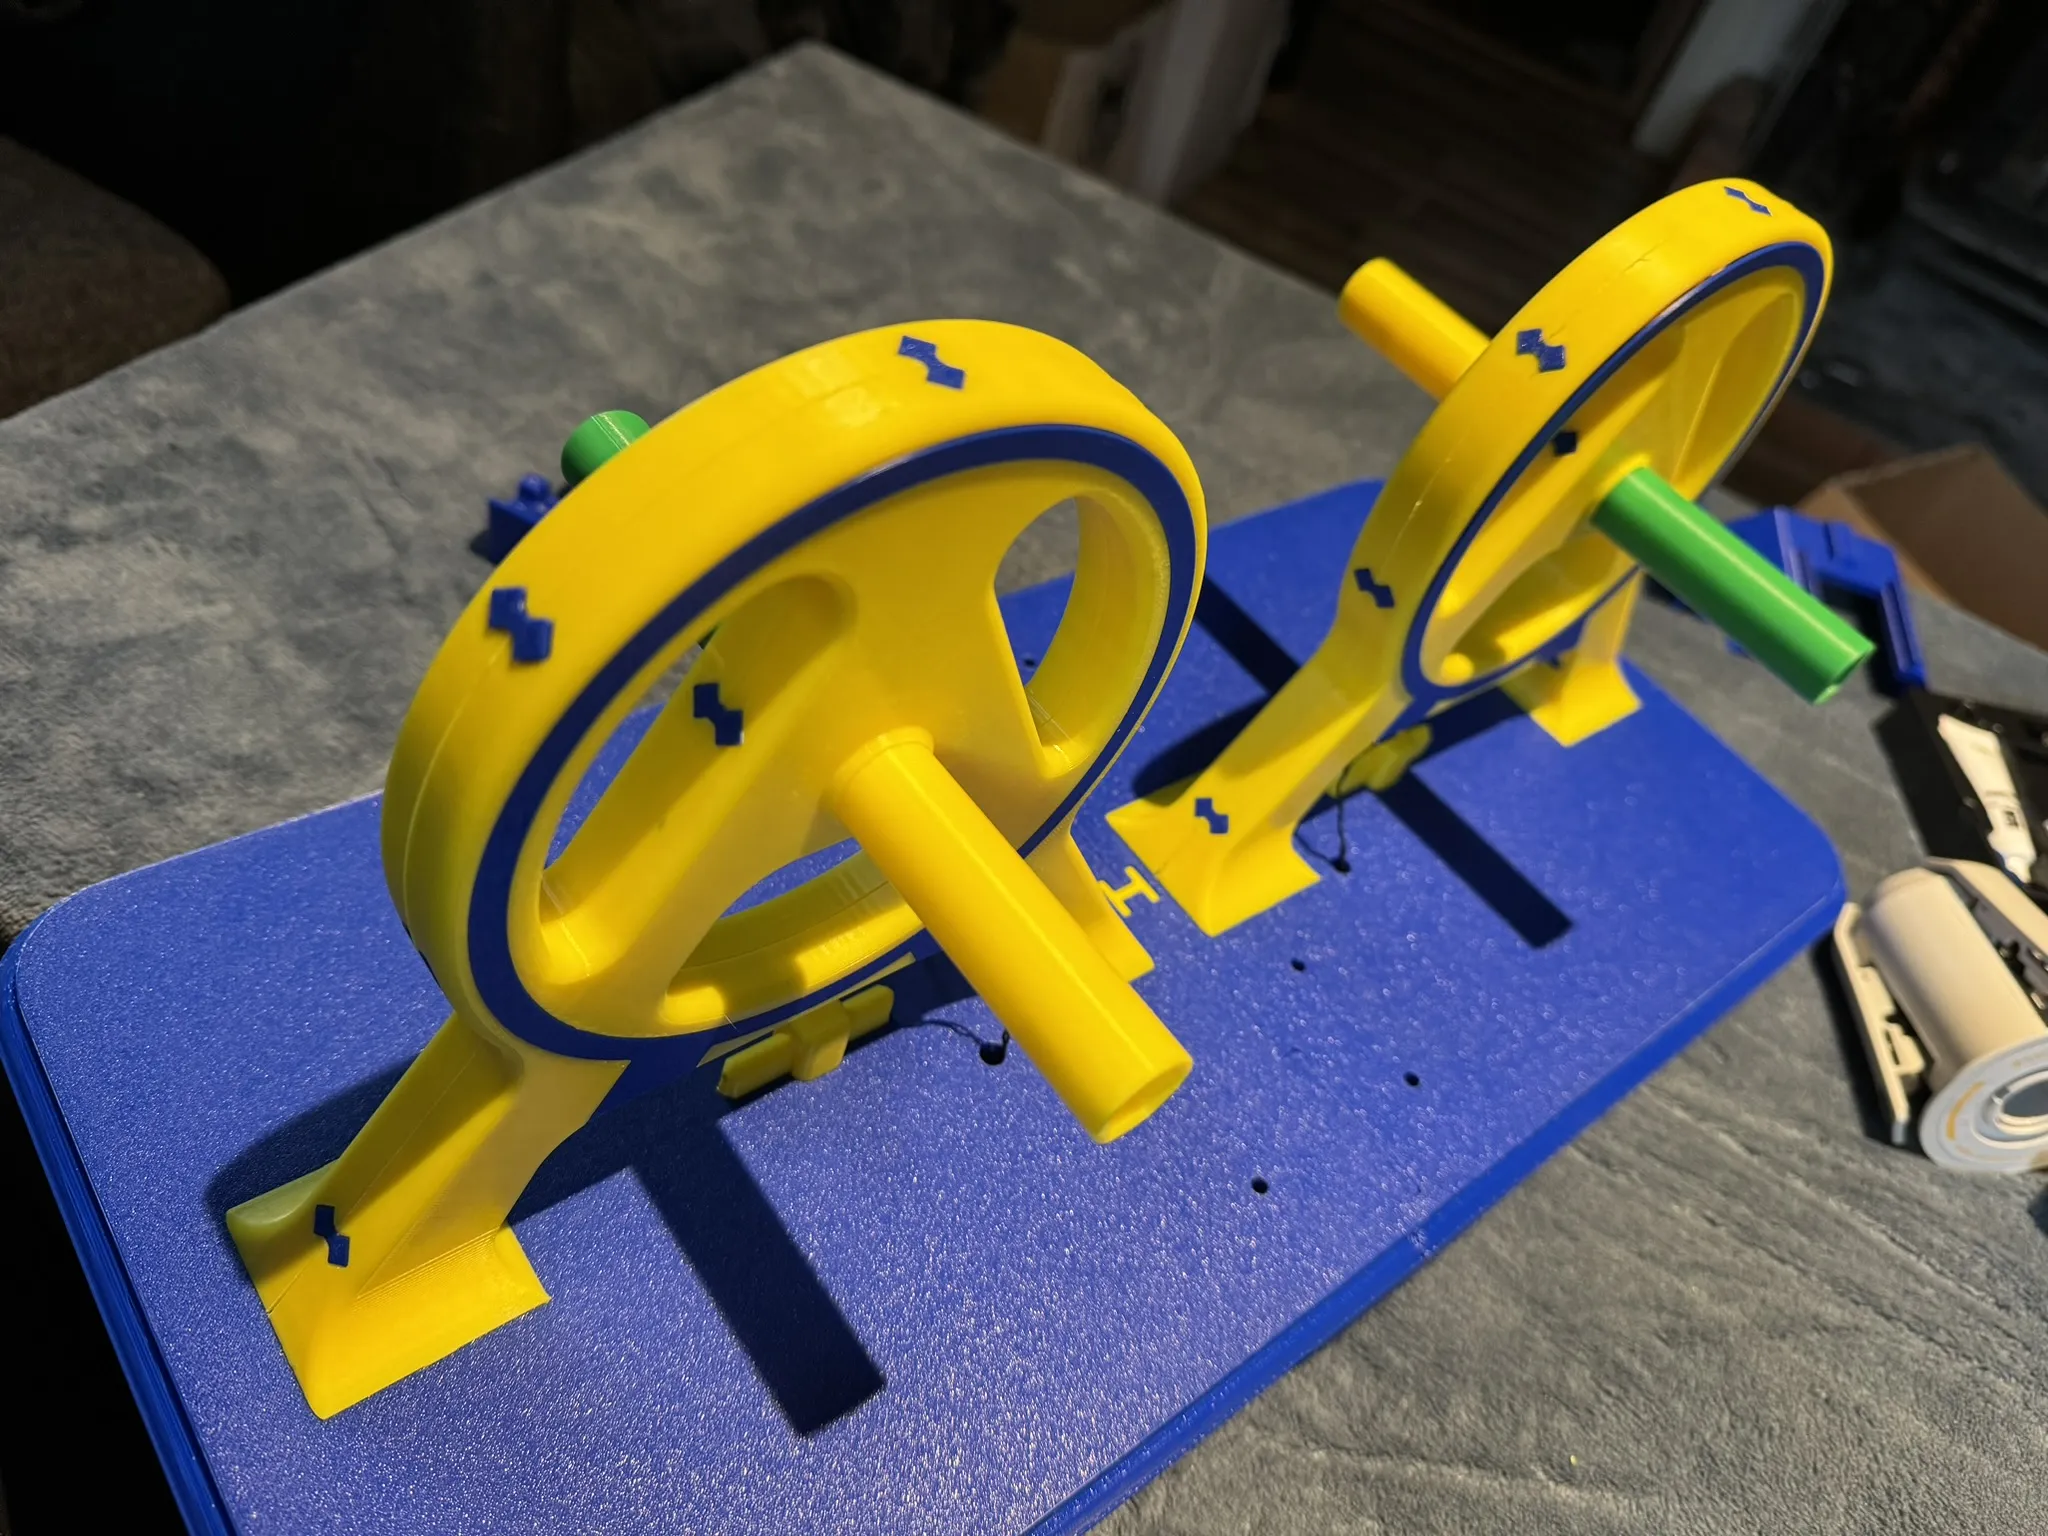
Now, mount the original spool holders, It might take some convincing, but they will fit eventually…
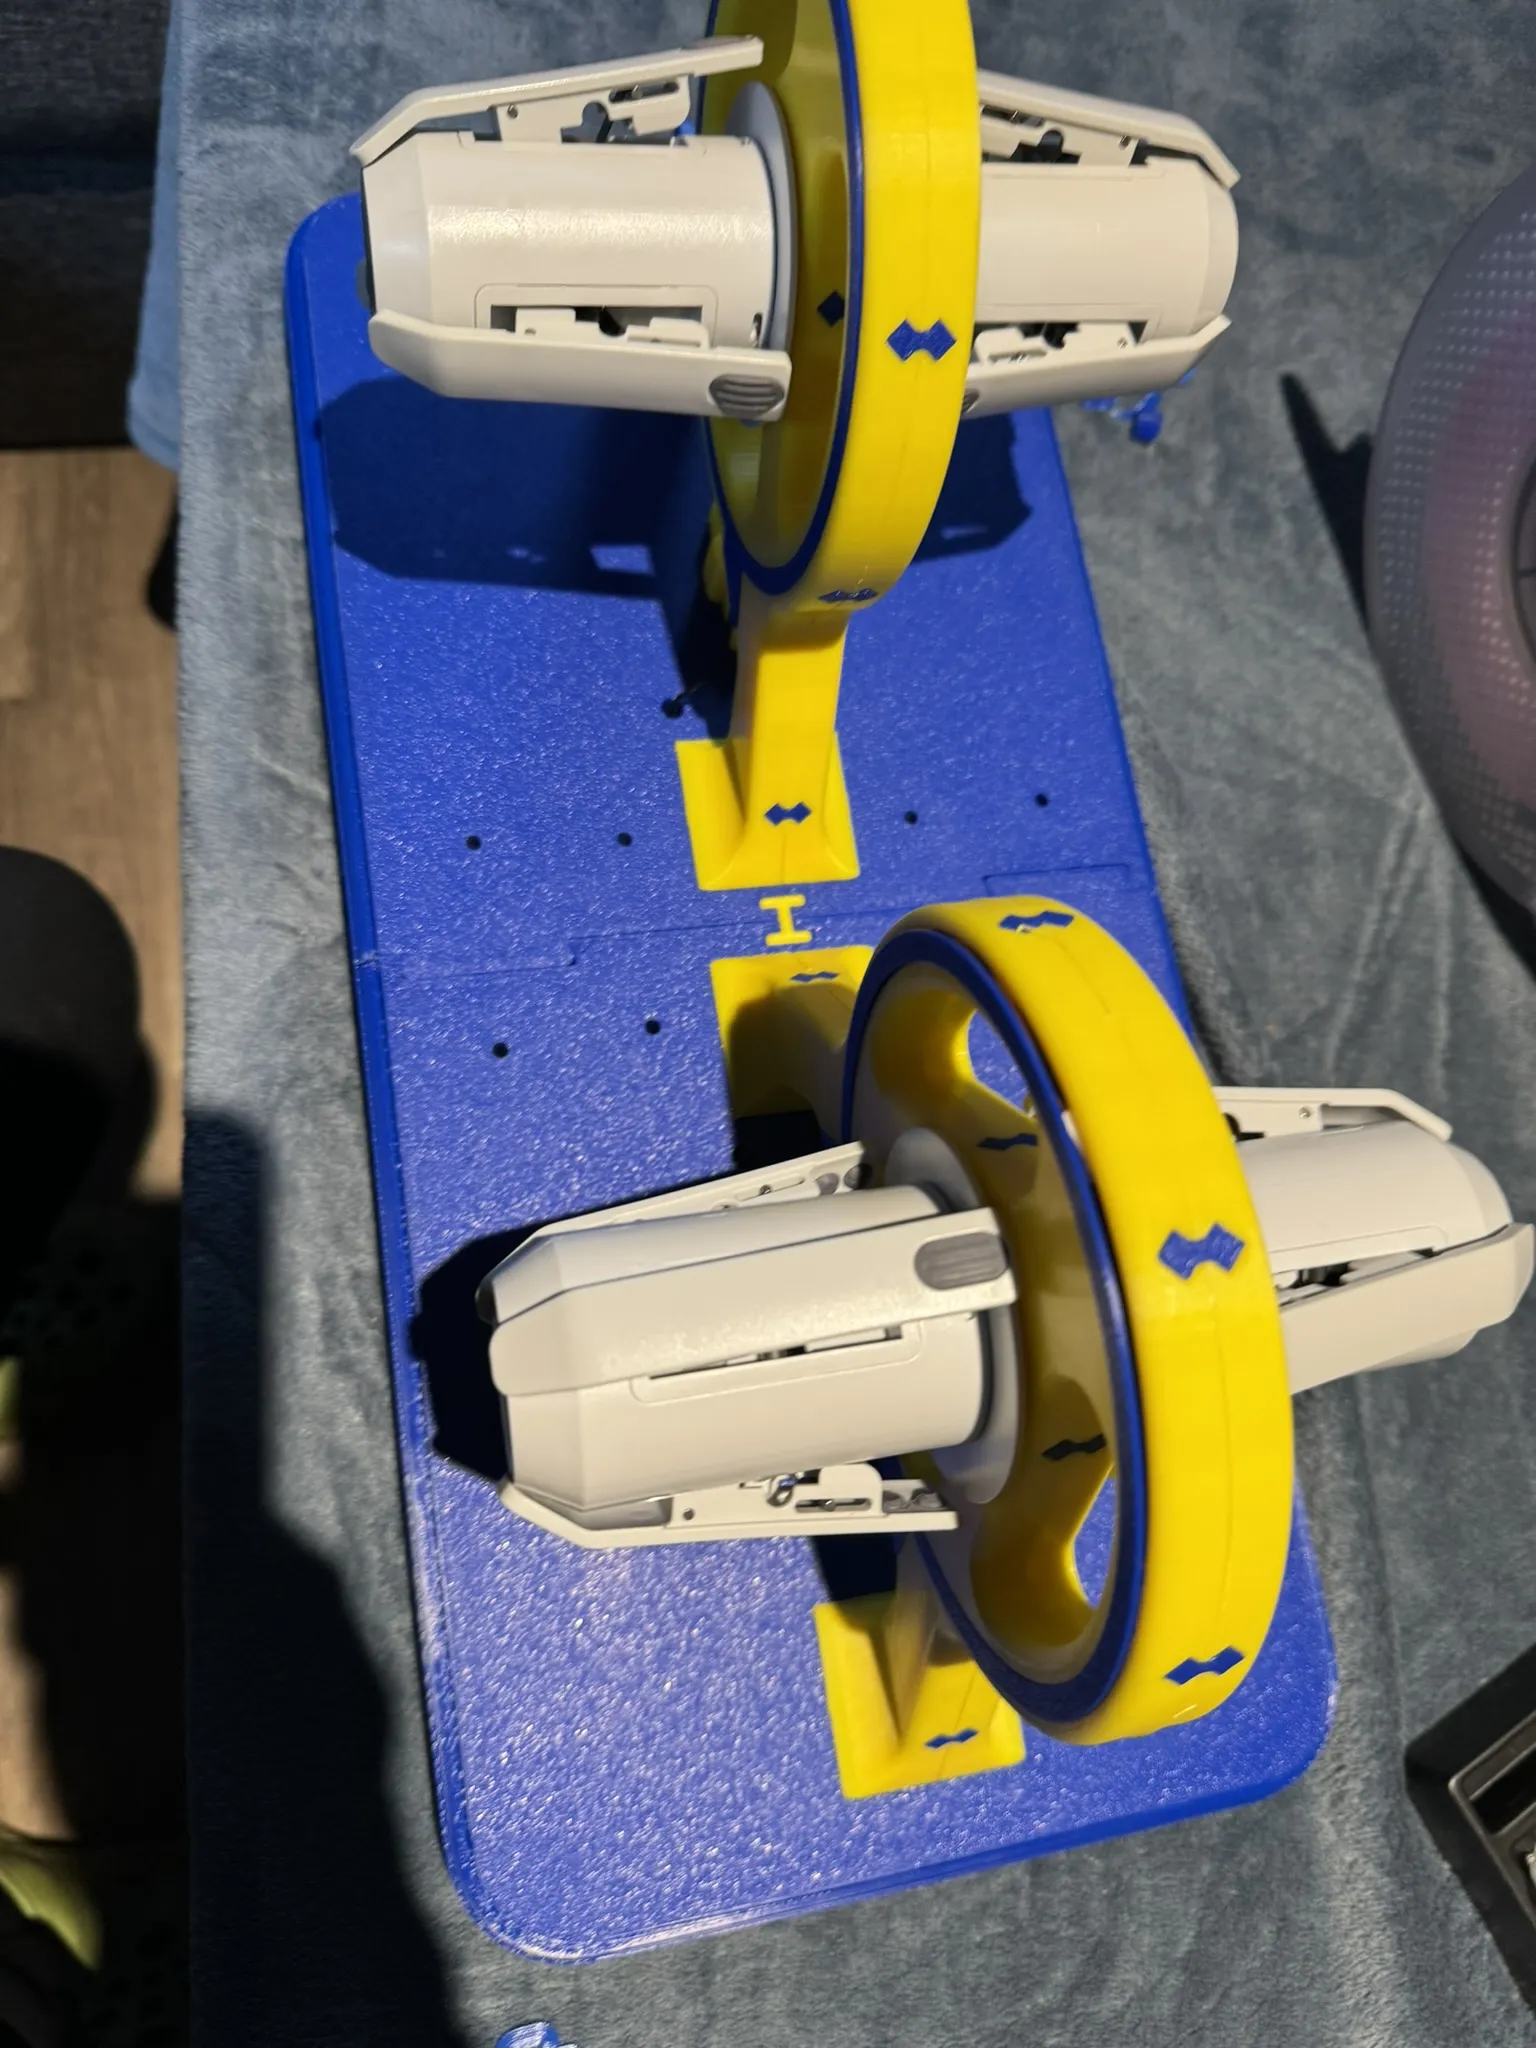
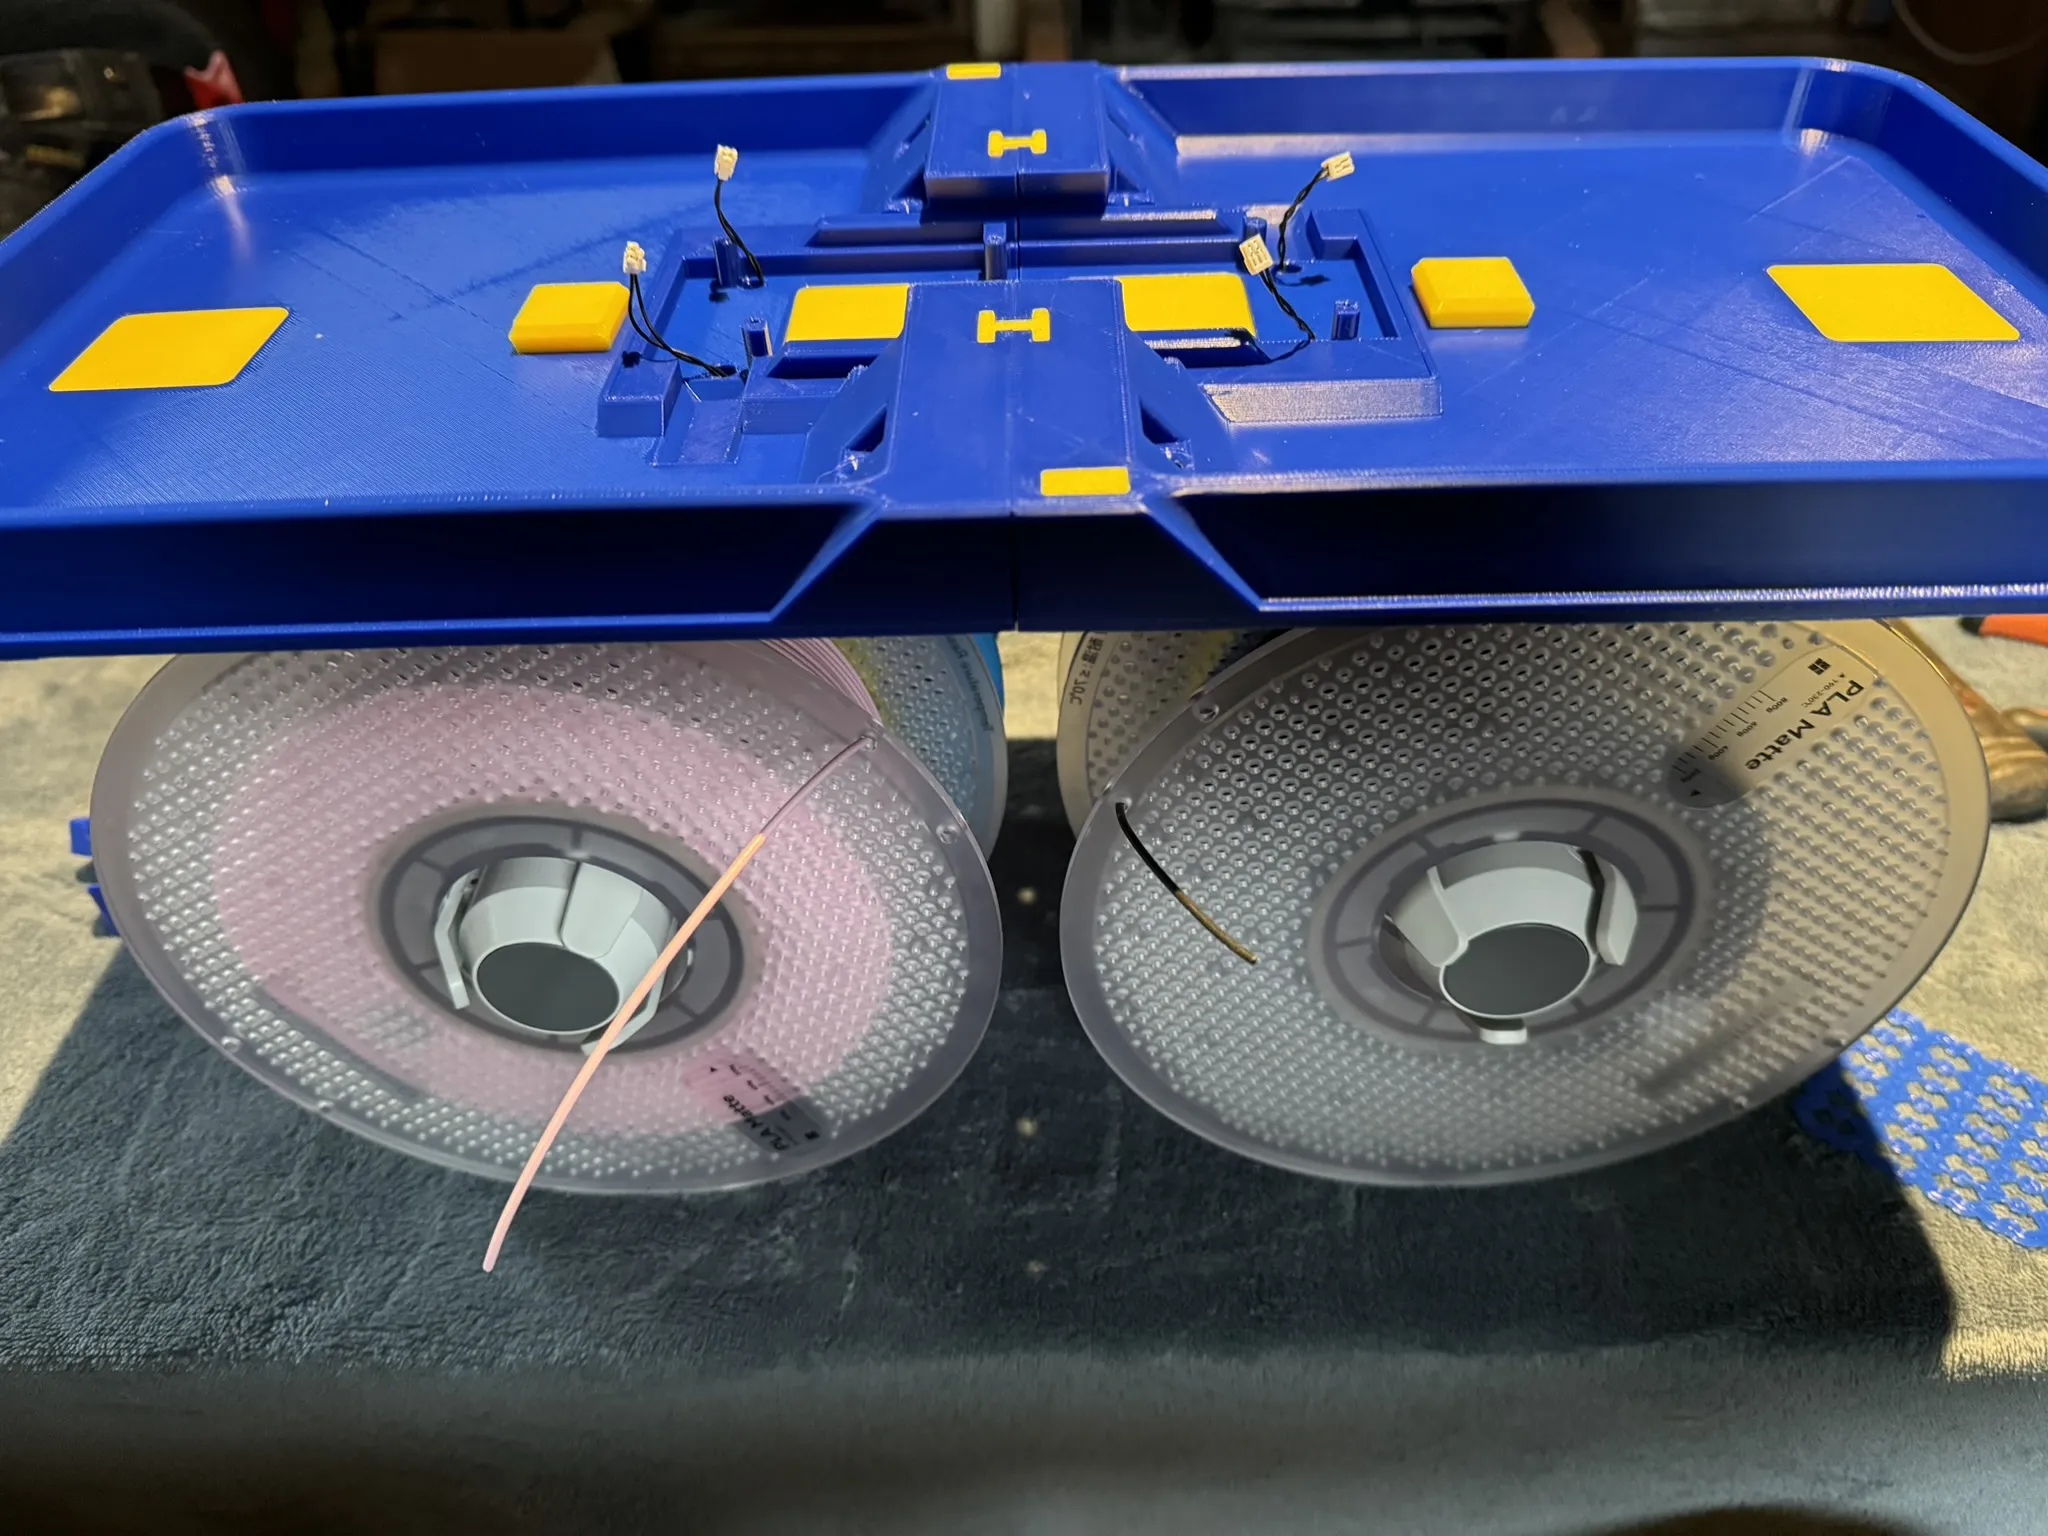
Add some rolls of filament, or don't. It's up to you, it was my way of getting the assembly to be able to turn over and rest horizontally while assembling the rest. A different option is to place it in the Sunly S4…
Attaching and connecting the motherboard
There is a surplus of mounting points for the motherboard due to the mirrored design of the parts. Some of the surplus mounting points needs to be cut away (use a sharp plier). You will realize which ones that needs to be kept. The motherboard is mounted upside down.
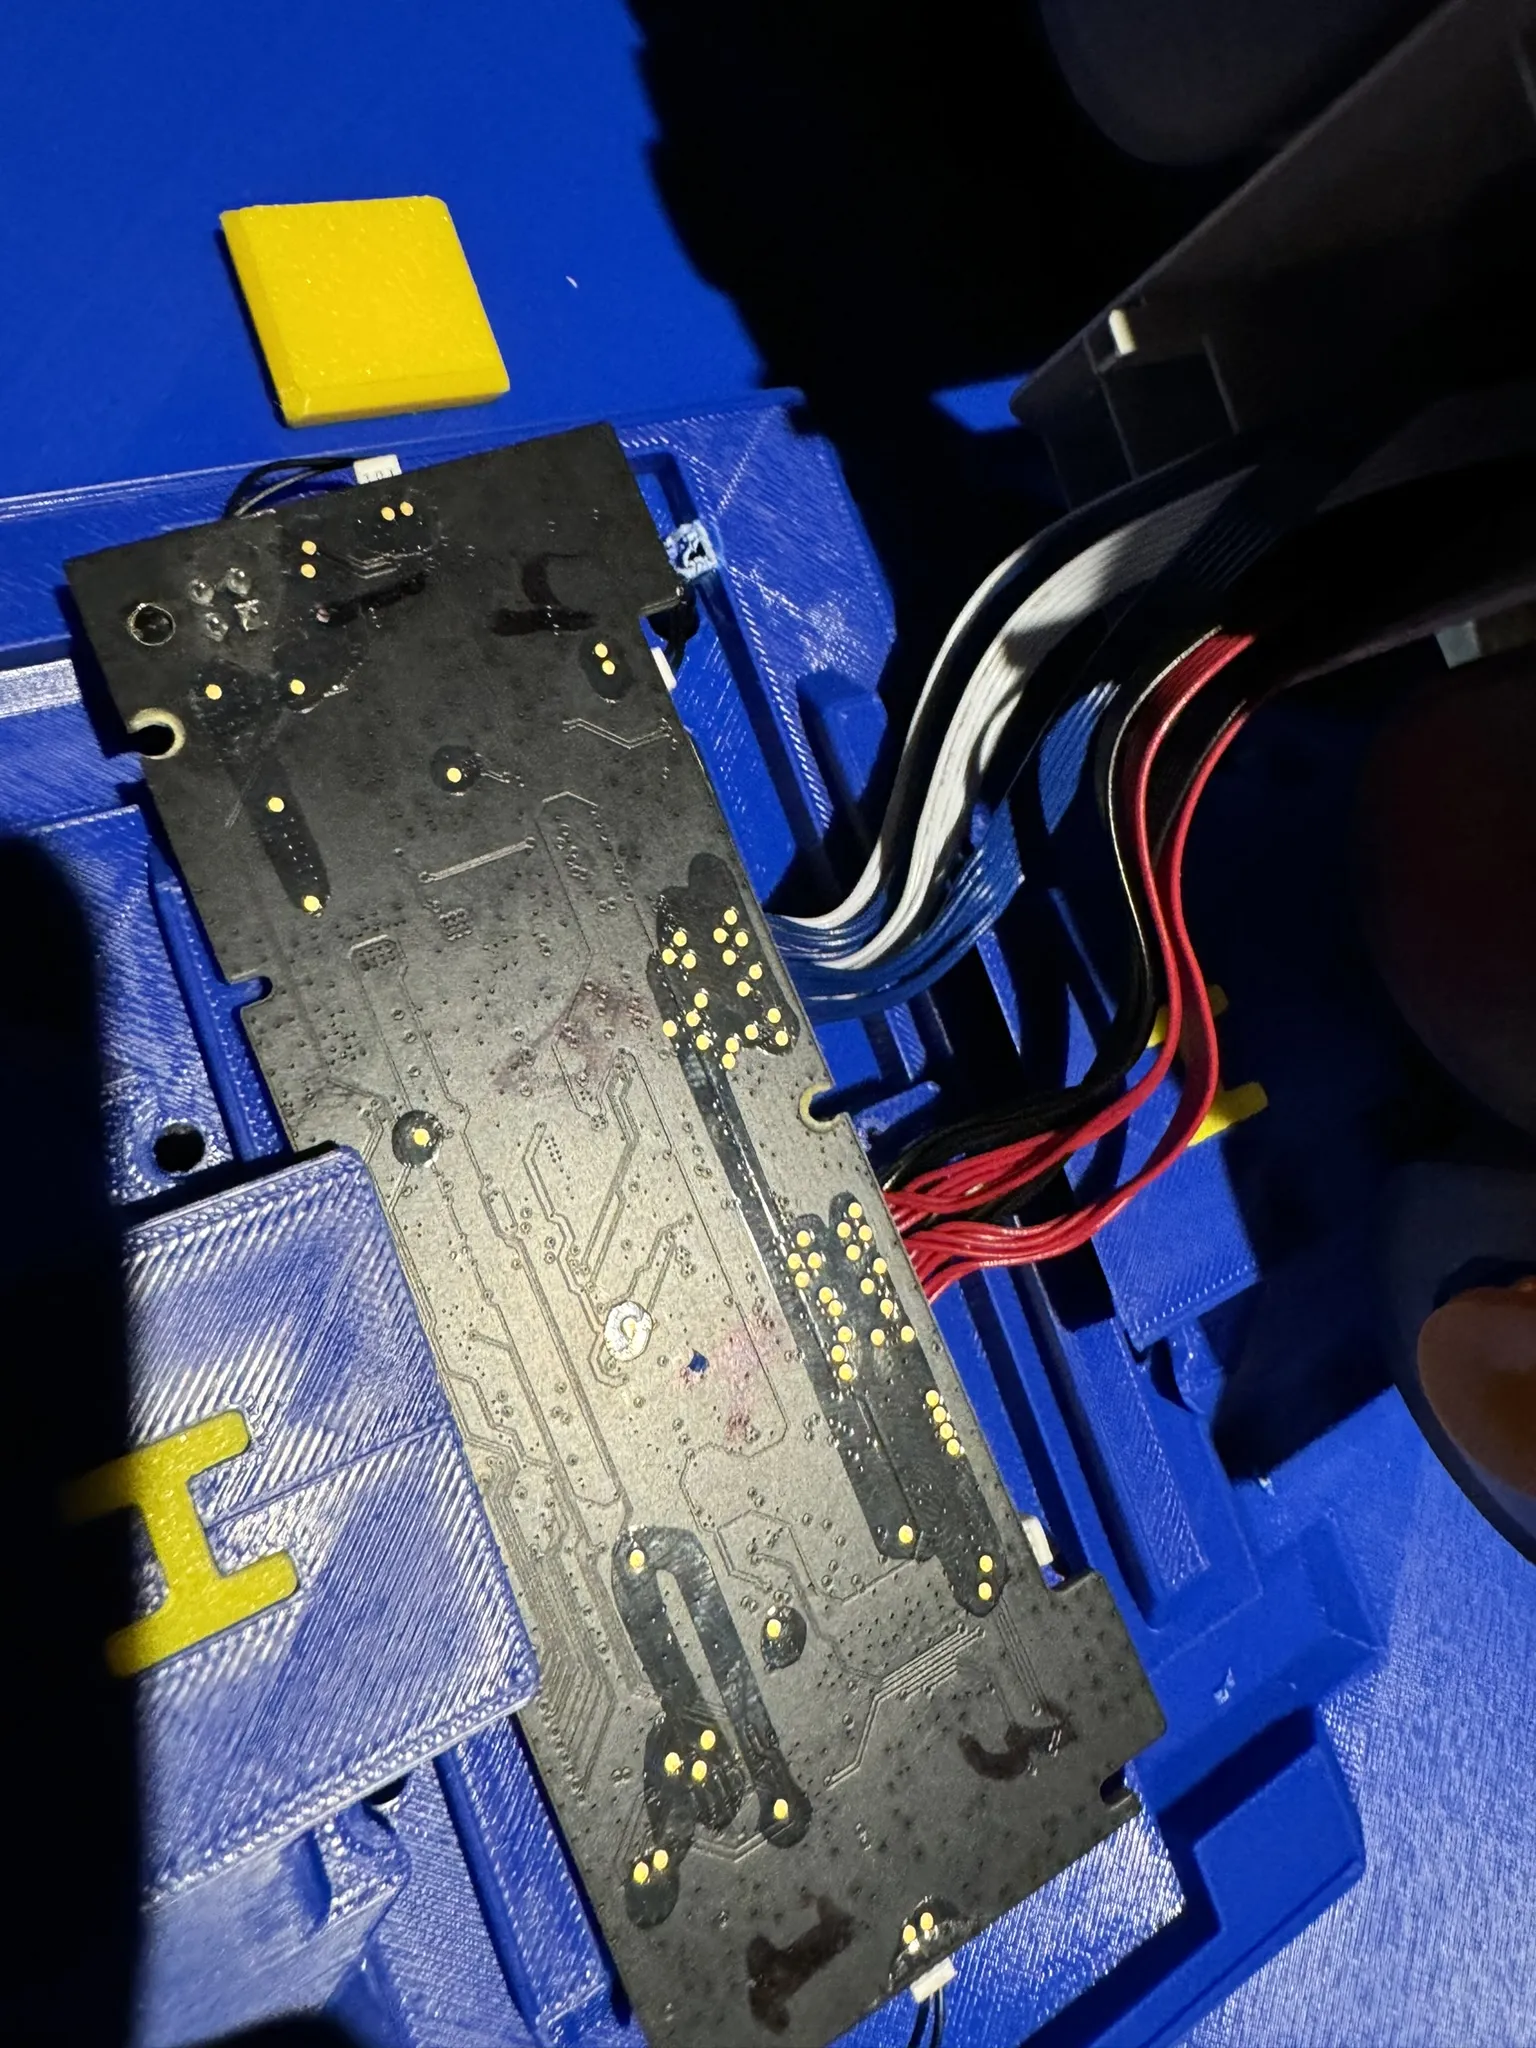
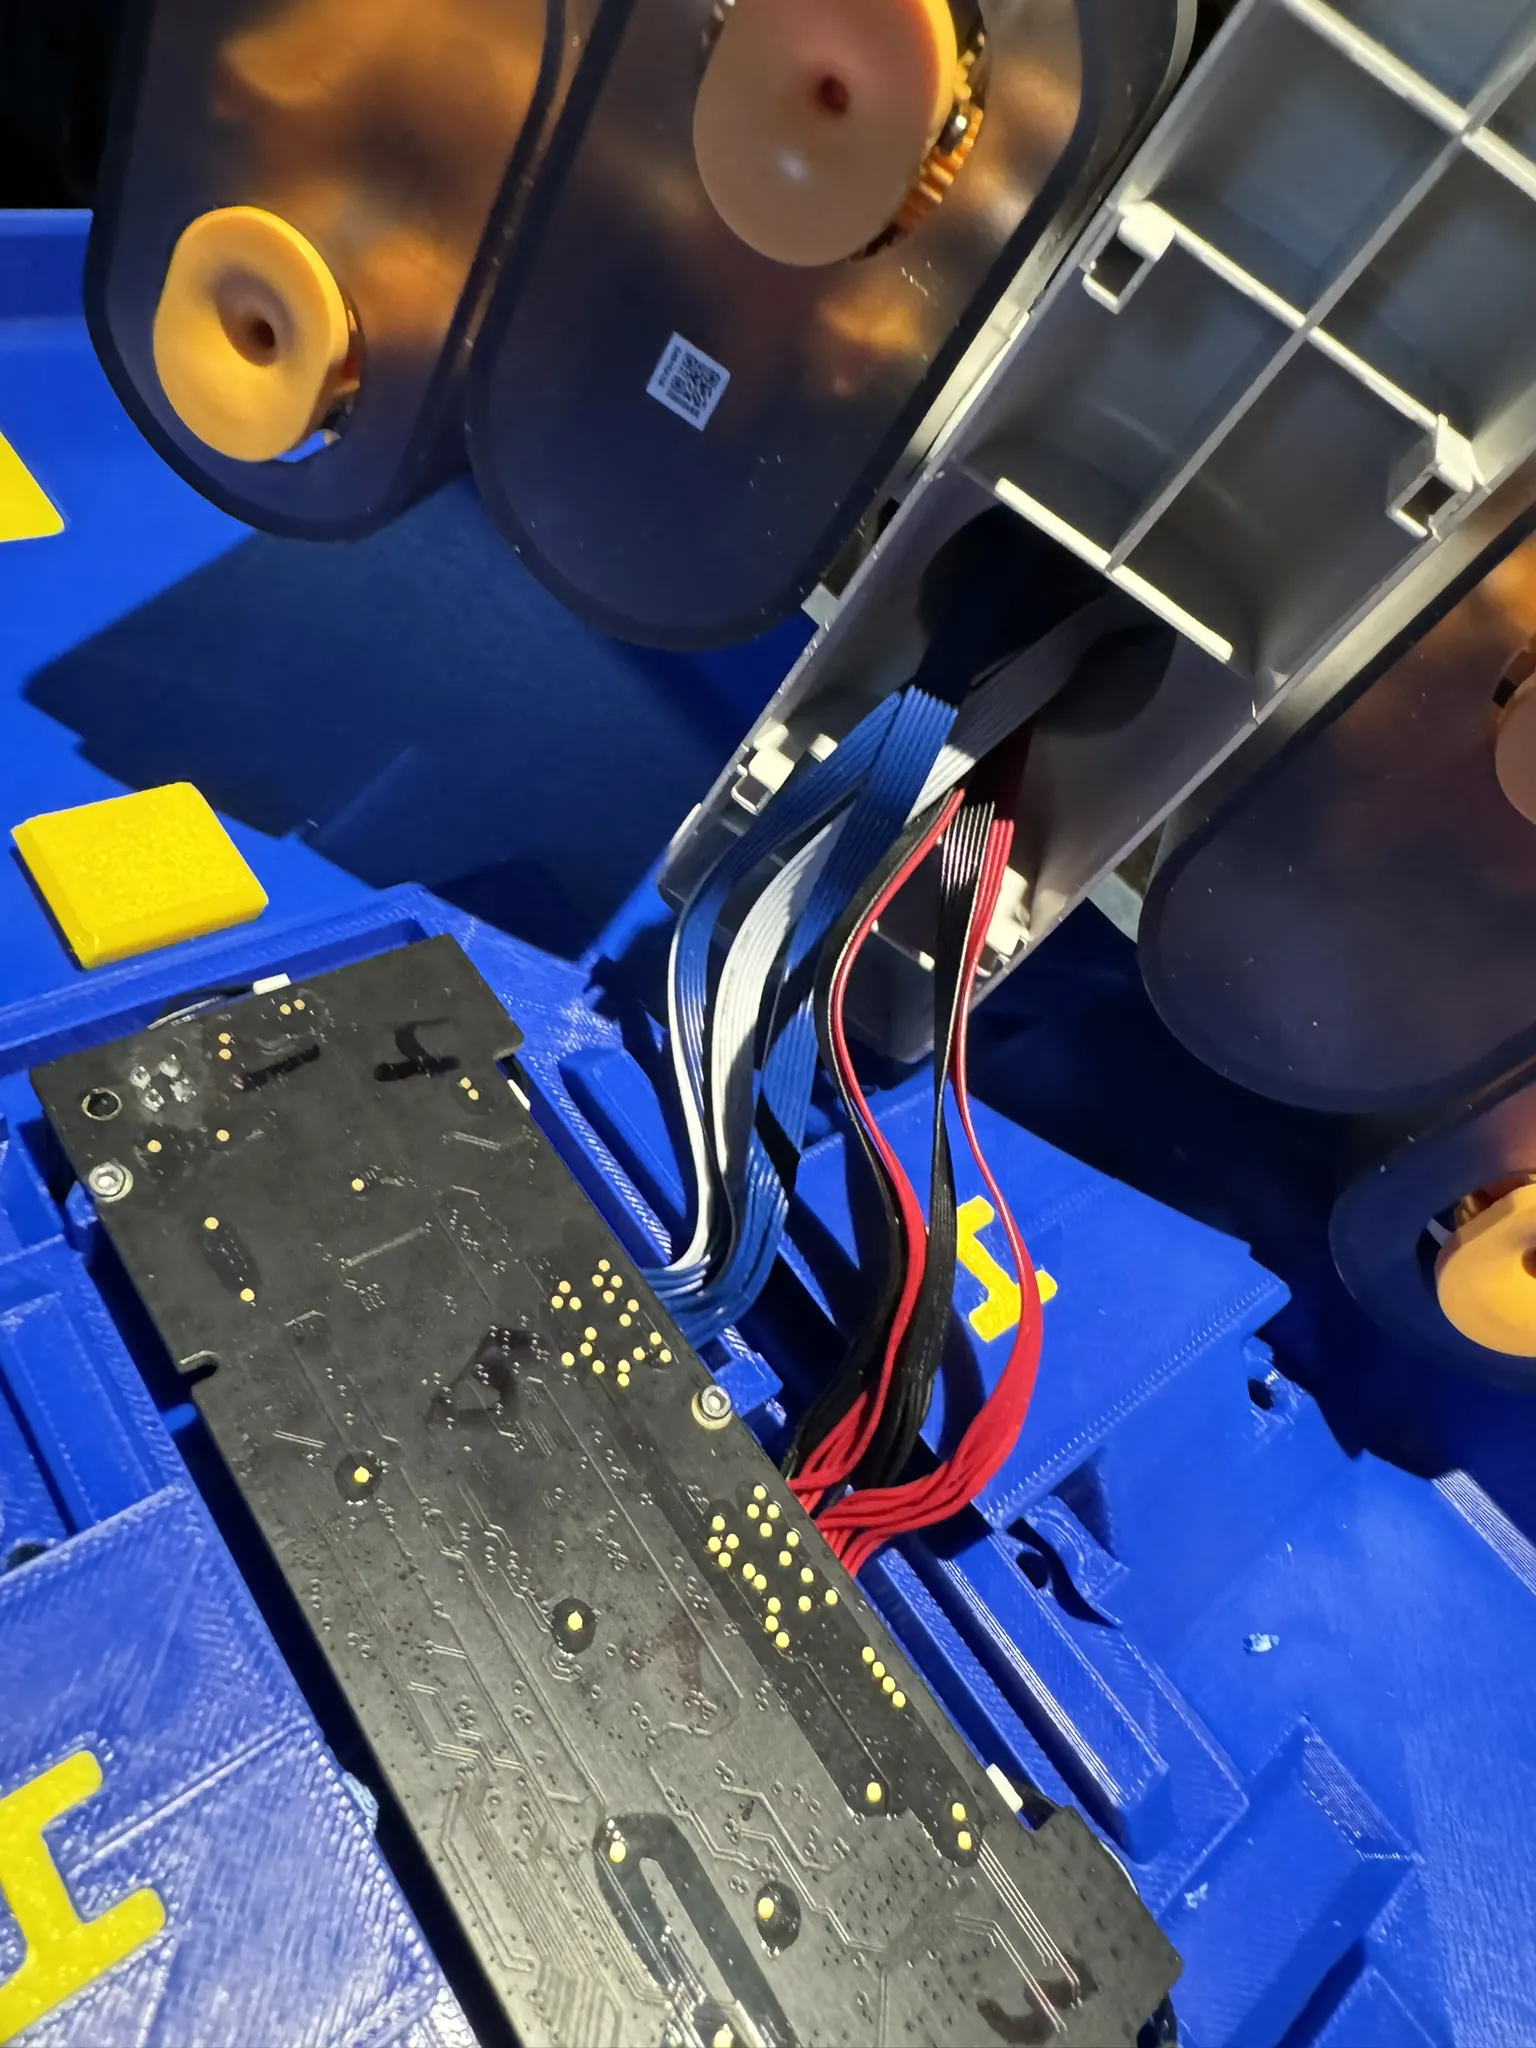
Note the arrangement of the ribbon wires. (B/W to the left), And also the numbering I did on the motherboard. It is the corresponding sensor wire for the NFC sensors.
We have now come to the point of mounting the housing for the motherboard. Locate the parts printed on the FIRST FEEDER STAGE MOUNT & MB HOUSING plate and take one of the MB Housing parts, and slide it onto the rails of main body. Make sure to keep the ribbon wires out of the way,
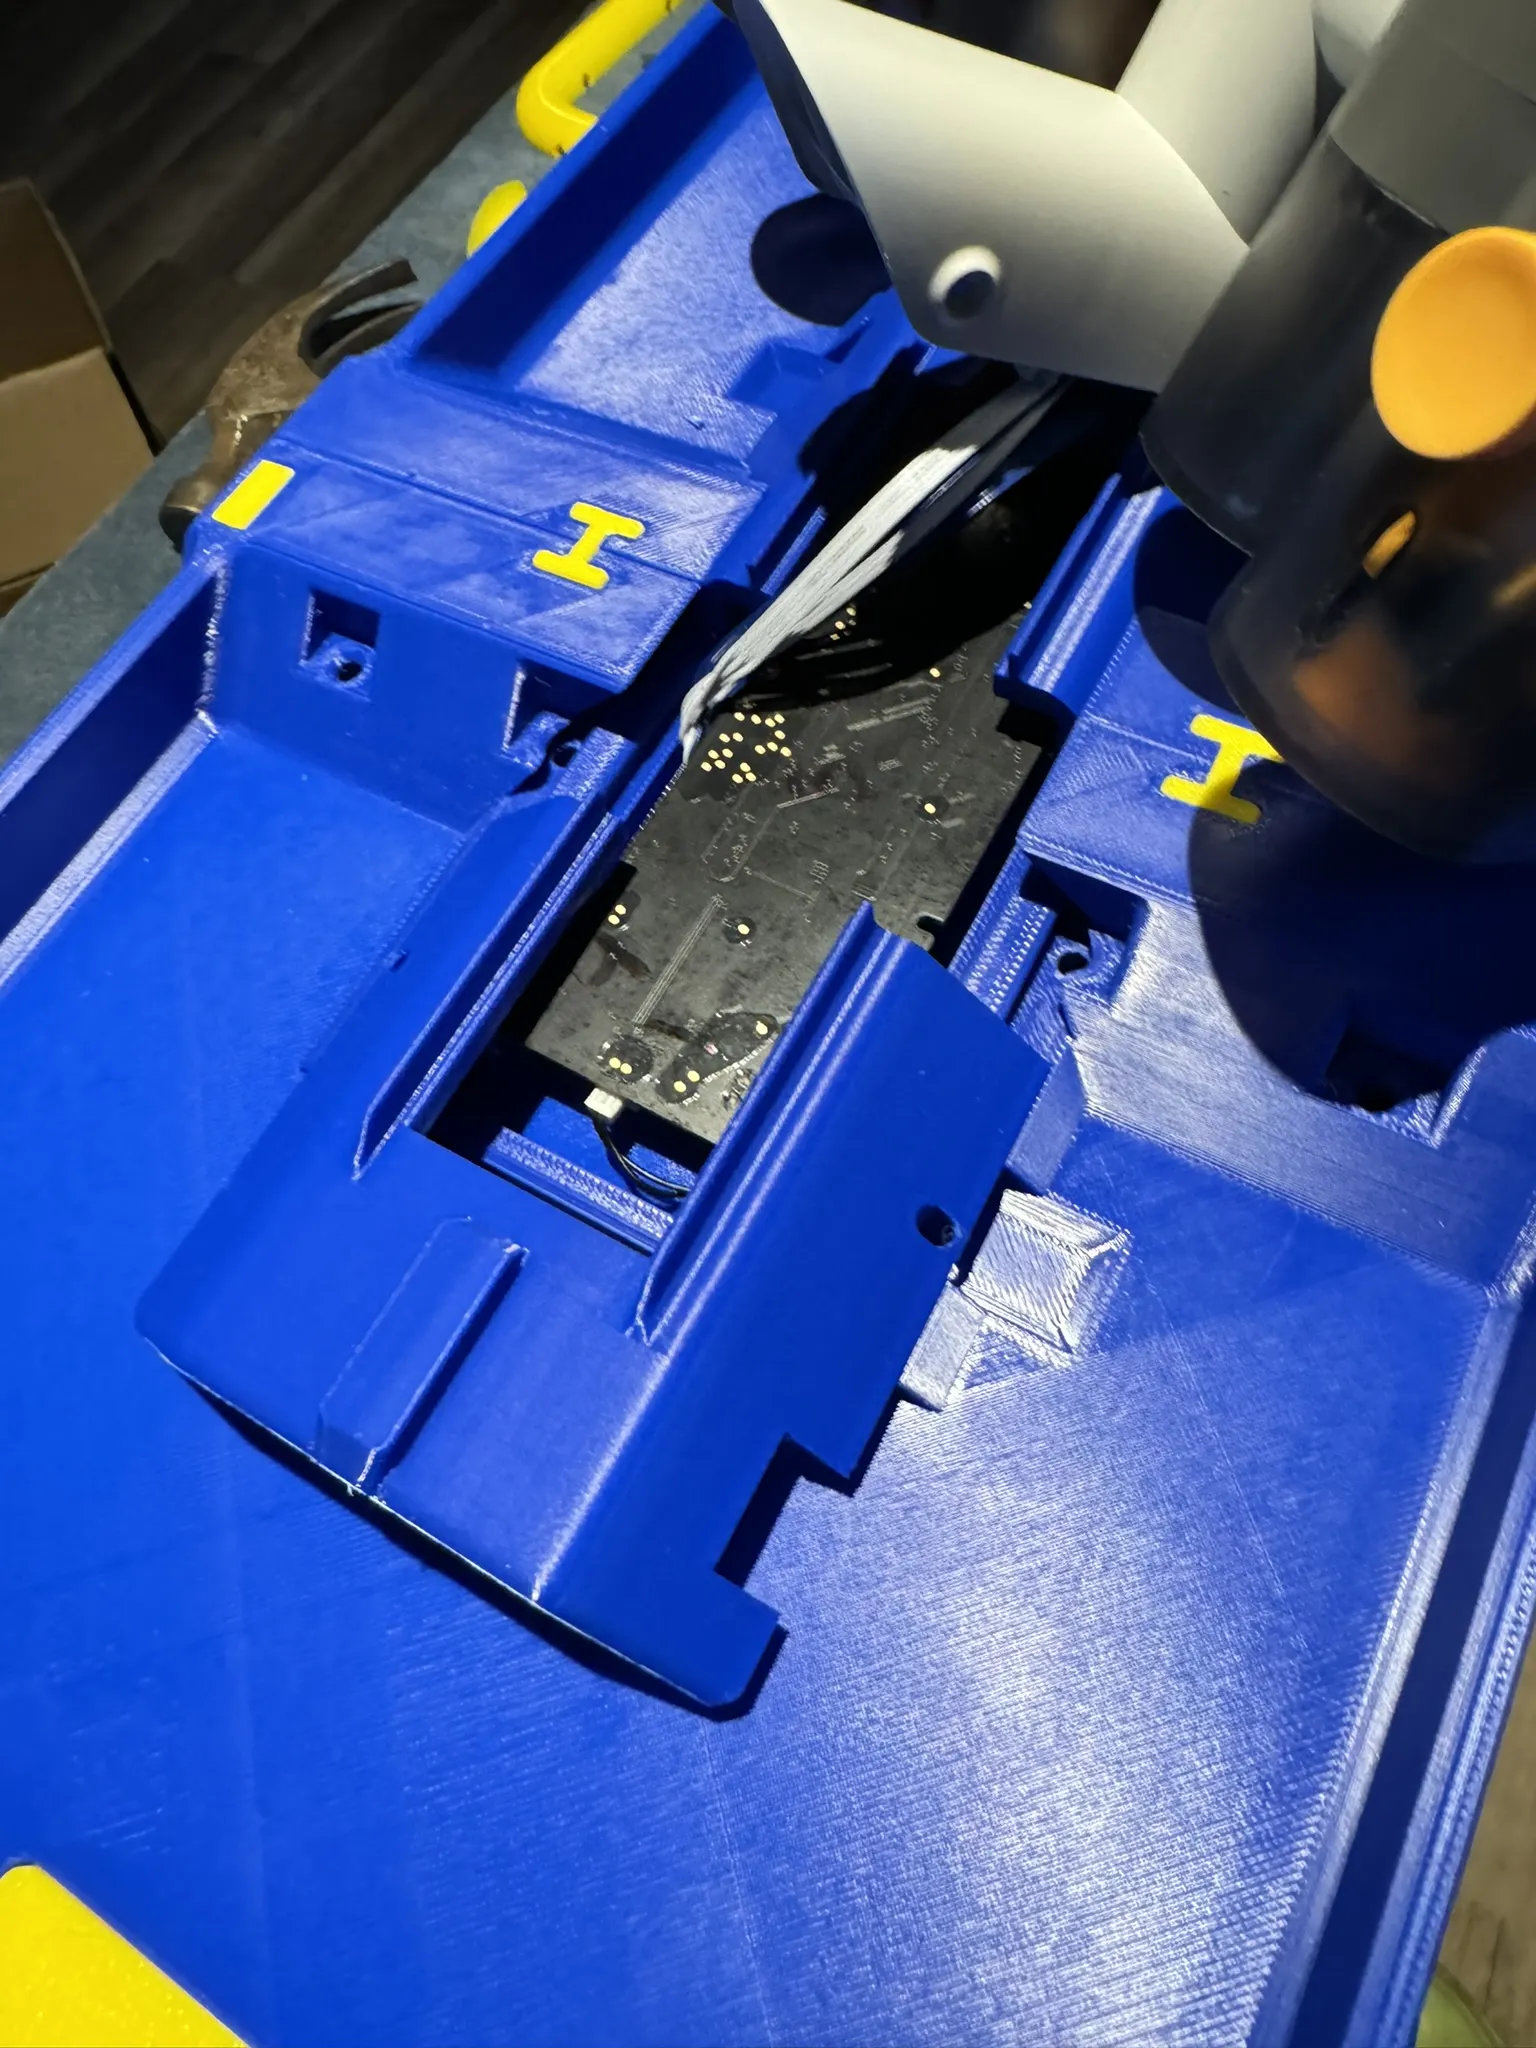
Do the same thing with the second mb housing part
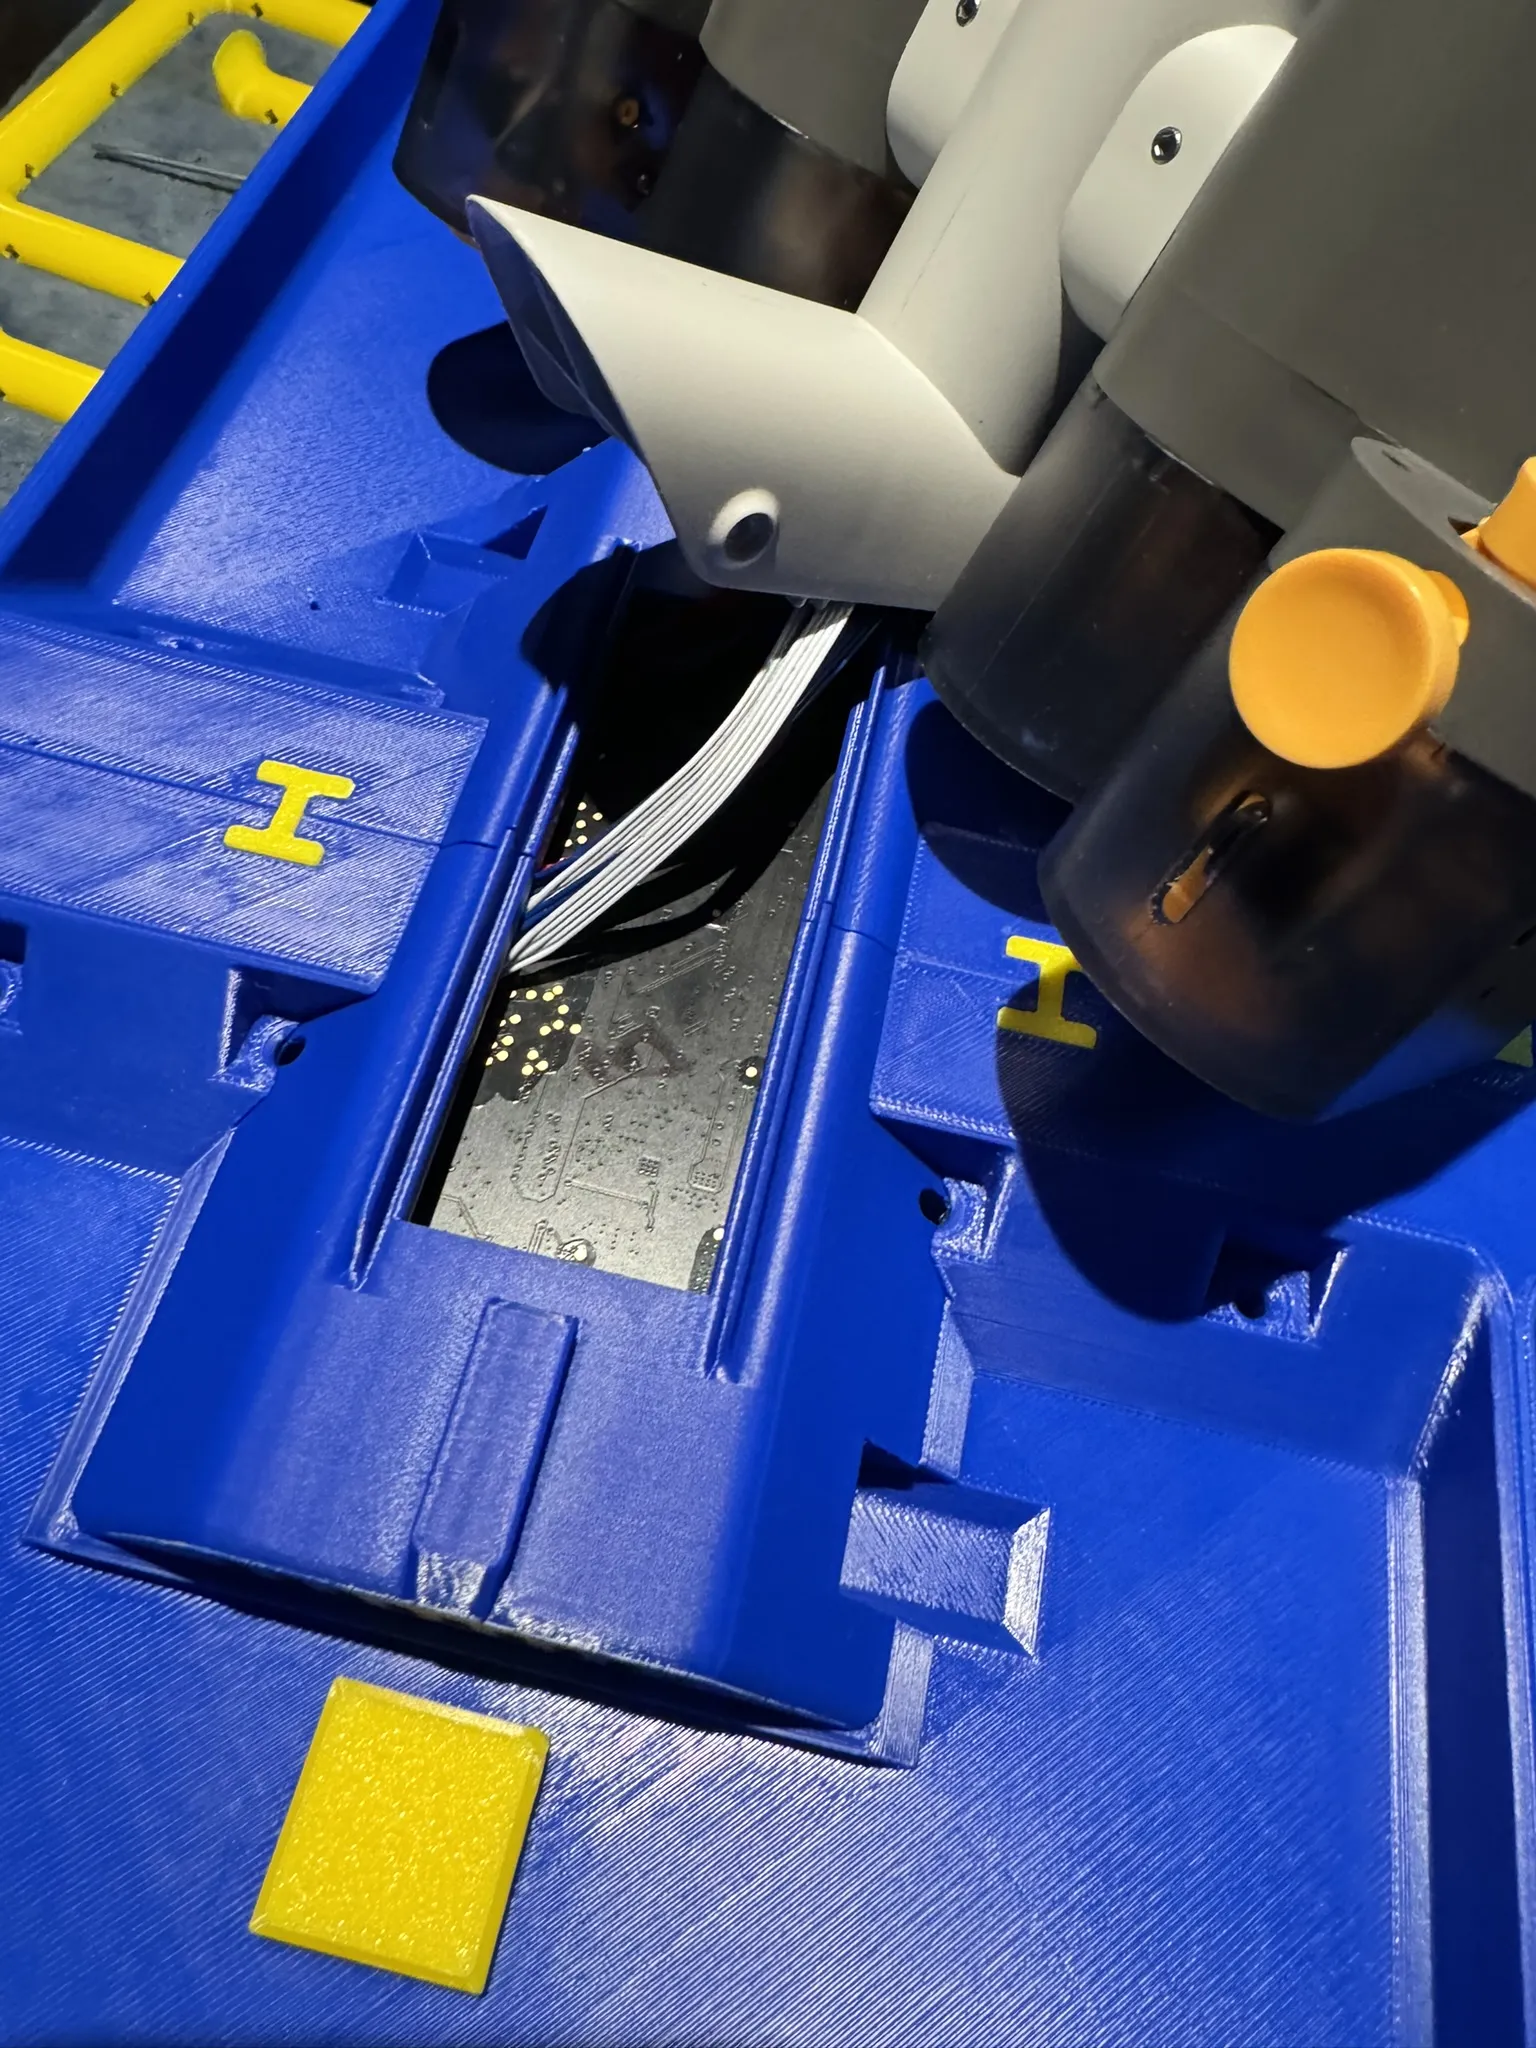
Slide the two AMS Interface units into place
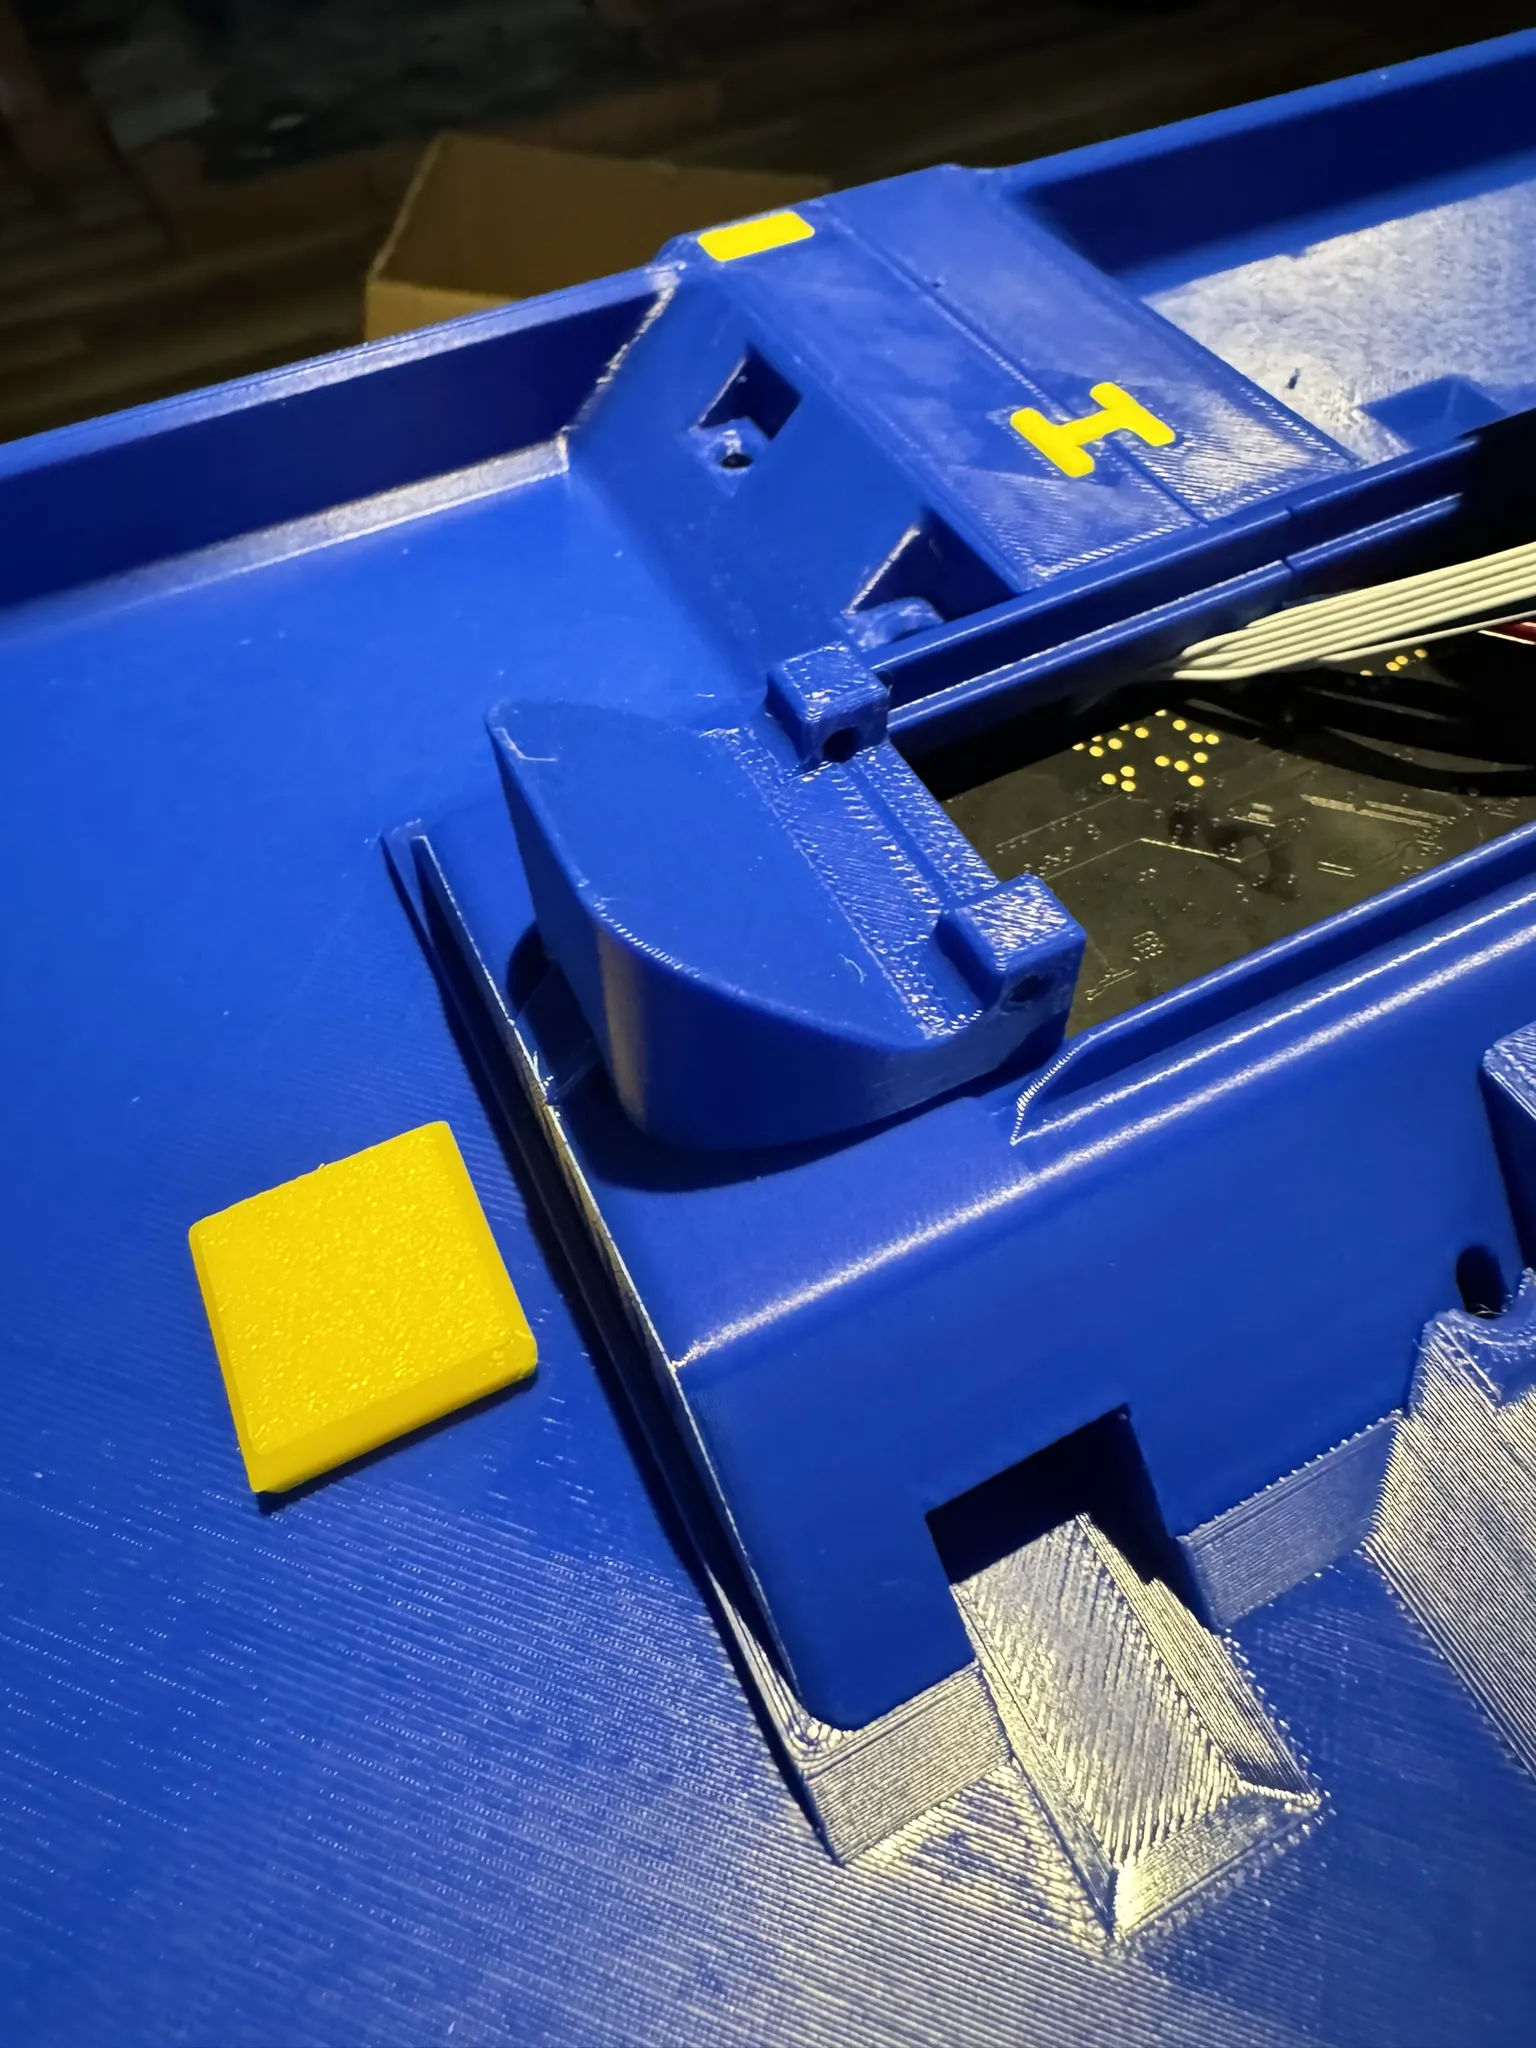
Screw the AMS first stage feeder assembly into place. make sure that the numbering of the feeders cohere to the numbering on the mainboard.
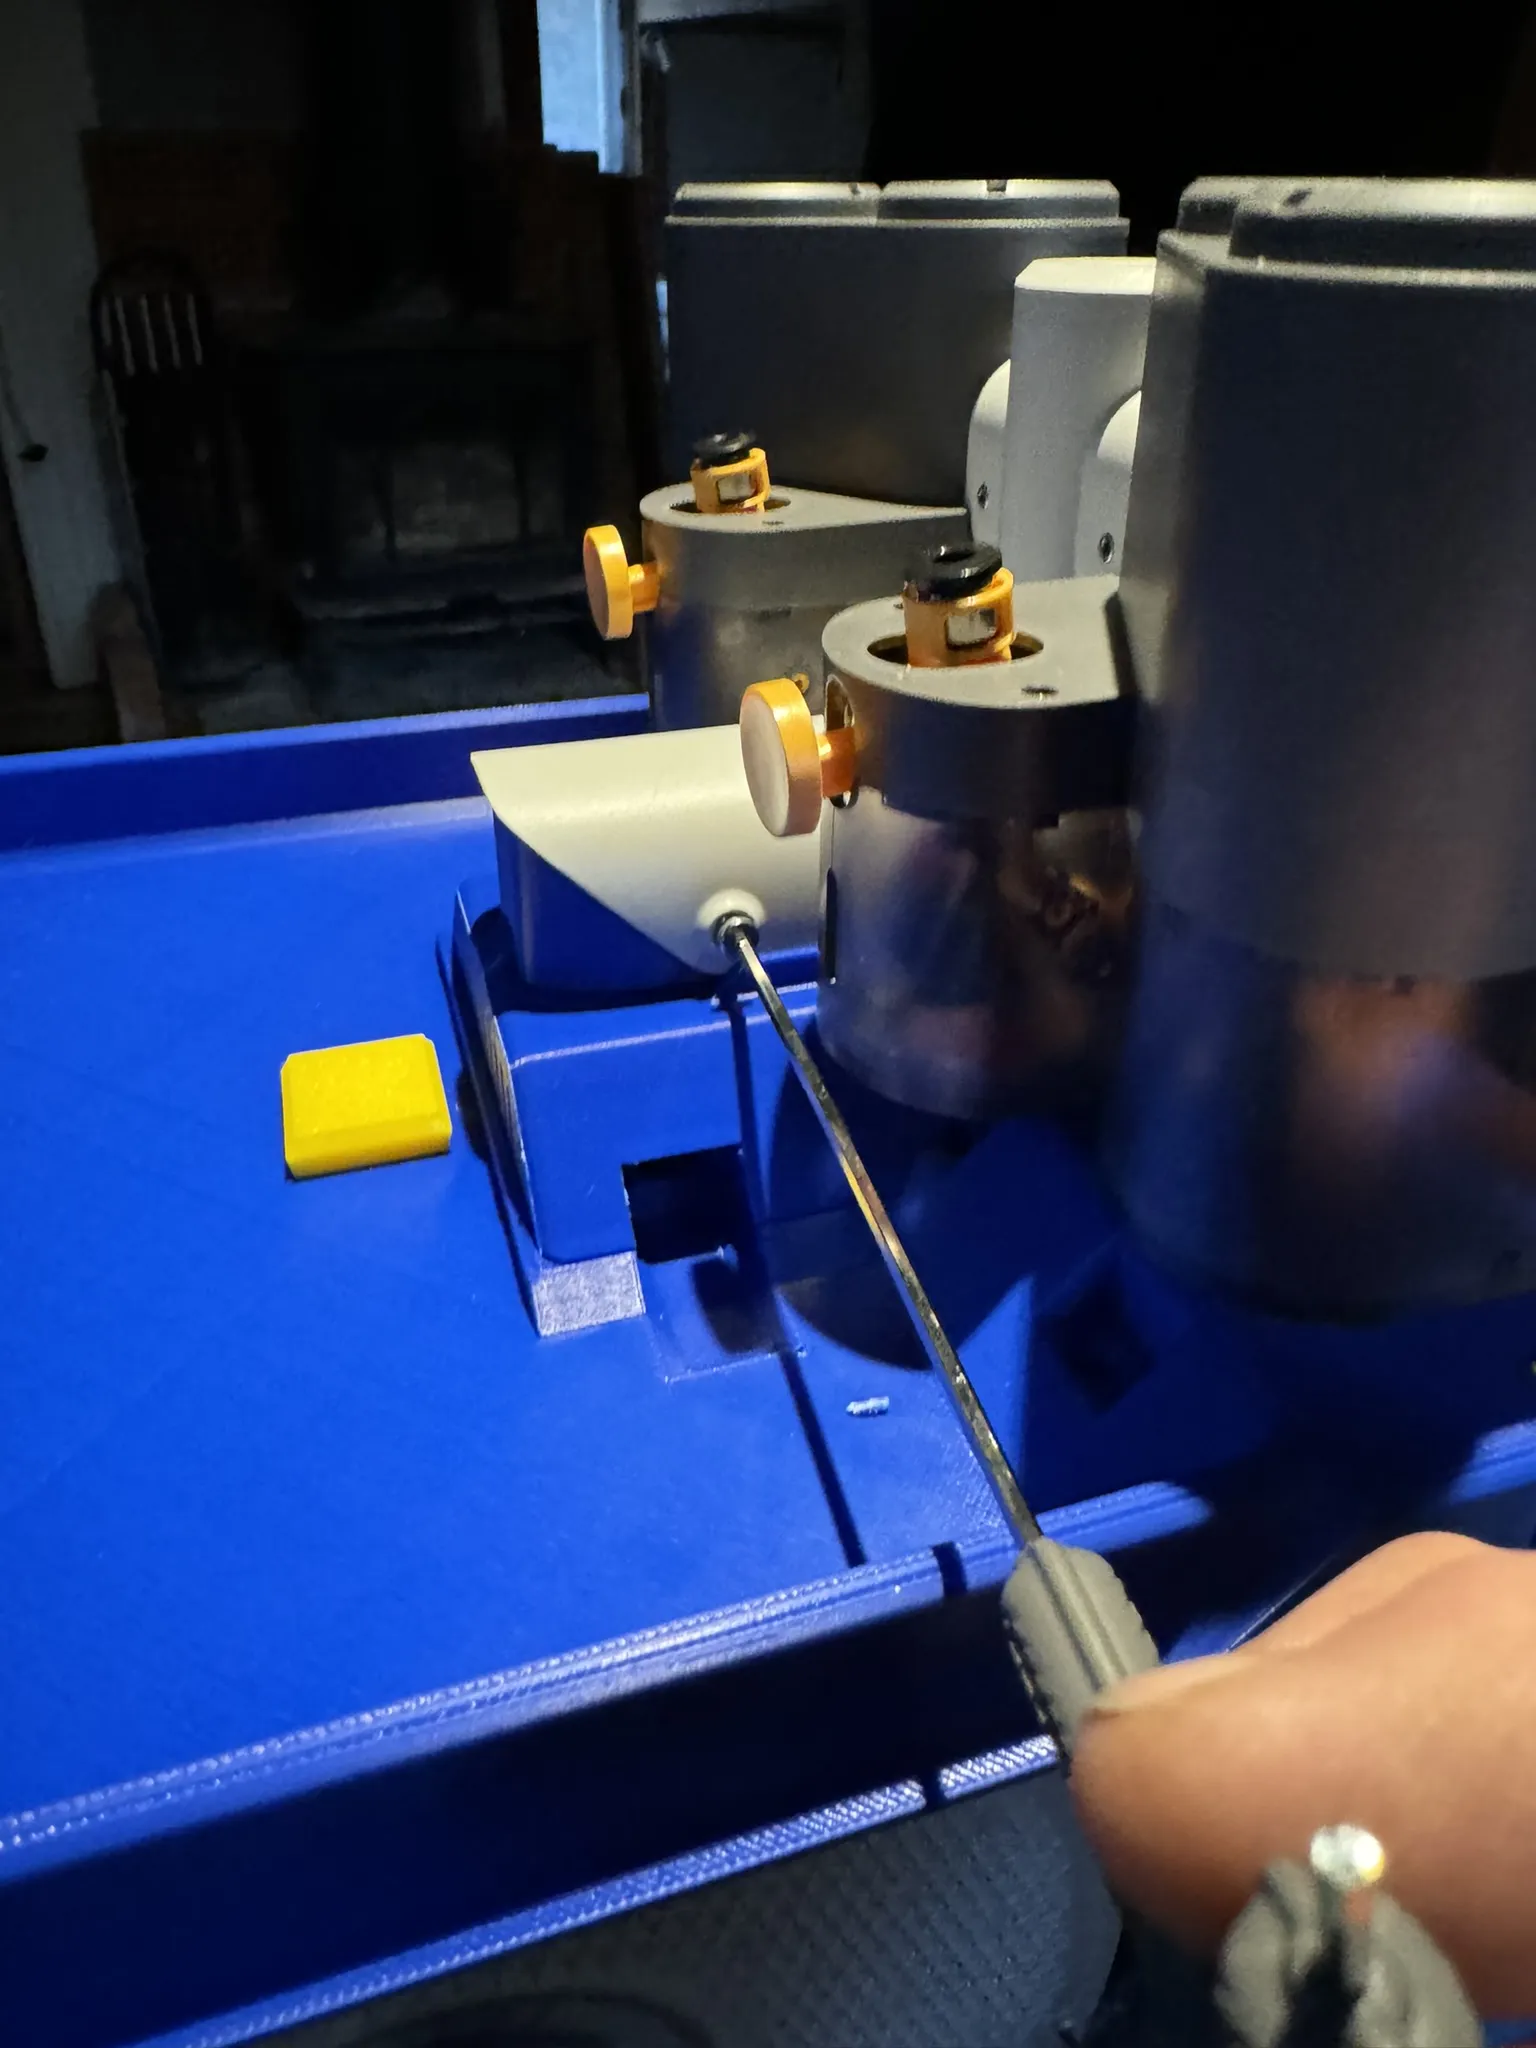
Assembling the handle
Locate the grip lock and grip interface from the CLIPS & LOCKS & PLUGS plate:
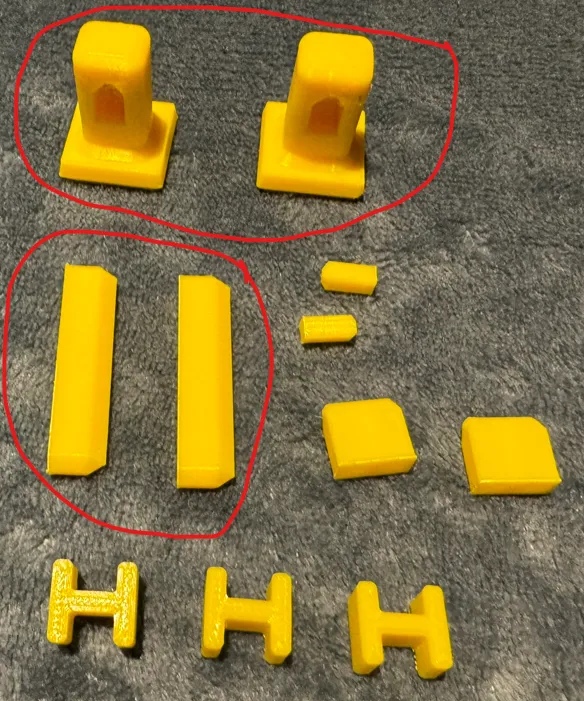
I don't have pictures of this, but it is more or less the same procedure as when mounting the legs.
Locate HANDLE A & HANDLE B. They look the same (and are identical in design)
- Attach one of the handles to both grip interfaces by sliding them
- Attach the other handle to both grip interfaces by sliding them
- Locate the grip clips (x18) from the CLIPS & LOCKS & PLUGS plate
- Push all 18 clips into the handle
Now you have a grip assembly in your hand that should enable you to:
Push each of the grip interfaces through the holes in the main body and use the grip lock (the bar) on the other side to keep them in place. I used a water plump pliers kind of tool to push the bar into the right place. As explained before, I initially did this assembly in a different order, hence no legs are present in this pic:
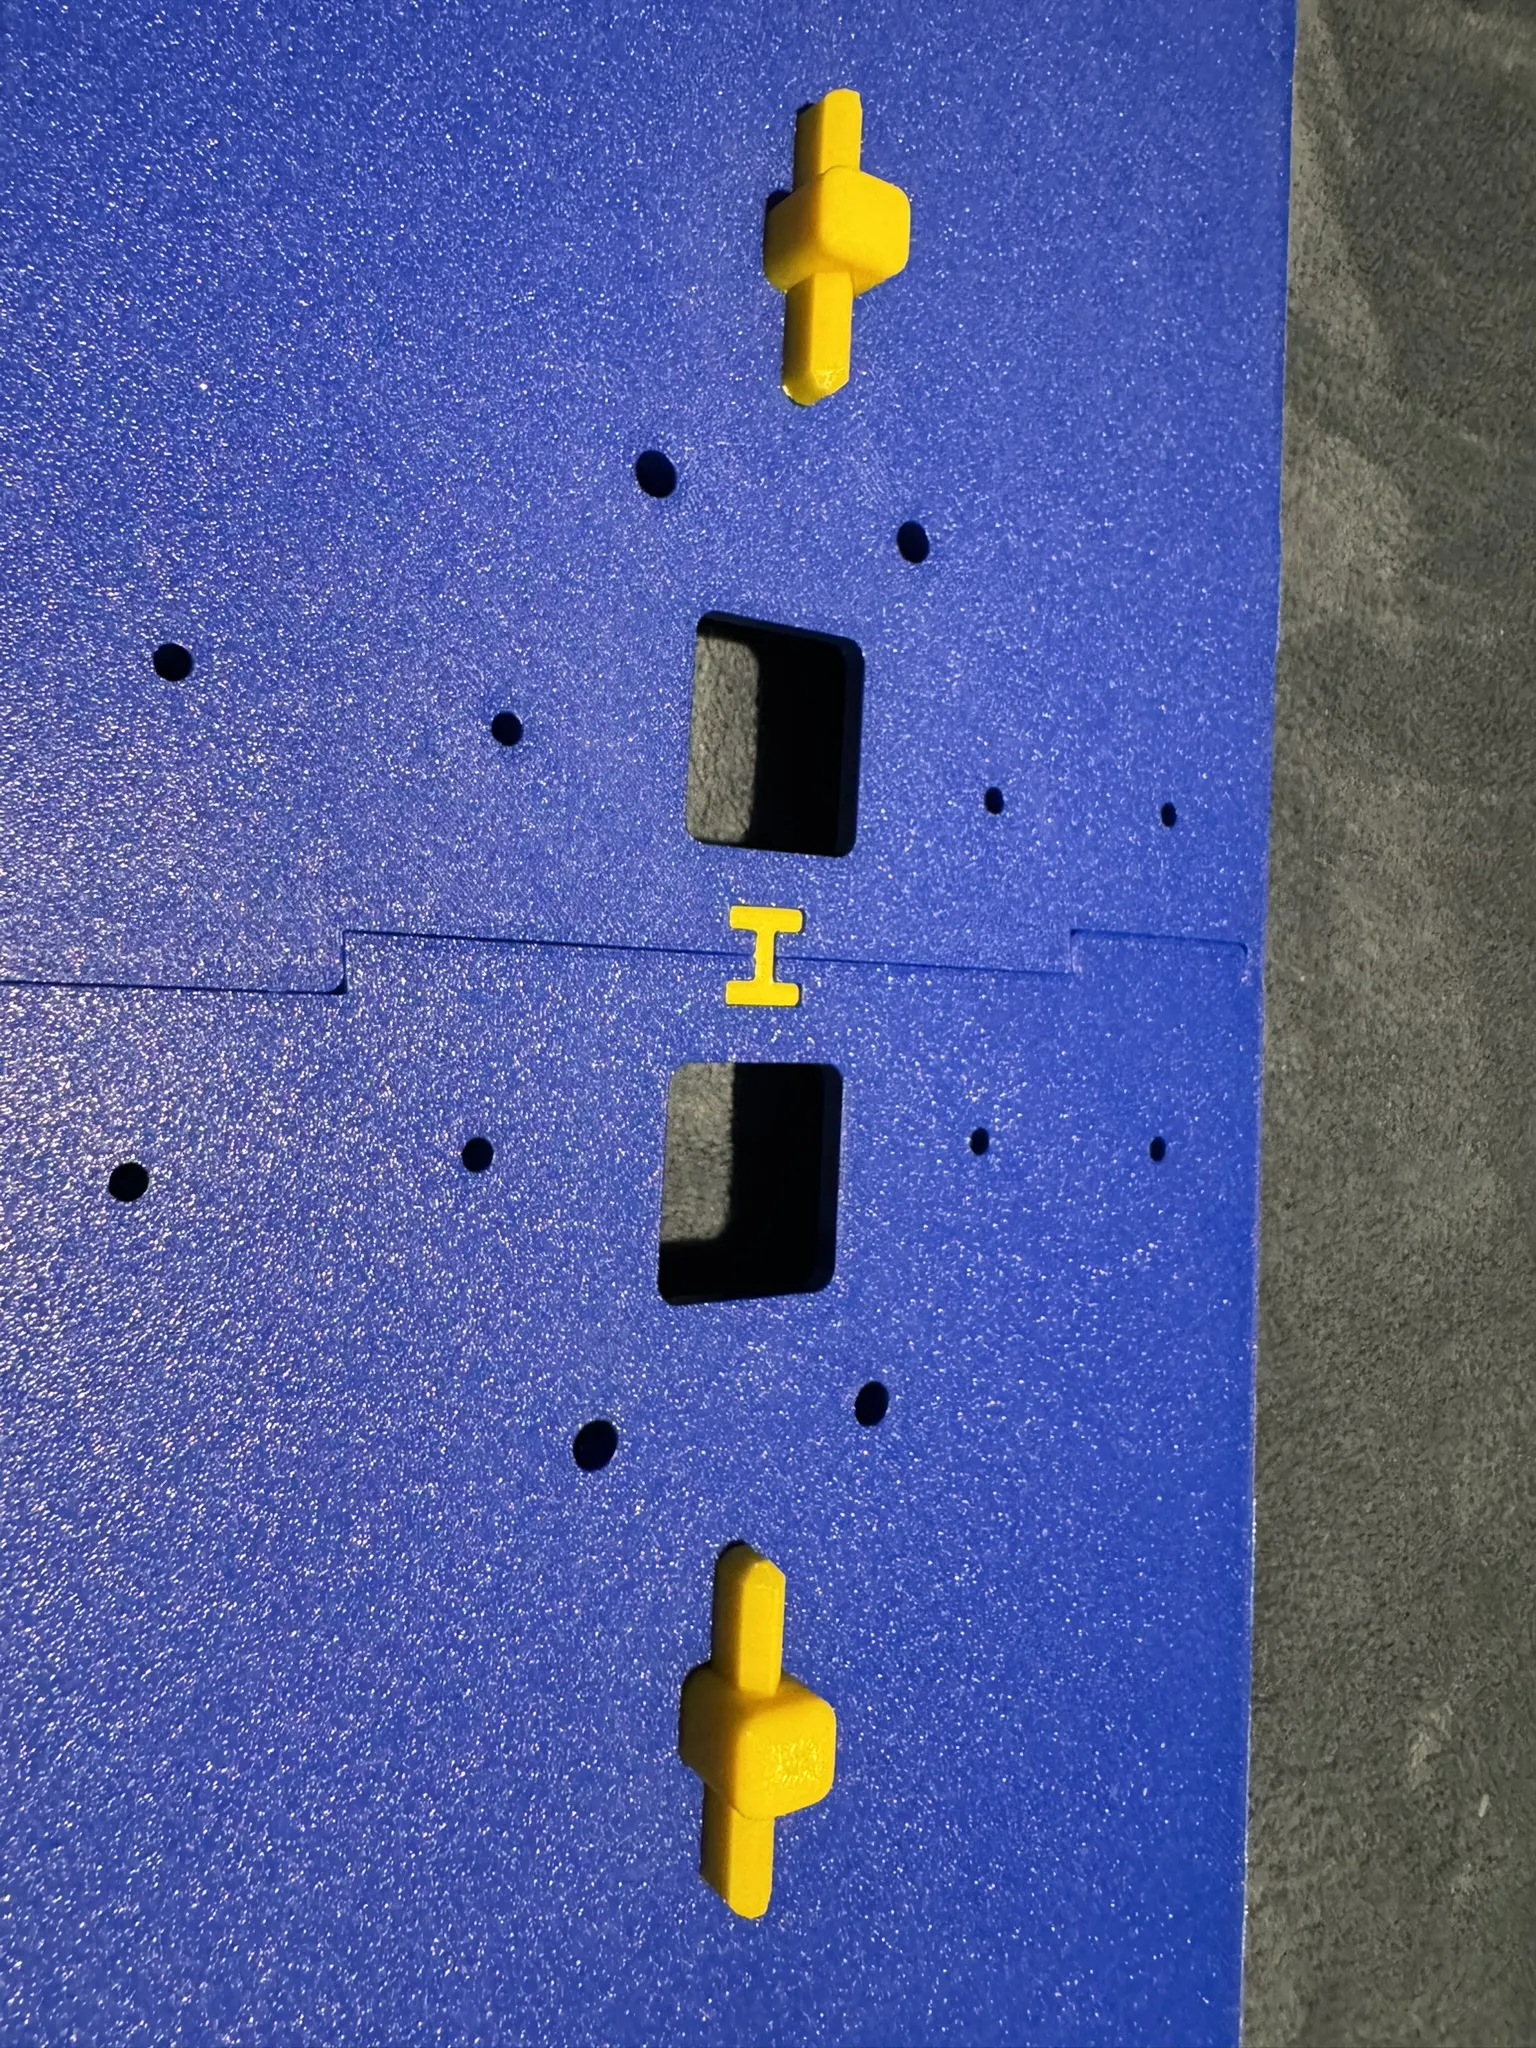
The result should look something like this (But with more clips installed):
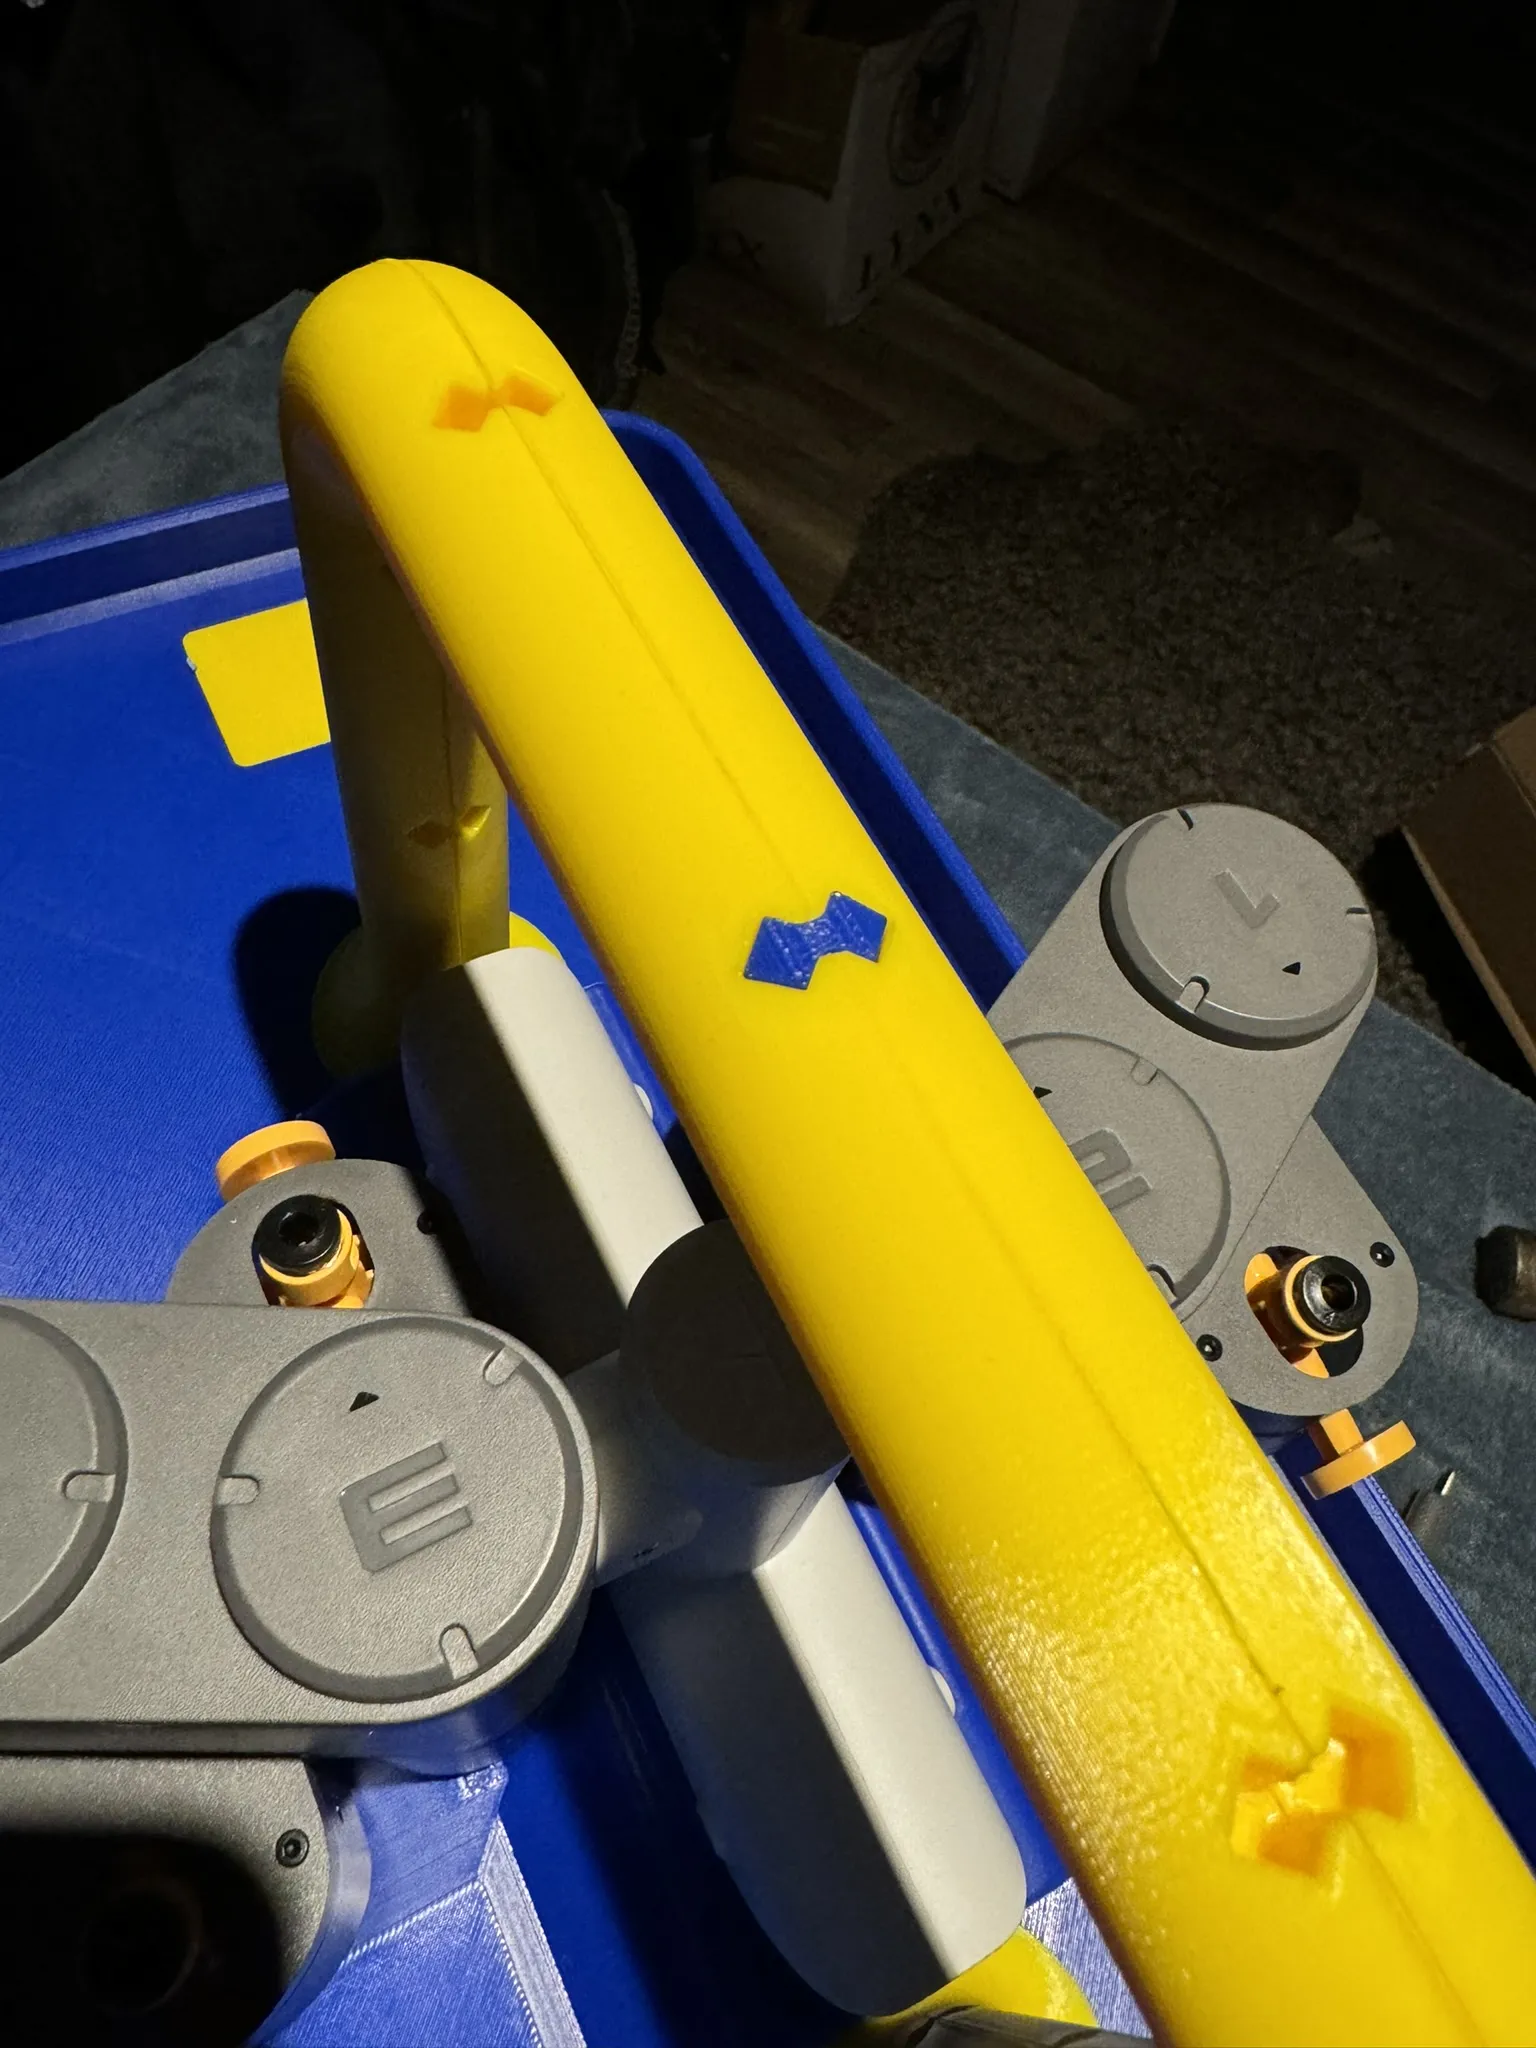
So, final touch. And yes, I know, it contradicts my prerequisites since it adds additional parts, but it is optional;
- For each first stage feeder, put a small PTFE tube trough the main body. It will simplify the loading of filament…
There are some models on the CLIPS & LOCKS & PLUGS plate that you can use to plug unused holes in the base.
Final Notes
If you are to print TPU it is (as you most likely know) not supported by the AMS Lite. In that case remove one of the original rollers from the Sunbu AMS Lite and feed the TPU through one of the standard filament holes of the filadryer S4. The roll will then rest on the original rollers of the S4.
I think I covered all now. If not, let me know….
License

You shall not share, sub-license, sell, rent, host, transfer, or distribute in any way the digital or 3D printed versions of this object, nor any other derivative work of this object in its digital or physical format (including - but not limited to - remixes of this object, and hosting on other digital platforms). The objects may not be used without permission in any way whatsoever in which you charge money, or collect fees.


Comment & Rating (837)