Search models, users, collections, and posts


Bio
Just here to print and create tools/other items to make life more fun.
Achievements

Stellar Reviewer
Rate or Comment 301 different models

Pioneer Maker
Print successful 297 different models and 2,480 hours

MakerWorld Guardian
This badge has expired

Love this decoration. I used Bambu Lab PLA Glow filament. I don't have the lamp LED from Maker's Supply yet, but the light on our TV console lights it up pretty well for now. This is a win with the wife too, so double thumbs up. Great model.

Share
0
0
0
This looks pretty cool in the Bambu Lab PLA Glow filament. I need to charge up the outside with a UV light, but it still looks good with light behind it, too. Very smooth outer finish.

Share
0
0
0
This turned out great with the Bambu Lab PLA Glow. I need to get a white glow-in-the-dark filament though. I had to look it up, but as someone else commented, I was a little confused by the pointy hood on the ghost. From 1990 to 2006 there was a ghost without the point and had a smile on its face. This one was released between 2012 and 2015 (likely when Scooby Doo was released). Now if I could just find the original ghost shroud from the old Castle sets. Again, great model! Thank you.


Share
0
0
0
I had a cardboard spool that looked like it had been dropped or something. There was no way I was putting that in my AMS because it was so uneven and I'd have to babysit it the entire print, so I used this tool to re-spool it onto a Bambu Lab spool. Worked very quickly and easy to assemble. Thanks!
Share
0
0
0
These work great! Just be sure to print in PETG or something more resistant to heat than PLA. Then, these won't fall off as easily in an AMS or in a dryer.
Share
0
0
0
Love this model! A little, "cuter"?.. Still, very detailed and much easier to assemble than some other Demogorgon models out there.
Share
0
0
0
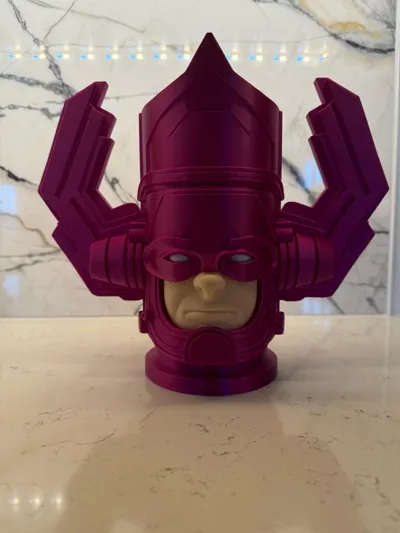
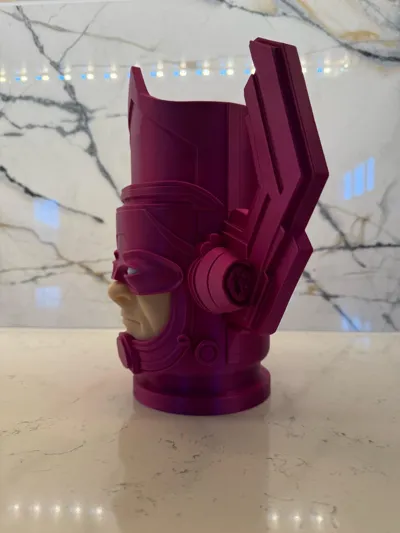
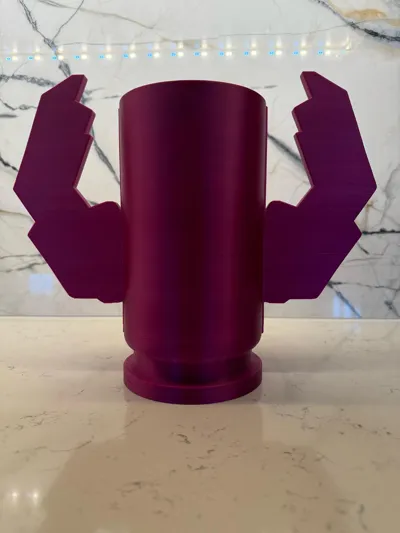
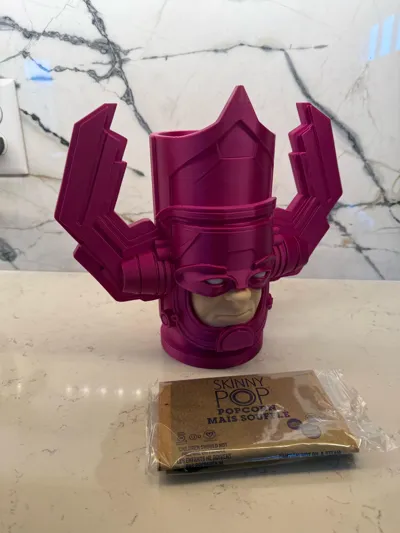
Tried this model with Microcenter’s Inland Silk PLA (Magenta), Inland High Speed PLA (beige), and Bambu Lab PLA Matte (white). This turned out great! I printed this one for my father-in-law and I’ll be printing one for myself soon, too. Compared to video footage of the one they’ll be selling when FF comes out, this one’s not quite as large. But, I love it. If I were to buy the one at the theater, I wouldn’t need/want that much popcorn (it's pretty massive). Plus, that's an overpriced bucket with light-up eyes (in a movie theater). This one will fit a small sized popcorn from the theaters. I did bump the overall size up on mine, too. I uniformly scaled it to an even 250mm on the z-axis. Not a huge bump, but it’s slightly larger.
UPDATE: I printed one for myself (same filaments as listed previously). I opted for the extra long print time by adding quite a bit more infill. I set mine to a 20% Gyroid infill. Added a bit more weight and durability. Not that a popcorn bucket needs it.
Share
0
0
0
The RP2040-zeros fit perfectly in the slots. I modified mine to make the third row of 4 slots one larger slot so I can store some pin headers in there as well. Thanks for the model.
Share
0
0
0
Fits well. Doesn't fit all Louis Ware calipers. I have the digital IP54-rated calipers. The area where you place your thumb to move the calipers back and forth needed a little more room for mine. You might also think that because it's the same brand, the tips (the parts actually used for measuring) would be the same shape/contour. Also not the case for me. Just barely off as you can see in my second photo. Great model. 5-stars because I know it's not specifically for my model of calipers.


Share
0
0
0
Doesn't fit all breadboards of this size. I have the Adafruit breadboard of the same size and the little notches on the outside are just barely in the wrong location. I had to make a couple changes to the original to get mine to fit, but thanks for the model. I know it doesn't specifically say it fits the Adafruit breadboard. Here are a couple photos of the original print with the Adafruit breadboard in case anyone needs to make additional adjustments.


Share
0
0
0
Had an issue with the infill being a different color than the outer body color. Where the eyes and nostrils are, it uses black filament. It also uses the black for the infill when it gets to those areas. When the print is finished, you can see through the 4 walls of the green body and see lightly colored lines where the black was used for infill. The overall print is amazing. I would just make sure the infill is the same color as the body color, or you'll have a striped Pascal. The stripes are easier to see when you don't have so much light shining on it from every angle.
UPDATE: Un-check the box for flush into infill. This fixes the issue I had with the print profile. Wish I'd known that trick before the print. Oh well, hope this helps if the print profile hasn't been updated yet.


Share
0
0
0
This is probably my favorite spool desiccant holder. Love the way you can just remove the smallest piece to fill it and you can leave the rest on the spool. I've only printed about 12 of them so far, but I have more to go. I did rearrange things so 4 complete sets (minus the funnels) fit on one plate. Takes about 10 hours on an X1C. Great model and great print!
Share
0
0
0
Printed this for my nephew. The chain for the chainsaw was kind of a pain to print, but other than that it turned out great

Share
0
0
0
I too had some issues with attaching the joints to the torso. Probably because I used all PETG, though. I ended up reorganizing everything on separate plates by color. I made sure to print the joints first, then I set a pause at layer 52 on the torsos. This allowed me to put all the joints in and turn them so I could resume the print. Once the torsos finish printing, you'll want to turn the joints 90 degrees so you can fit the belt over the torso, joints, and shell. It's a tight fit, but the belts do go on. I also used some acrylic paint markers to give the 80's Ninja Turtle vibe. Make sure to paint the head before putting the masks on if you want different colored eyes. I still need to print my purple mask for Donny. I agree with @IndustrialJones about this being one of the best action figures to print. So simple, easily customizable with colors, and you really only need glue for the mask and nunchucks. Great job and thank you!


Share
0
0
0
This took several attempts to get it to print successfully. I ended up needing a lot of glue for it to stay on the build plate. A couple pieces broke when trying to assemble and had to reprint. Overall, after the headache of several failed prints, the model turned out looking very good. The only suggestion I have would be to maybe try to put all the pieces into a kit so everything's connected, or put everything on a raft to make it easier to print. I think with so many small pieces, if one piece fails, it tends to take at least a few other pieces out before finishing the print. But again, it looks really good after it prints and is assembled successfully. Here's mine in finger-snap position.

Share
0
0
0
Share
0
0
0
No more data