Search models, users, collections, and posts


Achievements

MakerWorld Guardian
This badge has expired

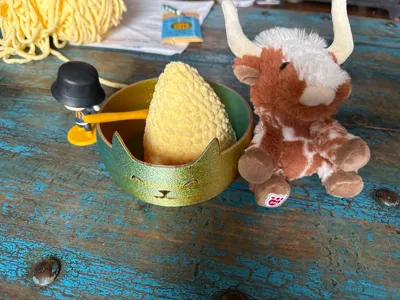
printed in tricolor silk PlA.
some of the supports in the fine detail areas was difficult to remove, but I was using a new brand filament and may not have been perfectly dialed in.
My daughter loves it and I think it came out great
Share
0
0
0
Share
0
0
0
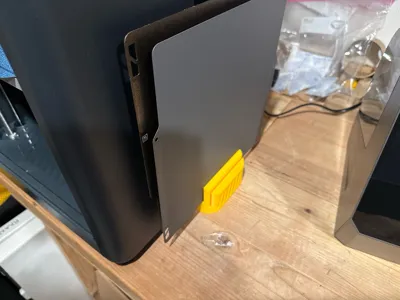
fit great in the and
Share
0
0
0
Share
0
0
0
Share
0
0
0
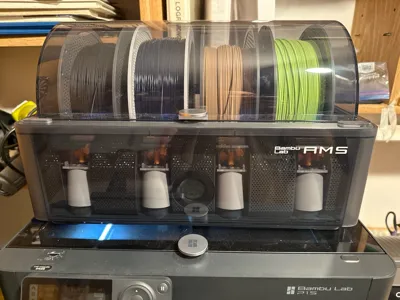
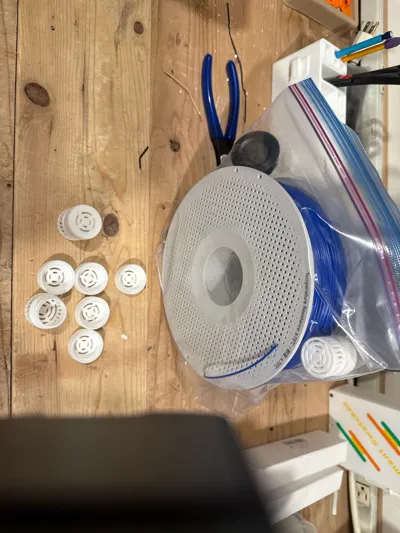
so far I have done the small 15mm bottles in PLA Jade white. perfect in single ziplocks with a spool.
Share
0
0
0
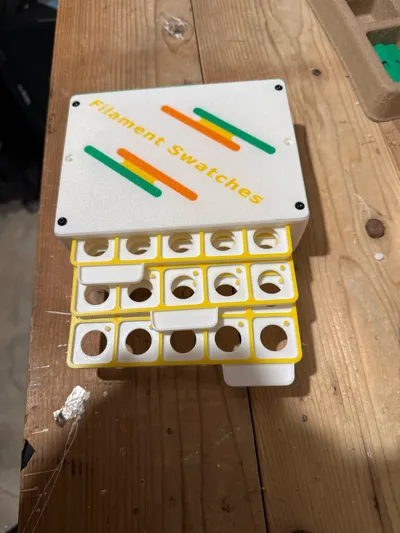
for assembly, really only need a single M3x8 on each corner
use self-tapping screws or heat inserts, my print was not threaded on the screw hole.
I will go back and use inserts + printed screws
Share
0
0
0
Share
0
0
0
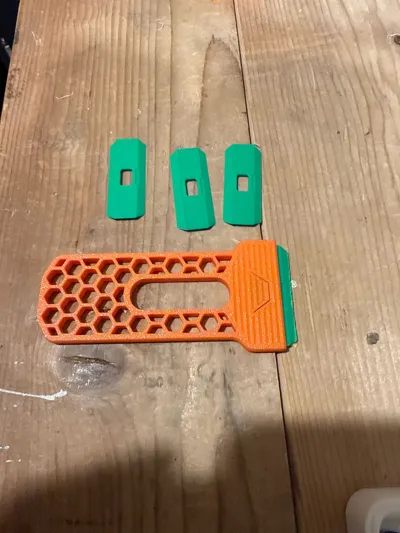
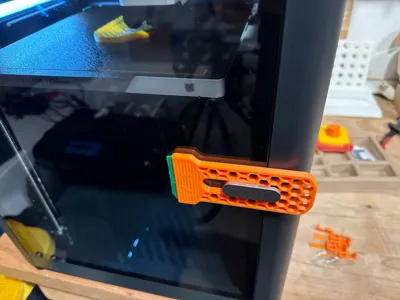
Share
0
0
0
great print
challenging to set the wrenches in the handle due to tight clearance.
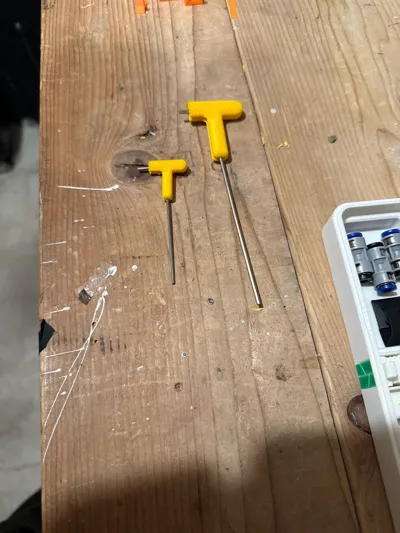
Share
0
0
0
print was great
I’m not using the default scraper print, so it didn’t lock in as I hoped
My issue, not the print
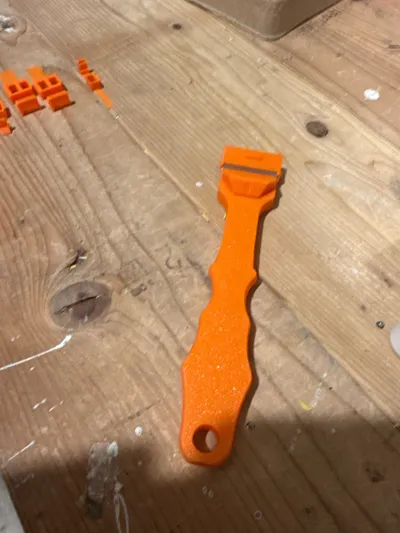
Share
0
0
0
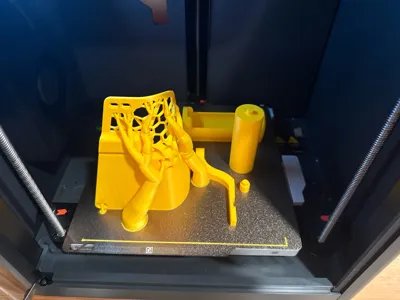
Inenof my first print on the P1S. Everything fit up nicely with zero issues.
Share
0
0
0
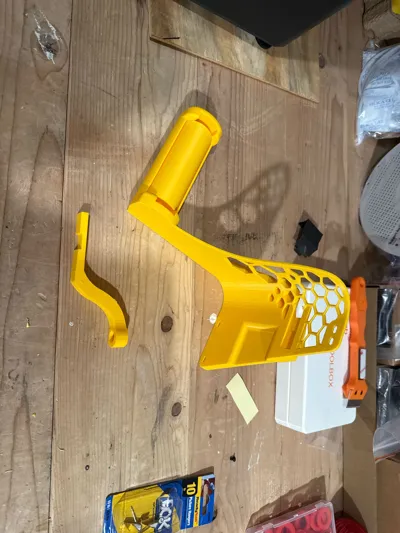
Fantastic print. Zero problems and clean. used the door handle version with no alterations.
Share
0
0
0
Share
0
0
0
Share
0
0
0
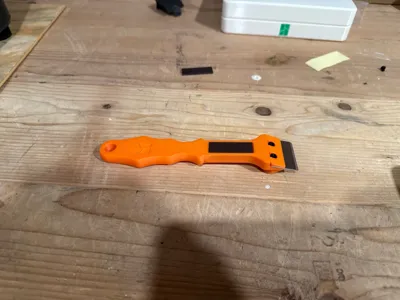
So far, so good.
Nice angle on the blade
Wish the holders were included on the same plate to delete or add as you want.
Share
0
0
0
Great print, clean and really quite nice.
Filament was Bambu PLA basic
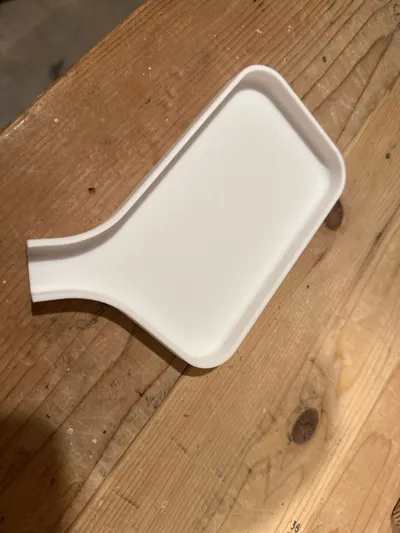
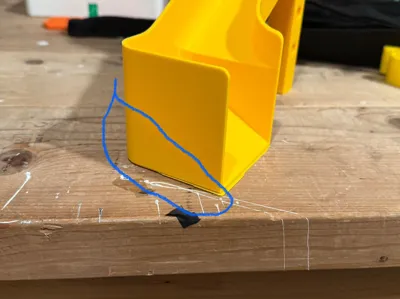
One area I may attempt as a first mod is the bottom of the ramp circled in blue. it is all internal build up and can probably open that with void space to reduce (a small) amount of filament used and print time.
I had supports turned on for Tree(auto) at 25% due to the warning on plate 1. My P1S never saw a need and printed with no supports.
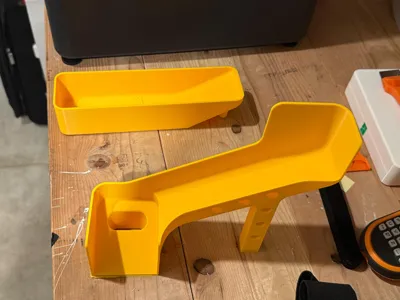
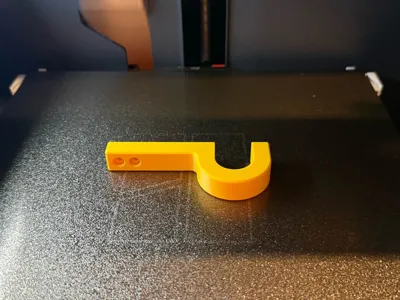
Share
0
0
0
saving for myself
The Journey from Idea to Object — Part I
Many of you have asked about the tools and processes behind the projects I share. It’s a journey that blends thought, technology, and a bit of personal preference. So, I wanted to offer a look into my current workflow, from the initial spark of an idea to the tangible object. Keep in mind, these are the tools that work for me; your own path and preferences might lead you to different solutions.The Genesis of an Idea: Low-Tech BeginningsProjects usually begin in one of two ways: a personal need, something I feel could be improved in my own daily life, or through interactions within our community — often not even directly related to 3D printing.Unlike many, I intentionally avoid extensive market research during the very early stages; in fact, I do none. My reasoning is straightforward: discovering existing solutions too soon can sometimes stifle creativity or, worse, halt a project before it even begins. If you find something “good enough” or seemingly better, the motivation to develop your own unique approach can diminish. By not initially knowing what’s already out there, I find that the mind is freer to explore unconventional paths. This effort in ideation can lead to novel concepts.Creating this mental “isolation” isn’t always easy; it’s almost a meditative practice, requiring a clear mind. In this phase, I steer clear of most technology. A simple pencil and paper, or anything that allows ideas to flow onto a physical medium with minimal friction, is key. The goal is to remove any barriers between thought and its initial capture.A potential solution might appear in seconds, or it could take days. I generally don’t spend more than an hour at a time intensely focused on a single problem if nothing emerges. If I hit a wall, I switch to another pending project. For me, having multiple projects running concurrently is vital to prevent creative burnout.There is one digital companion that’s almost always with me during this phase, so much so that I almost forgot to mention it: an e-ink tablet. I use a device from Boox (the specific model isn’t critical, as I’ve used various similar devices over the years). They offer great convenience and the assurance that my notes won’t get lost, unlike loose paper.Some notes I’ve taken for the Tower Crane projectNurturing the Spark: Selecting and Developing ConceptsThe process of selecting which idea to pursue is quite organic, without formal strategies like SWOT analysis or other formal methods. I simply continue to nurture the project, and often the most viable solution emerges somewhat unexpectedly — sometimes during a dedicated sketching session, but more often than not, breakthroughs happen between 2 and 4 a.m. or while I’m in the shower. These seem to be moments of heightened focus, curiously often when I’m not actively thinking about the problem at hand. This isn’t to suggest anything mystical; these insights don’t always pan out, so it’s far from any new-age formula.This phenomenon, often termed ‘diffuse thinking,’ is well-documented in creative practices. After periods of intense, focused effort on a problem, stepping away allows the subconscious mind to continue processing information and making connections in a less linear fashion. It’s during these moments of mental relaxation — showering, walking, or drifting off to sleep — that the analytical filters lower, and novel associations can surface, often leading to those ‘aha!’ moments. Cultivating this balance between focused work and allowing for mental downtime has become an indispensable part of my problem-solving rhythm.Once a seemingly viable solution takes shape, I try to detail as many aspects as possible. This, after the initial creative burst, is the part I enjoy most. It’s a very relaxing process, and I believe everyone should experience it. The further away from the computer, the better at this stage, as that’s where friction can start to creep in.This intensive detailing phase, even before touching CAD, serves as a crucial form of ‘mental prototyping.’ By trying to anticipate challenges and functionalities on paper or in simple sketches, I can often identify potential flaws or areas for improvement early on. However, it’s a truism in design that the journey from concept to physical object is rarely linear. The first idea, no matter how well-detailed, is seldom the final one. Embracing iteration not as a setback, but as an integral and enlightening part of the development cycle, is key to refining a design towards its optimal form and function. This mindset also helps in managing the ‘friction’ when it does appear, viewing it as a puzzle to be solved rather than a roadblock.It’s also at this stage that I might try to refine a sketch or two and the notes I’ve been taking, to make sure the process is documented more thoroughly. If I don’t do this, I know I won’t be able to pick up the process again if there’s a more prolonged interruption. So, before committing to full-scale CAD, I usually use Concepts for more refined digital sketching, and sometimes it helps to further explore forms and interactions, as you can see in one of my previous posts here:Rack4All project — Available at makerworld.comRefining the Vision: Digital Sketching and CADWhen it’s time to bring the project into the digital realm with precision, my go-to CAD tool is Autodesk Fusion. It has everything I need, but more importantly, I enjoy using it and am thoroughly familiar with its environment. A CAD tool, much like a pen, should feel like an extension of your hand. While the friction inevitably increases at this stage, the heavy conceptual lifting is largely complete; now it’s about execution. It’s very important to know how to use your tools well in the creative process. They shouldn’t get in your way.Fusion HomeMany ask why Fusion 360… I started with Solidworks back in 1998 and still use it academically — yes, it’s been a while! This extensive experience is invaluable. I rarely have to stop for long to think about how to create a specific shape, even organic ones. Years spent with Solidworks, 3DStudio, Blender, and even Cinema4D — working with surfaces and solids in Solidworks and Sub-D modeling with the others — have given me the foundation to use Fusion 360 intuitively. But don’t get me wrong, Fusion is one of the easiest programs to use that I know, and that’s probably why it’s so often recommended for people who are just starting out.What initially drew me to Fusion was its price, along with its versatile modeling capabilities. It supports traditional solid modeling (which accounts for over 90% of my publicly available work), T-splines (similar to SubD modeling in Blender or 3DStudio), surfaces (though perhaps not as powerful as Solidworks in this specific area), and mesh manipulation.Autodesk Fusion — Surface modeling area Working with meshes, once a rarity for me, became essential after I acquired a 3D scanner. I use a Revopoint Mini2. This device is why many of the parts I design fit your printer components like a glove. For more complex parts, I rely on this scanner, primarily for taking measurements and extracting geometry. I often say that for someone unfamiliar with 3D scanning, the device can be a new source of problems. However, once mastered, it becomes an indispensable tool that saves a significant amount of time.Scanned object already with the solid overlay in Fusion Optimizing the Workflow: Peripherals and Ergonomics in CADTo further reduce friction and enhance the CAD experience, I rely on peripherals from 3Dconnexion.SpaceMouse EnterpriseCadMouse Pro WirelessKeyboard Pro with NumpadThe complete kit from 3DConnexion I know these are premium devices, but I consider them a worthy investment. The integration with CAD systems is deep and well-executed. People who watch me work often comment on how quickly models seem to “appear.” These devices are a big reason for that speed. Another critical factor is ergonomics. While I try to limit my time at the computer, multi-hour sessions are sometimes unavoidable. Poor posture over the years can lead to serious musculoskeletal issues, like cervical hernias and other “gifts,” in addition to common wrist problems. I often say, “First the wrists, then the back.” This one side of my workspace On my back, I have some of my machines (some stuff I had to blur from the picture since it is stuff that is a very early stage of development). These peripherals are also application-aware; even within CAD software, the shortcut keys can change depending on the active workspace. While other peripherals with similar functionalities exist, I haven’t found any with this level of integration in CAD tools. Beyond CAD, they integrate with many other applications, including Bambu Studio, displaying specific icons for different functions — a nice touch. My positive experience makes me happy to share this, though I’m not trying to sell anything. In the past, I might have argued that I could achieve similar performance with a standard mouse and keyboard, and to some extent, that’s true. But from an ergonomic standpoint, these devices are hard to beat. In short, certain peripherals can create a more immersive and sometimes even enjoyable environment. For me, this is my choice.Macro tools for Bambu StudioFrom Virtual to Physical: The Printing ProcessOnce the digital model is ready, it’s time to make it real. This is where 3D printing comes in, and the software I use to interface between the virtual model and the physical printer is Bambu Studio and the broader Bambu Suite.The new Bambu SuiteEven as the design takes shape in the CAD environment, considerations for the eventual 3D printing process are already at play. The choice of material, and model geometry— can subtly influence design features like wall thickness, tolerances, or even overall geometry. Similarly, anticipating aspects like print orientation to maximize strength, minimize supports, or achieve a certain surface finish are often part of the digital sculpting phase. Thinking about these manufacturing constraints early on doesn’t stifle creativity; rather, it channels it towards solutions that are not only innovative but also viable and practical to produce with the chosen technology. This foresight helps streamline the transition to the physical realm and reduces the number of purely print-related iterations.What about machines? My primary printers are from Bambu Lab:H2D Combo LaserA1 ComboOccasionally, I also use my Prusa MK4 with the MMU3These machines are just tools that finalize the conversion from the initial ideation to the actual physical thing, of course, and others will have their own trusted hardware.Crafting the Narrative: Content CreationAfter producing the physical parts and verifying that everything works as intended (which, despite all care, isn’t always the case on the first try), it’s time to prepare the content for sharing. This typically involves photographs, computer-generated images (renders) from the CAD models, and, of course, the descriptive texts.The phases that make part of creating a thing for 3D printingFor creating renders, I’ve been using Blender. I try to maintain consistent parameters for a uniform look. There are other tools I could use in this department, but Blender is free and offers professional results, provided you know how to export the model correctly from Fusion to Blender — otherwise, topological chaos can ensue. As with other points, I won’t detail this process, as such information is widely available.A render image of the tower Crane without any material and scene applied The power of render can create situations that will be very difficult to obtain with a photographic process Returning to my initial notes, I begin writing the descriptions in my native language, Portuguese. For translation, I use Google’s LLM, Gemini (as of this writing, version 1.5 Pro, which is a significant leap from its predecessor). Those reading this in the future will likely chuckle, as these LLMs are evolving at a doubly exponential rate. This isn’t an excuse, but perhaps some of you will forgive a few errors in my English descriptions. I must confess my difficulty with English expression; it’s something I’ve always struggled with, and it’s always been quite challenging for me to express myself verbally this way. However, I believe this will soon be a thing of the past with AI, judging by what I saw at the last Google I/O ’25 Keynote. This might become a problem of yesteryear, but I’m still waiting to see.Google Meet with real-time translation already available Conclusion: The Evolving Creative JourneyAnd that, in essence, is my current journey from concept to creation. It’s an evolving process, and the tools change over time, but the core desire to build and share remains constant.
While these tools and methods form the backbone of my current workflow, there’s a rapidly evolving domain that promises to reshape many aspects of the creative process: Artificial Intelligence. Having touched upon its use in translation, the broader implications of AI in design and fabrication deserve a dedicated discussion.In the next article, I’ll delve deeper into my thoughts on AI’s emerging role in the creative sphere, exploring its potential, the challenges it presents, and the complex questions it raises for creators like us. Stay tuned for Part 2, where we’ll explore this fascinating and sometimes contentious topic.
Note
This is part of what I have on my blog: https://designrepcom.com/ which, despite being on Medium, is free, and it's where I usually publish. If you find it interesting and would like to occasionally receive information about what I'm doing, among other things, you would be very welcome as a member.
(Edited)
Share
1
0
0
No more data