Search models, users, collections, and posts

wuguigui
@wuguigui
8.8 k
83.6 k
148.4 k
75.3 k
Social Media Links
Bio
Show original
Commercial license:https://www.patreon.com/WUGUIGUI/membership Models synchronized to the international station have been transferred to the Chinese station account: WUGUIGUI Salute to Makes
Achievements

MakerWorld Guardian
Active more than 20 days out of last 30 days UTC time

Contest Winner
Won 4 model contest awards.

Featured Creator
19 models are featured by MakerWorld.

Maker's Supply Contributor
10 models with Maker's Supply Model Kit achieves 500 successful prints.

Popular Model
4 models more than 5,000 successful prints.

Popular Creator
More than 1,000 followers.
Pinned Models
Recent Article
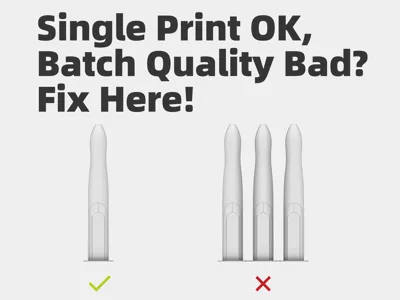
Single Print OK, Batch Quality Bad? Fix Here!
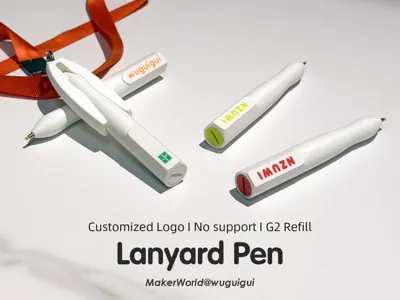
Single Print OK, Batch Quality Bad? Fix Here! #PrintClinicI designed this Lanyard Pen for exhibitions and public events, so I needed to print a whole batch at once. During my initial tests with a single pen, the surface was incredibly clean and smooth. However, when I cloned it to print multiple pieces, an ugly artifact appeared on the upper section of the logo tag on every single pen, as shown in the image below. Whether I printed two or ten, the issue persisted as long as there was more than one pen on the build plate. I tweaked numerous settings and tested the print on different machines, including the H2D, P2S, and P1P, but nothing worked. That was until I found a solution.While reviewing the different color schemes in Bambu Studio, I noticed that the biggest difference between printing one pen versus multiple pens was the print speed. The single-layer print speed for one pen was significantly slower than for multiple pens, as shown in the two images below. This made me realize the issue must be cooling-related: when printing multiple pieces, the nozzle moves too fast and spends too little time on each layer, leaving the cooling fan insufficient time to cool each layer properly. Since cooling-related settings are typically modified within the filament profile (which is saved locally to the user's device), the best way to embed this fix directly into the print profile was to adjust the model's process settings instead. I added a modifier (Cylinder) to the problem area of each pen and lowered the print speed within that modifier to the values shown in the image(The cylinder modifier above is used to add a fuzzy skin to the model). After slicing, the print speed in that specific zone matched the speed of a single-pen print. Then, I ran a test.The results were perfect! The issue was completely resolved. What’s even better is that when printing three pens, using the modifier only added 9 minutes to the total print time—a negligible impact. Finally, I can mass-produce this pen! If you run into a similar issue, give this method a try!
How I designed the "Mushroom Clicker"?
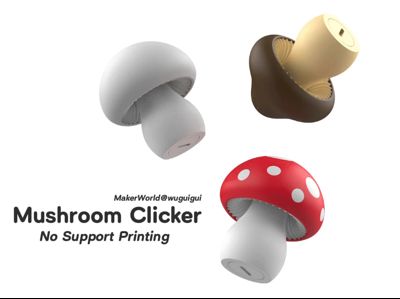
How I designed the "Mushroom Clicker"?Hi guys! Recently, I uploaded a series of “Clicker” models, and I am thrilled to see so many people downloading and giving them high ratings. Thank you all so much for your incredible support! Today, I wanted to share an article explaining how I designed the Mushroom Clicker.The Spark of an IdeaI actually got the idea while designing my “Retractable Ballpoint Pen - G2 Refill.” I realized that a 3D-printed retractable mechanism could serve as the core functional part of a clicker toy. This is quite different from most common clicker toys on the market, which typically rely on mechanical keyboard switches. Intrigued by the concept, I set out to design something unique.Why a Mushroom?Mushrooms have always been a favorite design theme of mine—as you might have noticed from my previous models, like the Mushroom Lamp, Mushroom House Lamp, Mushroom Bottle, Cozy Christmas Mushroom House Lamp, Mushroom Jar, and Mushroom Lamp A&B for LED 001 Kit, etc. Naturally, I decided to tackle a mushroom clicker first.Designing for "No Supports" (Exterior)A mushroom’s cap usually features a rounded edge. However, to avoid the need for print supports, I chose not to make the cross-section perfectly round. Instead, I designed it with a specific sloping angle right from the start, as shown in the image below.While the shape on the right can be successfully printed without supports, it often yields poor results in the first few layers, if your printer's cooling isn't powerful enough. Because of this, sticking to the geometry on the left is always my preferred choice.Optimizing the Interior GeometryI applied this same "no support" philosophy to the inside of the mushroom cap. As you can see in the image below, the internal shape uses a series of flat, sloping lines rather than a direct offset of the curved outer surface. This gradual, angular transition allows the printer to span the curved ceiling cleanly without any drooping or support material.Remarkably, even though the slope angle at the very top drops to just 18 degrees, it prints flawlessly. Keep in mind that the ideal angle for support-free printing isn't a fixed number. It depends heavily on your printer's capabilities, your specific filament, and your cooling settings. The key is to keep testing and modifying your design until it works perfectly.Solving the Assembly ChallengeConnecting the mushroom cap, gills, and stem presented a unique challenge. Initially, I planned to use a threaded structure to screw all the parts together. However, I quickly realized that because people actively fidget with clicker toys, a threaded connection would easily unscrew and come apart during use.To fix this, I modified the connection structure to a snap-fit design, as you can see in the image below. Additionally, because the snap-fit slot is hidden inside the cap and cannot be seen during assembly, I added a guide bar to the gills section. This bar not only helps align the parts perfectly but also doubles as a structural stiffener.Customized Installation ToolsTo make assembling the snap-fit parts easier, I designed a specialized installation tool. The zigzag shape on the outer ring of this tool perfectly matches the zigzag shape on the mushroom stem. This ensures that if you use a hammer to knock the stem into position, the impact won't damage the zigzag shape. I have tested this assembly method nearly a hundred times, and not a single component has been damaged by a hammer strike. This is the story behind the design of the Mushroom Clicker! If you would like to read more of my design stories and behind-the-scenes insights, please let me know in the comments. Check out my other articles here:How I Made the Assembly GuideHow I Designed the CyberBrick 4WD CarHow to design screw hole for a CyberBrick Project How to design a Wind-Up model with a model tool
Congratulations to all the winning Creators!
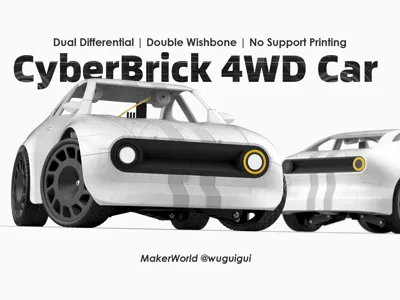
Congratulations to all the winning Creators! Congratulations to all the winning Creators!I also want to thank every creator who participated in the competition I hosted.Aside from the winners, there were so many other creative and outstanding entries. Since the number of awards is limited, I unfortunately couldn't recognize every single deserving piece. Many authors submitted multiple entries, which is something I took into consideration during the judging process. Now, let’s take a look at these fantastic winning works!  The Best Design AwardCyberBrick 4X4 Unmanned Wheeled Excavatorby 瘋子般の小白"This model perfectly integrates the chassis of my CyberBrick 4x4 Off-Roader with a brilliantly engineered remote-controlled excavation mechanism. The model instruction page is equally exquisite and detailed. It is truly an unparalleled masterpiece that well deserves the 'The Best Design Award'!" — @wuguigui The Best Creative AwardMini Cargo Van RC body-based on wuguiguiby KunLing"The creator submitted two entries that are both highly creative and expressive. Their ingenious concepts have significantly expanded the versatility of my CyberBrick 4WD Car chassis. Beyond the exquisite presentation and assembly manuals, the model photography stands out as the best among all entries. Truly deserving of the 'Most Creative Award'!" — @wuguigui @wuguigui's Pick Award4x4 Explorer Kit for Mini Off-Roaderby occultfullelo"A tasteful modification of my CyberBrick 4X4 Off-Roader, this model adds a winch, lighting, and polished detailing to achieve a pro off-road aesthetic. The high-quality images, videos, and clear attention to detail are exceptional. This level of attitude truly impressed me." — @wuguigui Body Shell Spotlight AwardCyberBrick 4WD Armoured Car armored car model no AMS for A1 miniby 会打酱油的酱油"This model makes excellent use of the CyberBrick 4WD Car chassis, featuring a compact structure and an ingeniously designed rotatable turret. It is a rare gem in the Body Shell design category!" — @wuguigui Further muscularized creation based on the wuguigui CyberBrick 4x4 carby YYcc"This model creatively reimagines the body kits and hood of my CyberBrick 4WD Car, adding a sport-style rear wing that delivers a powerful visual impact. It seamlessly integrates with the original design language, showcasing the creator's exceptional design skills and aesthetic mastery." — @wuguigui Excellent Participation Award GIFSplit Headlight for CyberBrick 4WD Car / Wuguiguiby ArnosjeJurassic Park 4x4 Mini Off Roader & Rigid Tiresby BG3D15X-Honeycomb Pattern_OD96 for D49 RIMby Lmaker_GKit Mad Max - pour le 4x4 Mini Off-Roaderby LaLoutreCyberbrick Little Bug - Body only for 4WD chassisby 3DJPThe Cyber Garageby oSPARKSo Finally, a huge thank you once again to everyone who submitted their creations!Salute to Makes