Simple Differential


Print Profile(1)
Description
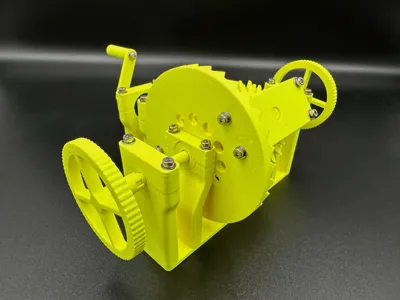
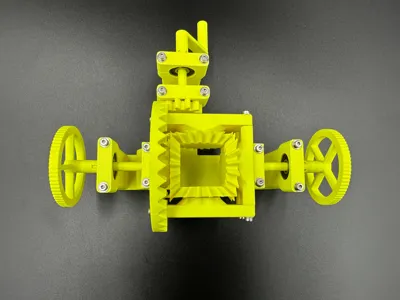
This is a working model of a basic differential intended either as just a fun model or for educational purposes.
I designed this so I could learn how to make gears for use in future projects. The gears were made in FreeCAD and imported into Shapr3D for the rest of the modelling.
Required Parts
- 8x 625 bearings
- 21x M2 ruthex inserts
- 8mm M2 screws
- 12mm M2 screws
- 21x M2 washers
Printing
The model is designed to be printed directly on the print bed with no supports. Note that I have printed this in silent (i.e. slow) mode to prevent the tall thin objects potentially falling over. I used a 0.4 nozzle with a 0.2mm layer height for everything, and printed the above model using Extrudr NX-2 neon yellow.
Assembling
Ruthex Inserts
| 12 of the inserts go in the holes in the top of the main body: |  |
| One insert goes in the end of the handle: |  |
| Two inserts go in each end of these two sides (total 4). |  |
| Two inserts in each end of this part (total 4). |  |
Plastic Inserts
| The insert with the smaller hole in the middle goes in the middle of the crown gear. |  |
| The insert with the larger hole goes in this part. |  |
Bearings Part 1
Push bearings into the following parts:
 |  |  |  |
Main Mechanism
Take both the bevel gears with the long axels and insert them into these parts:
 |  |
Take the bevel gears with the short axels and insert them into these parts:
 |  |
Now position the rear and one of the side pieces as so with the gears still inserted, and connect them with 2x M2x12 screws and washers.
Do the same for the opposite side. |  |
| Position the assembly next to the crown gear as pictured and connect with 4x M2x8 screws and washers. |  |
| Before putting the assembly into the main body, slide a bearing over each axel. It should be inserted into the outer-most support on each side. |  |
Attach the clamps, ensuring that the grooves in the axels align with the outer clamps.
The outer ones use 2x M2x12 screws each and the inner ones M2x8. Use washers. |  |
| Align the wheels carefully and push fit them gently onto the end of the axels. Apply pressure from the middle of the corresponding bevel gears if necessary. |  |
Finally…
| Slide two bearings over the axel connected to the involute gear. |  |
| Align and gently push fit the arm to the end of the axel. |  |
| Attach the handle with an M2x8 screw and a washer. |  |
| Carefully place the assembly in place. Ensure the groove in the axel is aligned with the clamp, then screw the clamps in place. |  |
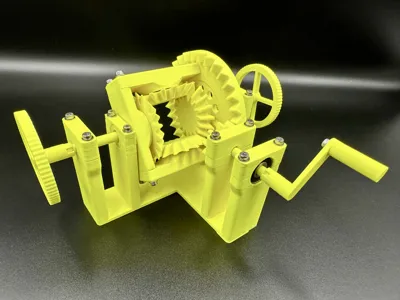
Congratulations, you should have a working differential!
Versions
2023.11.23: Initial version.
Support
If you like our work please consider joining our club on Printables!
License
You shall not share, sub-license, sell, rent, host, transfer, or distribute in any way the digital or 3D printed versions of this object, nor any other derivative work of this object in its digital or physical format (including - but not limited to - remixes of this object, and hosting on other digital platforms). The objects may not be used without permission in any way whatsoever in which you charge money, or collect fees.
Comment & Rating (3)