IIDX Structure Mini Controller


Print Profile(1)

Bill of Materials

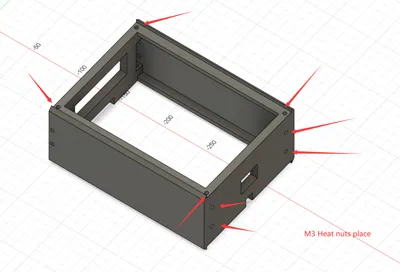
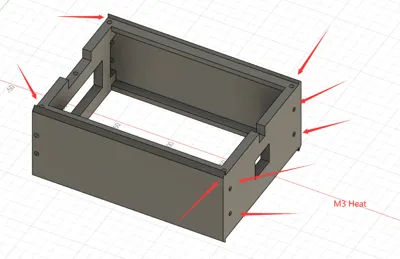
- M3*5*4.5 Heat Staking Insert Brass Nut x 54: M3*5*4.5热熔螺母
- M3*18mm Screws x 4: M3*18mm螺丝
- M3*14mm Screws x 36: M3*14mm螺丝
- M3*10mm Screws x 10: M3*10mm螺丝
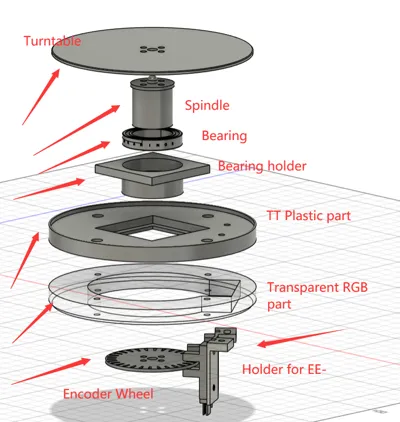
- EE-SX3009 optoelectronic switch x 2: EE-SX3009 光电开关
- 6805-2RS Bearing x 1: 6805-2RS轴承
- 1mm Flat felt round 125*125mm x 1: 1mm 圆形毛毡 125*125mm
- 12mm Metal round button x 3: 12mm 金属圆形自复位按钮
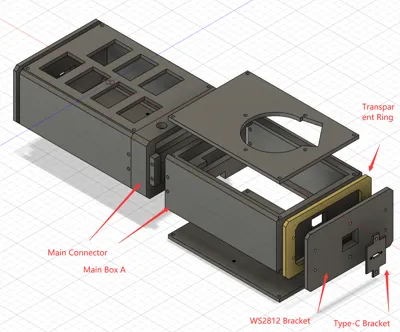
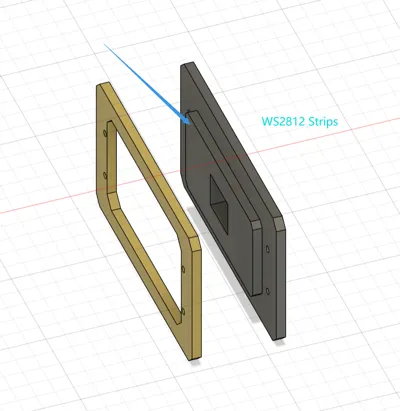
- Option:2M Thin size WS2812 Light strips x 1: 2M 窄版 WS2812 灯带
- Option:M3 rubber feet x 4: M3橡胶脚垫
Description
Hello everyone, I'm MiCCA. This is my first time trying to share my work.
Some of the descriptions are using Google Translate. If there are any errors, please DM Discord @Micca233. Thank you very much.
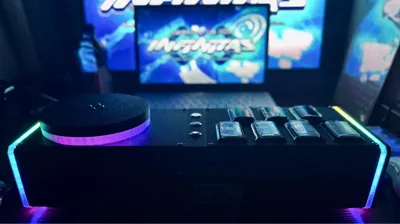
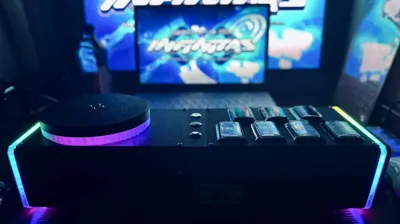
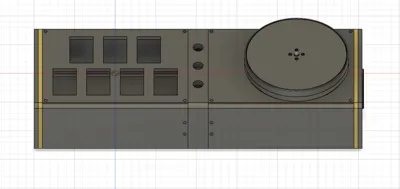
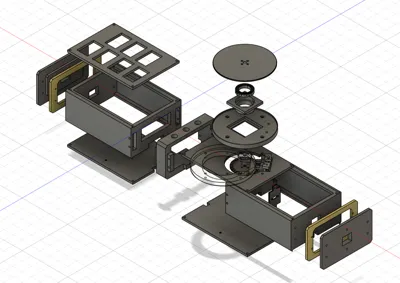
This is a fully modular beatmania IIDX style MINI size controller. It is still under development. Some models or files may change in the future. The building guide is also under development, so it may be a bit messy to read.
The largest part requires a 180mmX180mm print bed. It is compatible with all Bambu Lab printers.
This is only a case and turntable. If you want to make it work (IO board, circuit...), you can visit https://rhythm-cons.wiki/w/Beatmania_IIDX for some help. You can also join the best rhythm game controller DIY community - Cons&Stuff on Discord: https://discord.gg/fknwz8s
You need the following non-3D printed parts:
M3*5*4.5 Heat Staking Insert Brass Nut - 54pcs
M3*18mm Screws - 4pcs
M3*14mm Screws - 36pcs
M3*10mm Screws - 10pcs
EE-SX3009 optoelectronic switch - 2pcs
6805-2RS Bearing - 1pcs
1mm Flat felt round 125*125mm - 1pcs (You can customize a same size 1mm PTFE if you are rich)
12mm Metal round button - 3pcs (Release and bounce back version)
Optional:
Thin size WS2812 Light strips - 2m (If you like fancy light effect) (maximum 5mm in width)
M3 rubber feet - 4pcs (It depends on whether you prefer to install rubber feet or attach adhesive rubber feet instead)
Most buttons are compatible: Sanwa/Samduck/Chinese clone
The lamp holder connector... You may have to choose crimp connectors with an angle to fit in the controller. I haven't tested straight crimp connectors before.
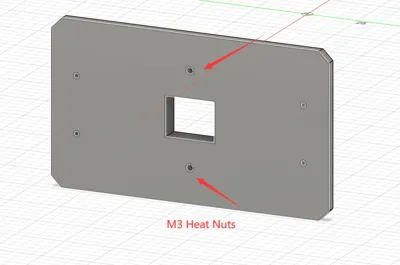
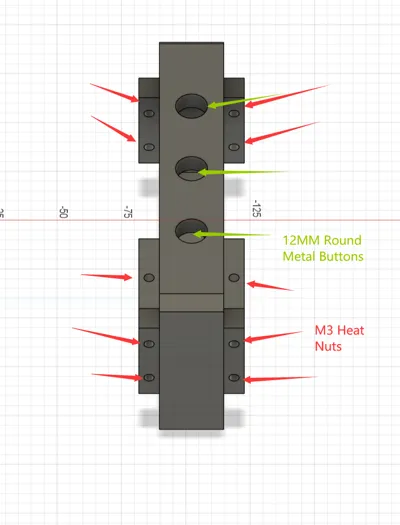
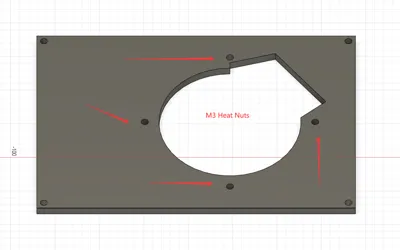
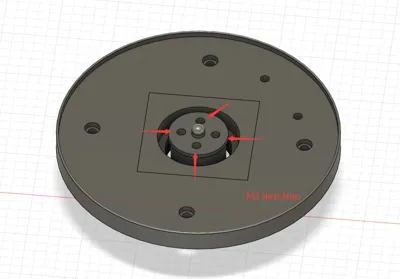
Hopefully, these images clearly show how to build this controller.
The encoder mount for the turntable is still under development... If you have any good ideas to improve this controller, feel free to DM me or talk in Cons&Stuff. You can also message me on QQ: 1098423808
I'm using Speedypotato's code to run this controller: https://github.com/speedypotato/Pico-Game-Controller?tab=readme-ov-file. I didn't design any IO board holder for this controller so.... You can make any IO board you want if it fits into this controller.
Hope you enjoy this DIY project and build!
Comment & Rating (0)