Customizable NFC Timer Cases + Programming Guide


Print Profile(2)


Bill of Materials


Description
Hello!
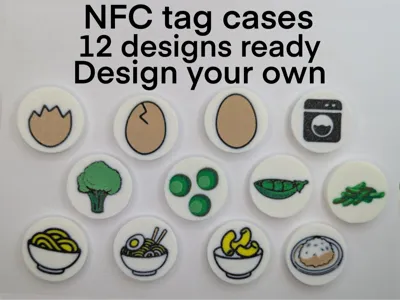
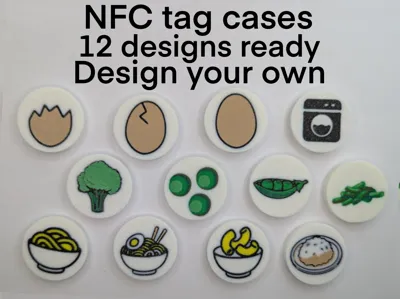
I’m autistic, and I like finding ways to make everyday tasks easier for myself. I often forget things like how long vegetables, pasta, or eggs need to boil or whether I turned on the laundry machine, so I made these NFC tag cases to help me set quick timers with a simple tap.
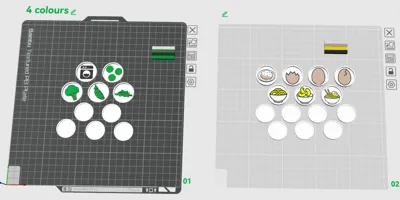
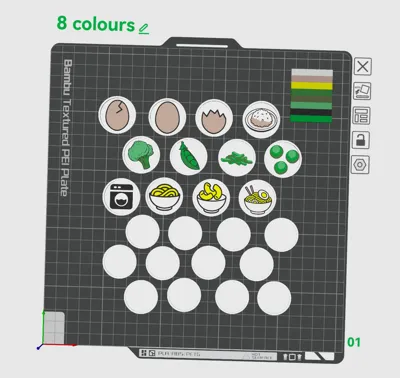
I love adding color to my prints, so I designed both a 4-color version and an 8-color version (for dual AMS users). I printed mine with a 0.4 mm nozzle, but you could get more detail with a 0.2 mm if you prefer.
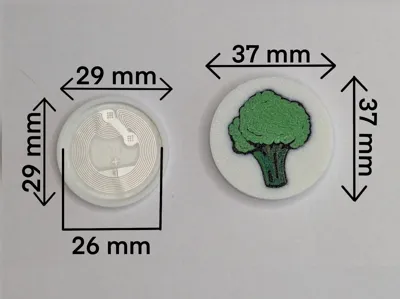
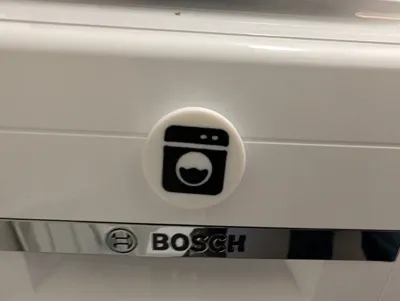
I’ve already made cases for vegetables, eggs (whole egg for hard boild, Cracked egg for medium and half a egg for soft), pasta, rice, and my laundry machine. I used double-sided tape to stick the kitchen ones inside my cabinet and the laundry one directly on the machine.
The cool part? These cases are fully customizable. You can make your own versions using the online image-to-keychain tool in MakerLab, and program the tags however you like. I hope this project helps you or someone you know.
Happy printing! 🛠️✨
Boost Me (for free)
If you like this model, I'd really appreciate it if you gave it a boost and followed me here on MakerWorld!
NFC tag (Android)
Download the app
Go to the Play Store and download NFC Tools.
- Open the app
Tap the “Tasks” tab at the top. - Add a timer task
- Tap “Add a task”
- Tap the magnifying glass icon and search for “Timer”
- Select “Timer” from the list
- Set the time you want (check packaging or Google for how long your food/laundry takes)
- Tap OK
- Write the tag
- Now you'll see your timer task listed
- Tap “Write”
- Hold your NFC tag against the back of your phone
- Test it
- After writing, tap the tag again with your phone
- If it asks you to download NFC Tasks, do that
- Try again to see if the timer starts
- Insert the tag
- If everything works, stick the tag into the case
- Snap on the cap
- Stick it where you need it — done!
Note: I don't have an Apple phone, so I can't test if this works with iOS. If you try it, let me know how it goes!

How to Create a Custom NFC Tag Design
- Find or Create Your Image
You can either search for an image online or design your own. Make sure it has a white or single-color background for best results. - Go to Makerworld
Head to Makerworld.com and go to MakerLab. - Open Image to Keychain
Start a new project in Image to Keychain and upload your image. - Choose Shape and Adjust Settings
By default, the shape will be a circle — keep it as is. Make sure the background is on, and leave a bit of white space around the edges to avoid any interference. Set the image thickness to 2 mm, then click Confirm. - Pick Your Colors
Decide how many colors you want for your design. Play around with the options until you're happy with the look. - Go to Plate & Thickness
Hover over the first arrow in the top bar and click on Double-sided. (like in the picture) - Export as 3MF
Once your design is ready, export the project as a 3MF file. - Open the Customize File
Open the Customize file found in the print profiles (this is your base NFC case setup). Import Your Image
Add your keychain 3MF file to the third plate. When prompted, choose “Import geometry only”, then click OK.
- Sync Your AMS and Fine-Tune Colors
Sync your AMS with your selected colors. You can also go into Objects and tweak the individual colors until you're happy with the result. Scale Your Image
Turn Uniform Scale off, then resize the model to match the example shown below.
- Lay Image on the Print Bed
Go to "Lay on Face" and click on the front of your image. If done correctly, the front will be lying on the bottom. Move to Coordinates
With the image selected, click Move and enter the coordinates as shown below. This ensures that everything lines up properly.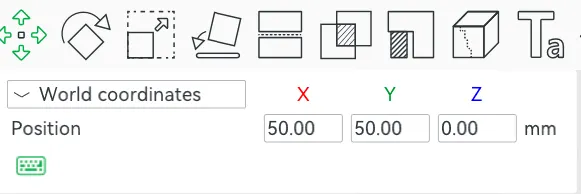
Duplicate for Multiple Cases
If you're making more than one tag, duplicate the ring first.
Move the duplicate to the same coordinates.
If done correctly, it will look like the picture below.

Merge the Model
Right-click the plate, choose Select All.
Then, right-click the model and choose Merge.
Arrange for Printing
If you're only printing one, slide the bottom part over to plate 1 and print.
If printing more, move each complete model to a new plate and repeat the process.
- Assemble Your NFC Tag
After printing and programming the tag, place it inside the case, snap the top on, and you're done!
License
You shall not share, sub-license, sell, rent, host, transfer, or distribute in any way the digital or 3D printed versions of this object, nor any other derivative work of this object in its digital or physical format (including - but not limited to - remixes of this object, and hosting on other digital platforms). The objects may not be used without permission in any way whatsoever in which you charge money, or collect fees.
Comment & Rating (0)