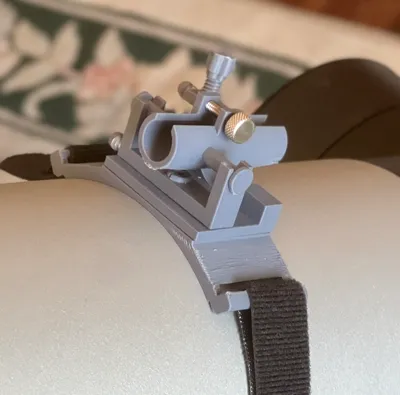
TWO AXIS Laser pointer mount for telescopes


Print Profile(1)

Bill of Materials
- knurled head screw: #8-32 9/16 x 1:
- polybands x 4:
- Velcrostrap x 1:
Description
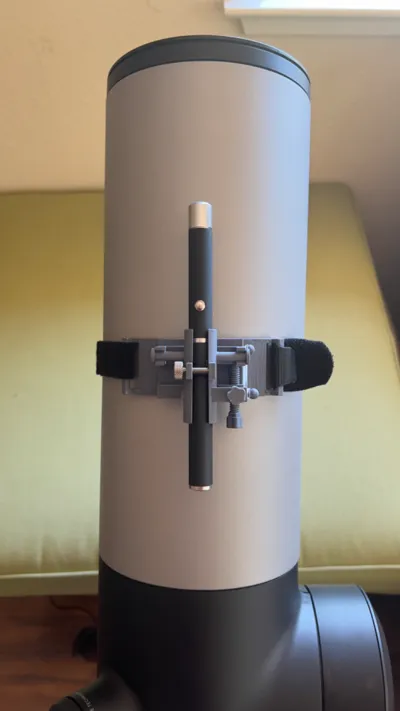
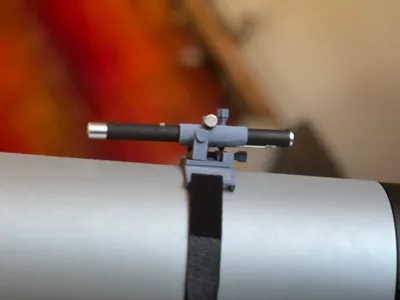
laser pointer mount for telescopes.
Why? This mount uses only two axis to pointer the laser: up/down and left/right. Can't get any more simple and easy to use than that!
This one is designed for typical laser pointers running AAA batteries, between 12.5 and 13.5mm in diameter. It may fit slighter bigger/smaller sizes too.
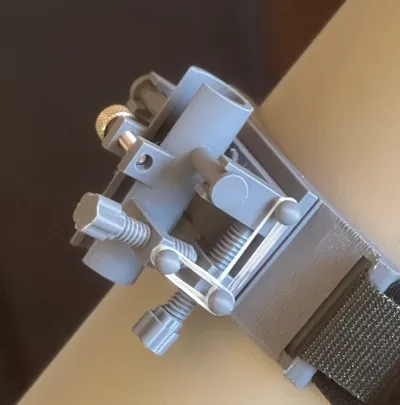
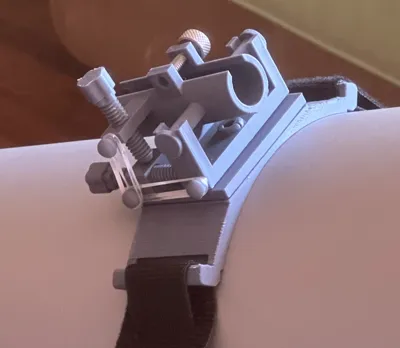
Although the design looks complicated, mounting is super simple, and aiming is super simple as this design uses only 2 axis: left/right and up/down. no more fiddling with 3 screws to move the pointer's aim!
Post-Printing
Designed for minimal support structures, but requires some assembly
•Models posted are specifically fit to Unistellar's telescopes with a diameter of 144mm. I can easily modify this (or anything else) to fit your OTA
• Pick only one of the laser pointer holder files to print, depending on where the pointer's pocket clip is in relation to the laser pointer's on/off button.
• A bolt clamps the laser pointer snuggly. This is knurled head screw: #8-32 9/16"
• Small rubber bands are used to keep looseness or "play" at a minimum, sold at CVS as "One+Other" brand, Secure Hold clear hair bands. I found these searching for "poly bands"
• Once printed and supports cleaned up, pieces all snap together.
• Ok, I admit there is a step where hot glue comes in very handy: The "platform" and "OTA mount" parts are hot-glued together. Hot Glue on PLA is essentially permanent.
• You can use any strap to attach to the telescope OTA, but I found some inexpensive basic velcro steps at home depot. I did have to cut off the end, reverse it and hot-glue it back together, but that makes it work perfectly.
• included is a ring that slides over your laser pointer's on/off button. A simple twist of the ring and it locks your laser "on." Twist it again to turn it off.
Comment & Rating (11)