Modular Cake Builder Game


Print Profile(1)

Description
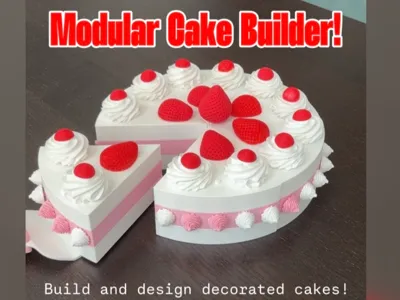
Build and Design Your Own Decorated Cake!
A modular cake-building kit featuring stackable cake layers and interchangeable decorations such as whipped cream, cookies, fruits, candies, and more. Mix and match components to create endless unique cake designs!
Perfect for imaginative play, creativity, and hands-on fun. The set encourages fine motor skill development, problem-solving, and experimentation while allowing children and adults alike to create beautiful custom cakes.
The kit also includes candy pieces with letters that can be used for reading and word-building activities.
Link to a demonstration video!
Standard Usage Warning & Disclaimer
This model contains small parts that may present a choking hazard. Not suitable for children under 3 years of age. Adult supervision is required during use. The creator assumes no responsibility for any injury, damage, or misuse resulting from the use of this model.
Modeling Info & Disclaimer
Onshape was used for the main cake structure and design, including the layers, frosting objects, the pry tool, pins, etc.
Also used: Nomad for specific cosmetic updates on the organic decorations; Bambu Studio primitive shapes was used to model the candies, and pinholes. Image to 3D was used for specific decorations like the cream and cookies.
Setup Guide
You do not need to print every object or plate. Simply print the parts you like and create your own custom set.
Refer to the attached images for more, visual info on the setup steps.
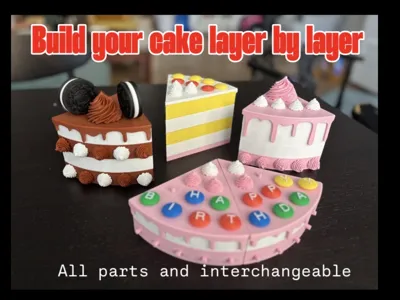
Cake Layers (Plates 1–3)
The first three plates contain the main cake layers:
Plate 1: Standard cake layer with smooth side surfaces for a clean, elegant appearance.
Plate 2: Cake layer with side pinholes that allow decorations to be attached around the sides.
Plate 3: A thinner version of the layer from plate 2, typically can be used used as a cake base.
Note: You do not need to print all six duplicates of each layer section. You can start with just a single segment (1/6 of a cake) if desired. The six-piece sets are provided simply to make it easier to print a complete cake. For reference, for most of the the cakes shown in my demonstrations, I printed plate #1 twice and plate #2 once. This creates a full three-layer cake.
Frostings (Plates 4–6)
Three frosting ("ganache") variants are included. They differ in the amount of frosting that drips over the edge and the number of pinholes on the top surface This allows a wide variety of decoration layouts and cake designs. The frosting version with 10 pinholes is particularly suitable for birthday-style cakes with many small decorations and candies.
Pins and Pinholes
Pins and pinholes are used to attach decorations to the cake layers and frosting pieces. This approach is chosen because it: reduces print time; improves strength and durability; makes decorations easy to swap; allows tolerance adjustments for different printers and materials. Yet, a small amount of assembly is required.
Installing the Pins
The cake layers and frosting plates already include the required pins - you do not need to print the pins separately.
Insert the pins into the pinholes on the cake or frosting.
Important: Each pin has two different ends:
Thicker end → inserts into the cake or frosting
Thinner end → receives the decoration
If the pin feels loose in the cake, you likely inserted it backwards.
Some force may be required to put the pin into the cake/frosting. A small amount of glue can be used for stronger installation.
Reference Image: Inserting a pin into a pinhole on a frosting.

Pin Lengths
Two pin lengths are provided: 7 mm pins for top frosting surfaces; 9 mm pins for side decorations on cake layers.
The longer pins provide additional grip for side-mounted decorations.
Pin Tolerance Information
Most pinholes in the cake, frosting, and decorations are designed with a 5.0 mm diameter.
The pins have two ends: Thick side: 4.9 mm; Thin side: 4.7 mm. This design creates a secure fit between the cake and the pin; A smoother fit between the pin and the decoration. This allows decorations to be removed and repositioned easily while keeping the pins firmly attached to the cake.
Because printer calibration and filament types vary, fit may differ slightly. If the pins are too loose or too tight, you can scale the pins slightly in your slicer OR contact me and I can add additional pin-size variants. I would love to hear how it works on your printer!
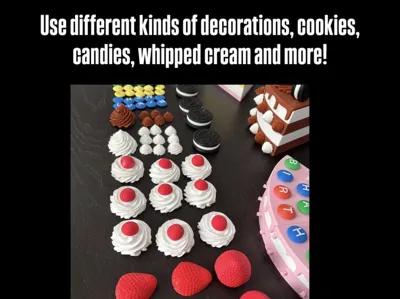
Cookie Decorations
Two Oreo-style cookie sets are included. Each set consists of: Two cookie biscuits; One cream filling piece.
Option 1 – Double-Sided Cookie
Create a “sandwich” cookie by gluing both biscuits to the cream piece. Attach the cookie to the cake using the side pinhole in the cream section.
Option 2 – Single-Sided Cookie
Glue a single biscuit to the cream piece. You can then attach it using either: The side pinhole; The top face center pinhole.
Reference image: one cookie sandwitch with pinhole at the side; One single sided cookie with pinhole at the top surface.
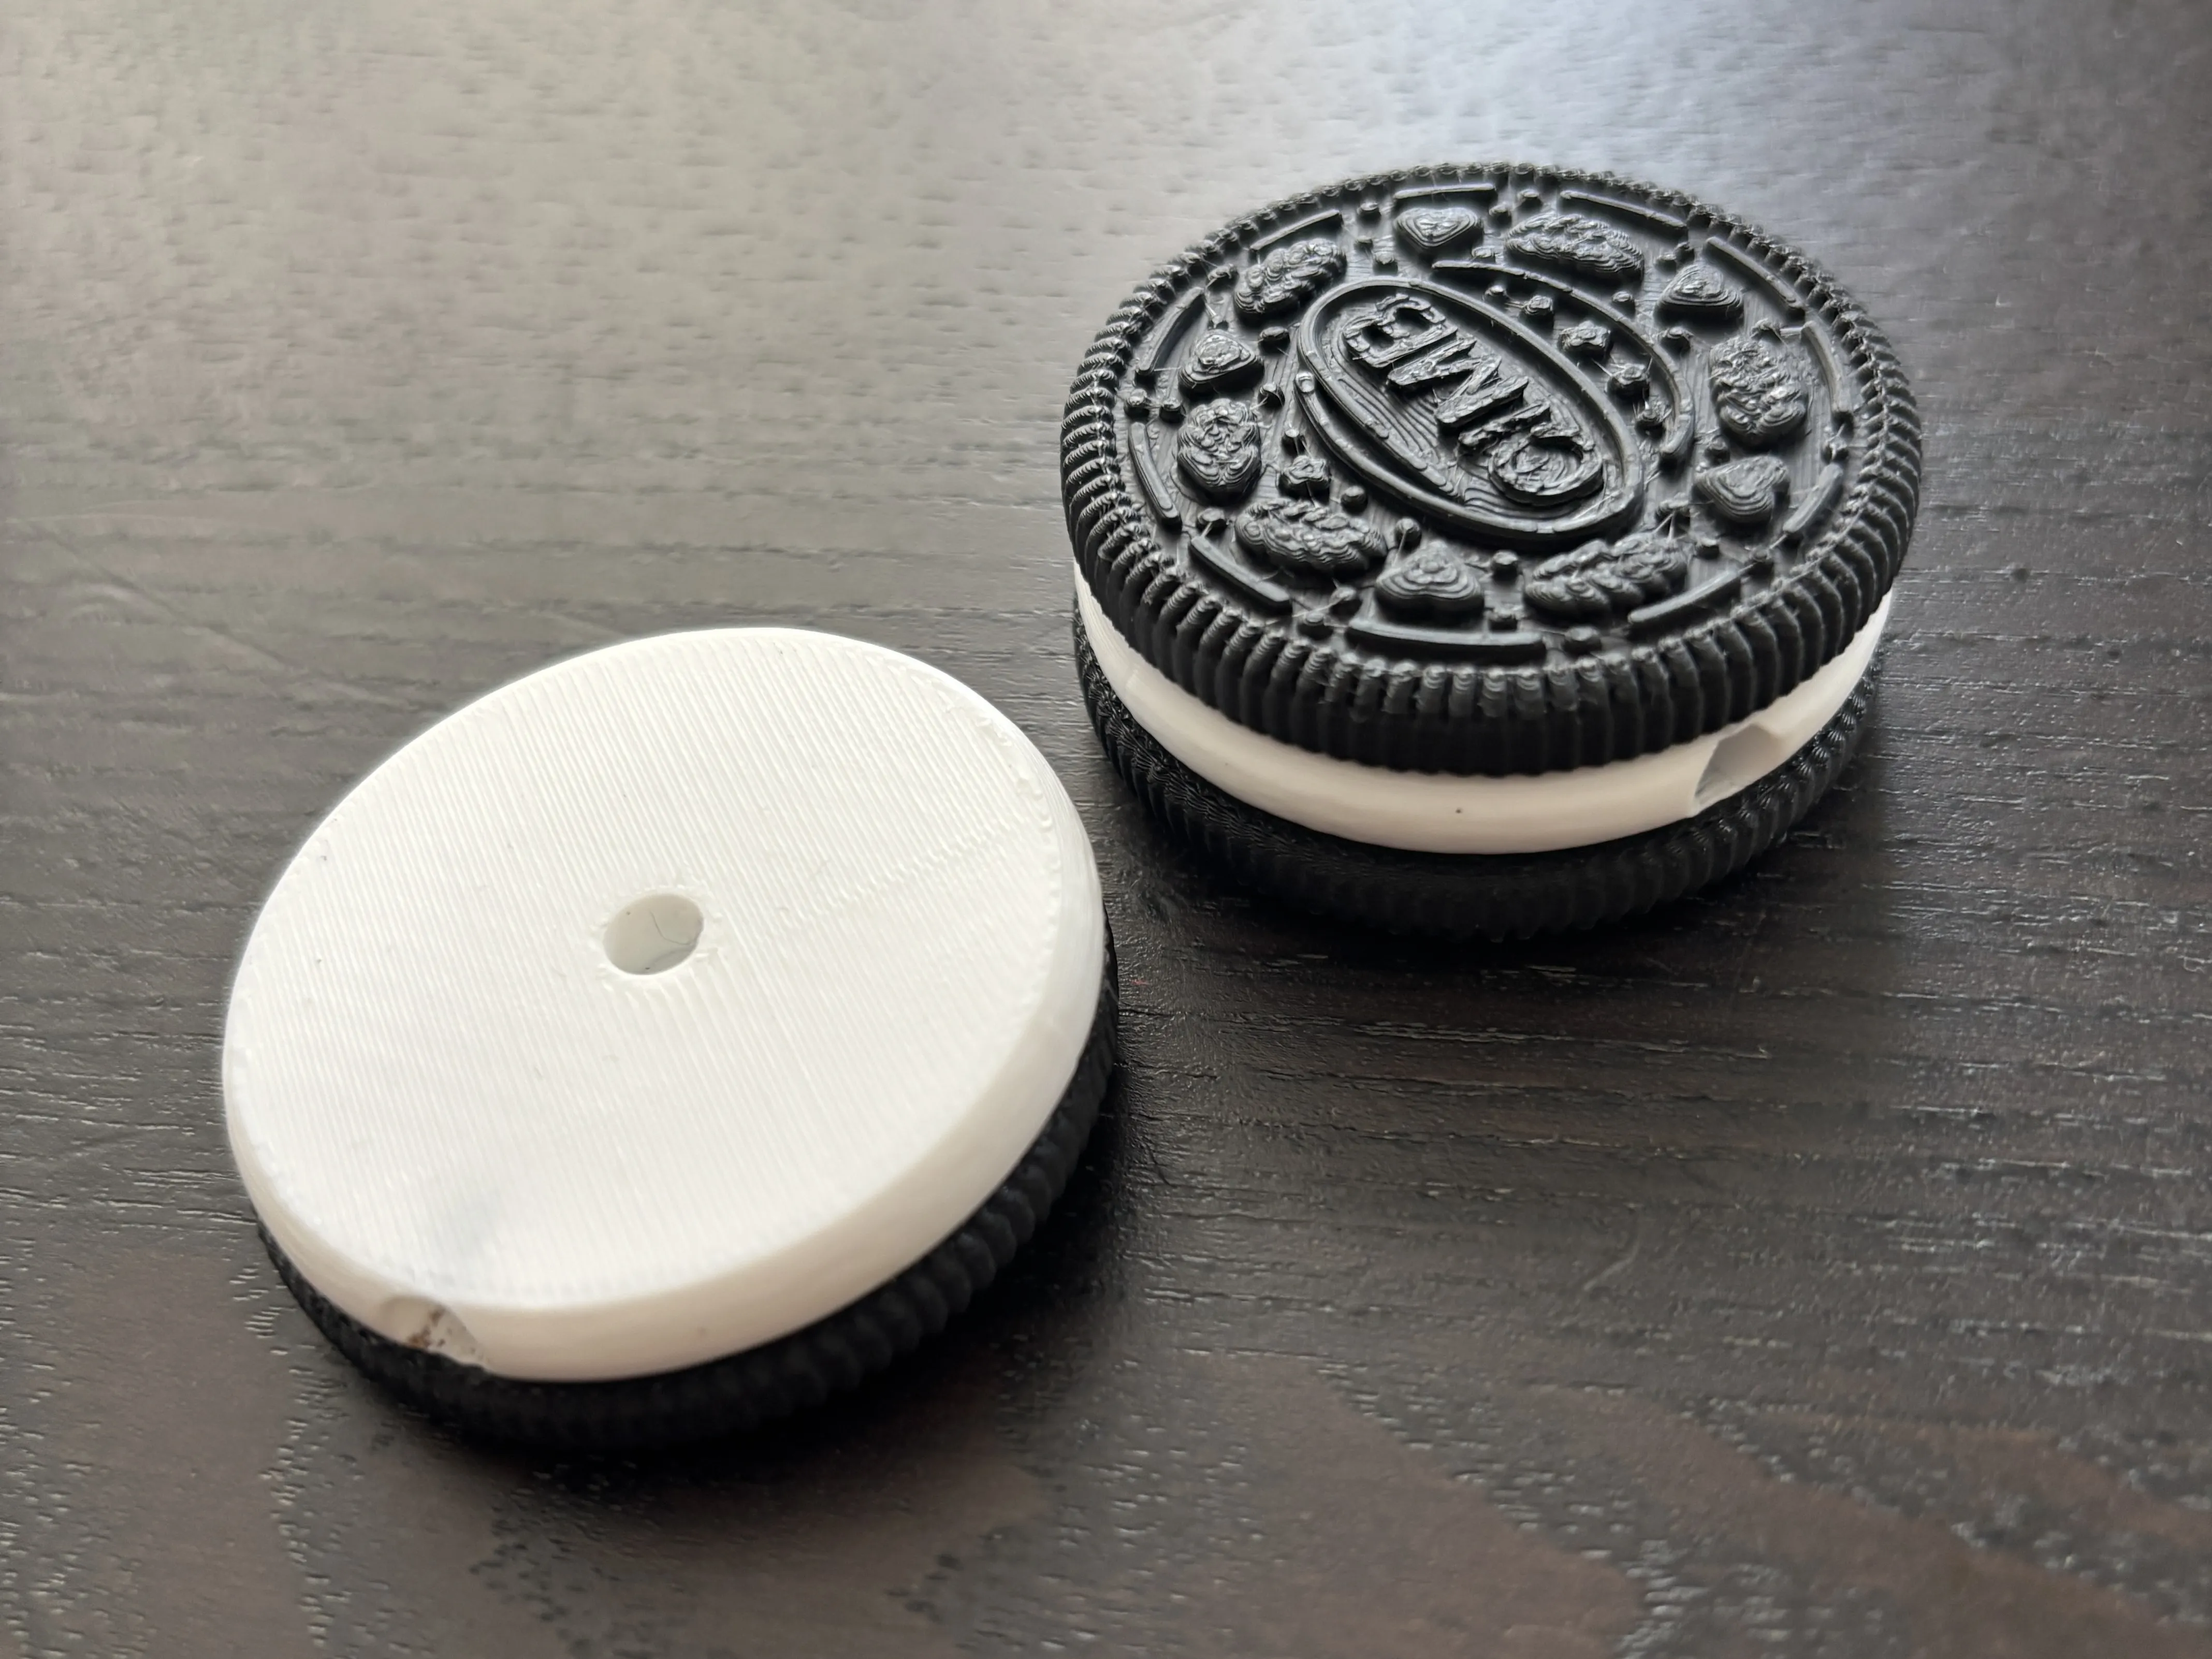
Special Note: The side pinhole in the cream piece is the only hole that is intentionally smaller than 5 mm. Because this hole is printed horizontally, printing characteristics tend to make it slightly oversized. The diameter was reduced to compensate and provide a better fit.
Cherry and Cream Decorations
The cherries can be used in two ways: As standalone decorations using their built-in pinhole OR Glued onto the "Cream with Cherry Placeholder" decoration.
Reference image: the Cherry placed on a wipped cream model:

Large Decorations
Larger decorations, such as the sliced strawberry and cream pieces, include three pinholes. This provides greater flexibility and more placement possibilities when designing your cake.
Reference Image: three pinholes on a large wipped cream decoration:

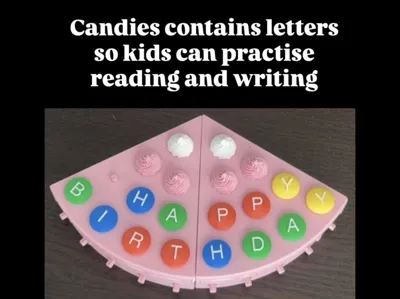
Candy Decorations
The candy pieces are available in multiple colors and include letters that support reading and writing activities. Blank candies without letters are also included. Two languages are currently supported but can be expanded.
Creating Custom Phrases
If you want to create a specific word or phrase: 1. Copy the required candy pieces into an empty plate/s and print them. You may want to separate plates by color to optimize print time.
Tip: If you have AMS, set the print order to "By Object" and merge objects of the same color together. This allows multiple color groups to be printed on a single plate while minimizing filament changes.
Pry Tool
The final plates includes a simple pry tool. Glue the handle pieces onto the base to complete assembly.
The tool can be used during play for moving cake pieces and is can be helpful for removing decorations if they become stuck.
If you enjoy the model, find any issues, or have ideas for improvements, please let me know.
I hope you have fun building your own cake creations!
License
You shall not share, sub-license, sell, rent, host, transfer, or distribute in any way the digital or 3D printed versions of this object, nor any other derivative work of this object in its digital or physical format (including - but not limited to - remixes of this object, and hosting on other digital platforms). The objects may not be used without permission in any way whatsoever in which you charge money, or collect fees.
Comment & Rating (7)