


Print Profile(2)


Bill of Materials


Description
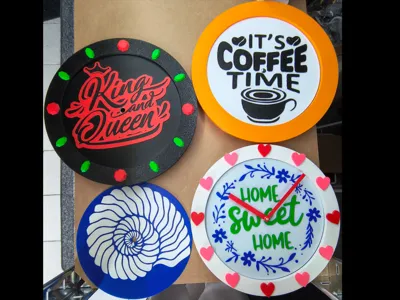
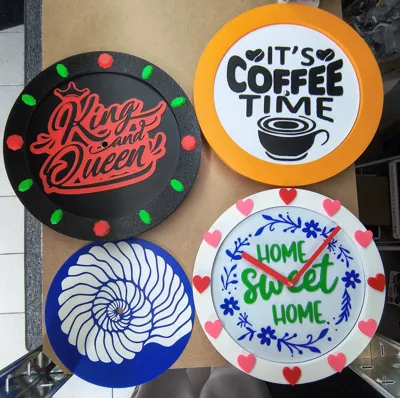
Modular wall clock with optional stand
(Option for your own design included in the print profile)
Print profile added with integrated pauses for people without AMS and without a PC
From a simple monochromatic dial with wall mount to interchangeable hour markers in various colors, dials, and frames with a detachable stand. With this model, you have everything in one. and even WITHOUT AMS!! And if you change your mind in between, no problem, everything is magnetic. (Can also be glued if magnets are not desired, but then the parts are not interchangeable except for the dial and the hands)
Various options:
1 quick simple wall clock without frills
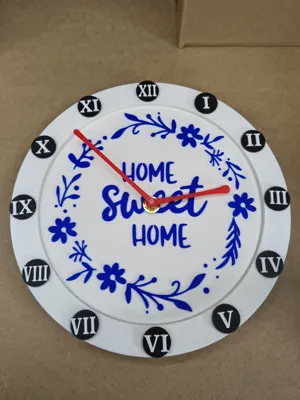
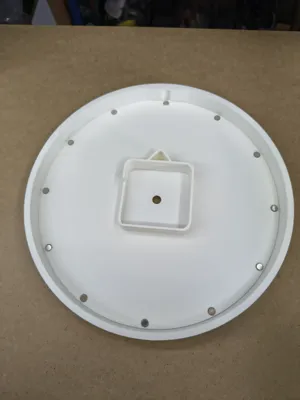
Plate with notches as hour markers and wall mount, just insert your clock kit MH011 from Bambu Lab, attach the hands, done
Additionally, magnets can be attached at the designated places to add hour markers with different designs and to swap them as desired
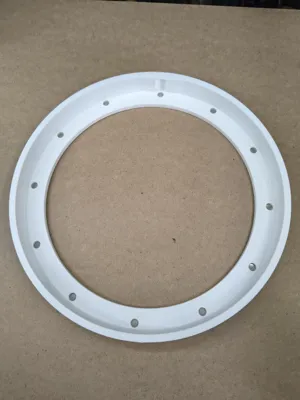
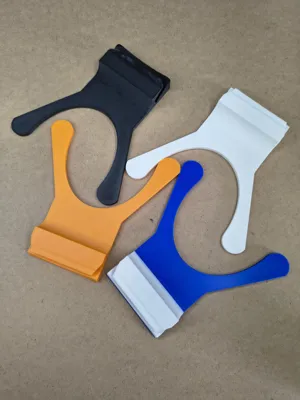
2 consists of No. 1 + frame (2 different sizes) with optional stand (1 stand suitable for both frame sizes). Here, the magnetic interchangeable hour markers can also be attached. The notches for the hour markers are covered by the frame here
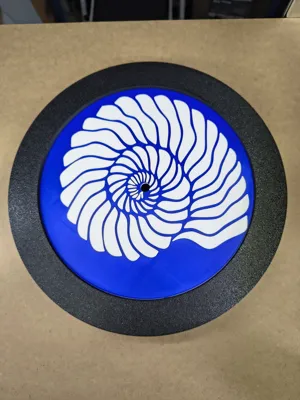
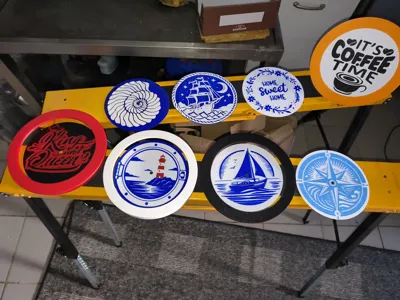
3 consists of No. 1 + No. 2 + interchangeable dials that you can swap as desired
4 Create your own dial suitable for this clock!!
The print profile contains a blank dial so you can create your own model. Simply add your SVG file in Bambu Studio for this. Change the size of your SVG file so that it fits on the dial, then set the height to 1.6mm or more and print it
Print various dials, hour markers, hands, and frames in diverse colors and sizes and swap them as desired
I will upload more models with different themes over time, with custom dials, hands, and hour markers. Feel free to check out my other models. These parts are created so that all models are compatible with each other
Each dial / inlay is also available as a simple round wall art with a frame (also interchangeable, easily pluggable) on my profile. Within these frames, you can also create your own design using a disc with a 180mm diameter
Required Parts:
Aside from the filament, you will need:
-a clock movement (available from Bambulab Kit: MH011) if you get a different one, please note that not all have the same dimensions for the hands and these might not fit!
-Magnets:
6x2 pieces. 12 in the frame + 12 backplate (if you don't use them individually, 8 are enough because the hour markers hold to the frame)
6x1 or 5x1 for each hour marker, so typically 12 pieces
Important before assembly!!!
!!Always pay attention to the correct orientation when adding the magnets!! (So that different frames or hour markers will fit together later)
All magnet sizes are recommendations, you can also use others, but keep in mind that the adhesive strength decreases if you use smaller ones
Assembly:
Glue magnets into designated recesses
Frame: 6x2mm or 6x3mm magnets recommended (max diameter 6mm, max height 5mm)
Backplate: 6x1mm or 6x2mm (max diameter 6mm, max height 5mm)
Hour markers: 6x1mm (max diameter 6mm, max height 1mm) These are kept small because otherwise the hour markers would have to be printed unnecessarily thick and that would no longer look good. I sometimes use 5x1 magnets, which works without a problem, especially with at least 6x2 or thicker magnets in the frame
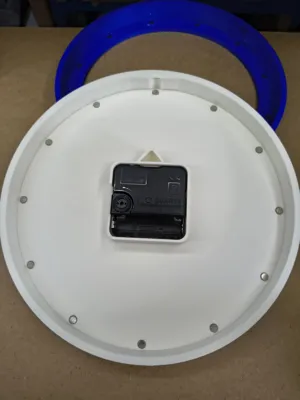
-Insert the backplate into the frame from the back, first at the top then at the bottom (matching slot in the upper part)
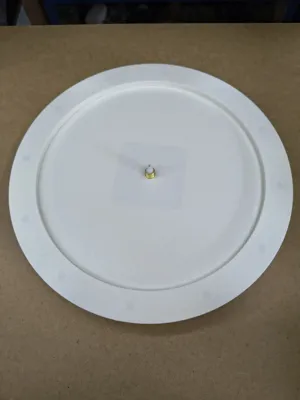
-Insert the clock movement from the back (clips are present so it does not fall out on its own), place the dial on the front, the washer and then screw on the nut
-Place the hands on the clock movement, making sure that the hands are positioned so that they have enough distance from the dial. The adjustment wheel is still accessible through the cutout on the housing if you want to set the time using it
-Now add the hour markers to the frame as desired and hang the clock (option directly on the backplate or an additional bracket integrated into the top of the frame for easier centering)
-Alternatively, you can also use the stand (which also prevents the backplate from falling out, if you do not want to use strong magnets)
License
You shall not share, sub-license, sell, rent, host, transfer, or distribute in any way the digital or 3D printed versions of this object, nor any other derivative work of this object in its digital or physical format (including - but not limited to - remixes of this object, and hosting on other digital platforms). The objects may not be used without permission in any way whatsoever in which you charge money, or collect fees.
Comment & Rating (0)