Search models, users, collections, and posts

platini76
@platini76
2.2 k
6.9 k
21.8 k
13.3 k
Bio
maker and enthusiast of 3d printing. If you are interested in commercial license or you want simply to support me Subscribe it. All informations on my models, filament used or other stuff present in photo or description, please PM me.
Achievements

MakerWorld Guardian
Active more than 20 days out of last 30 days UTC time

Popular Model
1 model more than 5,000 successful prints.

Stellar Reviewer
Rate or Comment 309 different models
Pioneer Maker
Print successful 194 different models and 2,765 hours
Recent Article
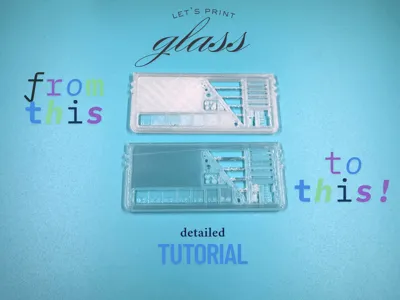
Printing Glass (Almost): My Experience CLEAR PETG
Printing Glass (Almost): My Experience CLEAR PETGArticle is in PROGRESS FOR PHOTO AND DETAILS # Printing Glass (Almost): My Experience with Transparent PETG   _A journey through swatches, profiles, humidity and... surprises._ ## Prologue: The Swatch ObsessionThis is the story of a small maker (yes, it’s going to be long, so make yourself comfortable — it might be worth it in the end) who has the flaw of wanting to do things properly.   Every time I get a new filament, the first thing I do is print my swatches: always the same models, always with my custom designs, which I’ve published on my MakerWorld profile. Some time ago, I came across a transparent filament that really intrigued me:   👉 PETG Overture Transparent  After some good research online — between guides, forum posts and YouTube videos titled things like _“Print Ice”_ or _“Print Glass”_ — I had a decent idea of the parameters to try.   You can do the same search — after all, we’re makers, we love experimenting.---## First Tests: Swatches, Profiles and SatisfactionWith a mix of patience and trial-and-error, I found settings that worked and printed my usual swatches:🧩 Bambu Lab Original Swatch    🧩 Ultimate Filament Sample Remix with Label    Yeah, I know, I’m a bit obsessed — but I love collecting swatches. They’re like little snapshots of every material I test: they tell the story of the hunt for the perfect profile.### Parameters I tweaked: - **Speed**: reduced for more accurate deposition   - **Fans**: turned off or to a minimum   - **Temperature**: slightly increased   - **Layer height**   - **Line width**: tuned for optimal fusion   - **Infill**: variable   - **Top/bottom shells**: reduced or disabled**Result?** Pretty satisfying. Clean, clear swatches. I archived them proudly, ready to show anyone interested in “crystal-clear” prints.---## The Newcomer: A Translucent DisasterThen one day, a friend gives me a new filament:   👉 Bambu Lab Translucent ClearI load it up, apply the same settings I used for Overture… and the result?   👉 A complete disaster.The printed part was **much more opaque**, with a cloudy, milky finish that had nothing to do with the transparency of the previous swatch.   *"What a crappy filament!"* I thought.I dried it just in case… but no improvement.   I was ready to label it “not worth buying.”---## Doubts (and Obsession)Then I asked myself:   **“Is it really possible that Bambu Lab, usually known for high-quality filaments, made something this bad?”**So I decided to dig deeper. With only 1–2 hours a day for my 3D printing hobby, it took me **several days**. I changed every single setting. My house filled up with swatches.   Each attempt improved one thing and worsened another. Still not happy.I even tried using the **perfect Overture profile** — slight improvement, but nothing significant.   Bambu Lab’s filament remained **noticeably more opaque**. And I was getting frustrated.---## The Plot Twist: Overture Turns Opaque TooAt some point I went back to Overture, printed a new swatch…   👉 And it came out opaque too!That's when the light bulb turned on:   **“Could this all just be a humidity issue?”** (but I *had* already dried it...)---## The Breakthrough: Extreme DryingI decided to go all in:   👉 18 hours of drying at 65°C.I wanted to be sure the filament was **100% dry**. Then I ran one final print.### The result? **Stunning.**   Even better than my very first Overture print (which probably arrived fairly dry, but definitely not at 8% humidity like both filaments were now).Looking back, I can confidently say **both filaments are equally good**. The only real difference was **moisture**.The print was flawless. (Yeah, I know the bridges are a bit weak, but we’re talking *zero cooling fan* here!)   While printing, the surface even felt **rubbery and smooth**, meaning the layers were fusing perfectly and uniformly — **no microbubbles**.---## The Takeaway: Humidity Changes EverythingI wrote all this just to highlight something Bambu Lab keeps repeating (and most of us tend to ignore):> 🛑 **DRYING FILAMENTS IS CRUCIAL.**Not just a friendly tip: **it literally transforms your prints**.   The microbubbles caused by absorbed moisture aren’t visible, but they make the plastic cloudy and even change the filament’s original color.- On **transparent filaments**, it’s obvious.   - On **colored or opaque ones**, less so — but the surface will still appear duller.---## ConclusionI hope this article helps someone out there. It definitely changed the way I approach my prints.   And if you’ve read this far: thank you for your time!### My advice?   👉 **Before tweaking endless print settings… dry your filament!**---## Extras (for the curious):🔗 My MakerWorld profile with all the swatch models  📷 Photo gallery of all my tests (coming soon...)🛠 Drying tips: use a filament dryer, convection oven, or a printer with a heated chamber. 👉  SETTINGS FOR FILAMENT:💰 Best Buy Filament Dryer Suggestions for few bucks:     Esun Dryer     Sunlu Dryer ## One Last Tip (Really)If you've made it this far, here's **one final piece of advice** — and it's an important one:> 🧼 **The build surface matters a lot**, especially for flat or low-profile prints where surface clarity is critical.A rough or textured bed will always leave a matte or frosted bottom layer, no matter how perfect your settings are.👉 **Use the smoothest surface you have** — if you own a completely smooth plate (like glass or a mirror finish bed), that’s your best choice. It can make a huge difference in achieving true clarity on flat surfaces.