
Large Earth Globe for LED Lamp 001

Print Profile(6)


Bill of Materials

Description
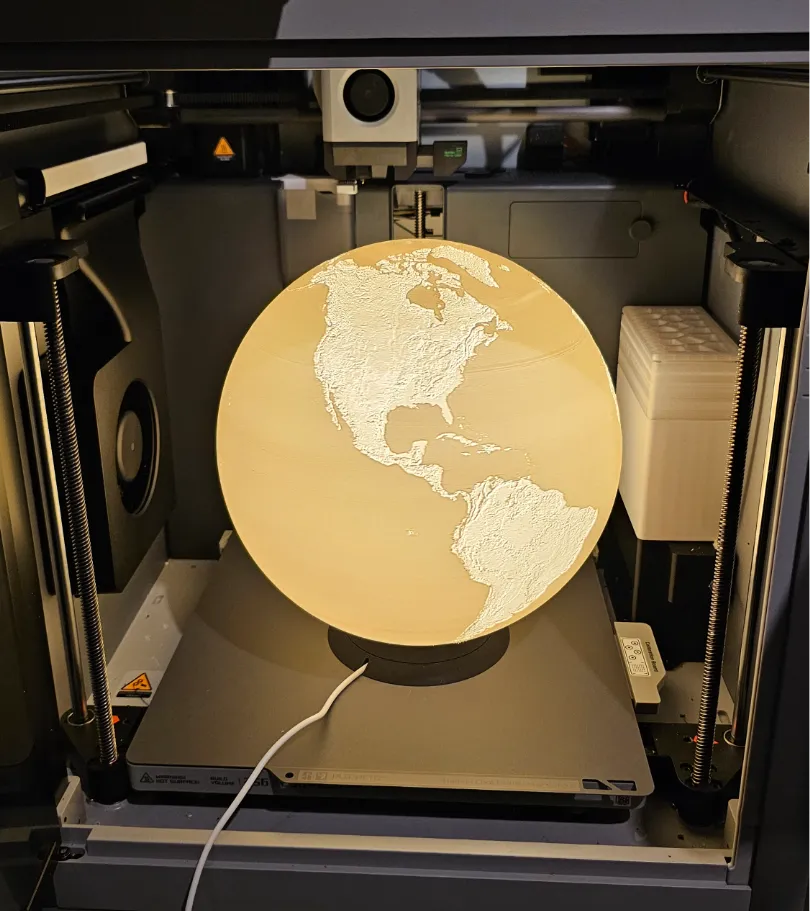
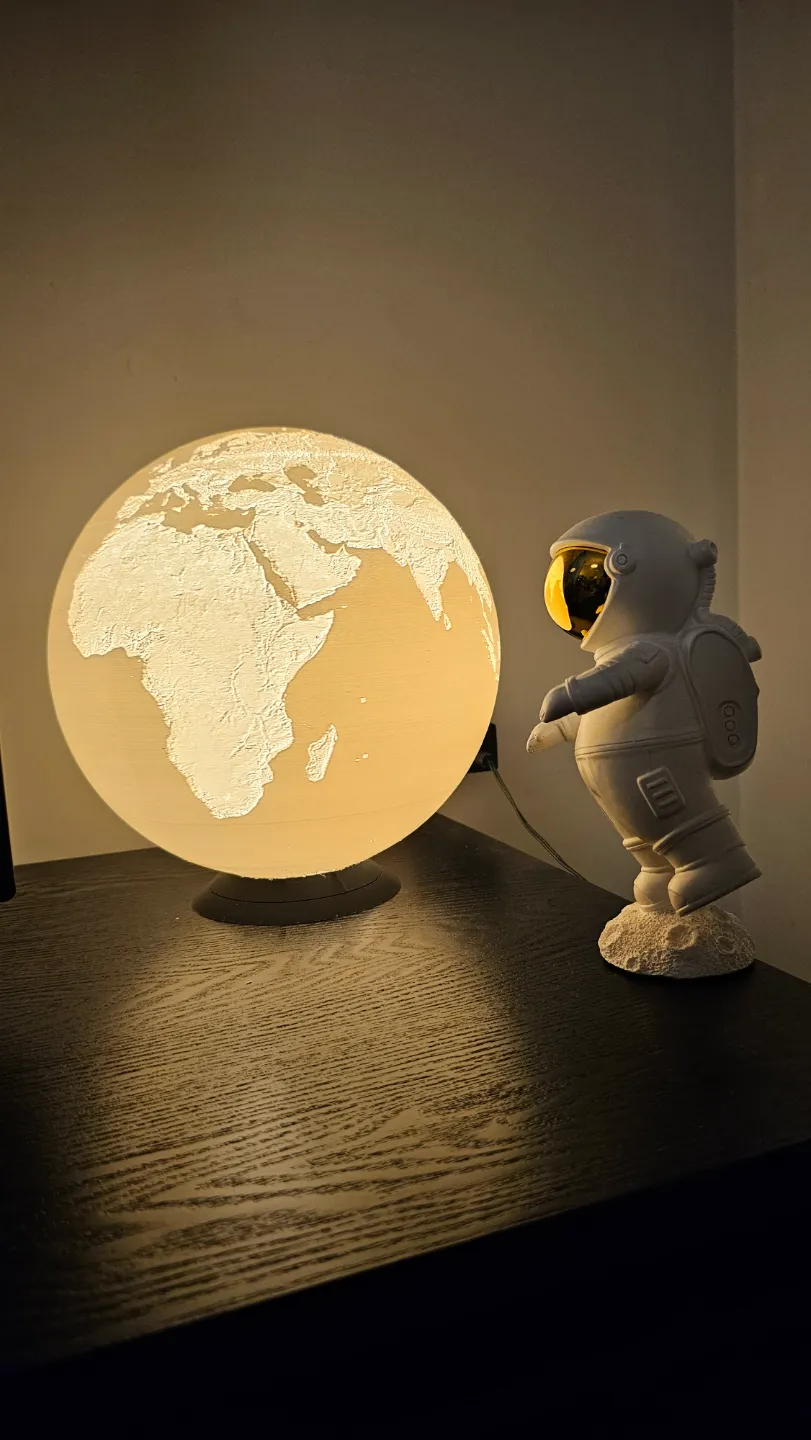
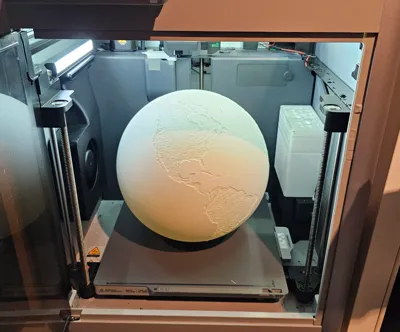
This is a 220mm in diameter earth globe designed to work with Bambu Led Lamp 001 kit.
Word of caution - this is not an easy model to print!
Naturally, due to it's size the model is not compatible with A1 Mini.
Recommended steps to take before attempting the print:
- dry the filament you're planning to use for the print, I highly recommend using PLA
- clean the bed plate with dish soap, rinse well and dry
- make sure the printer is fully calibrated, the rods are clean and lubricated, belts tensioned etc
- run auto calibrations of the filament you intent to use: in Bambu Studio click on ‘Calibration’ tab and run both the dynamics and flow rate
- change filament settings:
click on the icon next to filament selection
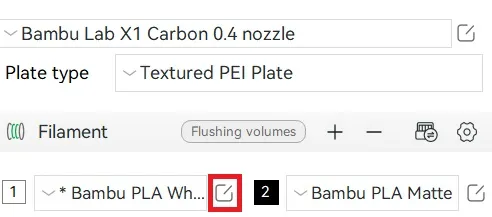
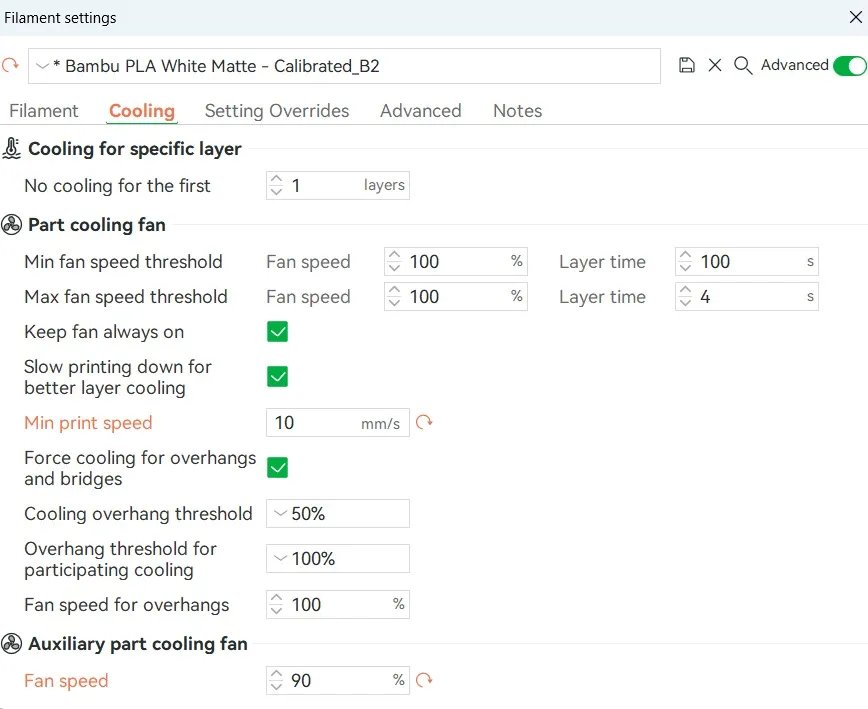
- open ‘Cooling’ tab
- set the ‘Min print speed’ to 10mm/s
if you have the aux fan in your printer I recommend setting it to 90%
- print the test models included in the ‘print test’ profile
- bambu printer are not amazing when it comes to overhangs, so don't expect miracles, there will be some imperfections, but try different settings, compare the results and apply these to the main model, the settings included in the profile are what worked for me on my X1C, but every printer is different
- if all looks ok print the main model (see notes below though)
- print 'Lamp Kit 001 Base', slide in the led and assemble the globe
COOLING
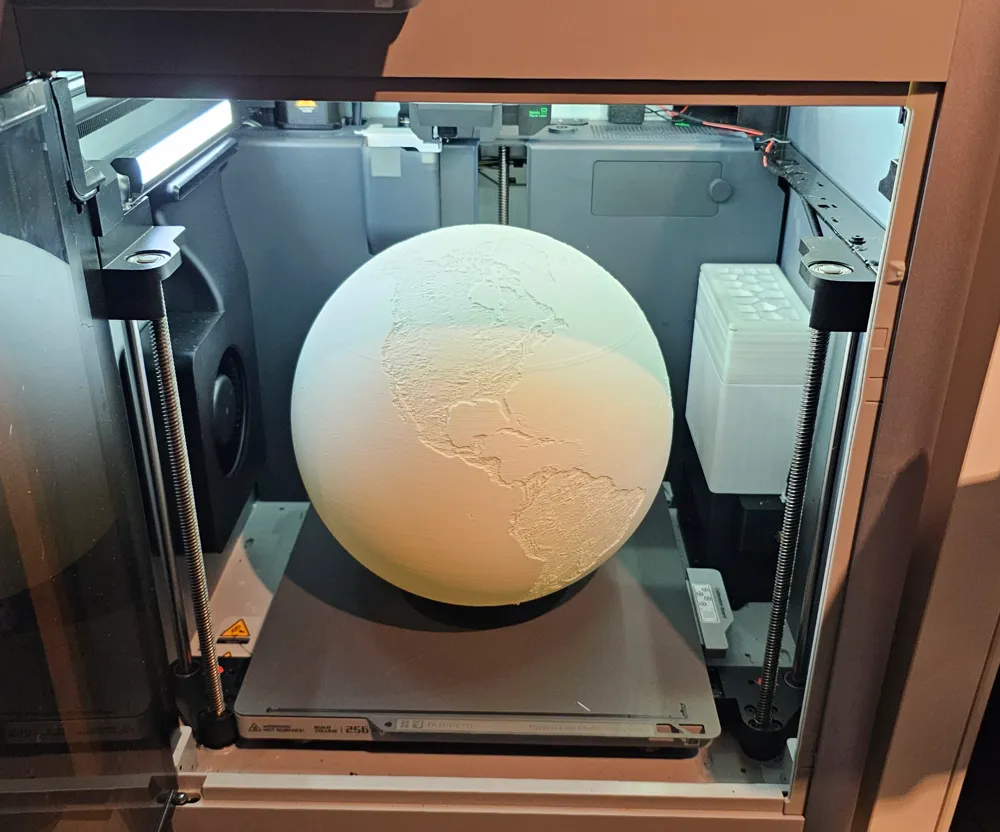
The print needs a LOT of cooling so if you're using P1/X1 printer make sure to open the top and the doors, I made a stupid mistake of closing the doors at some point of the print for 15 min (because of the noise) and this is the result…
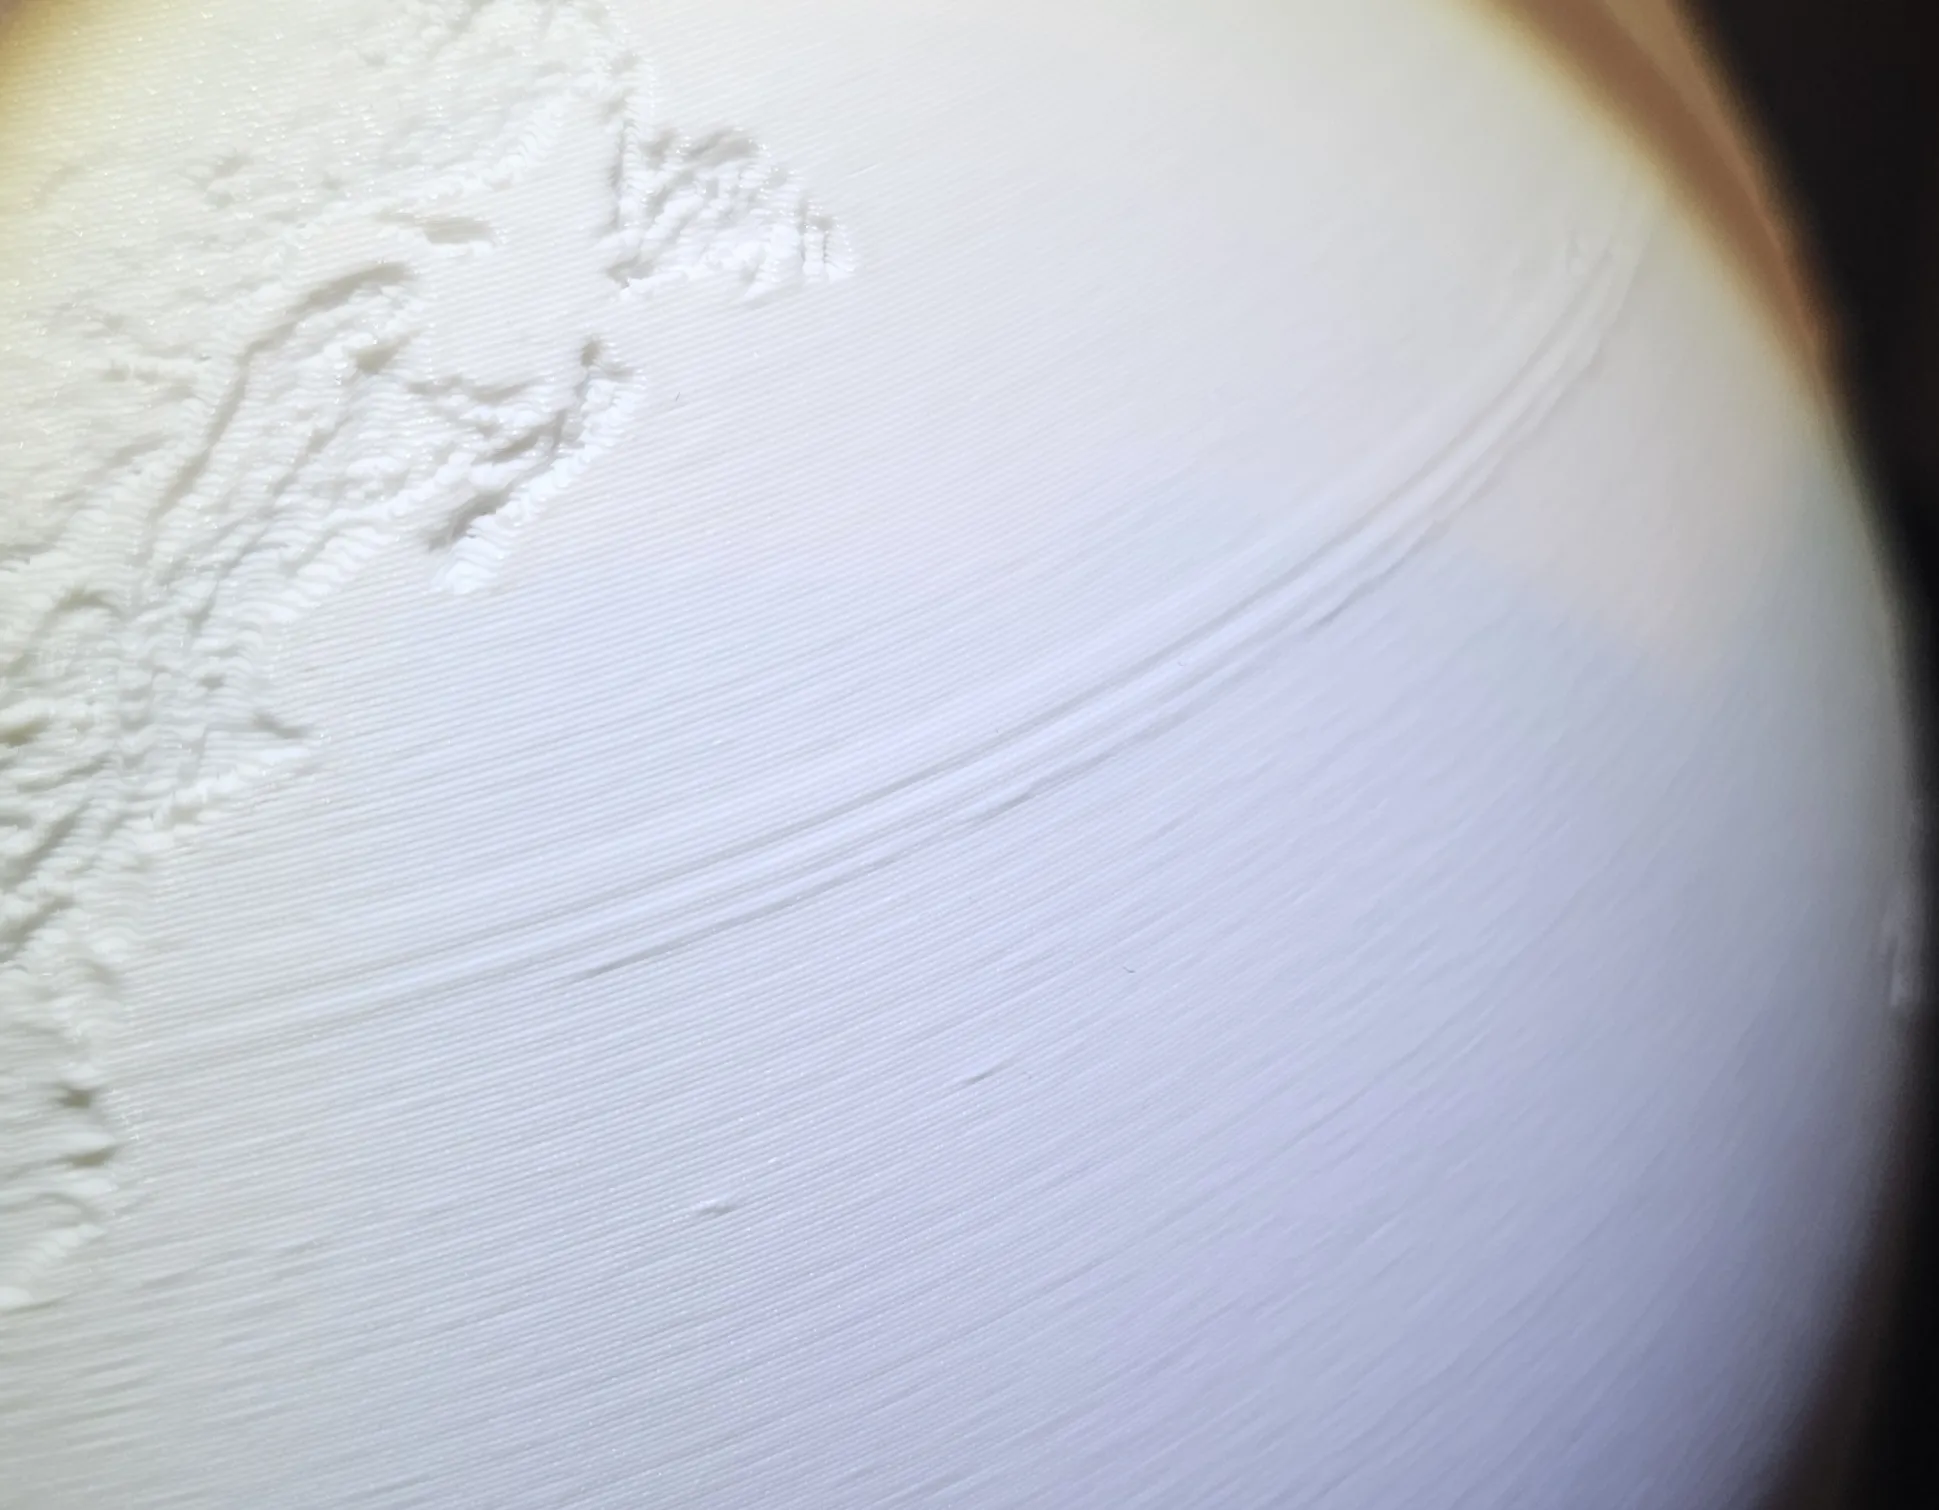
I also ran the aux fan @ 90% for the whole globe portion (set it to 60% for the base portion). If you don't wish to do so, at the very list manually increase the aux fan for bottom and top portions that have a lot of overhangs. If you use A1 printer it might be worth putting a desk cooling fan or smt similar next to the printer. Try different configurations with the ‘test print’ profile to see what works best for you.
- bottom overhangs: from layer 67 (approx 45min) to layer 120 (approx 1h 30m)
- top overhangs: from layer 1190 (approx 14h) to layer 1222 (approx 14h 30m)
Layer Height & Ironing
The the globe is set to be printed with 0.4 nozzle @ 0.2mm layer, but it includes variable layer heights for (starting ‘north of Scotland’) to make sure the globe looks as clean as possible. For that reason I also included ironing modifier to make it smooth.
Supports
If the printer & filament are calibrated well there is no need for supports for the globe. You do however need to support the base portion. If you have an AMS I strongly recommend using the PETG as interface material to make it super easy to remove (make sure to amend the ‘flushing volumes’ between PLA and PETG to mininum 250!)
You can add supports to the top portion of the globe, in such case simply delete the support blocker modifier, this will take longer to print though, also make sure to only do it with PETG interfaces, otherwise there's a high risk of problems when removing supports.
Brim
I've added 10mm of brim just in case, it's a long print and large model so better safe than sorry. Also I did my print on bambu SuperTack plate which resulted in perfect adhesion and I'd highly recommend it.
Additional notes:
This project is inspired by an amazing moon globe design by TBone_427120 (LINK), highly recommend printing it as well :)
The lithophane image is taken from 3dSolarLithophane github.
Base stl of the globe has been generated from Lithophane Sphere Maker.
License

You shall not share, sub-license, sell, rent, host, transfer, or distribute in any way the digital or 3D printed versions of this object, nor any other derivative work of this object in its digital or physical format (including - but not limited to - remixes of this object, and hosting on other digital platforms). The objects may not be used without permission in any way whatsoever in which you charge money, or collect fees.


Comment & Rating (268)