Mini CNC Drafting Machine/Writing Robot


Print Profile(1)

Description
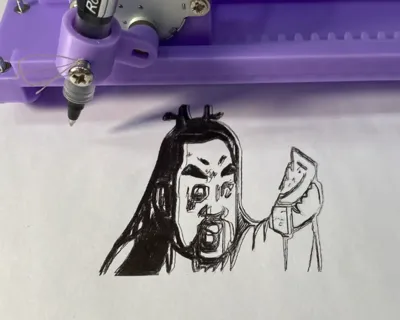
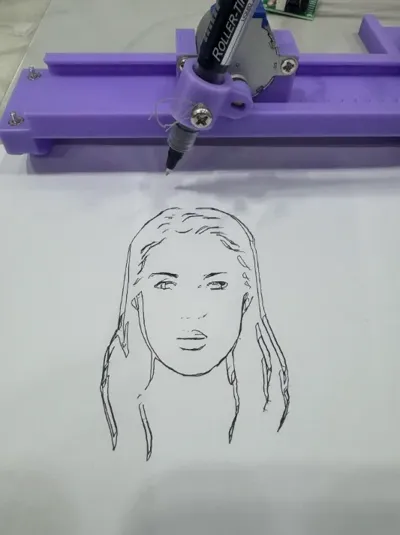
Mini Plotter, Writing Robot
I was thrilled to discover a plotter and writing robot with a completely 3D-printed structure, and I've made minor adjustments to the original design for compatibility with the Bambu A1 printer.
Printing Recommendations
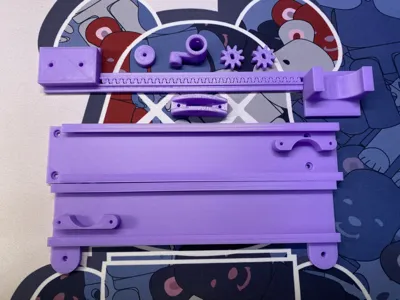
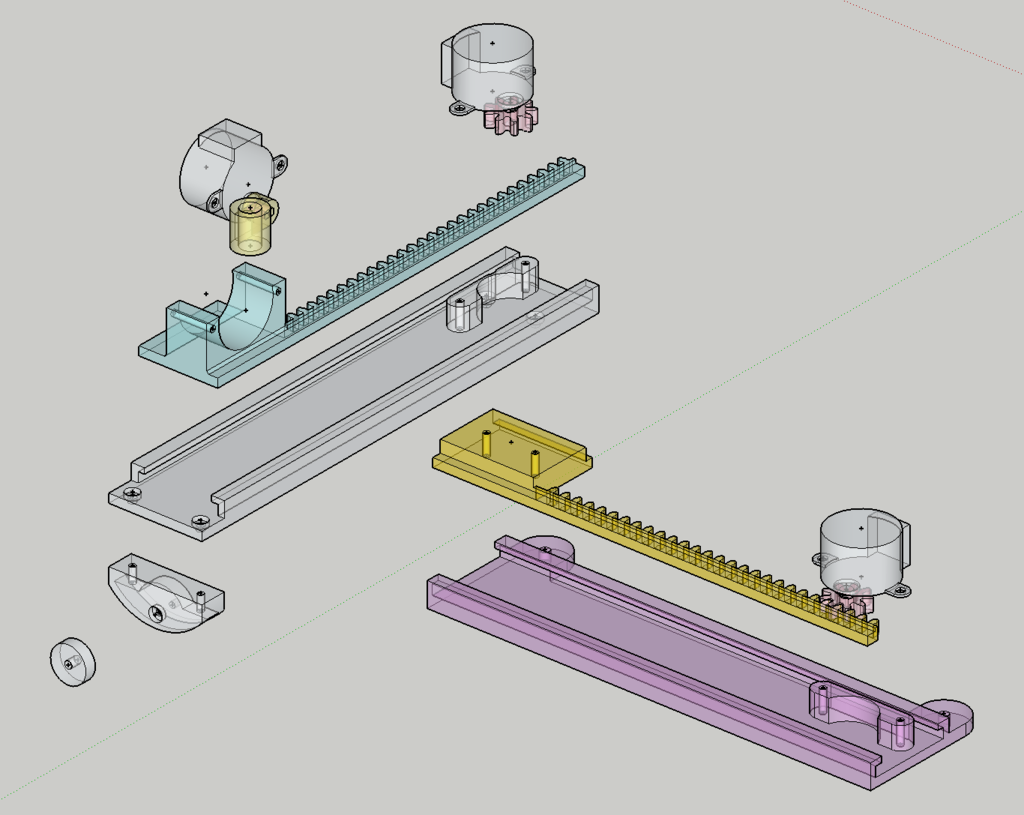
During my prototype testing, I used a support-less configuration. The "slide rails" exhibited stringing, requiring manual cleanup. Adding supports proved exceedingly difficult to remove, and the smoothness wasn't necessarily superior to manual post-processing of the support-less print.
Furthermore, the stepper motor gear models are extremely tight-fitting, necessitating the use of tools such as a small hammer for installation.

Assembly
Detailed assembly instructions, along with software and hardware tutorials, are currently being compiled (within 5 days).
After surface finishing, ensure the "slide rail" structure moves smoothly.

Install the stepper motor gears.

Mount the stepper motor to the "slide rail".

Attach the second "slide rail".

Install the stepper motor to this "slide rail" as you did with the previous one (omitted here); proceed to mount the pulley to this "slide rail".

Install the Z-axis and stepper motor to control pen movement.

Once the above steps are complete, you will have two separate "slide rail" structures. Now, use adhesive to join them (I used adhesive, but screws are also an option);

This completes the structural assembly.

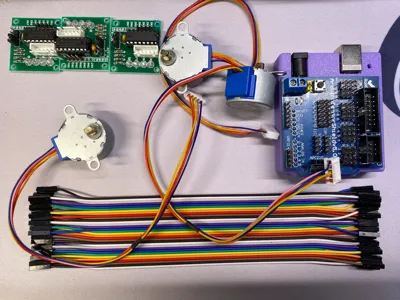
Hardware
Software
Software and hardware tutorials are currently being prepared; please show your support with a boost and star.
Boost Me (for free)

Comment & Rating (13)