Christmas Santa Hat Magnet (Customizable)


Print Profile(1)

Bill of Materials


Description
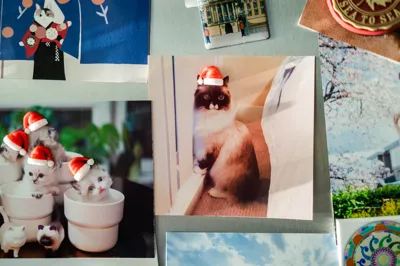
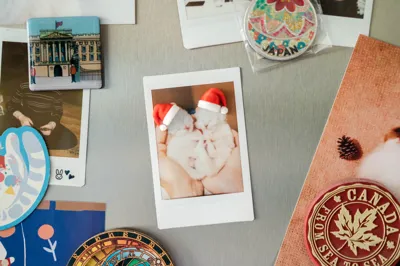
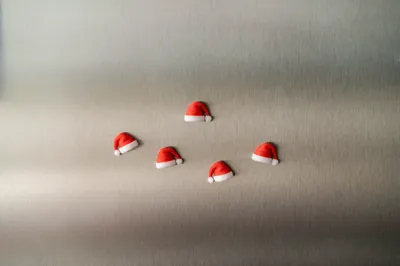
🎅 Christmas Santa Hat Magnet 🎅
We used to digitally add Santa hats to our photos, print them out, and stick them on the fridge with magnets during Christmas in the past. Then an idea sparkled ✨ - why don't we turn the Santa hats into the magnets themselves? That’s how we came up with this design: a festive and compact Christmas Santa Hat Magnet, perfect for adding a cheerful holiday touch to your photos, notes, or reminders on your fridge, locker, or office whiteboard.
Note: The magnet needs to be glued into the hat after printing. The print profile includes three plate options designed to fit 6x3mm, 5x2mm, and 4x2mm round magnets, but you can also customize the model and magnet hole size. For detailed guidance, please refer to the instructions below.
Also check out our Christmas Mini Santa Hat if you want a full hat without the magnet!
Boost Me (for free)
❤️ Your support is important to us, not only for showing appreciation but also for encouraging us to create more future models!
How to customize the model size and magnet hole
Step 1 - Scale the model to the size you need
Select the model in the group so that you can get an accurate measurement. The default scale measures about 12mm for the hat.
Step 2 - Set the size of the round magnet hole negative part
It’s recommended to add a 0.5mm clearance for the diameter because when printing vertically, the overhangs and bridging will make the hole smaller. For the thickness of the magnet, you can set a 0.2mm clearance. For example, the size for the negative part that fits a 6x3mm round magnet should be set to 6.5x3.2mm (as shown in the image below).
Step 3 - Move the round magnet hole negative part
Move the negative part so that it’s just touching the back of the model.
Step 4 - Adjust the fuzzy skin modifier and filament change layer
Scale and move the fuzzy skin modifier (yellow oval cylinder intersecting with the model) so that it just covers the lower layers. Make sure it’s not intersecting the negative part, otherwise the hole will get fuzzy skin contour as well.
Then adjust the filament change layer to the desired color change layer.
For more details and exclusive models, check out our Instagram and Patreon! Become a member to our Patreon to get commercial license of our designs, or simply just to support our work. If you just want to give a one-time support, buy me a coffee ☕️


Don't forget to check out our other designs https://makerworld.com/en/@MildMochika
Christmas Mini Santa Hat
https://makerworld.com/en/models/893072#profileId-850101

Honeycomb Christmas Tree LED Tea Light Holder
https://makerworld.com/en/models/819164#profileId-76194

Honeycomb Christmas Tree Mini - Ornament | Keychain | Bag Charm
https://makerworld.com/en/models/819941#profileId-762821

Hollow Honeycomb Christmas Ornament
https://makerworld.com/en/models/811042#profileId-752367

Origami Snowflake Ornament
https://makerworld.com/en/models/832005#profileId-776575

Flexi Lobster Holding Claws (Magnet & Keychain)
https://makerworld.com/en/models/1019976#profileId-1001023

Articulated Whale - I Whale Always Love You
https://makerworld.com/en/models/1063862#profileId-1052567

Wood Fired Pizza Oven LED Tea Light Holder
https://makerworld.com/en/models/947351#profileId-914387

Scanimation Clock / Moiré Clock / Motion Illusion Clock
https://makerworld.com/en/models/878286#profileId-831820

Ripple Clock
https://makerworld.com/en/models/865214#profileId-816323

License
You shall not share, sub-license, sell, rent, host, transfer, or distribute in any way the digital or 3D printed versions of this object, nor any other derivative work of this object in its digital or physical format (including - but not limited to - remixes of this object, and hosting on other digital platforms). The objects may not be used without permission in any way whatsoever in which you charge money, or collect fees.
Comment & Rating (24)