Bed Plate Handle V3 - A1, A1m, P1, X1 Compatible


Print Profile(3)


Description
UPDATE 2/19: NEW V4 OUT! https://makerworld.com/en/models/1127187#profileId-1126794
This is the ultimate version of my previous handle designs:
- https://makerworld.com/en/models/830474#profileId-774711
- https://makerworld.com/en/models/838997#profileId-787075
My goal was to address all of the common feedback. Here is a list of what's changed:
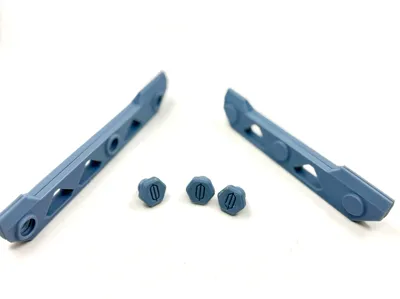
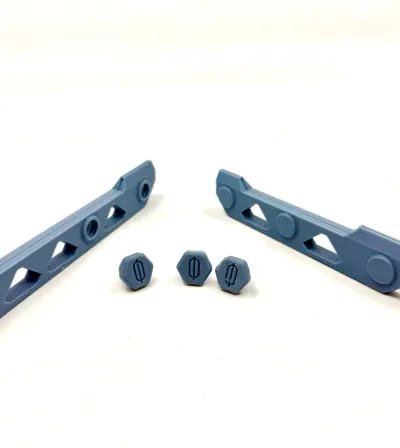
- Added a chamfer to the threads of the screws to allow easier insertion
- Clarified which end the screw should be inserted by partially covering the back
- Reoriented screws to be printed sideways with supports for more strength
- Lengthened screws to be stronger
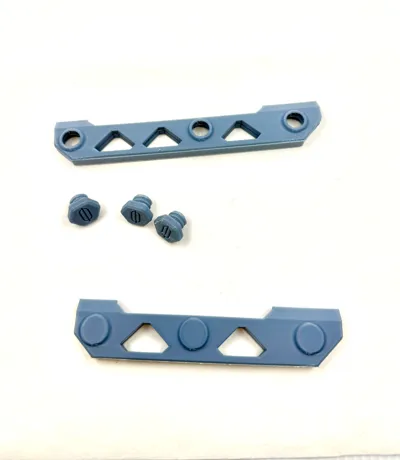
- Shortened the depth on the plate to not interfere with the extruder on P1/X1 models. Also chamfered the edge to help
- Shortened left edge to allow X1 to read bed info code
- Added A1m version
Please let me know if you have any further feedback!
Original description:
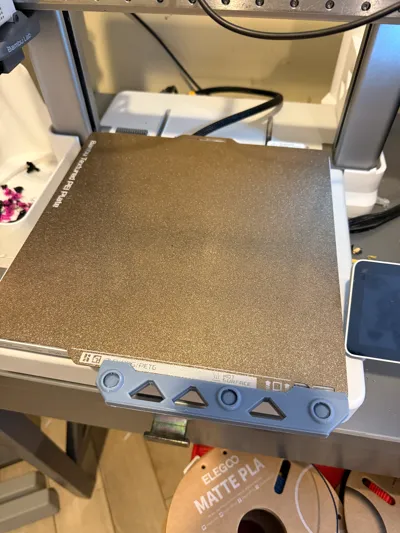
Tired of cleaning your build plate all the time? Accidentally touch your plate too often?
I designed this handle assembly to attach to your build plate and give you a secure place to grab the plate that won't result in you touching it and contaminating the surface. A must-have for all printers! Results in way less need for cleaning over time and is semi-permanent. Can also be removed at will if needed.
Assembly is simple. First, place the screws into the handle on the side with the chamfered lip. Tighten by hand.

Next, place the handle on the bed plate by sliding the lips onto it.

Finally, tighten the handle down with pliers or a wrench. Do not overtighten.

If you've used my profiles and followed these instructions you shouldn't need more than approximately a half turn to get it tight enough to hold. I was able to tighten mine down hard enough that I could not remove them by pulling.
Let me know if you have questions!
Boost Me (for free)
Drop a boost if you love it!
Thank you for checking out my model! See below for Boost and Commercial Membership options.
Boost Me (for free)
If you love the model, drop a boost!
Membership
See here for membership options, including commercial licensing.
License
You shall not share, sub-license, sell, rent, host, transfer, or distribute in any way the digital or 3D printed versions of this object, nor any other derivative work of this object in its digital or physical format (including - but not limited to - remixes of this object, and hosting on other digital platforms). The objects may not be used without permission in any way whatsoever in which you charge money, or collect fees.
Comment & Rating (496)