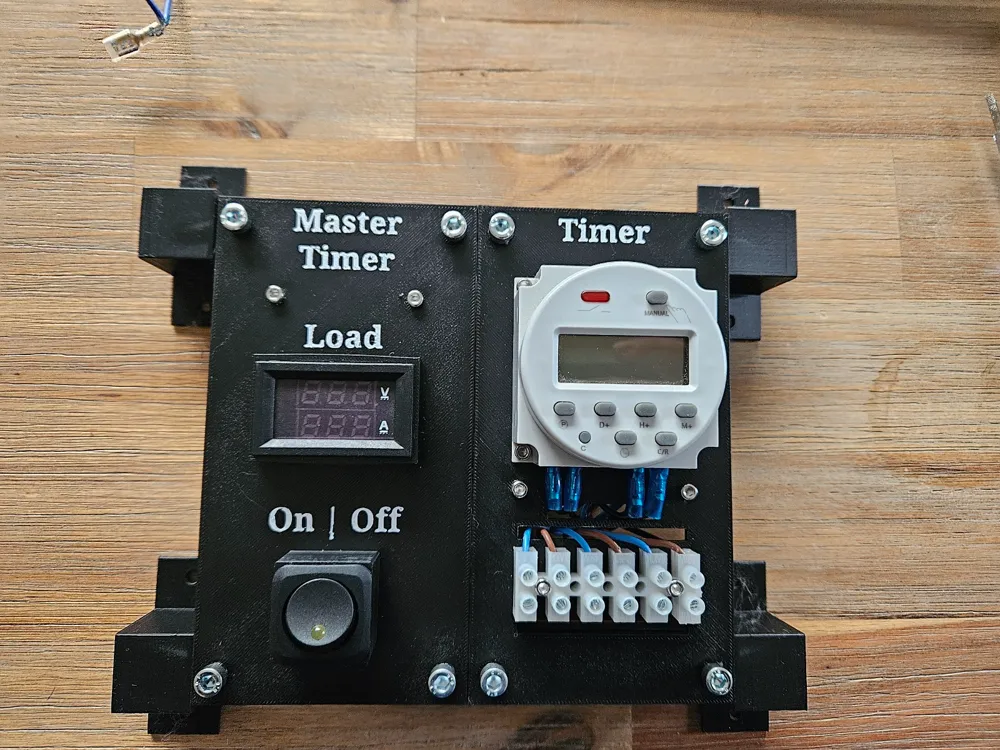
12v Modular System - Timer


Print Profile(1)

Description
This module is part of a versatile series, designed to help you build a customized 12V system tailored to your specific needs. The modules are designed to integrate seamlessly with 20mm x 20mm extrusions, making it easy to build and securely contain your system.
Explore the full range of modules in my 12v Systems Collection to unlock endless possibilities for your design.
Bill of Materials
For this module you will need:
Four M5x10mm bolts
Four M5 T-Slot nuts.
Four M3 x 16mm bolts
Four M3 hex nuts
Wire (at a minimum 0.75mm 2 core)
Terminal Blocks (1 x 6 piece, 1 x 2 piece)
CN101A 12v Timer (From amazon)
Building
Secure the Module to the Extrusions
Insert the M5 nuts into the larger holes and attach them using T-slot nuts. This will allow you to securely mount the module onto the 20mm x 20mm extrusions.
Attach the Terminal Blocks
Use the M3 bolt to fasten the terminal blocks onto the mounting plate. Two of the M3 bolts/nuts will be used to secure the 6 piece block on the front, and the other will be used to connect the 2 piece block on the back. Ensure all bolts are tightened evenly for a secure fit.
Attach the Timer
Use the remaining M3 bolts and nuts to attach the timer to the front of the plate.
Connect the Wiring
Once the terminal blocks are mounted, add the necessary wires to connect it to other modules in your 12V system. Double-check all connections to ensure proper functionality.
Test Before You Connect
Before adding the module to your 12V system, it's essential to test it independently to ensure proper functionality and avoid potential issues:
Prepare for Testing
Connect the module to a suitable 12V power source using temporary wiring.
Ensure the connections are secure and insulated to prevent short circuits.
Verify Output
Use a multimeter to measure the module's output. Check that the voltage and current match the expected specifications.
Confirm that the module powers up without any irregular behavior, such as overheating, unexpected noise, or flickering.
Test Load Handling
If applicable, connect a small test load to simulate its operation under typical conditions. Monitor performance for stability and reliability.
Inspect for Faults
Visually inspect the module for any signs of damage or malfunction, such as loose components or burnt traces.
Once the module passes these tests, it’s ready to be integrated into your 12V system. Thorough testing helps ensure smooth operation and protects your other modules from potential issues.
Summary
This system operates on 12V electricity. While the voltage is relatively low, there is still a potential risk, so caution is essential during setup and operation.
Please note that none of the modules in this collection include specific wiring instructions. If you require guidance, there are numerous resources available online, including detailed tutorials on platforms like YouTube.
Always exercise care, and thoroughly test each module individually and in combination with your subsystems to ensure safe and reliable operation.
Hope you find it useful!
License
You shall not share, sub-license, sell, rent, host, transfer, or distribute in any way the digital or 3D printed versions of this object, nor any other derivative work of this object in its digital or physical format (including - but not limited to - remixes of this object, and hosting on other digital platforms). The objects may not be used without permission in any way whatsoever in which you charge money, or collect fees.
Comment & Rating (0)