Stash Box Clock


Print Profile(2)


Bill of Materials


Description
Boost Me (for free)
If you like my work, please consider giving me a boost. It really helps to support me in creating free files for everyone to print.
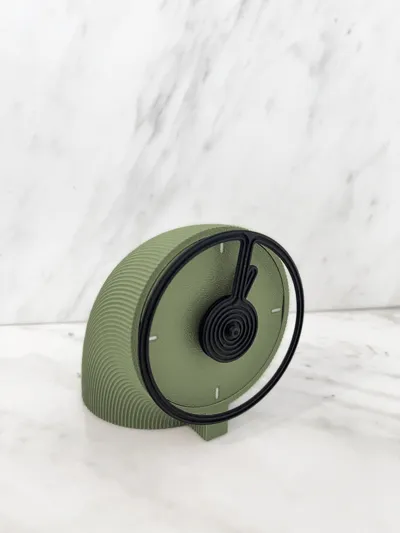
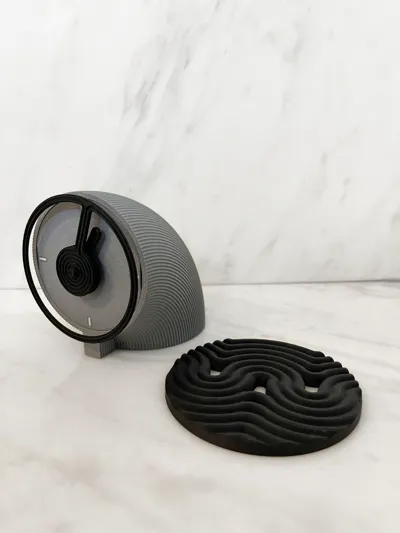
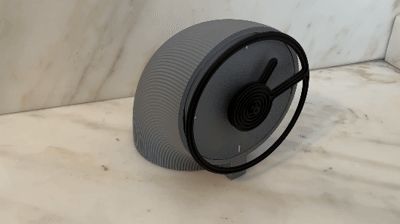
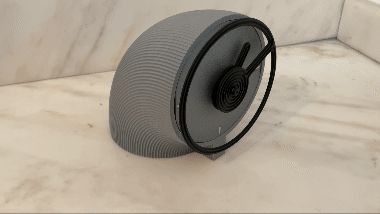
Introducing the Stash Clock!
This beautiful, contemporary desk clock packs a hidden secret. The base discretely hides a section where you can keep your most precious small items (or naughtiest).


If anyone wants any minor tweaks or changes like a numbered version, or a different pattern on the outside, just let me know and I'll be happy to make them for you.
The Clock is designed to hide the clock mechanism completely, so this does mean there are a few minor extra steps to assemble the clock.
Just follow the easy step by step instructions below:
Step 1:
Loosely assembly your clock mechanism to the front piece. Please ensure the clock mechanism is vertical. Do not fully tighten the brass nut as we need this to float a little during assembly.
Step 2:
Slot the top of the front piece into the slot in the main body.

Step 3:
Lightly flex the face and snap in the bottom snap. Once the Clock face is in place, center the clock shaft and tighten the nut. (The cutouts on the side are to allow you to get your fingers or a screwdriver in to flex the snaps in and out of place)
Step 4:
Push your hands into place (don't forget the second hand cover!)
Step 5:
Screw in your stash pot and you're done!
To Disassemble or to change the batteries, just do this in reverse.

Boost Me (for free)
If you like this design I would really appreciate a boost. It helps support the creation of these designs!


Please check out some of my other designs here:


Membership
If you would like to buy a commercial license, please review them here
Boost Me (for free)
If you like this model, please consider giving me a boost to help support my creative work
License
You shall not share, sub-license, sell, rent, host, transfer, or distribute in any way the digital or 3D printed versions of this object, nor any other derivative work of this object in its digital or physical format (including - but not limited to - remixes of this object, and hosting on other digital platforms). The objects may not be used without permission in any way whatsoever in which you charge money, or collect fees.
Comment & Rating (4)