


Print Profile(7)


Description
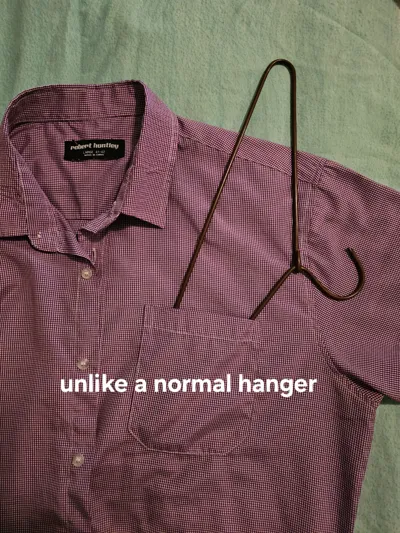
Have you ever travelled somewhere and found that there was no provision to hang up your clothes? Has your room got a wardrobe, but no clothes hangers inside?
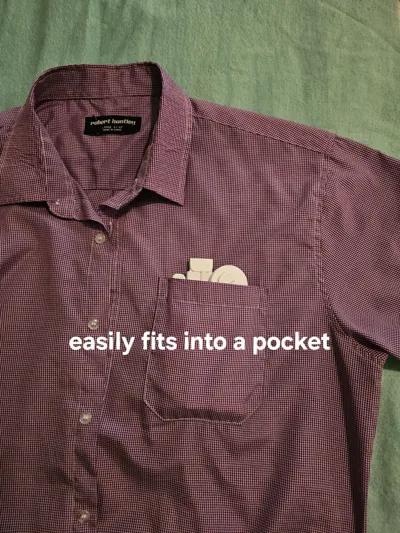
Having been in this situation a number of times recently, I decided to have a go at making one I can take in my carry-on luggage.
Details
The hanger can be used in 3 modes:
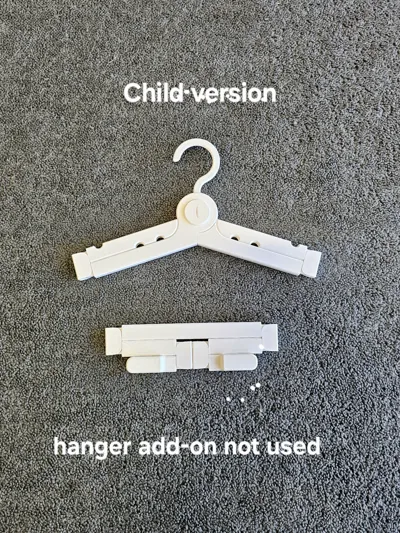
- child coat/clothes hanger
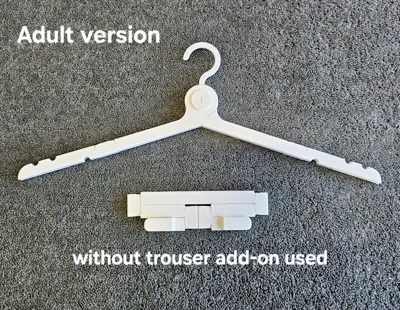
- adult coat/clothes hanger
- adult hanger with trouser rail
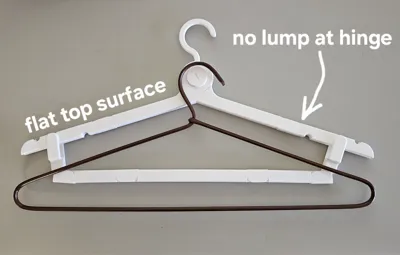
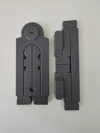
6 of the 7 folding joints are print-in-place. The main joint uses a large circular ‘nut and bolt’ to secure the hook and main arms of the hanger.
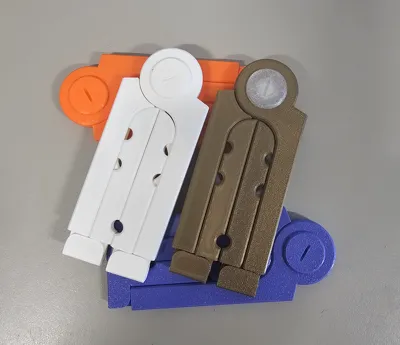
The build plate contains 3 washers of different thicknesses that can be used to change the tension on this bolted connection (ie when using a textured plate, a washer can be added between the ‘nut and bolt’ so that the arms move freely when the bolt is secure).
If you are not interested in using the trouser add-on, simply remove this from the build plate before slicing.
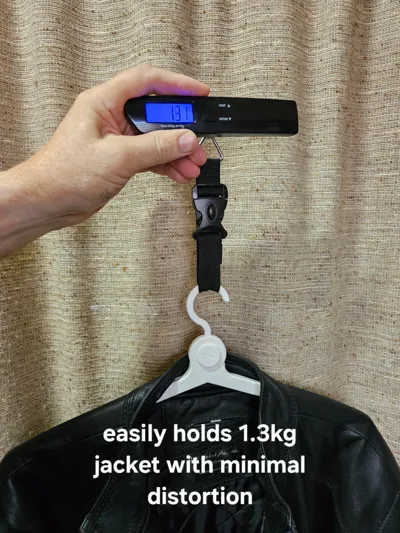
The print works well using PLA - with the main hanger at 45g and the trouser add-on at 33g.
When printed in ABS - weight is 39g for the main hanger and 29g for the trouser add-on.
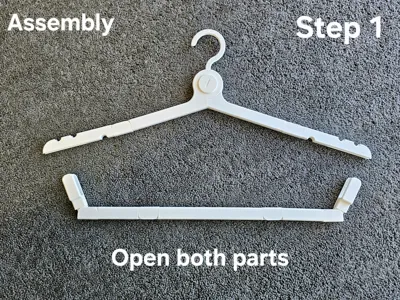
Assembly
Each joint has been printed in the slightly open position. To get each joint operating freely, apply a little pressure to the ‘legs’ on each side of the joint so that the ‘legs’ touch each other. You will hear (and feel) two slight ‘clicks’ for each joint (repeat this for the remaining 5 joints).
It has been suggested by someone that has printed a number of these - to do the joint movement once the parts have been printed and not wait a day or more before doing so. I have always done this as soon as the print is finished and have not had the issue. Bambu Lab recommend removing supports within 2 hours of the print finishing.
Once the joints are moving freely, it is easier to remove the support material. There are 6 supports that need removing (2 on each of the two main hanger sides and one on each end of the trouser add-on).
Before assembling the hanger, screw the large circular ‘nut and bolt’ together to ensure the threads are working properly. You may need to screw them together a couple of times if they are a bit firm. The slots on the outside of the nut and bolt will accept a small coin (ie 5c or 10c AU coins).
Using the Hanger
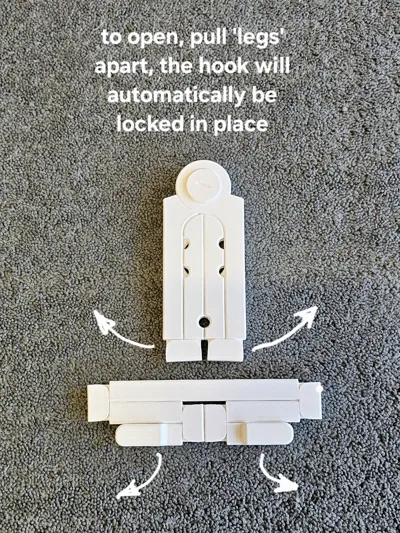
To open the hanger, spread the legs apart (refer photo). This will automatically expose the hook and hold it in place once fully opened.
This is the child coat/clothes hanger position. Open the smaller arms to setup the adult coat/clothes hanger.
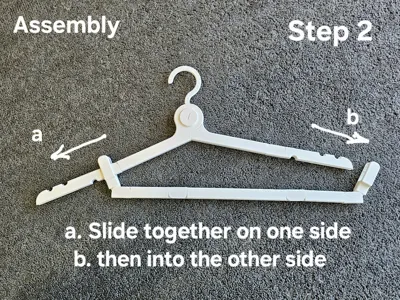
Adding the trouser/pant bar
1. Open the trouser add-on to form a ‘U’ shape (refer photos).
2. Slide one side of the main hanger into the slot on the end of the trouser add-on, far enough in order to side the other side of the hanger into the slot in the other end of the trouser add-on.
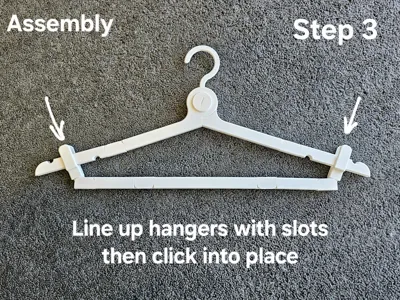
3. Line up the slotted arms as shown in the photo and click each into place.
Alternate Hooks
These have been added in response to a request to make a “captive” hook specific use situation that will also increase its strength.
Three alternate hook print profiles have been added. The profiles use the 0.2mm “Standard” BL setting. To improve the strength even further - add more wall (or use the “Strength” setting).

Simply undo the main 'nut and bolt' and replace the original hook with the alternate.
- Solid/Full Loop version: May need to be held in place using a carabiner.
- Openable Full Loop version: This version may require the hanger to be fitted before adding the garment(s). With the hanger in the partly open position, the hook can be opened - and the hanger placed onto the item to be secured to:

Lowering the arms will automatically bring the hook sides together:

Join the two hook halves by placing the pins into the holes on the opposite half:

3. Carabiner Version: The simplest to use. A little bit of post processing required to fit and secure the arm.


License
You shall not share, sub-license, sell, rent, host, transfer, or distribute in any way the digital or 3D printed versions of this object, nor any other derivative work of this object in its digital or physical format (including - but not limited to - remixes of this object, and hosting on other digital platforms). The objects may not be used without permission in any way whatsoever in which you charge money, or collect fees.
Comment & Rating (166)