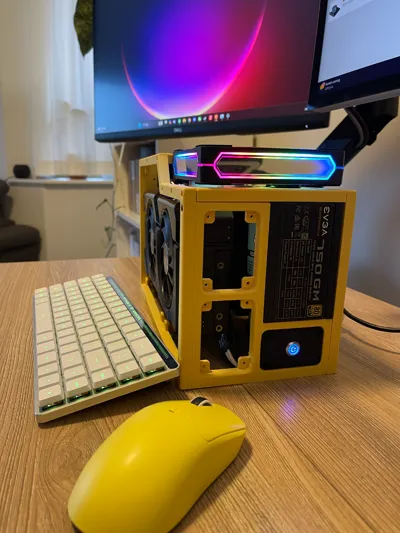
ITX PC case 8L


Print Profile(2)


Description
-------------------------------------Updat 2025.12.15---------------------------------------------------------
I built this website for everyone wants to design their own case. Should be simple to use.
If you are also a developer, feel free to check it out at
https://github.com/lixuefeng/pc-case-builder
------------------------------------- Original content ---------------------------------------------------------
A ITX desktop case. 8.5L
Inspired by bilibili creator 梦寐C86
What you need:
- ITX motherboard
- SFX PSU.
- Computer Case Extension Cord Power 90 Degree Angle Extension Cord like this one
- And a 180 degree GPU power adaptor like this one.
- 40 * M3-10mm screws
- 5 * M3 nuts
I also use customized cables for PSU so it's kind of more clean.
Installation Instruction:
-Step1. Install the vertical support and PSU hook:


- Step 2. Attach the upper and bottom frame for motherboard to vertical support.


-Step 3. Fix the motherboard to the frame.


GPU riser cable needs to be inserted into mother board at this stage if you want to use the slot up there in the top frame for the cable.
My cable is too long, so I have to leave it over the frame which looks ugly.

-Step 4. Install the IO Panel


-Step 4. Install the PSU

Attention, power extension cord must be plugged now.

Use the back panel to help the PSU stand right there.

Don't forget to plug in the power cord extention before you install screws. And those 3 small holes are for these wires.

Also, the socket need to be installed to the IO panel.

-Step 6. Install GPU
The order is very important here. The Video Card would be perfectly stuck in the vertical support.
So, Vedio card needs to be put in first. Then insert it into the socket of GPU riser and fix the socket to the case lastly.


-Step 7. install all the outer frames.
That would be simple.
-Step 8. Install the fan.
There are 2 hooks for the fan. As the hooks would be under the fans, the right order is install the fan on the hooks first and then install the hooks to the case.


Comment & Rating (22)