


Print Profile(40)


Bill of Materials


- Wooden Dowel - Your Chosen Diameter x 1: You'll need around 3800mm (3600mm+cutwastage)
- Sandpaper x 1: 80 Grit + 240 Grit*
- Oil or Stain* x 1: Not necessary but nice to have
- Super Glue* x 1:
- Hand Saw x 1: Mitre Box is helpful
- Spray Paint* x 1:
- *All parts listed with an asterisks aren't required but are nice to haves x 1:
Description
Boost Me (for free)
If you like my work, please consider giving me a boost. It really helps to support me in creating free files for everyone to print.
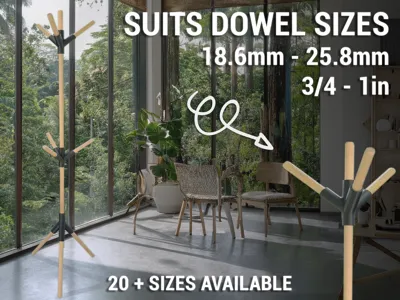
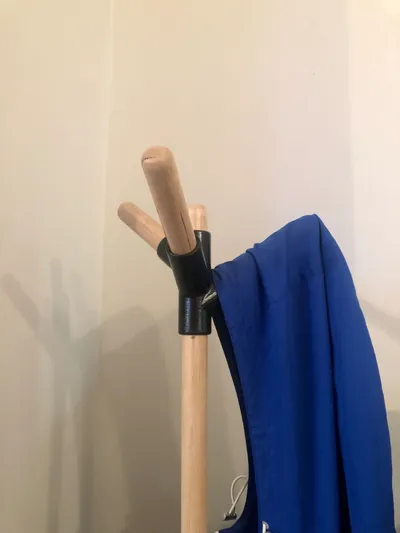
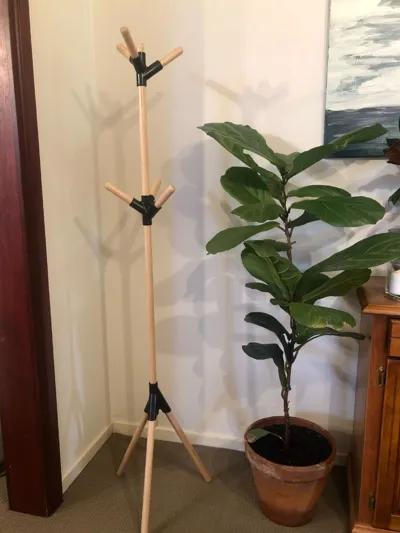
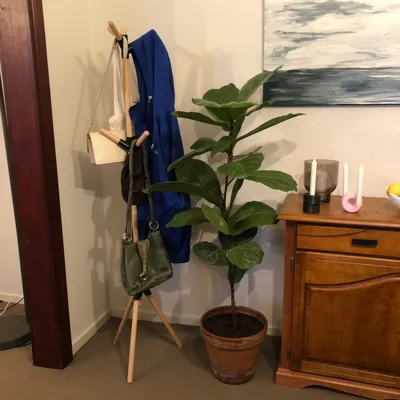
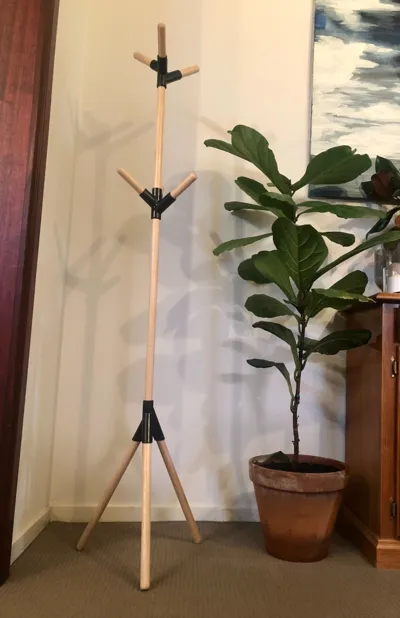
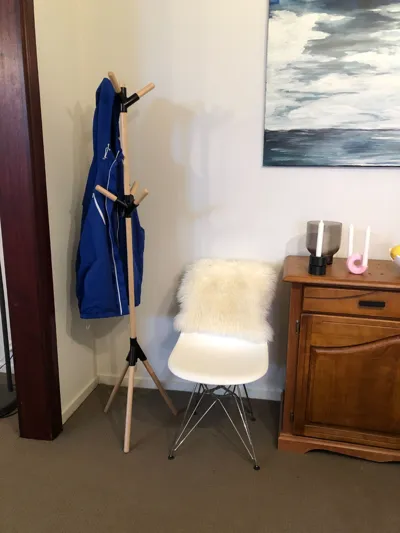
Contemporary Mid Century Modern inspired coat rack designed to be easy to print, and combined with off the shelf wooden dowel. The dowel in the picture is Tasmanian Oak.
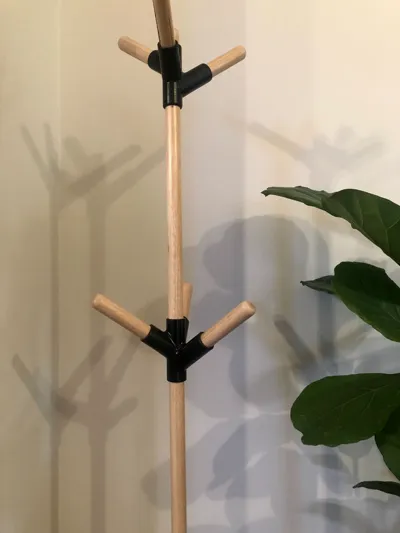
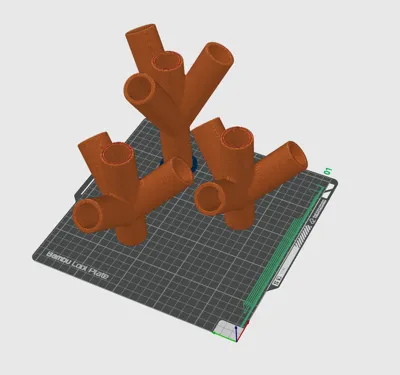
There are 3 parts in total to print and I've arranged them all onto 1 bed in each of the print profiles, but you could easily move them onto different beds to print on the A1mini or to spread-out the print a little more.
I printed these and then sanded and painted them, but they will look great unfinished also!
Boost Me (for free)
If you like this print, please consider giving me a boost. This really helps support me. Why not print some of my other designs also!?
Please Read Me Before Printing:
This coat rack was originally designed around round 25mm wooden dowel similar to these:
America:
https://www.amazon.de/-/en/DR-1x36/dp/B01C4MVA1E
Australia:
England:
Germany:
I have modified it to work with a large range of Round Dowel timbers which will be sold as (Diameter):
| 19mm | 3/4inch |
| 20mm | 51/64Inch |
| 21mm | 53/64Inch |
| 22mm | |
| 23mm | 29/32Inch |
| 25mm | 63/64Inch |
| 25.4mm | 1inch |

I've designed them around lengths of the following dimensions:

| Item Number | Length (mm) | Qty |
| 1 | 180mm | 8 |
| 2 | 350mm | 3 |
| 3 | 685mm | 1 |
| 4 | 425mm | 1 |
As long as you keep each item number the same, the dimensions can be adjusted to what works best for you.
As an example if you wanted to buy more standard cut lengths and piece this together so you don't have to cut any lengths you could use the following, which would still work. *Please note Item Number 2 should be a minimum of 350mm long. Any shorter and you wont have a stable base.
| Item Number | Length (mm) | Qty |
| 1 | 200mm | 8 |
| 2 | 400mm | 3 |
| 3 | 600mm | 1 |
| 4 | 500mm | 1 |
Step-By-Step Guide:
- Buy your Dowel. Pick one of the available sizes listed above and choose what type of wood you like. I'd also suggest getting a stain of your choice to finish the wood, but this isn't actually necessary. I used Danish Oil on Tasmanian Oak. Dowel lengths are available from Amazon, but are significantly cheaper from your local hardware store.
- Measure your dowel with calipers. You need to work out the average Diameter. Make sure you measure a few different sections of the dowel as the material varies rather significantly. Make sure that you rotate the Dowel to get cross section measurements along the X and Y axis.
Once you have measured your dowel. Take the average and select the Test Fit Jig print which is 1 size larger. Eg if you measure 19.4, 19.3, 19.5 and 19.4 then you should print the 19.6 size Test Jig. Print this to check if your dowel will press fit. (These prints should only take around 0.5 hours). These profiles all have images like this representing the dowel Diameter

- Use this test print to check the fit on your dowel. You want it to be a press fit, where the parts wont easily fall out, but also that you can be confident you can push the dowel the entire way into the fitting and bottom out to ensure the finished exposed lengths are correct. It's better to have a little move movement and result to using superglue than not to (especially if you plan to paint)
- Cut Dowel to length. Remember that Item Number 1 should all be the same size and <240mm and Item Number 2 should be a minimum of 350mm.
- Round 1 of the ends of each of the Item Number 1 and Item Number 2 components. I did this using a belt sander, but this can definitely be done by hand.
- Sand your dowel using the 240 Grit sandpaper and apply Stain / Varnish of choice. If you are going to do this, I would suggest doing this as Step 6A *OPTIONAL STEP
- Check the fit again using your Fit Test Jig.
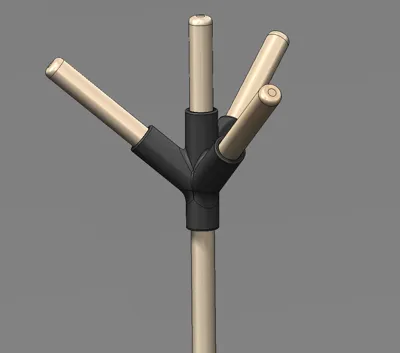
Using the size of your Fit Test Jig, print the corresponding size of Joints. These profiles all have this image on the profiles

- Remove support from print and assemble your Coatrack
- Sand and Paint your Printed Joints*OPTIONAL STEP
Test Fit Jigs:
These are all the measured sizes that I have made so far. If None of these work for a tight press fit for you add your size requirement in the comment section and I'll make it for you, or go 1 size larger and use superglue to glue to dowel into your prints.
| 18.6mm | 19mm | 19.4mm | 19.6mm | 20mm | 20.4mm | 20.6mm | 21mm | 21.4mm | 21.8mm |
| 22mm | 22.4mm | 22.8mm | 23mm | 23.2mm | 24.2mm | 24.6mm | 25mm | 25.4mm | 25.8mm |
FAQS
What did you use to Cut your dowel pieces?

You can buy a really Inexpensive saw like this from any hardware store. The miter angle box is good to ensure you get a square cut.
After Printing my Joints my wooden dowel pieces don't fit (Too Tight). What can I do?
Sand the wooden dowels down using 80 grit sandpaper. You only need to sand the section that penetrates.
After Printing my Joints my wooden dowel pieces don't fit (Too loose). What can I do?
Use superglue to glue your points into the print. Please note this will only work if your print is only 1-3 sizes bigger than required. If you purchased 19mm Dowel, but printed the 25mm size or similar, please see below.
I have 19mm Dowel, but Printed the 25mm size (or similar). What can I do?
You'll need to make a reducing bush (which is just a hollow cylinder) Like this.

The Reducing Bush ID should be +0.2 of the Dowel Measurements and the OD should be the size of the print option you printed. Eg if you have 19mm Dowel and printed 25mm size then the OD should be 25mm and the ID should be 19.2mm. This bush should be 50mm Long and you can glue this onto the wooden dowel and then glue this into your printed joints.
How do the Dowel sections slot into the Joints?
All Dowel pieces should push into the printed Joints until they Bottom out.


Why does mine look slightly different to the pictures?
I originally had this designed as a slightly asymmetrical version. Every single piece of Dowel had to be cut to different dimensions and perfectly inserted to ensure the end result was level. This was way too much work and really didn't improve the aesthetics at all! In order to make this simpler to print and make, I've redesigned the files to make them easier to work with. I have test printed the files and they print well on a well tuned machine.
How tight should the press fit be?
You don't want the dowels too hard to push in, but you also don't want them falling out. If unsure err on the side of caution and print larger, then use super glue to hold the dowel in if required. The gif below shows a perfect press fit which is a variance of only 0.25mm in Diameter from the side that is a little loose to the side that is perfect.

What do you mean measure multiple different angles on the Dowel?
Below are images of a Printed Dowel measured, with each measurement corresponding to a 90 degree rotation. You can see the variance is significant, and will be even more so on a wooden dowel. With these measurements, I would print the 25mm size option.


If you've got this far, please consider giving this model a download, like and following me.
Also if you like my designs I would really appreciate your support in the form of a Boost.
Why not check out some of my other models?
I've also uploaded the STEP files in case anyone wanted to modify the design slightly.
Please check out some of my other designs here:


Membership
If you would like to buy a commercial license, please review them here
Boost Me (for free)
If you like this model, please consider giving me a boost to help support my creative work
License
You shall not share, sub-license, sell, rent, host, transfer, or distribute in any way the digital or 3D printed versions of this object, nor any other derivative work of this object in its digital or physical format (including - but not limited to - remixes of this object, and hosting on other digital platforms). The objects may not be used without permission in any way whatsoever in which you charge money, or collect fees.
Comment & Rating (29)