Search models, users, collections, and posts

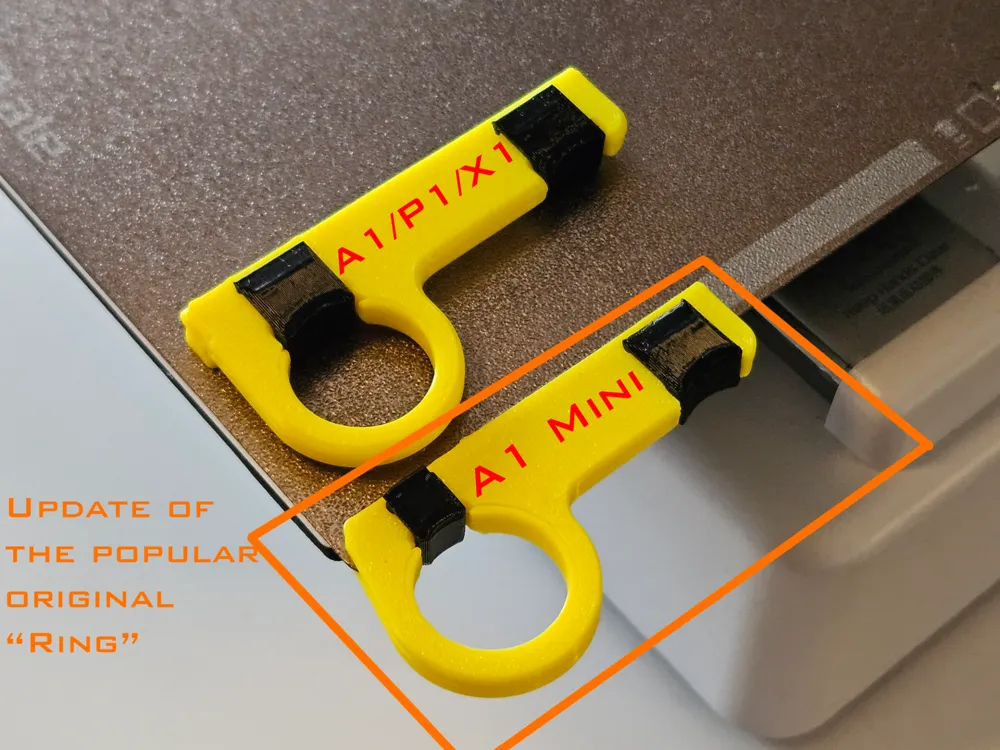
Ring V4, handle for Bambu build plates! (180x180)

Print Profile(4)

All
A1 mini
P1S
P1P
X1
X1 Carbon
X1E
A1
H2D
H2D Pro
H2S
P2S
H2C
X2D
A2L

For Textured PEI-plate, 0.2mm layer
Designer
28 min
1 plate
4.8(241)

For Smooth plate!
For Smooth plate!
Designer
28 min
1 plate
4.7(47)

PLA two plate for 2 color, brim and less first layer speed.
36 min
2 plates
4.9(10)

Textured build plate - ASA/ABS
24 min
1 plate

Open in Bambu Studio
Boost
505
1262
359
134
1.6 k
1.2 k
Released 

Description

(This one is for A1 mini. Bigger 256x256 version for A1, P1 and X1 printers available →HERE←)


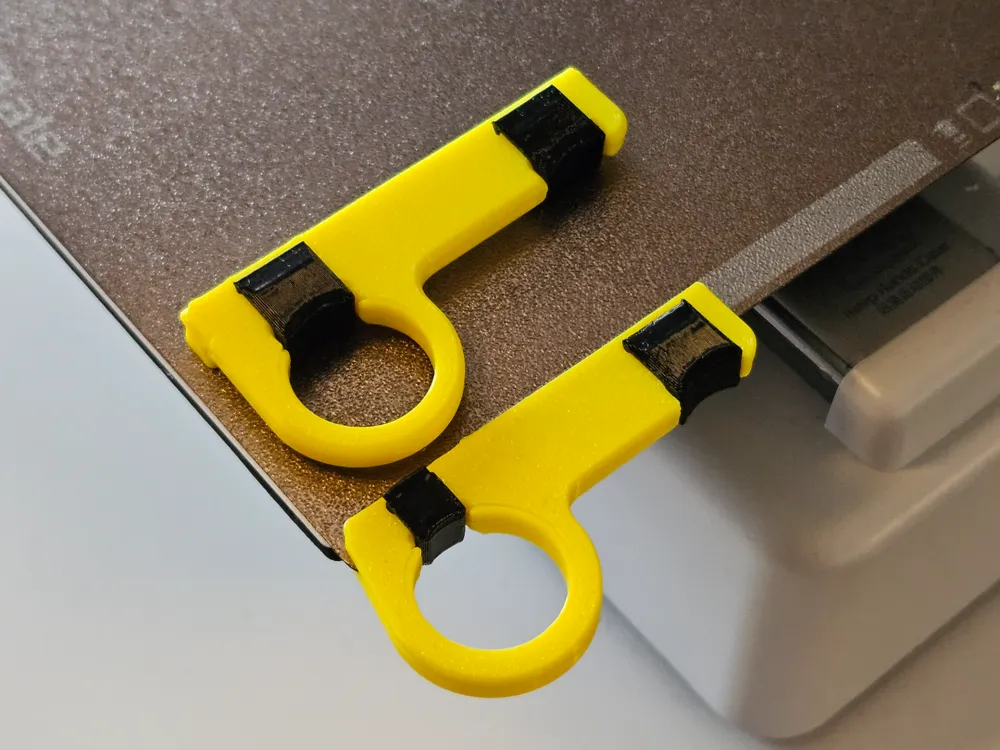
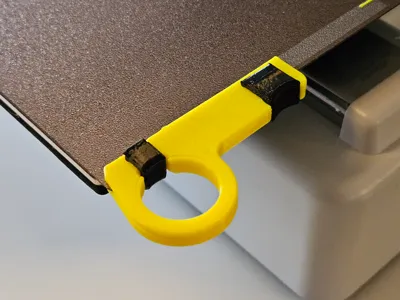
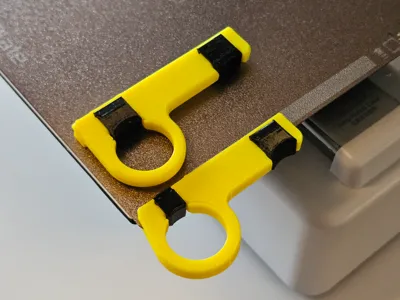
This simple, small handle helps you better manage your Bambu Lab plates. It makes it easier to lift the warm plate from the bed, wash it, and avoid leaving grease from your fingers.


It's particularly useful for washing your build plates.


The small size allows the ring to remain on the plate during printing. Tested and proven functional with Bambu Textured 180x180, 256x256 and Smooth 180x180 plates.


Size: If the fit is too loose or tight, scale the ring in your slicer the appropriate amount. Lot of variables can cause size differences.


Use PETG (or stronger) for better heat resistance, however, PLA does work. I recommend using my print profile and settings! (Strength, bridge direction matters and etc.)


Boost Me (for free)

Please remember to boost if you find my creations useful!

Assembly:

  1. Insert one half with the pegs through the plate.
  2. Push the other half into the slots in the pegs. Make sure that piece lays as deep as possible in the peg grooves.
  3. Push the two rings together.
  4. Clips: Insert them into the slots, first from inside the ring and the second one on the handle. It may feel stiff, but this is necessary for final tension. It's a tight fit, which is intentional.

Note: Compatibility with all types of plates has not been fully tested.


Feedback is greatly appreciated!

Comment & Rating (359)

(0/1000)

Print Profile
For Textured PEI-plate, 0.2mm layer
Great I needed this!
The profile uploader has replied
profile
1
Reply
Nice 😁
0
Reply
Boosted
@CrispyW Is the only difference between the smooth and textured rings the distance of the plate gaps? I printed a bunch of both but the smooth rings ended up being too loose for all of my plates (mostly 3rd party) so now I'm trying to figure out what I can reuse to cut down on reprints.
The designer has replied
0
Reply
Yes that's the only difference. You can scale the model up in the slicer if it prints too loose. edit: and it is made for bambu plates. which aftermarket plates have the same holes?
(Edited)
0
Reply
Boosted
Replying to @CrispyW :
Thanks. There a few Aliexpress plates that have the holes, as I specifically bought them to work with this handle. If the links work they're below: https://www.aliexpress.us/item/3256807128128728.html? (A1 Mini, Black Epoxy Resin Plate) https://www.aliexpress.us/item/3256808058852881.html? (PEI Honeycomb) https://www.aliexpress.us/item/3256806512227317.html? The Bambu plates are kind of expensive and the 3rd party ones seem to work just as well from what I can tell. Unfortunately none of the 3rd party 3D effect/patterned plates seem to have the Bambu holes from what I've found.
0
Reply
Boosted
Worked great for me, I've also added the Print profile I used for ASA.
The designer has replied
1
Reply
Good stuff 👍
0
Reply
Print Profile
For Textured PEI-plate, 0.2mm layer
printed well
The profile uploader has replied
0
Reply
Great to hear! By the way it looks like you had adhesion issues. wash your build plate with dish soap, and the ring is useful for that :D
0
Reply
Replying to @CrispyW :
re washed. all good
(Edited)
profile
1
Reply
Perfect fit in P1S textured build plate.
2
Reply
Print Profile
For Smooth plate!
It doesn’t quite clip together correctly. Clipping the circular part together was incredibly difficult, but then when I was able to finally do it, the small clip that goes on that end wouldn’t snap at all. I printed 2 of these, as I wanted to use the other one for another plate I had. However I clipped the second one together to see if it wouod clip together. It was difficult to do so, but I did manage to clip all the clips together without the piece being attached to the PEI Plate. The tolerances need to be adjusted for the Circle and Small Clips.
The profile uploader has replied
0
Reply
Thanks for the feedback. Were the tabs all the way through the plate holes when you tried to close the pieces together? Its a tight fit so the handle won't rattle.
0
Reply
Boosted
Print Profile
For Textured PEI-plate, 0.2mm layer
very useful!!
The profile uploader has replied
0
Reply
Thank you!
0
Reply
Print Profile
For Textured PEI-plate, 0.2mm layer
very nice! printed with PETG-CF dark blue
The profile uploader has replied
0
Reply
looks great!
0
Reply
Boosted
Print Profile
For Textured PEI-plate, 0.2mm layer
Printed in PETG, turned out great! Had to print the clips a few times because I insisted on not printig with brims :) Personally, I would make it double the width and a bit bigger overal, to get a better grip. Still 5 stars!
The profile uploader has replied
0
Reply
Thank you for the feedback! I didn't make it so wide since I was worried the longer brim might act as a lever on the connection pins. I'll make a test version if that really is the case.
0
Reply
Print Profile
For Textured PEI-plate, 0.2mm layer
parfait !!
The profile uploader has replied
0
Reply
Thank you!
(Edited)
1
Reply

License

This user content is licensed under a Standard Digital File License.

You shall not share, sub-license, sell, rent, host, transfer, or distribute in any way the digital or 3D printed versions of this object, nor any other derivative work of this object in its digital or physical format (including - but not limited to - remixes of this object, and hosting on other digital platforms). The objects may not be used without permission in any way whatsoever in which you charge money, or collect fees.