Rack for the UMSS


Print Profile(1)

Bill of Materials


Description
Boost Me (for free)
I usually don’t ask for this, but I’ve noticed that many creators actively encourage it on other platforms—and it makes sense, as it helps increase visibility. So, if you can follow me, it would make difference. It’s a great way to support my work and show appreciation. For more insight subscribe my blog at: https://designrepcom.com/ This design is freely available for the community, but if you enjoy my work and would like to show your support, you can boost this project. Thanks!
Introduction
(TL:DR)
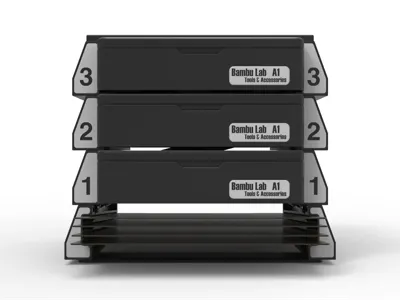
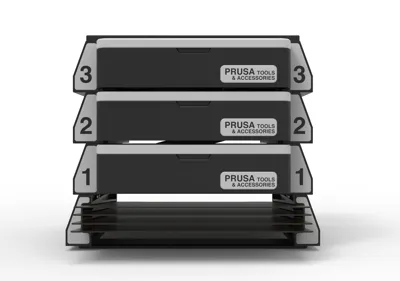
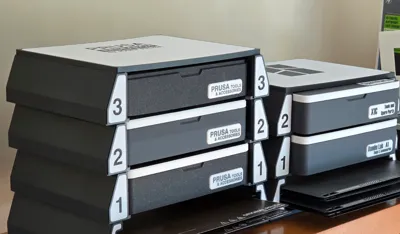
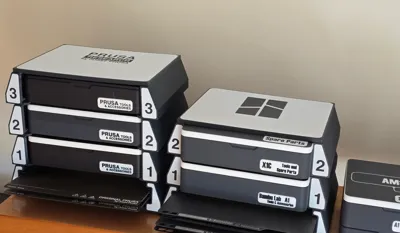
Rack for the UMSS – a sleek, modular storage solution designed to keep UMSS boxes, and build plates organized and accessible. Built as an upgrade to the MMSS, this rack offers precise, easy-to-use modules, fitting seamlessly with PRUSA, and Bambu Lab X1 and A1 accessories. Perfect for makers who value functionality and flexibility in their workspace!

Introducing the New Rack for the UMSS:
As designers and makers, we know that a well-organized workspace isn’t just a luxury – it’s essential. With this in mind, I’m excited to introduce my latest project: the Rack for the UMSS (Universal Modular Storage System). This rack is designed as a seamless extension of the UMSS, building upon the versatile, user-centric approach that has made it a go-to storage solution.
The Rack for the UMSS brings together functionality and aesthetic coherence, allowing users to efficiently store and access various UMSS boxes and plates. This project is a natural evolution from the MMSS (Multi Modular Storage System) I introduced a year ago, but with several refinements based on user feedback. It’s specifically tailored to integrate with PRUSA and Bambu Lab Boxes and Build Plates, offering a dedicated storage rack that organizes does parts.
So why this rack, when other systems are already out there? Simply put, it’s all about precision and ease of use. Every module is meticulously modeled with dimensional and geometric accuracy, ensuring a seamless fit and an intuitive experience. Think of it as a fully integrated, adaptable system where you can work confidently, knowing each piece serves its purpose.
Regarding the UMSS and for those who like to personalize, the UMSS system is also designed with flexibility in mind. Empty blocks are available for creating custom modules, and extra boxes offer even more storage versatility. You’re welcome to mix and match – UMSS modules are fully compatible with MMSS, so you can craft a storage solution that’s uniquely yours.

Instructions
Printing
As previously mentioned, the system accommodates both Prusa and Bambu Lab boxes and build plates. However, smaller boxes with a single 150x150mm tile won’t fit into the rack (currently under development). Therefore, make sure to download the files that correspond to your specific printer model.

Assembling
I’ve prepared a video to guide you through the assembly process. While it’s straightforward, there are certain details to keep in mind, such as the assembly sequence, to help avoid any setbacks.
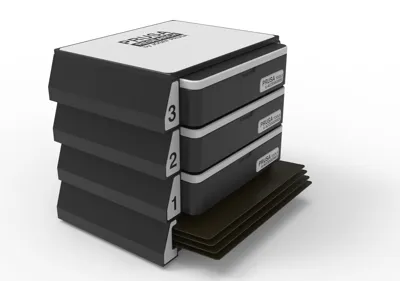
Exploded view drawing

Standardized Parts:
- 41x Nut M3
- 12x Washers (optional)
- 41x Screws M3x8
- 32x Magnets 6x3mm
Then you need the printed parts in PLA or PETG and on the bottom you have 4 feet's in TPU (optional)

Tools Used to make this project
I’d like to clarify a common question I receive about the tools I use for my projects. This project was modeled using Autodesk’s Fusion 360 CAD software, which I find ideal for creating complex 3D models. Over the years, I have used other CAD applications, but I ultimately chose Fusion 360 due to its flexibility and ease of use. It is also one of the most accessible CAD tools for this type of community, offering free licenses for personal use. Additionally, its mesh modeling tools are some of the bests I’ve worked with.
Other tools are also used to achieve the final result. For example, rendered images are sometimes generated directly in Fusion 360, while others are done using Blender (I dont model in this software, it is not parametric neither it has a timeline.
It's rare for me to start a project directly in CAD, as it can disrupt my creative flow. For this reason, I prefer to begin with hand sketches, sometimes with great detail, and only afterward do I translate the design into the CAD tool.I hope this answers one of the frequent questions I receive.
Where to start…
Here on the main project, the UMSS modules

Change log.
- (07/11/2024) - Initial release
- (09/11/2024) - Change to print profiles
- (28/11/2024) - Added label 4 and 5 and "Lateral Build plate R - For brace" body for does who need taller racks.
Curious About My Tools? Check This Out!
For those of you who often ask about the tools I use to bring ideas to life, this article, The Journey From Idea To Object (Part I), offers some insights into the initial stages. It highlights the use of various tools, including software like Autodesk Fusion for CAD design, Blender for render and Bambu Studio for 3D printing preparation, and other... So, if you're curious about the software and hardware too, that I've incorporate in my workflow, take a look at the link for more details!" – Visit https://designrepcom.com/ for much more.
Documentation (1)
License
You shall not share, sub-license, sell, rent, host, transfer, or distribute in any way the digital or 3D printed versions of this object, nor any other derivative work of this object in its digital or physical format (including - but not limited to - remixes of this object, and hosting on other digital platforms). The objects may not be used without permission in any way whatsoever in which you charge money, or collect fees.
Comment & Rating (39)